Garage Day: Titanium Hitch and His New to Him Ford (Post #383) 8/27/2013

Another Saturday, another Garage Day. Wrenching on a old truck with your best friends in the middle of rural farm country is as American as America gets. This time the patient was Titanium Hitch’s 1998 F-150. According to TH the truck had been running pretty rough. It was in bad need of a tune up.

What started out to be an oil change, a brake job, and to investigate the rough running, became an all day ordeal. When we talk about project creep, this project not only crept, it grew as it did. What finally happened was a plug change, oil change, brake fluid change, two O2 sensors replaced, air filter change, and a final sorting out of the sound system problems from the last garage day.

First, the good news, the truck did not need brakes. The pads were deemed to be in satisfactory condition. So TH is going to shelf the pads he bought for another time. The brake fluid was sucked out with a syringe, fresh oil replaced. Then the nipples all got a turn as the bad fluid was evacuated from the lines.

This went exceedingly well with three pseudo-mechanics working on it. +EGD was at the wheels while I filled the reservoir. TH was relegated to pumping. The instructions were pretty tough to follow. Pump the pedal and say when he was pumping. This took a few tries to get perfected. But as with most things TH finally became an expert peddle pusher.

On to the O2 sensors. A lively debate was had betwixt the three of us regarding how many O2 sensors an F150 had. We quickly found what we later learned were the upstream sensors. Only through a parts search did we find out that it had a set for downstream as well. Well hoity-toity for them! We all were surprised and our theories of why it could only have two, like a Land Rover were dashed on the rocks of our hubris.

The codes that were being thrown were thought to be related to the downstream sensors. I’m still a little fuzzy on this but I went with it. Besides the down stream sensors looked to be the easiest to remove. Yeah right!

The driver’s side came out with out much of a problem.
The passenger side was…welded …frozen …rusted WELDFROZTED in.

A great many attempts were made with a great many tool configurations.

We first cut the lead so we could use a deep socket,

We then attempted to sawz-all the sensor,
Then a propane torch was tried,

Then the sensor was cut into pieces with a large bolt cutter,
Finally a socket with a large cheater bar was used to tear the threads off. To get the cheater bar in to play the truck had to be lifted up to the maximum height of 5 ton jack stands. I was quite worried about this, as one mistake and the state’s insurance agencies would be writing a bunch of checks to happy sad widows.

I’m surprised I don’t have a picture of the end result of the sensor. But suffice to say brute force won the day. You can well imagine that the threads were trashed. EGD remembered to grab a tap in the correct size when we went to the parts store to spend some more of TH’s beer money hard earned pay on auto parts. EGD managed to get a few threads cut back into the sensor port and the second was installed. The front sensors were looking pretty bad as well. They were probably WELDFROZTED in as well. None of us wanted to find out. Another problem for another day.
Next was plugs. We should have guessed we’d have problems. The first plug fell apart as the lead was being pulled from it. You can see the center conductor out of its plug in the following picture a long with what was left of the O2 sensor on the right side.
Half the plugs we pulled came apart in one manner or other. After examination of the plugs it was easy to say they were the originals. This was evident by checking what was left of the anodes for spark gap. The plugs were so badly eaten away and the gaps so large I was surprised the truck ran at all. One of the gaps measured .1000. Yes… point 1 thousands. The actual factory plug gap should have been .0560. Two of the plugs measured .0900. I didn’t measure the rest. I hope you can see the ends and how badly eaten away they were in the picture.

I gapped all the plugs with a feeler gauge and they were installed. At some point here a lively debate broke out about the parts we had just picked up. The replacement O2 sensors did not have the correct key on them. It looked to me what little key was there was half-heartedly cut off/ground down.

We looked at the existing up and down stream plugs for comparison. Then we compared them with the one upstream sensor which we could actually reach with out being a contortionist, the passenger side. Sure enough the replacements didn’t match any of the OEM ends. We installed them anyway, trusting that the AutoZone guy gave us the right parts and they were labeled correctly in the boxes.

The oil change was completed in short order. The truck was two quarts low on oil as well. The black stuff that was serving as oil didn’t even fill the five quart jug of the replacement oil.

I had to bail out before the speakers were addressed. I waited long enough until I got to hear the engine with all the new bits. They gave me the honor of firing her up. She roared into life and idled like she was meant to. I’m going to guess she gets 3-4 miles more per gallon of petrol.

About an hour after I got home I got a panicked call from TH asking if there was something I could think of that might have made her run poorly. Seems when TH tried to drive home although idle was good, any application of throttle caused coughing and choking and a poor running motor. It was probably dropping to “limp mode”.

I remembered I had pulled the passenger side O2 lead, but I hadn’t reconnected it. I relayed that and he was off to check it and indeed it was still disconnected. It was reconnected and he made it home.

I talked to TH the following Monday and he told me she was still running rough. During the Garage Day festivities we had had a lively discussion about the Air Idler Valve. If it was half as bad as the other parts, it most likely really needed a good cleaning if not an out right replacement.

It was fun to hang out with my old mates and swap stories and wrench a little in the sub-Saharan African hot Saturday in Oklahoma. I wouldn’t have rather been anywhere else, well perhaps in my pool with Mrs. Okierover, but I got that too so I was a winner all the way around.

Thanks for reading and Happy Rovering.

Garage Day – August 2013 (Post #377) 8/14/2013

My good friend and resident evil scientist the +Evil German Dude (EGD) announced we were having a Garage Day at his house this past Saturday. For once I didn’t have anything Land Rover related for him to assist me with. I’m sure he and the former Titanium Hitch were quite surprised as we normally have something to do on the Range Rover. They both liked the Big White Bus’s new stance on fresh springs. I had to call it to their attention, but they responded with friendly comments after looking her over.

Inadequate alternator

The main goal of the day was to install a new alternator in EGD’s F-250 Super Truck 4×4 Beast. If you have been a frequent reader you know every thing EGD touches must be modified. His Chevy 1500 was highly modified. I could write an entire blog post listing the changes he made to the 1500. His F-250 is well on its way to being heavily modified.

EGD and the Former Titanium Hitch

More after the jump….

Today’s modification was to be a nuclear power reactor. He has the need to power small cities and in case of a disaster provide power to his evil lair. Sadly the Nuclear Regulatory Commission denied his permit for a mobile nuclear power reactor. They said his design was sound and the schematics were first rate. They just did not feel he rated one.

Beefy.

So he picked the next best thing and contacted the Russian’s for one of theirs installed a DC Power Engineering alternator. At maximum revolutions this monster will put out 300 amps. At idle it puts out 190 amps. Compare that to a stock Land Rover alternator and its 100 amps at max output. They will send it to you polished or one of 11 colors. Impressive.

Size comparison. New on the left and old on right.

The task was a simple one if you were content with using the existing wiring. But EGD is an evil mad scientist, so you know there has to be enhancements. First was replacing the cables to 1 aught. Yes, you read that correctly…1 aught. He is fond of his power conduit mechanisms. Three hundred amps is a lot, and to run it through stock wire is just silly.

One aught cable and in-line voltmeter.

He also installed an in-line volt meter. This is cool enough to warrant install on my Big White Bus. I will have to investigate this option further. One of my pet peeves about my Land Rover is the apparently inadequate wiring. Lots of Land Rover owners outfit their rigs with wenches winches, lots of lights, refrigerators,…etc. These are all power hungry devices in which dual batteries and beefy alternators are just the prescription to get the needed amperage to the devices. EGD’s beastly F-250 is no exception.

Installed.

The former Titanium Hitch and I mostly handed EGD tools and offered the “extra hand” every mechanic, at one time in their life, wishes God had given them. Working with EGD on his rigs over the years is truly entertaining. I’ve never seen him come up against something he hasn’t all ready anticipated.

His work is meticulous, precise, and clean. I have learned a lot from him over the last decade. I told the former Titanium Hitch that when I work on my Range Rover I think about what EGD would say if he saw my work. You’ve no doubt seen the W.W.J.D.? (What Would Jesus Do) and the many variations over the years. My own is W.W.E.G.D.D?

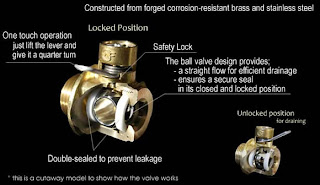
EGD then decided to manipulate the worldwide price of a barrel of crude by doing an oil change in the big diesel. The behemoth uses 13 quarts of oil. Since I have the smallest beer belly of the group, I was elected to ride the creeper under the truck to empty the oil. EGD has made this a simple process by installing a Fumoto valve. No more guessing which wrench you need. No more getting oil on your hands removing the plug. Easy peasy.

Once EGD was done with the alternator installation and oil change was completed, we had a great dinner of roast potatoes, hot dogs, and grilled vegetables prepared by EGB (Evil German Bitch). I know what you’re thinking. But I assure you that’s her own moniker, she picked it out. That’s even how I have them in my phone. She is a superb cook and I always love eating at their house.

After chow time was over, Titanium Hitch told us about the sound system woes in his newly acquired late nineties Ford F-150. The after market sound system had been butchered. EGD was keen to sort out his problems.

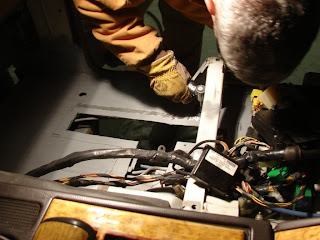
I fetched tools while EGD started extracting the radio from the dash. I was also tasked to find a wiring diagram for Ford pickups on the interwebs. That was no real challenge and I was back to handing them tools.

We found the problem, a blown speaker. The others were not in good nick and it was suggested he replace them all. Replacing them was a job for another day.

So we wrapped it all up. I said my goodbyes and headed home with a detour to drop the used oil off at JagGuy’s garage where he will undoubtedly use it in his Bobbed-Duece.

I received an email from an Art of Manliness reader who told me the visited link color on my OkieRover.com website was virtually unreadable in low light. So I swapped it to a red for high contrast.
Thanks Shawn.

Thanks for reading and Happy Rovering

The Difficulty Scale (Post #368) 7/15/2013

I wrote this for my original website and a less grammatically correct version of this post can be found in its original location. Many of you have read it before. You may have seen the link and never clicked it. In any event here it is…

This is a brief explanation of the Difficulty Scale I often refer to. I am not the most mechanically inclined person on earth. I would not even place myself in the top 20% of the population.

Obvious questions come up when someone who owns a Land Rover and maintains it himself makes a statement like the one above.

A few of my favorites are…

“What possessed you to buy a Land Rover?”
“You’re not the sharpest knife in the drawer are you?”
“Are you going to buy a Jeep when you get tired of pushing that Land Rover?”
There are others, I’m sure you’ve heard them.

This is my scale. I have some friends that my 5 is their 3, notably The Evil German Dude (EGD)  and JagGuy. The only reason they don’t have home-made nuclear power reactors in their secret evil lairs is the federal government frowns on the private ownership of U-238 and U-235. Guys like them can disassemble and reassemble entire motors in the dark, asleep, and not lose any parts. I’m not one of those guys.

This is my scale that I use to gauge how hard a project might be. It has five levels, Level One being the easiest, Level Five being virtually impossible for me.

Level One
Easy. A talented 5 year old child could do the work. If you can’t do this level, get a 5 year old, they would love to help.
Examples: Single tool jobs. Using a screw driver to replace a light bulb. Oil changes.

Level Two
Technical. You may have to read the instructions. Usually requires more than the Official Land Rover On-Board Tool Kit. You’ve heard…
“It ain’t rocket science.”
or
“It ain’t brain surgery.”
And my personal favorite,
“It ain’t rocket surgery.”
Those are common phrases used for this level.
Examples: Replacing the brake pads. Replacing the battery or an alternator. Replacing belts.

Level Three
Moderate. You are gonna get dirty doing this level. Taking it apart and putting it back together more than once are common. At this level after you render the vehicle undriveable you will find you may need a new or special tool you don’t own, and must reassemble the vehicle to go and purchase it because your wife has taken the kids shopping in the minivan.
Examples: Radiator removal. Fuel pump replacement. Replacing tie-rods.

Level Four
Hard. Higher math skills desired. You will have the vehicle apart for more than a few hours. Pray for good weather or decent shop where the work can be done in a semi-climate controlled environment. Three-dimensional spatial skills are used at this level. A high degree of praying to the Land Rover gods wouldn’t hurt either.
Examples: Brake caliper rebuild. Tracing electrical problems. CV Joint replacement. Heater core replacement.

Level Five
Impossible. The ability to understand particle physics is good here. Find a mechanic or an automotive Superhero that will work for beer or who owes you money. Common phrases often heard at this level…
“No, I don’t know what happened, send a tow truck.”
or
“That’s not a place I would have expected smoke to come out.”
or
“I think I have a Visa card with that amount available on it.”
Examples: Head gasket repair. Transmission rebuild. Anything inside the engine.

Once again this is my scale. I’ve emailed with gents and ladies that said my Level One was their Level Three. I totally get that. Don’t get frustrated with the job. What might seem complicated gets considerably simpler when you are holding the replacemnet parts in your hand. Don’t be afraid to ask for help. How are you ever going to learn if you are never taught?

Thanks for reading, and Happy Rovering.

Victory Beer (Post #349) 6/9/2013

Nothing tastes better than Victory Beer.


vic·to·ry beer noun \ˈvik-t(ə-)rē\ \ˈbir\

This is the beverage you get to consume after you solve a particularly difficult problem on your Land Rover. The beverage is most often one from the British Isles but not necessarily so. See also “victory rum and coke”.

We get proclaim victory and drink beer because we solved the mystery of the electrical gremlin that had invaded the Big White Bus. As you may, or may not recall, I had some trouble with the sun roof, clock, driver’s seat, map lights on the rear view mirror, and the interior and door lights.

Originally I had planned to have the amazing JagGuy help me sort out the problem. He is a genius and pretty much my go to guy for electrical problems of all kinds that don’t involve attempting to electrocute giant monsters. I usually call The Evil German Dude  for that kind of power. Well JagGuy’s grand children were in town and visiting and his lovely wife was celebrating her birthday, therefore No Garage Day routine for him, and incidentally me as well.

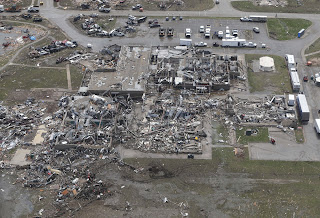
So after I drove to the shop in Oklahoma City I turned around and headed back south. Spontaneously I decided to stop by my friend Butch (formerly known as Titanium Hitch)’s house. He was just a few blocks from the complete devastation in Moore, Oklahoma of the May 20th tornado you saw in yesterday’s Newcastle Police Dash Cam post. Southwest 134th street leads straight to his house and was the path of the EF5 tornado. The destruction was hard to drive past. So many lives changed. You can see how the people of England and Germany during World War II felt when their homes were destroyed.

An aerial of the destruction at Briarwood and more after the jump….

He was home and talking to the insurance adjuster about his roof. He had 150mph winds at his house and the roof is trashed. His home was in the “debris ball” of that tornado and the dirt and insulation from hundreds of homes was on everything in his neighborhood. I talked with his wife about her feelings during the event. Their son was in Briarwood Elementary School when the tornado hit. I visited with he and one of his high school buddies who is a roofing contractor. After a great chat, they headed off to lunch and I headed to the Okierover de hacienda.

I started by looking at the fuse block. With a suggestion by JagGuy to measure the voltage at the fuse block I found nothing there. He suggested jumpering the fuse next door to the bad fuse port. B5 had no voltage, B4 had the correct amount. I made a jumper out of a paper clip and tested the electrical bits. Sure enough it worked with a jumper.

So with that bit of knowledge I decided to look at the wiring loom. I started at the battery and traced the loom back to the fuse block. The wiring loom runs from the battery through a cable to an odd octopus of connections to the fuse block along the right (passenger) fender and on into the cab and to the fuse block.

If anything had failed I figured it was outside the cab. Mostly I figured that because I was too lazy to pull the dash off and walk the loom  from the fuse block back to the battery. Laziness, what a comfort.

So I pulled back the “protective” cover. There I saw one wire not connected. As you can see from the picture the green is a lovely bit of corrosion that had eaten through the wire. Believe me when I say the first thing I thought was, “This cannot be this easy.”

I’m guessing these two should be connected…

A lovely color or green.
Blurry…

I tested the solution by jumpering the two wires with a make shift jumper with a fuse in line, as JagGuy said, “just in case.” I was very surprised at how easy this was. I was also pleased to see the circuit light the map light on the bottom of the rear view mirror, signaling my success.

I wonder why I continue to use this camera. Blurry.

A quick call to confirm my thoughts with JagGuy and I was moving toward repairing the line by soldering a jumper. I cut away all the corroded wire and made the connection. I soldered the jumper in place and put some heat-shrink on the bare wire. I then tested all the electrical bits I could find that were affected by the bad wire. Victory
.

I buttoned everything back up and declared V-WL day. (Victroy Wire-Loom). I bought a round of beers for all those present in my garage. I was sadly all alone but I thanked myself for the drink and went to my office to type up this blog post. I am on my second Victory Beer and this blog post is done.

P.S. Some random thoughts. The whole octopus connected to the bolt/connector is, well…poorly done. I would have much preferred a lovely power block with power on one side and the individual wires on the other…and as we are say what we REALLY preferred, those wires labeled with their destinations. Eh, whatever.

With every turn of the wrench solder of wire we get closer to the Circumnavigation of Oklahoma.

The face of patience as Mrs. Okierover snaps pictures.

Thanks for reading and Happy Rovering.

The one where I catch myself on fire in the furtherance of Land Rovering (post 234) 12/21/2010

I started a little slow out of the gate Saturday. My good friend, the Evil German Dude (EGD) agreed to help me weld in patches for my rusted passenger side floor. So the plan was to get up on Saturday and drive to the lovely town of Jones, Oklahoma where EGD has his evil lair. It didn’t help that I had what would be considered a bad dream the night before. In the dream I forgot to get up and go to EGD’s house for the project and I couldn’t get him on the phone to tell him why. Weird.

My slow start was mostly due to me failing to move all the crap that was piled on and around my Range Rover. I had to move two cars and it simply took longer than I planned. It turned out not to be a big deal, but when you are dealing with Evil German Dudes you want to be punctual. The drive was unremarkable except for the big hole in the floor letting in the morning chill. The heater kept it comfortable so it turned out not to be the issue I expected. I did see one thing on the way in that disturbed me though. A sign at the city limits of Jones read,

It is illegal to dump animals in Jones.

Is this a big problem? I guess it would make sense to drop an unwanted animal off in “the country” instead of feeding it and loving it. Jones is definitely in “the country”. But Jones is having none of that. It must be a big enough problem that the City of Jones sprung for a sign to declare its intention to fine you if you are caught.

I arrived at EGD’s evil lair and with some pleasantries we got the Range Rover into the garage. “Back it in.” was my first instruction. I asked why, to whit he responded, “it will be easier to push it out of the garage if it catches on fire.” DULY NOTED! That had not even crossed my mind.

The project at hand was to weld in replacement floor panels to cover the rusted holes that I cut out of the floor. EGD’s evil mistress is EGB, the Evil German Broad. She had a project as well and so we all assembled in the secret lair and got started. I’m substituting broad for bitch. I like her, so I tend to think of her in a better light than the later word would denote.

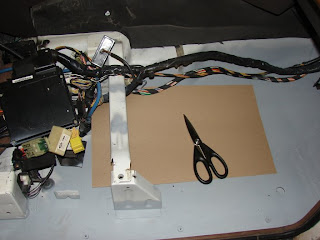
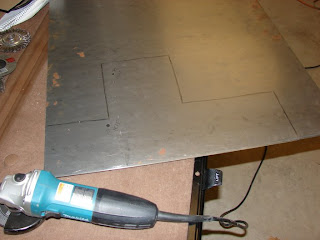
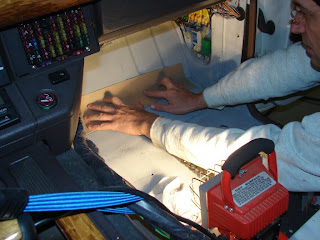
I failed to do my homework so we were set back while I made my templates for the holes. Templates are a good idea. With the price of sheet steel and the distance required to retrieve more if you screw up makes mistakes like poor cutting a show stopper. I got the card board and cut the template.

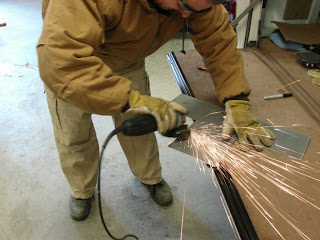
My next task was to cut the steel to match the template. All this would be duplicated for the second set of holes in the front of the floor pan. I transferred the template on to the steel by tracing the outline and got to cutting. I positioned our old friend, the angle grinder, now fitted with a cutting wheel, and got to cutting.

This is the part where a quote from a movie is necessary.

“Stupid is as stupid does.” – Forest Gump

I can just hear you all out there, “But OkieRover, I always thought of you as a pretty sharp guy.” Well that is a nice thought my dear readers, but let me tell you the facts. As my cousin Victoria will assure you, “Marines are NOT the sharpest knives in the drawer.” She would also be the first Army dog to tell you, “Marines may well be the biggest and scariest knives in the drawer, but not the sharpest.”

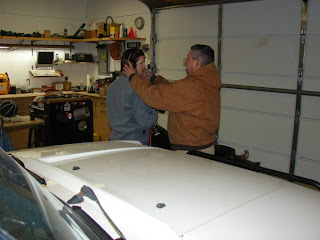
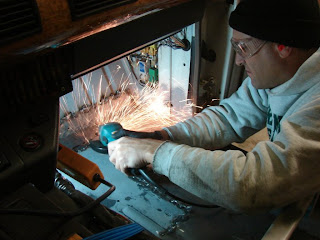
You can see from the picture that something funny is about to happen is about to go horribly wrong. On my third cut the sparks flying at my thigh were hot enough to ignite my Levi’s 501 jeans.

On the first and second cuts I had noticed that the spot where the sparks landed on my leg got warm. But I’m a Marine and I am not phased by such annoyances for my pain threshold is high and my discipline is unwavering. Sadly that level of pride proved too much when the warm spot on my leg got A LOT WARMER, you might even say damn hot.

I looked down just as the Evil German Dude said, “You are on fire.” Before the last syllable of –ire was said I was already slapping the fire out. I did not feel “stop, drop and roll” was appropriate so I just slapped my thigh until the flames were gone.

We all had a big laugh. EGD said, “If you would have left it burning for another minute I would have had a picture of it.” I’m not sure that would have been worth the photo. As it turned out I only received a small blister and a bruised ego.

Growing impatient with my pathetic attempts to cut the steel EGD leaped into action. He took over the cutting. Perhaps he was wanting to have all the fun. I know he has had extensive training in metal working, shop procedures, welding, and nuclear reactor construction techniques from the Stadtweke Bremen AG Academy of Evil Villains. We often tease him that he could build a fully functioning nuclear reactor from two paper clips, a nine volt battery and a piece of cork. We also know he minored in earthquake manipulation while at the Academy. It should then come as no surprise that Jones Oklahoma experiences an extraordinary number of earthquakes. We have not yet gathered the evidence that he is guilty of the earthquakes, it’s only a hunch at this point. Update: The evidence is getting stronger.

=”>

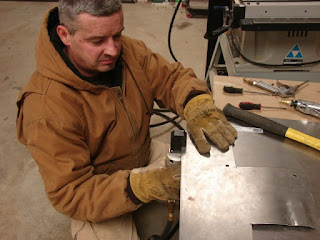
The next step was to cut holes in the steel plate to make tack welds. Unfortunately I had only two thicknesses of steel to choose from at Lowe’s, 16 gauge and 22 gauge. Sixteen gauge being the thicker steel. EGD’s pneumatic punch tool was no match for this thickness and it was determined to edge weld the larger patch.

With that in mind we had to remove the paint I sprayed to protect the naked steel from rusting. I marked the outline of the panel and EGD ground the paint away with his air tool.

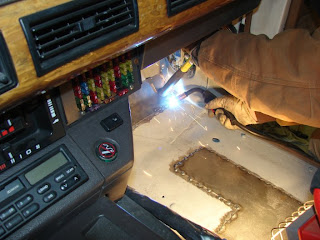
Then it was on to the welding. Originally I had intended to learn this task and do it myself. I was pretty sure I wasn’t ready for this today. EGD was the accomplished welder and I just stepped aside and assisted when necessary holding the plate down as he made the tack welds.

Pretty soon he was done and I was back in there to make the template for the last two holes. I’m now an expert at making templates. I also cut this panel out and managed to not catch myself on fire for a second time. 22 gauge is pretty thin so I cut this one out with the metal shears.

To get the flex and bend necessary for this section we went with the 22 gauge. The punch was easily able to penetrate this thickness and EGD went to work. He also gave the piece a nice bend in his vise and it was back in to weld it down.

I got in and used the air grinder to get the paint off to insure good welds. This time I ground the paint back inside the template marks due to the punch method being deployed.

EGD fired up the welder and got the last panel welded in place. He used the hammer to assist in holding the plate in place with the proper bend. It was necessary to have the air compressor fitted with a blowing tool and at the ready. As the welds were made, several times the rubberized undercoating Land Rover saw fit to install caught fire. It was easy enough to keep under control with a few hundred PSI of forced air to blow out the flame and cool the steel after the weld.

The final step was to knock the high spots of the welds down with the angle grinder. I got that task knocked out in no time.

All that was left was cleaning up. I grabbed the shop vacuum and cleaned up the floor pans the best I could. The grinder wheel and slag from the welding can leave a pretty good pile of debris.

We finished up the day with a lovely meal. EGB had prepared chili and cornbread. It was delicious. I bid them a good day and I was on my way home.

On the way home the alarm went off inside the cab. This is the same alarm that sounds when the transfer case is in neutral. I thought I had eliminated all possibility that it would sound again.

I pulled over in Nicoma Park, Oklahoma and shifted the transmission to PARK. I grabbed the shifter and fully expecting the damn thing to sound, I shifted back to DRIVE. Nothing, no alarm, WHY.THE.HELL did it do that?

I proceeded on home and one more time the alarm sounded. Just a short beep and then no more trouble. The road noise was reduced by the new panels, so I thought I’d listen to the radio. I punched in my CODE and the radio did not spring to life. Maybe it’s the wrong code. So I’ll have to pull the radio again and get the code. My good friend and former roommate Master Guns has a radio from one of his cars for me. I have to get it from him to see if it will fit in the limited space of the Range Rover’s dash. Maybe we’ll just go with a whole different system, I don’t know.

I got home and jumped out of Range Rover. As I passed the front of the Rover I heard a high pitched sound from the engine compartment. I went back and popped the bonnet and listened. My guess is I am loosing the bearings in my alternator. I have a lifetime warranty on the alternator so I guess I’ll pull it and take it down for a replacement. I didn’t expect a new project but I am not surprised by it either.

On Monday evening, Oklahoma was blessed with some unseasonably warm weather. We topped 73 degrees (F). That is very unusual for this time of year. Consider last year at this time. The weathermen were predicting a snow storm for Christmas Eve. What we got was a blizzard with five foot snow drifts that crippled the metro area for 7 days. We named the event Snowpocalypse 2009 mocking the news coverage of the event.

So, with seventy degree weather I was determined to paint the new bare naked panels before surface rust sets in. After Mrs. OkieRover and I got dinner (Chick-Fil-A), mom’s grocery shopping (Homeland), we had to take a roll of tape over to our friend who owns Rusty’s Frozen Custard. When we were neighbors he would always come over on December 23rd or 24th and ask if we had any tape for he had exhausted his tape supply wrapping presents. So after the second year of his late season visits, we started buying extra rolls and giving them to him as a present. Eventually we moved away, and now we take the tape to his store and leave it for him. On and off for fifteen years we have been doing this, a very long running joke.

With all our duties done, we still had time to go to O’Reilly’s for paint and bed liner material. If I hurried I still had time to get some of that paint on the metal before bed time.

We went into O’Reilly’s. Mrs. OkieRover said she “always” goes in with me. I told her she NEVER goes with me to the parts store. I can’t honestly remember the last time we were even at the parts store together. So once again her ALWAYS and my NEVER come up short on reality.

Castrol Edge Synthetic was on sale, buy five quarts get a Mobil One oil filter free. The Scion and the Civic both need oil changes so I grabbed 10 quarts. I don’t know anything about Mobil One oil filters. So that’s something I’m going to have to look up today.

So I look at the receipt,

  • 2 cans of bedliner, =”>
  • 2 cans of MarHyde acid etching primer, =”>
  • 10 quarts of synthetic oil.=”>

130$(US)! WTH? Wow that was a lot. I have to get it out of my head that a quart of oil costs a dollar. So you can imagine I was not expecting 70$(US) for two oil changes. I guess I know what I’ll be doing during the day on Christmas Eve. I’ll probably take advantage of the situation and extend it to a learning situation to the boys. Diet Mountain Drew graduates this year and needs to know about this stuff.

The next steps are to see about sealing up the floor and getting the bedliner sprayed on the new panels. There are some unavoidable problems already popping up. The best way to have done this job was to take the body off the frame and weld in a new floor for this section. With that in mind, it is going to be a challenge to seal out the water. I’ll have pictures of the underneath in another blog post this week. It will become clear why this task is going to be such a challenge when you see the pictures.

One more time, I’d like to send a big thanks out to my friend EGD for his help and to EGB for the great meal.

And to everyone else thanks for reading and Happy Rovering.
=”>

The last of the 70 degree days (Post #223) 11/27/2010

I caught a break on Wednesday. The temperature was above 70 (F) degrees. That may not seem like much of a break. If you knew that last Tuesday I pulled the sagging headliner off my overhead with the thought I would replace it after I was done running my mom to her doctor appointments. What I didn’t plan for was the application temperature for the spray glue.

Yes, spray glue has an optimum temperature with a minimum and maximum temperature use range. 70(F) is the lowest you should attempt to use their product. As the temperature was a pleasant and hovering in the mid 50s(F) that day I thought I’d be fine. But after reading the side, I thought I should probably call the information line. The lady on the other end of the line, said, “seventy, seventy degrees”. Well that was disappointing.

So I went on with my sanding of the old glue away from the overhead and generally cleaned up the surface in anticipation of NEXT MARCH! when I know the temperature would creep above 70 degrees. I used some 60 grit sandpaper and a foam sanding block. It’s light sanding, just enough to remove the glue. It is apparent that this will be the last swap with this fiberglass overhead. The fiberglass layers are starting to separate and will either need to be repaired or replaced.

So I rolled out the new headliner material that I bought from Gipson’s Trim in Oklahoma City. This place is a throw back to the old warehouse style shops in the olden days. Every thing about this place is retro. They still hand write receipts. You can see the rolls of materials behind them in the dusty and unkempt shop. So I told the counter man my application and he suggested the thin foam fabric due to the sunroof, and pointed me to the samples board, “Just match it up the best you can.” So I did, selecting W1913. I am mostly unable to distinguish one shade from another, my internal color wheel doesn’t work all that well.

I purchased three yards and two cans of glue. I remembered after I got home and cut the fabric that I made this same mistake last time. I needed 3.5 yards, factoring in the fabric for the sunroof cover and a little over two cans of glue. I had two extra cans of glue so I was good there, but will need to buy another yard (half yard if they will sell that little) for the sunroof.

I laid out the fabric and decided to use the “glue a foot, stick a foot” method. My friend EGD said that is how he had done it before. The last time I did the job I glued a few feet and tried to stick it with mixed results.

I am now ready to offer the secret to getting the liner into all the corners. I didn’t do this, and only came up with the solution AFTER I finished gluing. Get some weights in bags, place them on the fabric in the corners to insure they fabric meets the contours and stays in place as you stretch and match the fabric to the contours. I have a few places that the fabric after stretching it here and there pulled loose from the headliner overhead. I may try a injection technique I’m dreaming up in a lame attempt to fix my mistakes. A bag full of shot might be too heavy, while a small bag full of beans might be too lightweight. I think some five pound leg weights, the kind in bags might work. More on that if I try it.

The last time I did this project I attempted to cut the fabric “to fit” the openings. But after I saw what it was doing I decided to try a different technique. The first time I did the project I used masking tape to hold the fabric. It worked well, and was still in place when I removed the old fabric this time. On this headliner swap I decided to use glue and glue the fabric on the underside.

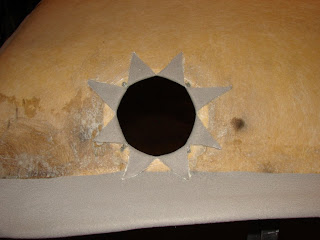
I also cut all the holes using a pie pattern which I hope will provide good results.

It produces a star pattern when you glue it back.

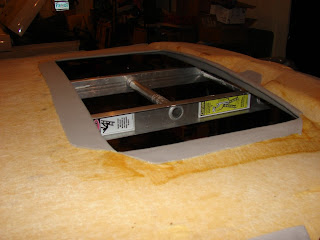
I used this or a similar method in all the openings. The sunroof, I cut to the corners and then cut out the middle to within 3 inches of the edge. The same with the front dome light opening.

You can see my multi-function ladder which transforms like a freakin’ Transformer in to all kids of forms. This is the scaffold configuration which made a good surface for me to work on.

So with that, the temperature was dropping each minute so I was in a hurry. It shows in my work. Pro tip: Avoid being in a hurry and take your time. It will result in a much better product when you are done. Like EGD said while checking out my work at our Thanksgiving feast, “Just think, a few more times and you will be pretty good at that.” Maybe so, maybe so.

Thanks for reading and Happy Rovering.