A Visit to the Air Defense Training Facility (Post #629) October 29, 2023

Half track

I was invited by my friend Correy Twilley to come to Fort Sill and participate in a WW2 living history event. The plan was to take the M3 Half Track and a Jeep with a Pack 75 howitzer out to the field and and have students and family come by and learn some history. Unfortunately the weather for Saturday would be pretty nasty. For dedicated living historians that’s not a big deal but the purpose was to have visitors. Not likely to have many visitors when the north wind blows in the 20mph range, rain falling, and temps in the middle 30’s Fahrenheit (1 to 5 Celsius).

World War 2 is not one of my current periods. I would have had to borrow my entire kit. But Correy said not a problem, so I said, “let’s do it”. When he cancelled I told him I still had the day off and would like to come down and visit the training facility.

If you are following the news, they are deploying some anti-aircraft units from Fort Sill to the Middle East. So I was at first concerned I would be in the way. Turned out not to be a problem as most of the troops were already getting their trashed gather up for deployment. Correy taught a class that morning and had a meeting but the afternoon was available for us to tour the displays.

Friday was pleasant with sunny skies so I toured the gun park. There were several examples of weapons I trained on in the park.

I trained on the M101A4 at artillery school. Fort Sill is home to the Artillery School now, but when I served there were two schools, Camp Pendleton and Camp Lejeune. They sent me to Las Pulgas, Camp Pendleton.

After school I was assigned to 5th Battalion, 14th Marines, Oscar Battery. We were using the M110A2 howitzer. This beast was a very accurate system and nuclear capable.

In the infinite wisdom of the Corps they sent our M110s to California changed our unit designation to 2nd Battalion, 14th Marines, Fox Battery. These towed behemoths required modern trucks (M939) to pull them. I was not a fan.

When Correy was finished with his classes he gave me a tour of the training facility. As you will see in the video, they have an amazing collection. Several of the systems are 1 of a kind or there are less than 3 of these known to exist. Several of the trucks and Jeeps are near fully functional and could be taken out if a little work was done on them. Several of the systems are demonstrated for students with live fire exercises.

As promised, Correy said we would take the M16 Half-track out for a spin. It is an M3 based Multiple Gun Motor Carriage equipped with the Maxson M45 Quadmount (specifically the M45D) with four M2HB machine guns. Our first stop was to drive it to the gas station and put in a couple of gallons. The looks on people’s faces when you roll up to the station is pretty fun. After that we took it over to Medicine Man Bluff and then around the old post and finally back to the museum.

I’m looking forward to the next opportunity to go down to the base and to go out in the field with my friends. The weather has turned cold. Seems like we skipped Fall all together this year and went from 90’s to 30’s Fahrenheit in two days.

Thanks for your patience while we went to St. Croix for a week. We needed the break and took a lazy week to recover from work and life. I did manage to see 5 Land Rovers on the island. You can see them on my Instagram account.

I’m working on the backup fuel pump and plan to get the BWB started and turned around in the shop. That will allow me to tackle the rust on the passenger (starboard) side. I’ll have another video up next week.

Like and or subscribe to the Youtube channel, every little bit helps. As always, I’m happy to see comments and will comment back as soon as I see them.

Thanks for visiting and Happy Rovering.

The Big White Bus Will Not Start (Post #625) September 25, 2023

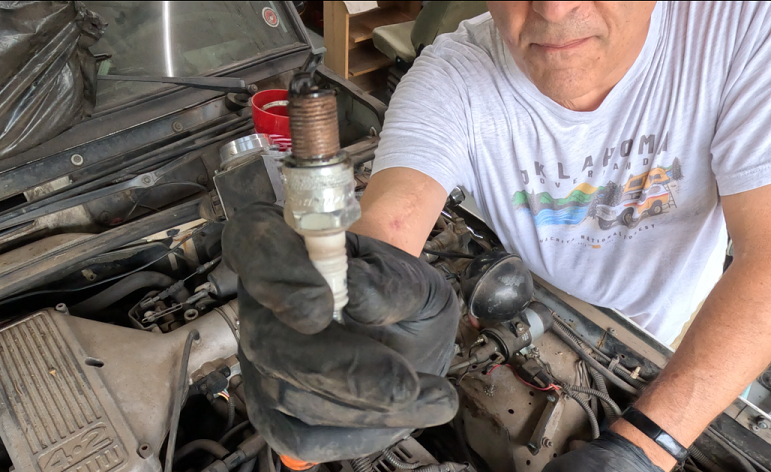
spark plugs

In this post I am sort of after the fact prepping the motor for it’s first start in several years (at least 3 years). I was given some advise that I should lubricate the cylinders prior to starting for the first time. The reason is obvious. The cylinders are dry.

I’ve already tried to crank the engine. That was evident in the last video. So perhaps doing this NOW is a bit superfluous. Meaning I’ve probably already damaged something. But maybe not, I’ll know when I get the engine started.

I’ve pulled plugs and I’ve squirted some WD-40 inside each cylinder. How much you say? That’s a great question. I was told at least a couple of seconds of spray. The WD-40 fluid is going to adhere to the cylinder walls and if the rings were stuck, would have acted on them hopefully freeing them. They make a special “foggy spray” for this application but I was told just to use WD-40. I highly recommend you do your own research on this. I’m damaging my own stuff. I don’t want you to damage your stuff if I’m wrong.

The fuel pump is on the way and might arrive today 9/25. That would make it 8 days since I ordered it. They don’t work on Saturday or Sunday so Monday was the first time they started to “fullfill” the order. I am also in the farthest away region from their shipping hub. So a minimum of 5 days of transit. Looking at their location, I could have driven up there, picked up the part in person, and arrived back at base camp before the shipped part arrived.

Next step is to get a fuel pump installed and the Big White Bus started. Drive it to the top of the driveway. Hose off the parts so I can coat them with rust conversion paint. I will then turn her around and have the starboard side on the same side of the shoppe as the welder. I have some rust under the starboard rear wheel well the might need some patching. I also have the repairs to the existing rust spots identified in other videos. B pillar, D pillar.

You can support me on Patreon if this content is appealing. I would be greatly appreciated. Like and subscribe to the video channel.

Thanks for reading and Happy Rovering.

Fender Repair Part 5, MORE Crappy Welding of the Large Fender Patch (Post #622) September 2-3, 2023

Super happy

In this installment I finish the left rear fender panel. And by finish I mean I had to completed replace the outer fender I had previously welded up. I added a strap to attach the inner fender to the outer fender.

The outer fender’s welds were compromised because I ran out of shielding gas halfway through. The panel was 16 gauge and I swapped it with an 18 gauge. The right thing to do was replace it and “do it right”.

Now, I’m no body man and right to me is probably not right to someone who actually knows what they are doing. As I mentioned in the video I need another 10 or 20 years of welding experience to be “competent”. Over all I’m a lot happier with this replaced panel. The 16 gauge panel would not have worked. It would not have been watertight no matter what I did.

I covered everything with yet another coating of primer. I also put seam sealer in the appropriate places. This only seemed prudent as I am almost certain this will rust again. My hope is it will take at least 20 years to rust out.

I thought some of the welding went a lot better than the previous attempts. I want to say, “I’m getting better.” but I’m pretty sure I’m fooling myself. Most people could probably weld if shown how and a little practice. Welding WELL however is really hard.

So add to the fact I’m saying welding is hard…and welding UPSIDE DOWN is another level. We did not go over this scenario in my class. I’m half tempted to take the class again and do the entire class upside down. I finally figured out the I could weld sideways that worked pretty good. Even with my new sideways technique it didn’t stop me from getting some new holes in my PPE and my skin from hot slag dripping down. My grandson Grady was horrified by the scab in the crook of my elbow. The chunk that got me on the chest made a similar hole there.

I also did quite a bit of cutting and the sparks flying back on me warmed me up a bit. Thankfully my Round House Overalls1 deflected the sparks and only “warmed” my family package. If you remember this post from December 2010, “The one where I catch myself on fire in the furtherance of Land Rovering” [Okierover] I caught myself on fire cutting the passenger side floor panel. What I learned from that was:

  • Blue jeans are not safety gear and are a sad substitute for PPE.
  • Longjohns [IBC] (aka long handles [Collins], thermal underwear, etc…) will keep the flame off you for a brief time.
  • Your best friends don’t want you harmed, but also want to take videos of you when you are on fire so they can tease you later.

Thanks for reading and Happy Rovering

1This is my unsponsored review of Round House Brown Duck Overalls. It is a solid 10 out of 10. They are made in Shawnee Oklahoma (Home of Brad Pitt) and at $60.00 a pair (on sale at the time of this posting) a real bargain. 

Shoppe Clean-Up and Mower Repair (Post #617) July 31, 2023

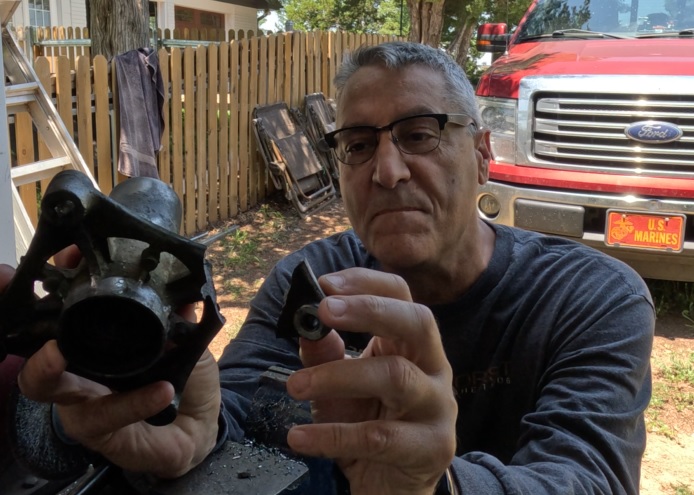
Broken Mower Part

No Land Rover content this week. I started the weekend trying to get the chores done first. Mowing the grass which grows at a ridiculous rate due the the wet July we’ve had. I’m cutting grass every week now.

I got on the mower and got my book on tape going [Extreme Measures by Vince Flynn the eleventh book in the series]. I kept hearing some odd noises, vibrating parts, and the engine was running like crap. Just last week I was evaluating how many more summers I might get from this mower while I was patching the holes in the tires with plugs.

I have been impressed at how trouble free this mower (Husqvarna 1842) had been with this being the sixth summer. I’ve only had one other serious repair. It was also a mandrel. I have also replaced one battery and before the summer is up, I really should replace all the tires.

After an inspection I saw the shaft on the mandrel wiggling like crazy. The upper bearing failed on the mandrel. So it wasn’t going to be grass cutting for the weekend, it would be mower repair. I looked the part up and found it had a John Deere part cross referenced. I went down to P&K Tractor on Highway 9. The parts guy was SUPER helpful. He looked up the part on several sites and found a part number at O’Reilly’s. Turns out in his words this was the most common bearing in the world. I was surprised how many different parts numbers were associated with it. I ran down to O’Reilly’s grabbed two.

The bolts (steel) were really stuck in the mandrel housing (cast aluminum). You don’t have to be a chemist to know this is a recipe for disaster. And that’s exactly what happened.

I wound up having to attempt to drill and easy-out what was left of the bolts. Broke two drill bits and eventually the mandrel. Four hours lost. I’ve ordered a replacement, it comes in this week. So I spent the rest of the day cleaning and organizing the shoppe.

I’m going to visit an old Marine friend of mine this week. Jeff was one of my closest friends in the Marine Corps. We went to boot camp together and artillery school. I haven’t seen or heard from him since perhaps 1988. Gonna be great catching up. RovErica’s kids are coming to stay with us this week too. With all this happening I don’t think there will be any video next week. But we’ll see.

Jeff and Bear
Heavy sigh.

Thanks for reading and Happy Rovering.

Overlanding Kit on the Way (Post #569) 1/22/2017

I bought a second aluminum medical transport chest. I read an article on Overland Bound about having a three trunk system. Pack 3 Cases describes a system where you have three cases ready to go at all times. Adjusting your kit to have the optimal amount of gear for getting out and getting on the trail.

If you have the cases pre-packed you can get home, get your kit on you rig, and get on the road more quickly and efficiently. It’s a solid idea, so I went to some effort to find and purchase 2 additional GI Aluminum Medical Transport Cases. They come in basically three sizes I prefer the Medium size.
Medium – 11½. H x 19½ in. W x 31½ in. L
Large – 17 in. H x 19½ in. W x .31½ in. L
X-Large Chest – 22 in. H x 19½ in. W x 31½ in. L

A quick search of eBay may find you some used ones. I found some at Coleman’s for a reasonable price 79.99$(US). I’ve seen the for as much as 130$(US) and weren’t as nice. Coleman’s often runs out of stock so be prepared for that eventuality. I bought on from a gentleman on eBay. It came with a lot of additional stuff which I thought was awesome. In addition to the case, I got a sleeping bag bivy cover, a very large ditty bag, and a large ammo can. So shop around you don’t know what you’ll get.

If you read my Organizing the Boot post you will see my first medical case there in the pictures. In that case I pack all my tools, spare parts, and straps both recovery and packing. I recommend you read that post as well as it outlines how I pack all the gear needed to keep me on the road and prepared for most issues.

I have packed the camp kitchen in one of my other cases. I still have a little room left for more items if necessary. The third case I think will be my sleeping gear like sleeping bag and sleeping pad. My cot will still need to go in the back along with camp chairs. My friend Erik recently purchased a set of the upgraded heavy duty plastic storage cases.

The thing with either of these solutions is that the cases are water tight and very sturdy. I don’t expect that I’ll have to replace them any time soon. After Erik posted this picture on the Oklahoma Land Rover Owner’s Facebook page I thought of doing a similar picture. However that was the first week my shoulder was really acting up and I couldn’t lift anything over my head. The thought of emptying the cases to make them lighter didn’t appeal to me either as I had just got them loaded with gear.

Thanks for reading and Happy Rovering.