The Good, The Bad, and The Ugly (Post #193) 8/12/2010

[Queue the theme song]
The Good, I started on the rear brakes last night.
The Bad, I can’t finish the project.
The Ugly, I found a broken axle half shaft.

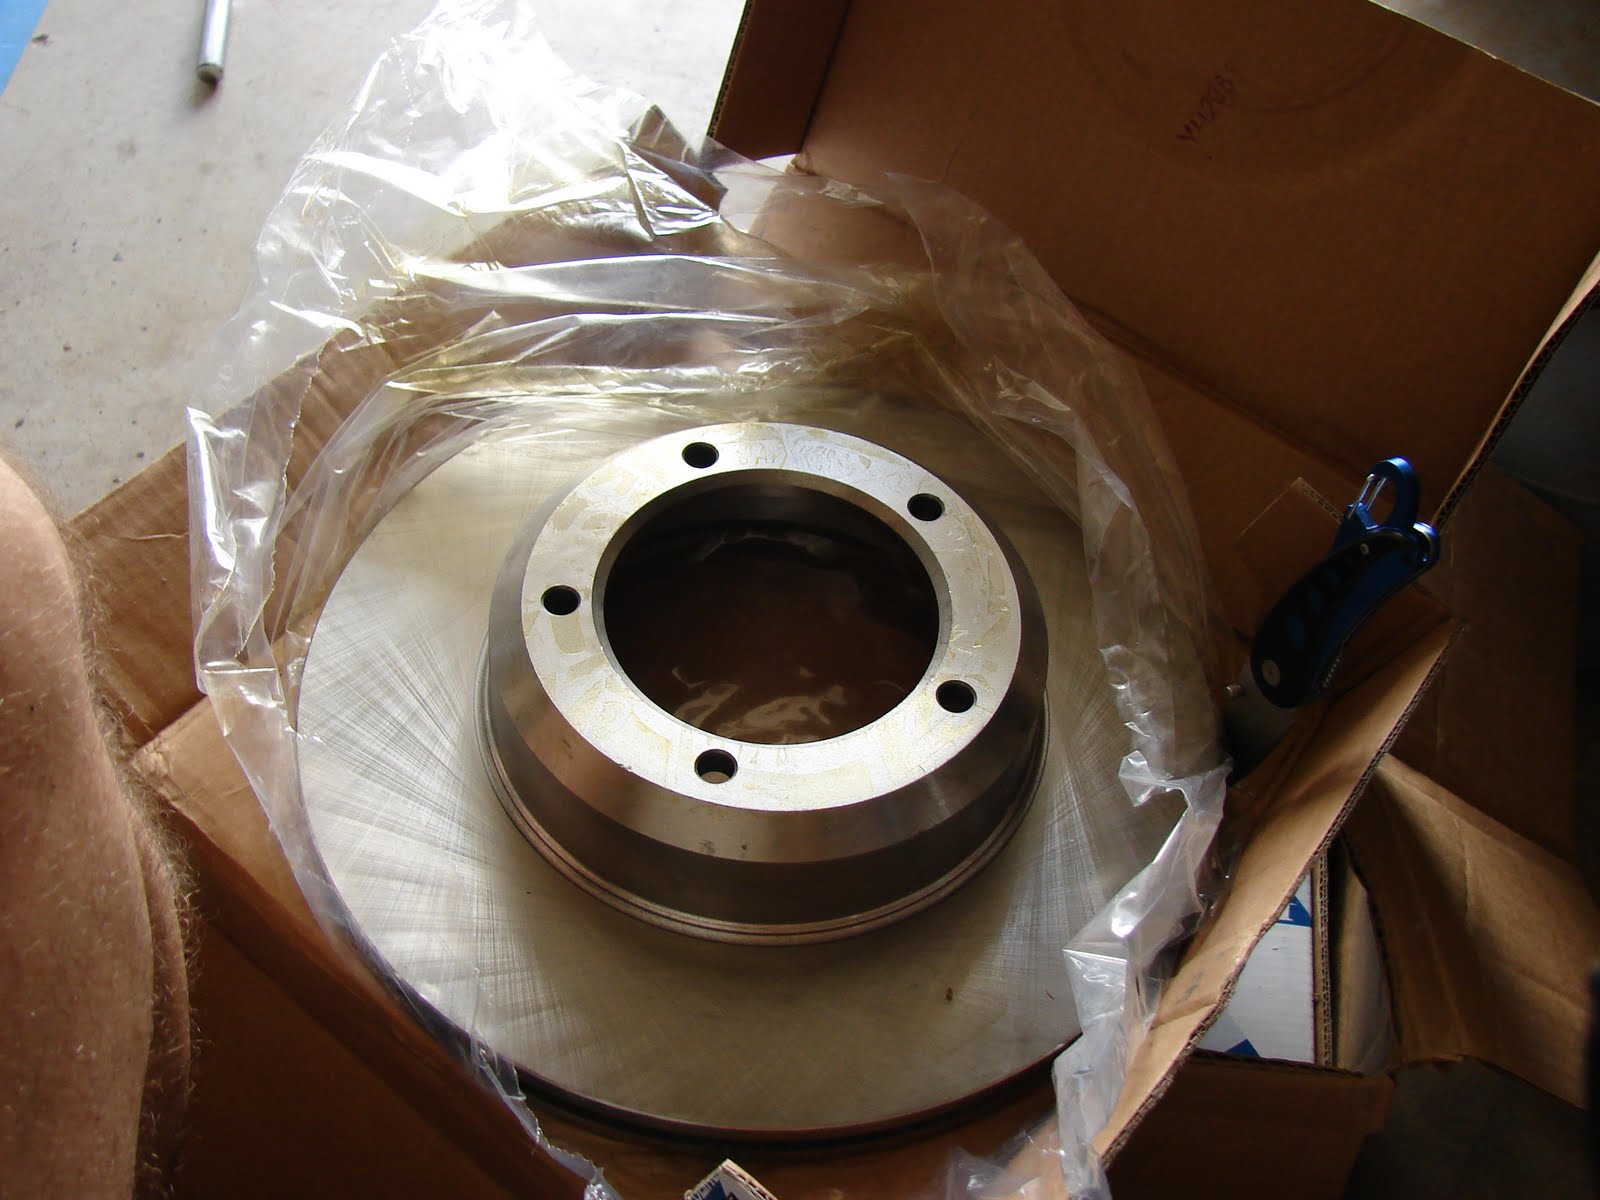
As you can see in this picture the rear brakes on the Range Rover are looking pretty knackered. I love that word “knackered”. In this context I’m using the British and Irish slang form. But it works as well for me on the British/Australasian level too. For when I saw the broken half shaft I translated it into American English and that was one of the words I used do describe my disappointment. RovErica, while driving her UN-air conditioned Taurus, is famous for her saying, “Dad it is hot as balls in my car.” It was definitely “hot as balls” in the garage while I was working on this project. The temperature was still above 95F when the sun started going down. Considering all this, knackered works on many levels.

 
On the final few drives in the Rover, the brakes seemed to be seized at least on the left rear side. And the rust is simply annoying. I normally don’t swap the brake discs when I do a brake job, and as you can see they have probably NEVER been replaced in this Rover’s life. The groove or lip on the edge of the disc was getting pretty deep so it was time for some new discs.

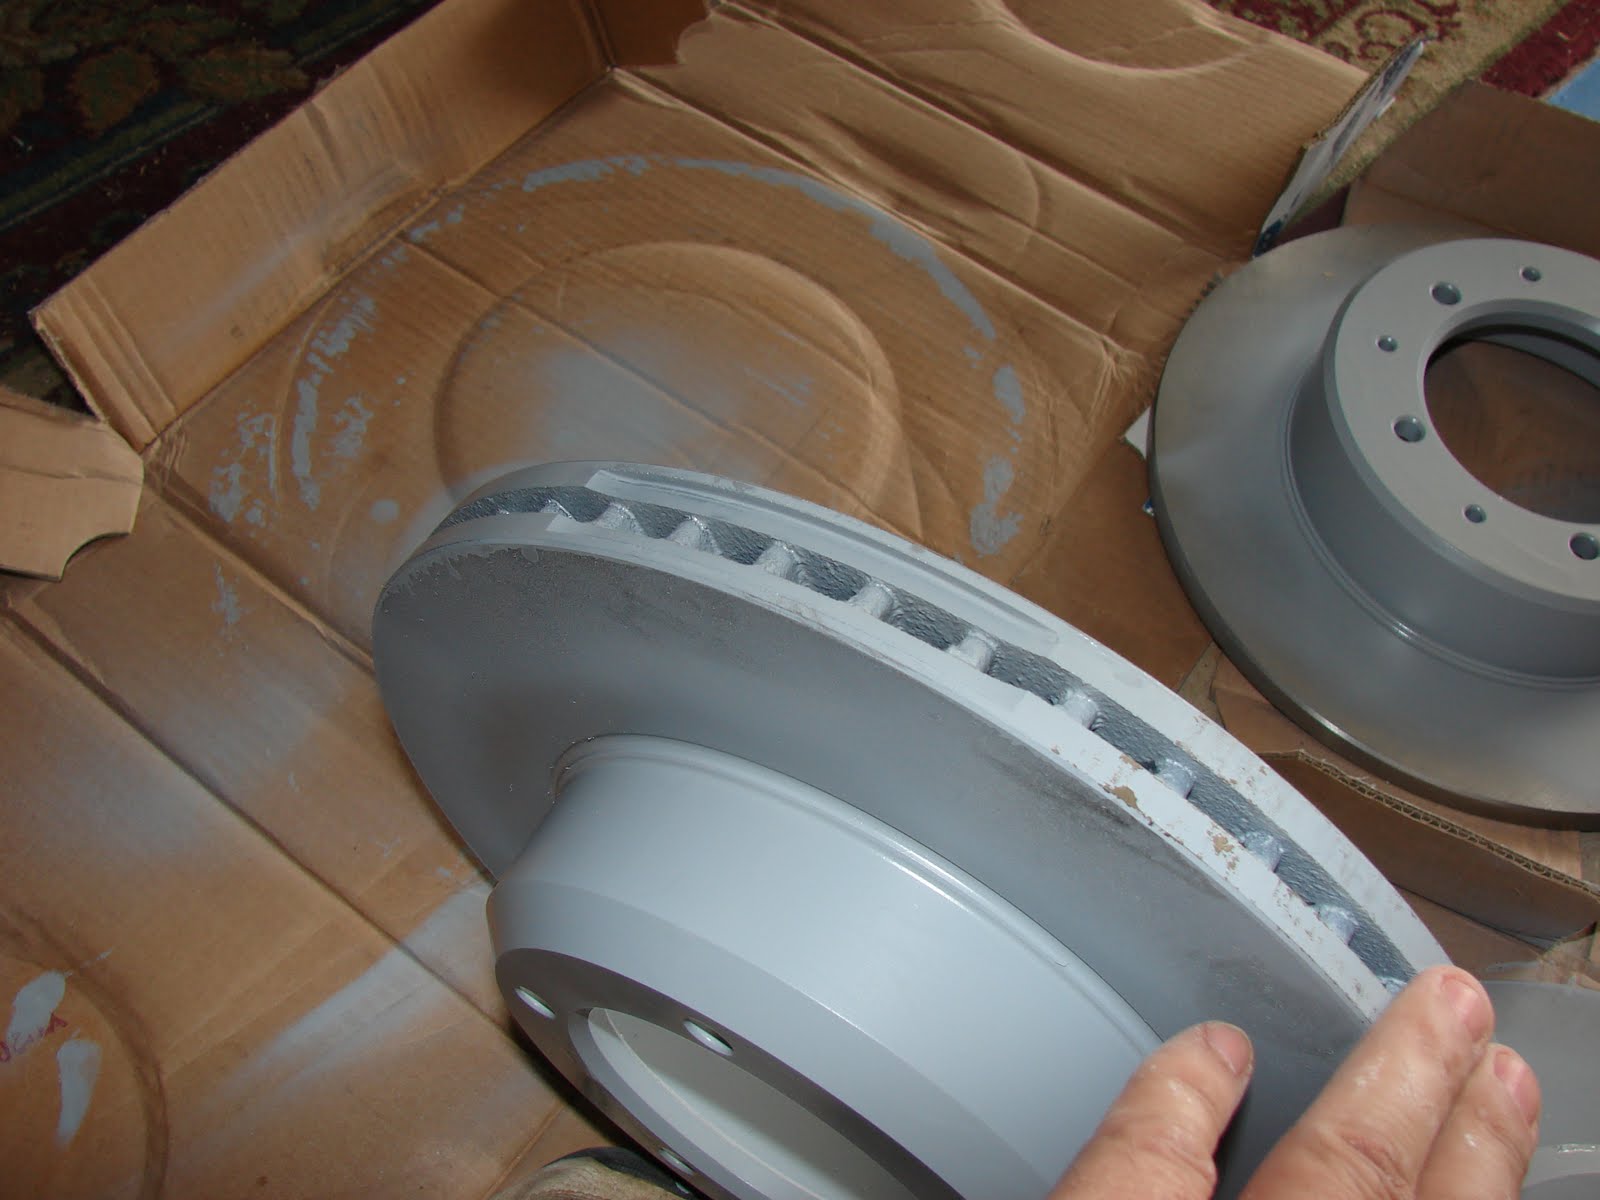
I bought a full set of discs and decided, like all the new items I put on the Rover, to limit the rust the best I can. I decided that a coat of acid etching primer would be just the thing. You might ask, “Will it work?” Who knows, but I feel better about them being painted.

So I took the new brake discs and painted them with the primer. It was not my intention to paint the actual braking surface but through my laziness efforts and impatience some healthy overspray, I got paint on the braking surface. I don’t think it matters for when the brake pads start making contact there won’t be much paint there after a few stops.

After I had put the first coat of paint on the discs I noticed an irregularity on one of the front discs.

After checking with several sources (JagGuy and The Evil German Dude) it was determined this was done to balance that disc. I had seen this before, but wanted to make sure.

Swapping the discs is a pretty straight forward job. You remove the caliper, or as EGD says the “ka-LIPer” (I wish I had an audio file of him saying that for you). This requires the brake lines on the rear brakes to be removed. So have a catch pan available or you will have a huge mess. The brake lines are “hard piped” as in not flexible at the caliper. The flexible part of the brake line on the rear axle is in the center above the axle.

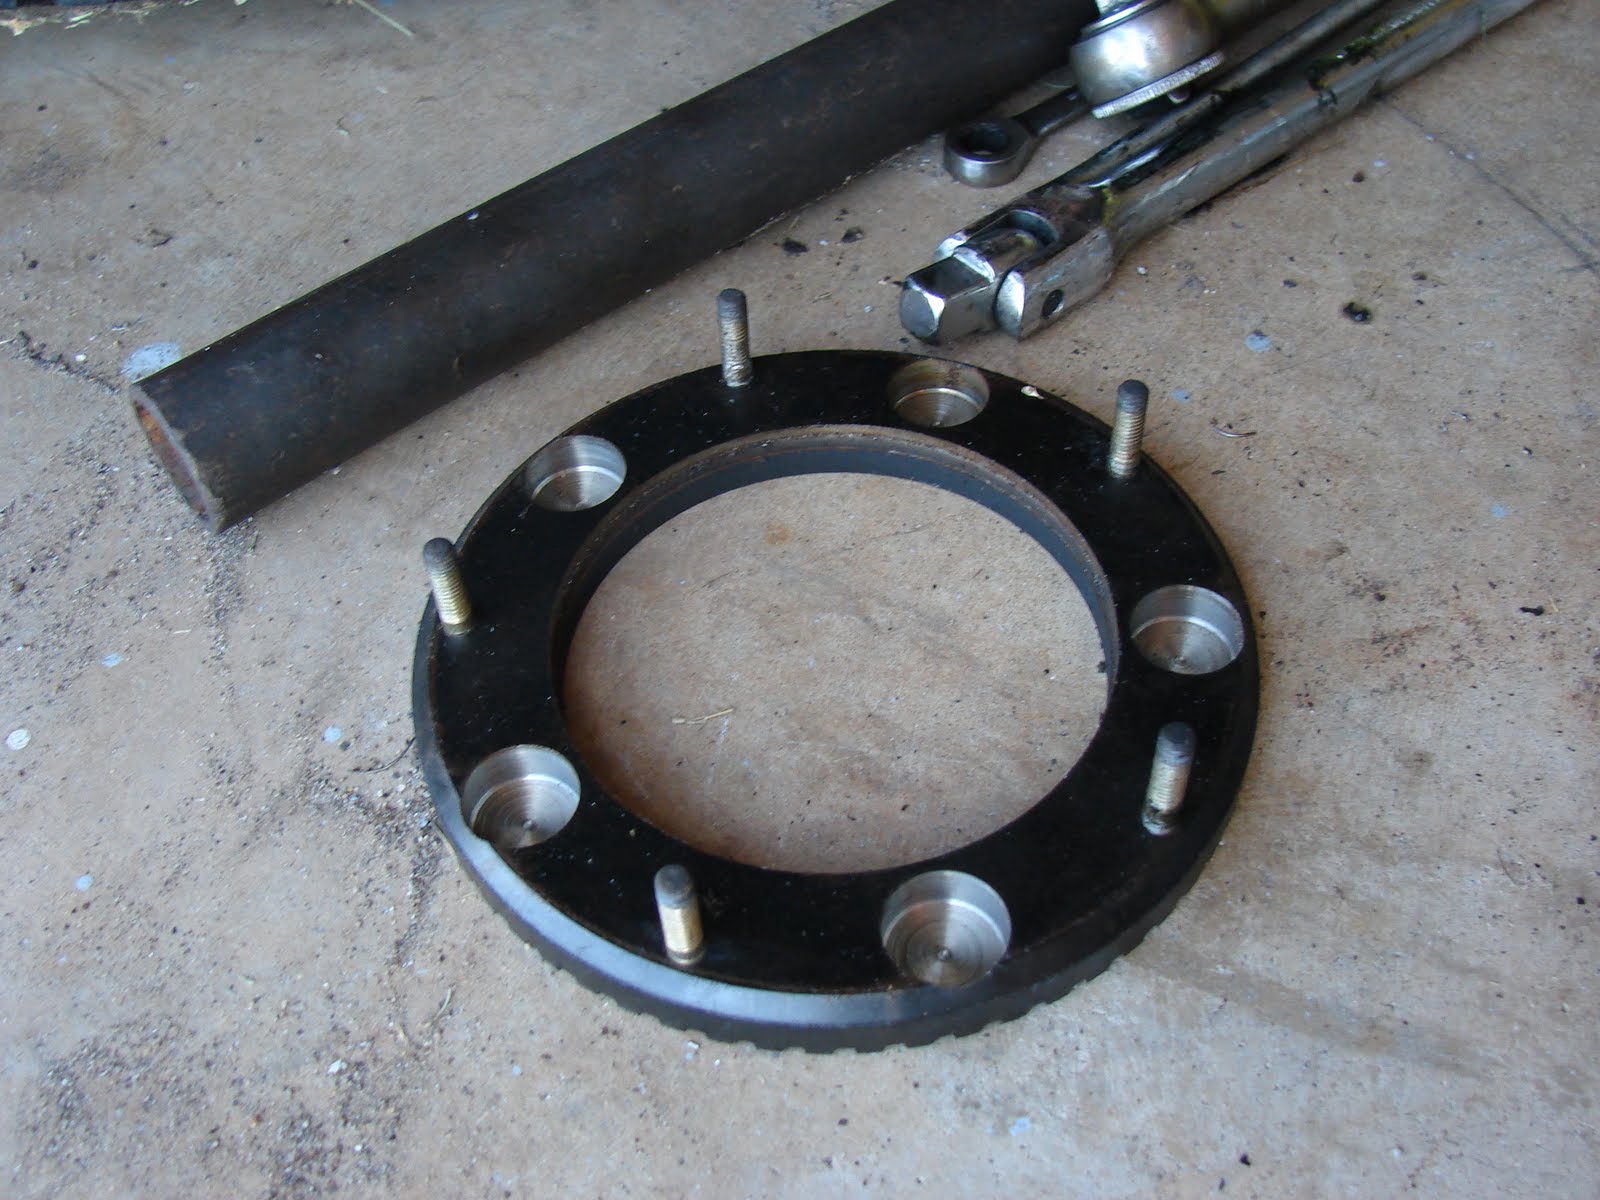
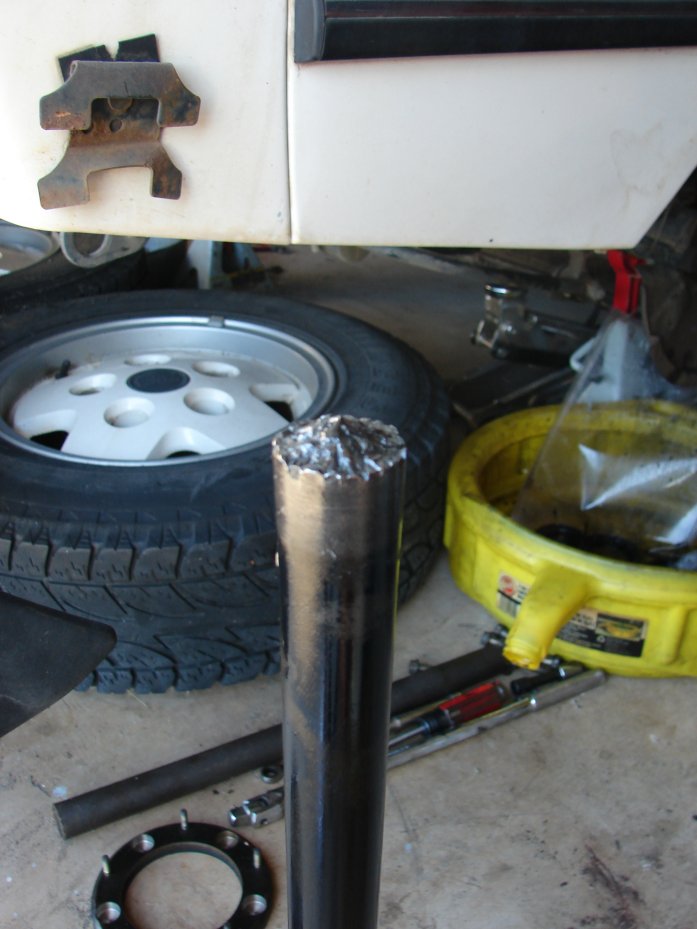
After you have the caliper off, it is time to remove the axle half shaft. That can be seen in this picture.

Five bolts and you are done.

Pro Tip: I used a breaker bar to hold the wheel in place as I broke the bolts lose. I also had to use a cheater pipe to extend the leverage of the socket and ratchet. I’m getting wimpier in my advanced age.

I used a large screw driver to slip between the axle half shaft cap and the hub. Once you break the seal it comes out easily. You then flatten out the keeper ring and remove the bearing nuts. These nuts are very large and I used the biggest channel locking pliers to get them started. They were not very tight in the first place but the grease made them very hard to work with.

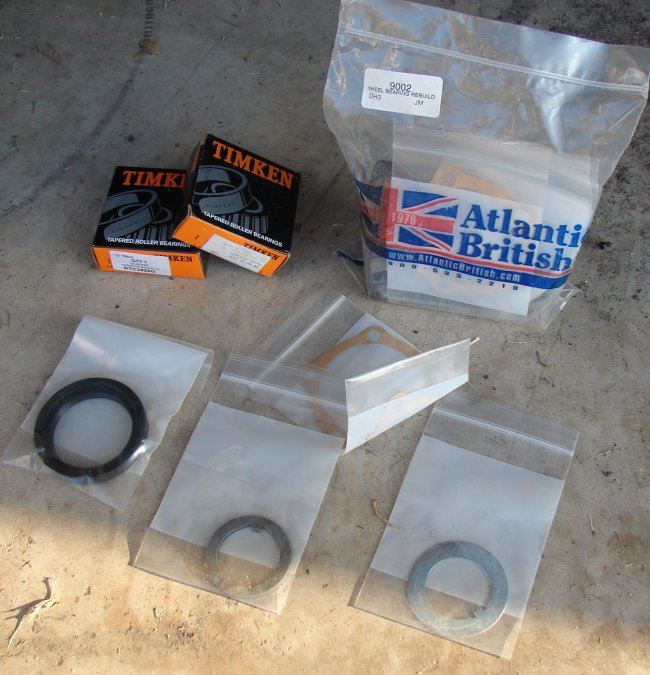
Here is another “good” for this project. It is a good idea to replace stuff as you go through the vehicle you are working on. In this example the wheel bearings are in these hubs. I remember I had bought a wheel bearing replacement kit some time ago when RovErica reported some odd behavior and noise. From what she described I thought the bearings were going out. It turned out not to be the case and I had the kits still sitting on the shelf. My axles have 185,000 miles on them. So basically if you break something down this far, go ahead and replace the serviceable parts while your there, if your budget can afford it. I will store the old bearings “for good measure” as I believe they were not bad in the first place and will work in a pinch if necessary.

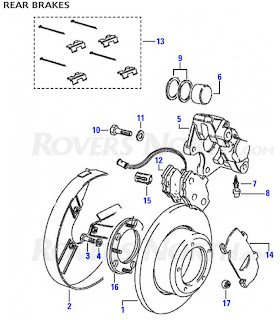
After you have the hub off it is time to remove the disc from the rest of the hub. This is done by removing the crown nuts that hold the anti-lock brake sensor ring.

And those thread shafts pass through the disc holding the hub to the disc. They are dual threaded. Both ends are threaded and this may cause you trouble when you attempt to take the crown nuts off. Be creative. Extra points are awarded to you for removing the ring if you have to deploy additional tools or techniques. Rovers North has a good picture of the ring and assembly and how it all fits together. Click on the picture to open their site for a complete parts list.

With a little persuasion gentle tap of a hammer the hub and the disc will separate. Reassemble in reverse order. If you have a bearing kit to install you will need to do that as well. If no, definitely renew the grease on the old bearings. I will post another entry when I put the new bearings back in.

Right now I’m debating if I’m going to bother sand blasting and painting the hub unit. I really want it all to be pretty and new so maybe perhaps.

Now on to the broken axle half shaft.

This crappy photo shows the sheared off end of my right rear axle shaft. After seeing this and an expletive laden rant a little disappointed cursing, it hit me, I will have to tear the differential apart. KNACKERS!

If we refer to the rule above, now would be a good time to put in a locking differential. But sadly the budget does not support it. What? You’ve never had the axles out of your Rover? Click here to see what a proper shaft should look like. In short, it depends on who you ask and what you are doing with your Rover.

IF we, that is you and I, were sitting in my garage having a Bodington’s the conversation might turn to 10 spline versus 24 spline axles at this point. Basically in mid-1993 Land Rover started using 24 spline axles instead of 10 spline. Are 24’s better than 10’s? There is a thread on RangeRovers.net in their forum. Check it out for wisdom on the subject.

So another phase of the project will be to assess the damage done and get the axle half shaft piece (or pieces) out of the differential. Gag.

As I posted in an earlier post, everything I touch generates two (2) more projects. At this pace I may never finish the restoration. I am trying to keep a positive outlook on everything, but Mrs. OkieRover is wondering how much this will all cost and when will it be done. As I told her, this is my “mid-life crisis motorcycle”.

I am respecting her wishes that I not buy a motorcycle. I’m hoping she realizes that this is my hobby and in her mind, is a lot safer than a motorcycle. Well, it’s a lot safer than ME BEING ON A MOTORCYCLE.

Thanks for reading and Happy Rovering.

Central Locking System Woes (Post #158) 11/13/2009

I attempted to repair the central locking system on Veteran’s Day. I could write this post in the form of a battle, but I will not. I won’t write the post in that form mainly because…

“History is written by the victors.” – Winston Churchill

So with that quote you have probably figured out I lost the battle.

First, I wasn’t totally confident I would win. I took a lot of INTEL (reading and research) in to the battle with me.
I had all the RESOURCES (tools and time) to win.
None of that allowed me to carry the day.

I got the panels off of the passenger side doors. These were the locks that bounced UP and DOWN four or five times each time one of them was locked. This resulted in the locks either being locked or unlocked when it finished. It was a crap shoot each time. So to lock the Rover you waited for the cycling to stop and then you manually lock the doors. As you can imagine, I received quite a bit of teasing from the unwashed non-Rover people that ride in my beloved Landy.

After the panels were removed I attempted to sort out what was happening each time the locks were depressed. I’m guessing there is a threshold that checks if the locks are in the locked state. And at the point you press the lock it attempts to lock the door several times until it just gives up. That is a basically a WAG (wild ass guess).

Even my remote fails to do the job. I did use it once to unlock the doors as a last resort after my daughter locked the last remaining key in the truck on a very cold winter day. Also locked inside the vehicle that day was her coat. So with freezing rain coming down we each learned a valuable lesson that day.

I guess I’m going to replace the entire system. Or I’m going to at the least replace some bits to get it back to functioning. There is a great post by Chris-St Louis on DiscoWeb describing how he repaired his central locking system. There is even a schematic that shows how to wire the entire system with two relays. To check out his post you will have to register at the site.

There are some great tips on the RangeRovers.net site as well. I’d go through these before jumping to the replace everything stage. A used replacement door lock module could also be a solution if you are willing to spend the money for it. Perhaps your’s is just worn out.

So for the mean time I have pulled the fuse and I am locking and unlocking the doors “the old fashioned way” ala’ my 1978 Malibu. It is a barbaric method of locking your vehicle. But it does cut down on the disparaging remarks from my non-Rover buddies.

Chris graces all his posts with another great quote by Winston Churchill.

“Truth is incontrovertible; malice may attack it and ignorance may deride it; but, in the end; there it is.”

Thanks for reading and Happy Rovering.

November 26th, 2003 (Post #37)

November 26, 2003
Reply from John Brabyn
Further investigating the O2 sensors Eric — I am wondering if their part number search is dependent on model year entered or something. I entered 89 (the year of my old Classic) and did the 13021 part number search and sure enough the part came up. Let me know if you figure this out!!
Cheers, John

That never occured to me that all the Oxygen Sensors could be functionally the same. I wonder if anyone wiser and more knowledgeable than I knows this?

November 25th, 2003 (Post #36)

November 25, 2003

Ordered the parts
Wow two updates in two days. Well I decided to order the parts after all. I ordered the tie-rod ends and the oxygen sensors.

Oxygen sensors. I looked at the rangerovers.net site and could not get any hits on the parts or part numbers they recommended there. I attempted to email one of the people there and I got a bounce so I went out on my own. I ended up on OXYGENSENSORS.COM It is actually automedicsupply.com. After seeing prices greater than $150US for the part I found it here for $79.90. Part number was 250-23880 it’s an NTK and I chose the universal one. I bought two. The online order process was good.

Then I went in search of tie-rod ends. I used the brand that was listed on Rangerovers.net.
I looked for Lemforder parts on a Google search. The search lead to this site Auto Parts OEM.
I looked for my truck’s parts through a sort of confusing menu system. The jist of it is this, after each selection it grays out until you click the “Search” button. With this discovery I continued to refine the search. I found the parts and that you need two of each for a complete replacement.

left hand thread M3010-43959 for 31.09 each. That’s 25 dollars off the list price.
right hand thread M3010-50620 for 30.21 each. That’s 26 dollars off the list price.

Those prices compared with the discounted prices that were on the Rangerovers.net site.
Well I was “pleased as Punch” to put it mildly with those prices. Then I actually tried to order them. Well that didn’t seem to be as easy as it looked. I tried a couple of different ways to register and gave up and called their help line (800) 661-8335. The young man registered me right on the phone asking the same questions as the form. I then went back to the site and “logged in” and completed my order.

Epilogue
What is up with the Rangerovers.net site. Well it’s been there quite a while and the information is hard to keep up to date. I will send them an email and let them know what I found. It’s the least I can do for relying on the site for so long.

Could I have gotten the parts cheaper?
Probably. I am kicking myself for not ordering the Oxygen Sensors when I first saw them listed for twenty something dollars a couple of years ago. It is supposedly the same part as a Nissan part with a bit of modification. There is still some modification but it seems to me that everyone got wise to the cheap price and adjusted their stocks. If you find them cheaper don’t gloat, but do send me an email and let me know. I would like to still know if those parts can be found cheaper and where.

A very good friend of mine had a wise saying recently when we were discussing the price of things. He is a doctor and works a crazy 60 plus hours a week. He has plenty of money but is still frugal which is a pleasant change from many and reflects well on his upbringing. The saying is this, “Whenever you can trade time for money, it is a good trade.” We are getting on to our 40s now and time is the only thing I can’t get more of. If I had researched a while longer and looked around a good bit better I may have found a cheaper part. But as you see I didn’t spend that much time on this and I still beat the “Dealer” price by a margin I am pleased with.

The next installment will be the installation of these parts. I’ll let you know how it goes.

November 24th, 2003 (Post #35)

November 24, 2003
Updates
I could have told you cold weather was coming. As you will see the list of repairs for the Big White Bus has only grown right here before Christmas and the weather was beautiful the last two weeks. But alas no money in the pocket of this hapless Rover owner for repairs.

Well lots of things have been going on lets get them listed. I have reported the Error 34 and it’s cause, I am sure, is the oxygen sensors. So I consulted the site Rangerovers.net and am going to buy the sensors fairly soon. I am going to try the NGK equivilent parts at the reduced cost. I’ll let you know how that goes.

I also have to have new tie-rod ends. Those are obviously getting critical due some noticable
variations in my steering. This is a less exciting repair but again very important. As I don’t wish
to pay for two alignments I will probably order a bushing set also. With the addition of installing my new springs and shocks this will make for a very interesting Saturday I am sure.

I have a catalytic converter with a nasty rattle also. I will probably wait to do this as I am not sure I can afford to put that much out all at once. This is not so critical and I can stand the noise for a bit more.

A new leak in the power steering hoses near the steering box is going to be yet another adventure. I have learned a lot from the last time and will be more careful this time. I hope they will be able to be recrimped and if not I will have a new set made. This is a tiring annoyance and I don’t want to do this project again.

This morning I noticed a bit of anti-freeze on the drive way on the driver’s side of the truck. I was running late and not dressed for auto maintenance this morning so that will also wait ’til later. I can’t think of any good reason for the leak over there so I am a bit concerned.

As you can see dear friends the Big White Bus is showing it’s age. We intended to take her on a trip this fall to Denver but with all these things I decided not to risk the long drive. Sad as she would have been a more comfortable alternative to our Taurus. I have been contemplating a big rebuild but I don’t have a third car so that will also have to wait. My laziness and my financial situation have crept up on me and it shows due to the list above.