Steering Issues Solved…For the Most Part (Post #297) 8/19/2012

 If you recall, I left off with the last post with a cross-threaded power steering hose. Sorting it out would take a few phone calls and a lot of hope.

First thing I needed to do was find a tap to correct the threads I managed to mangle. There are LOTS of types of taps. And there are lots of names for those taps. It seems everyone has their own name for each type of tap. I’m sure it varies by region too. I did not know that before this project. I also did not know the name of the tap I needed. JagGuy told me I might need a bottoming tap.

Bottoming tap: 1-2 lead threads ground. Used for continuing to thread a blind hole close to the bottom of the hole. It’s difficult to start threading a hole with this tap.

Looking at the taps its easy to see the bottoming plug was best. Why? Well that is a good question. There are only 5 or 6 threads in the hole. If you use a taper tap you might not have enough threads make contact. Same issue with a plug tap. I needed the bottoming tap.

As it turns out, that was pretty easy. I just visited the amazing J&E Supply and Fasteners. I have sung their praises before. Finding the bolts and nuts for this project required me to visit them twice. Twice because I didn’t have a list of all the nuts the first time. The tap had to be a blunt or

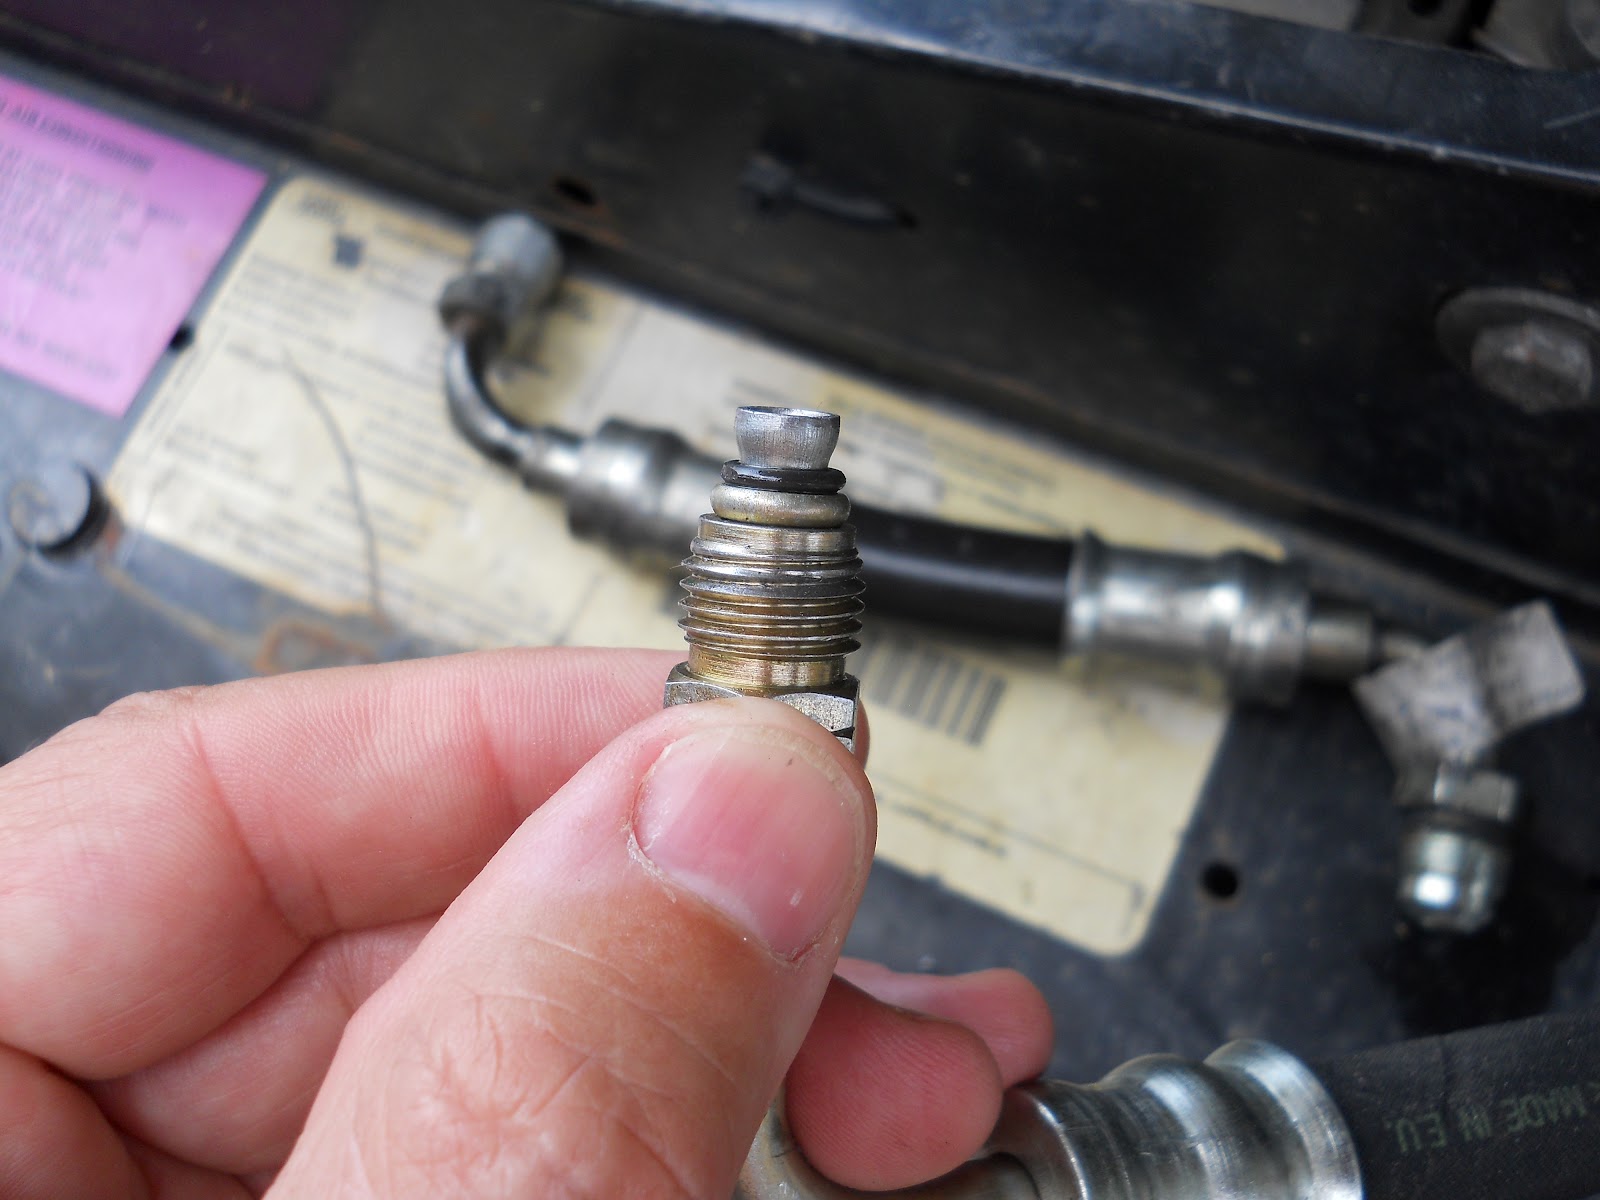
In any event I took the “test fitting” with me and we matched it up to a tap. I was shocked they had it, but they did. I was so stoked or chuffed or happy, maybe all three at once. This tool saved me several hundred dollars American in replacing the steering box.

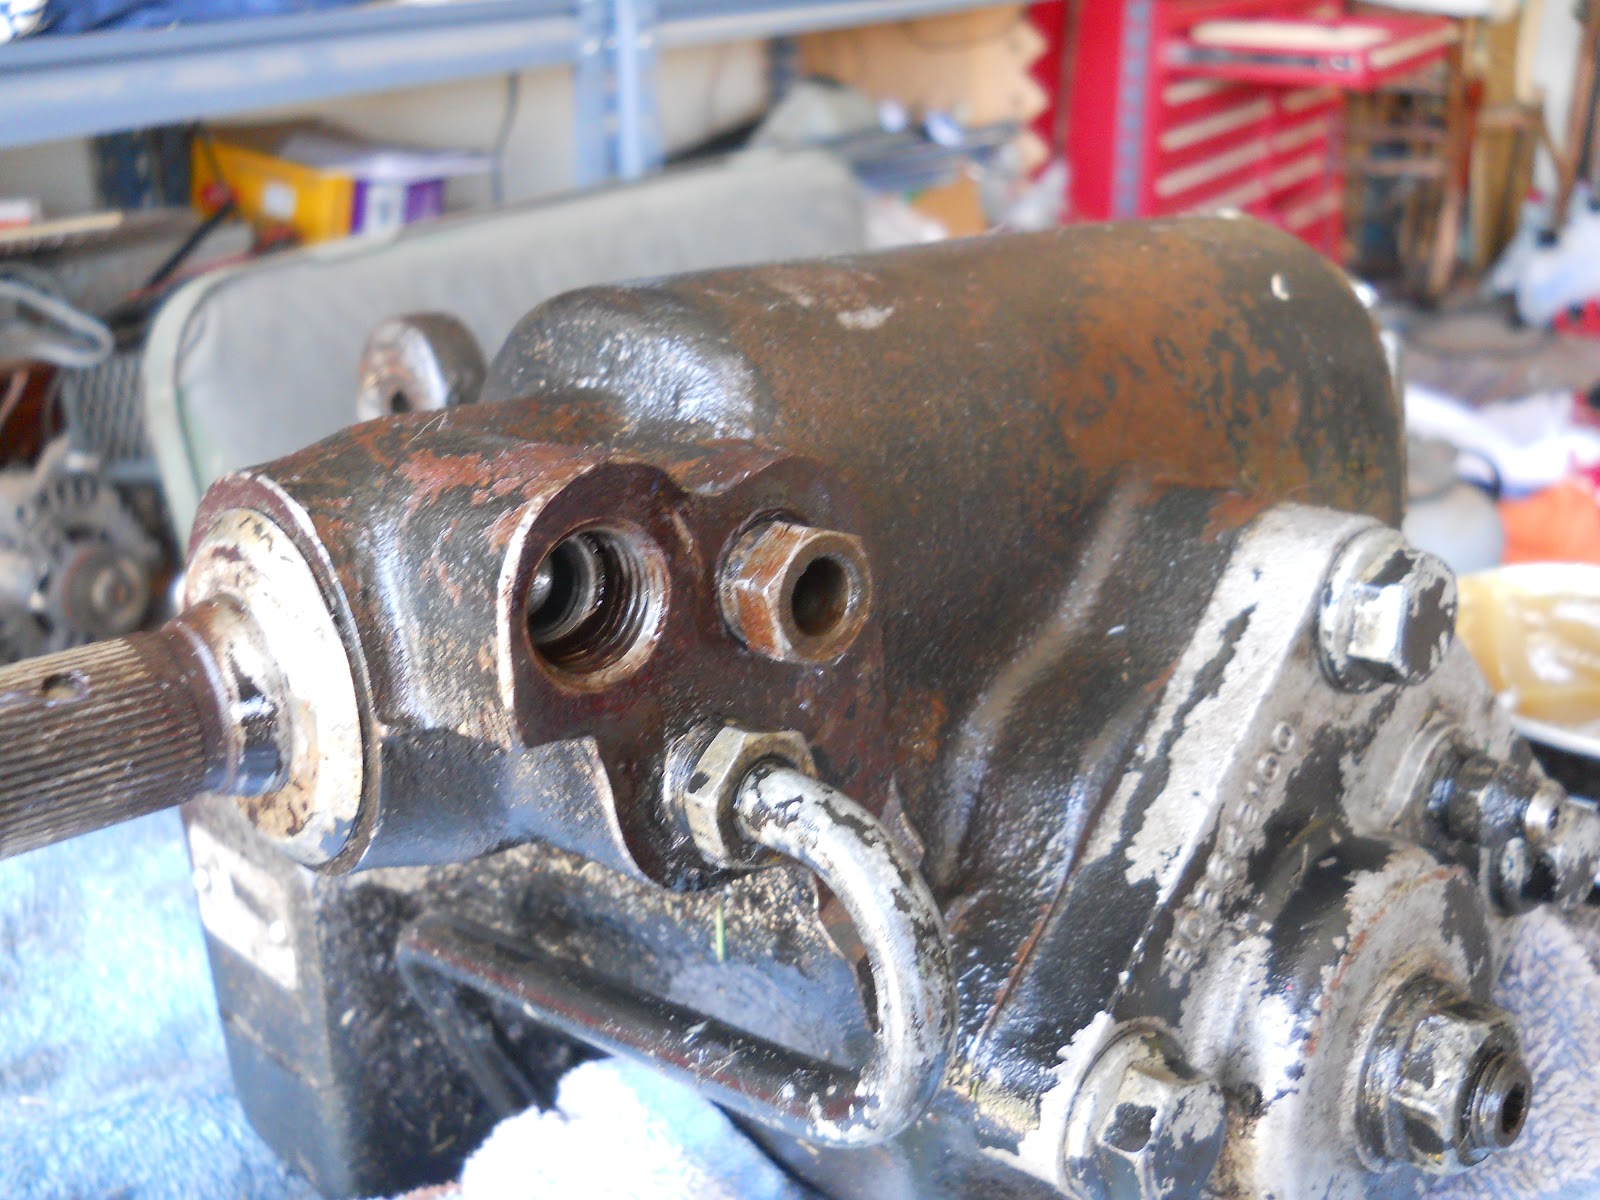
Having NEVER successfully tapped anything in my life…I chose to call JagGuy and ask for some sage advice. he was full of all kinds of advice for this. First bit of advice, pull the steering box. It turns out I probably would have been able to tap it in place. But, pulling it made it easier and I was able to clean it up while it was out. Second bit of advice, keep the shavings out of the unit.

To do this he suggested dipping the tap in grease. The grease captures the shavings and you just have to wipe it off to eliminate the shavings. This was easy enough.

With the advice in mind, I lined up the tap, and started it and gave it a turn. I backed it out and turned it again, like I had seen on countless TV shows. I turned it all the way to the stop and backed it out. I took the sample fitting and screwed it in. My awesome neighbor Mr. Fisher had walked over and was witness to the successful tapping. I have never been so excited. This was really awesome.

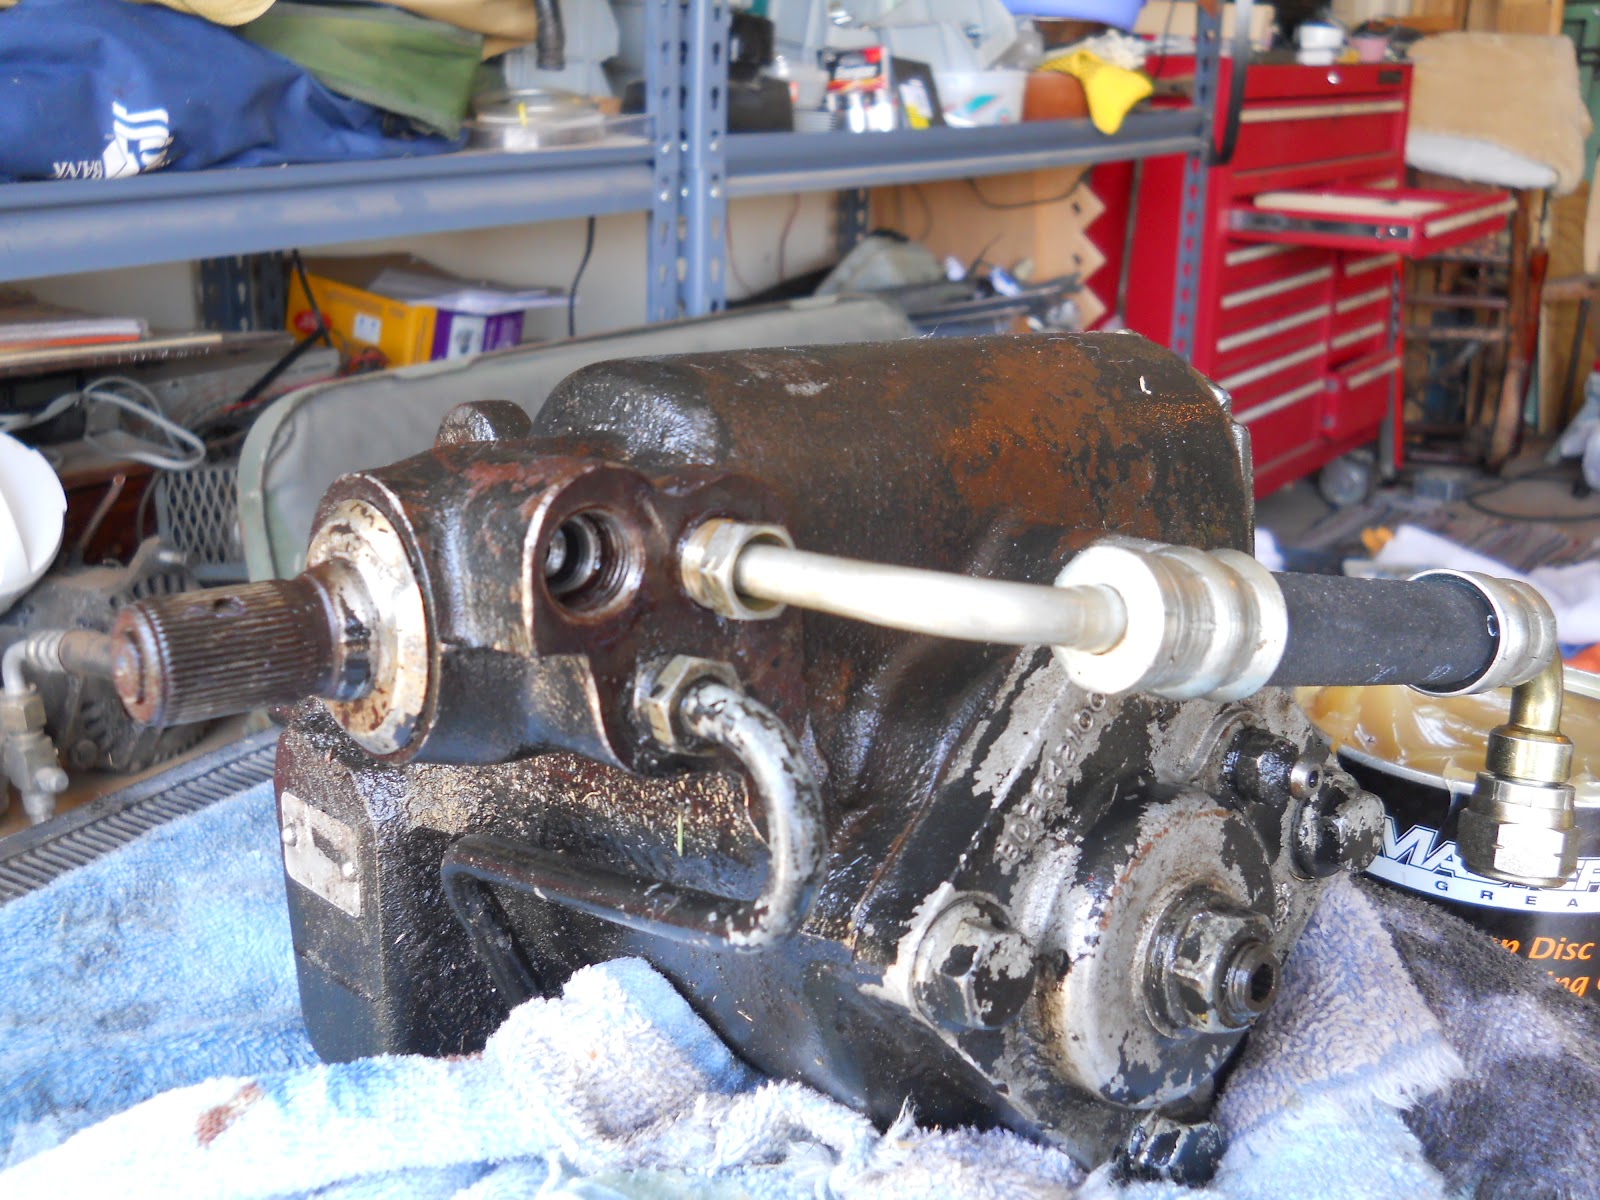
I took the new hose and threaded that as well. I was convinced now that it would not leak and I was ready to clean it up and give it a coat of paint.

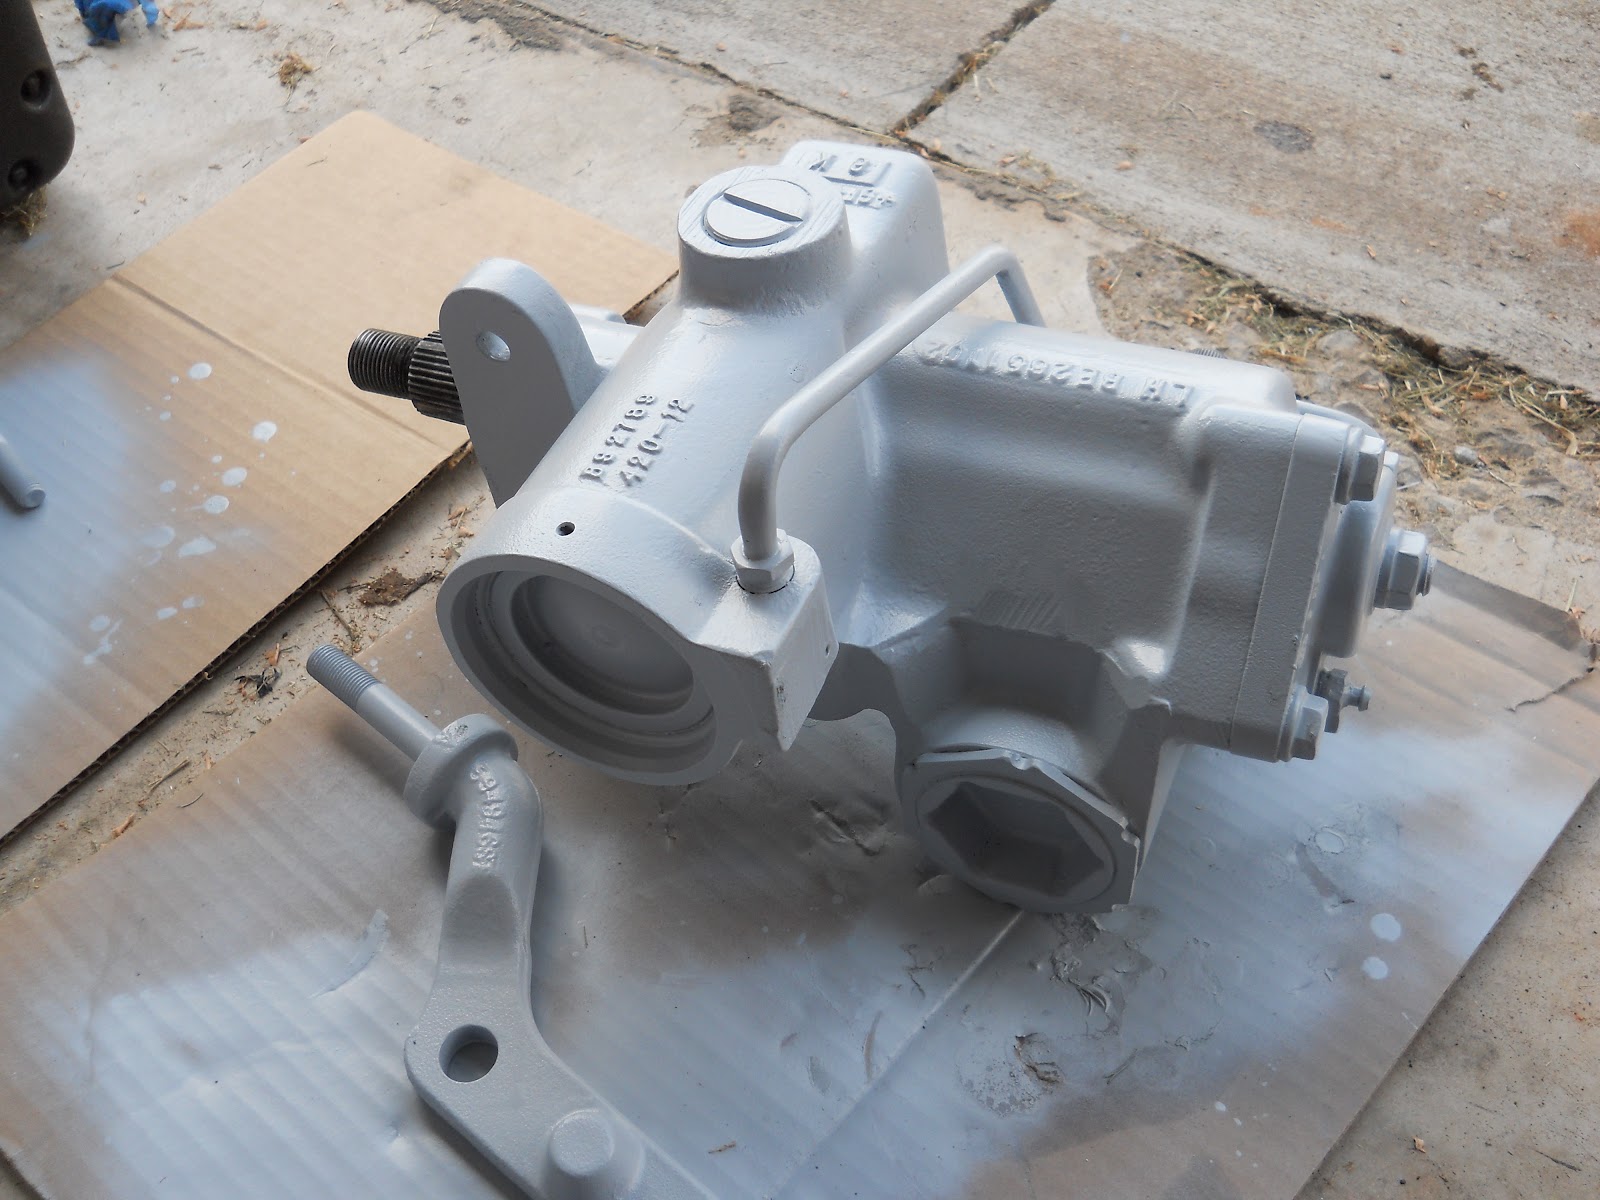
Following my habit of painting everything I pull off the Range Rover and replace I gave the steering bits a couple of coats of primer gray.

I managed to get her all together. I filled her with power steering fluid. I turned the steering wheel to the bump stops in each direction three or four times to clear out all the bubbles. I saw that on the TV as well, in fact Mr. Edd China from television show “Wheeler Dealer showed me that.

Okay, now that the steering box is all back together. Where am I on all this? As it turns out the steering box probably has some damage from running with low fluid. There are “spots” when I turn the wheel where I get some negative feedback from the steering. It is either this or an in accurately aligned steering shaft. The shaft has two universal joints and if you don’t have it “just right” it binds a bit. I might be having this. To sort this out I will have to get back under the hood and see if I can adjust the bind out.

On the OkieRover Difficulty Scale, this job is a three. I say three because the job is actually removing the steering box. So if you are going to swap your steering box this is a difficult job and there are lots of things to get back in place correctly.

Thanks for reading and Happy Rovering.

Panel rust and rust in the cargo area (Post #189) 7/20/2010

Welcome back dear readers. Multiple post in one week? What is wrong with me?
As promised in yesterday’s post I said I’d come back with the pictures and descriptions of the rust in the rear of the Range Rover. So here it is.

I have always seen the rust bubbling up on the rear of the Range Rover. I vowed I’d get to it eventually. Eventually is here. If you see rust in one place, its a good idea to look for it in other places. That couldn’t be more true on a Range Rover Classic.

A note here about quality. I find it entirely unacceptable to produce an automobile that is as capable of off-road adventure like this…

…and then to fail to use materials that protect it from the elements. The rubber pads and bits and pieces that cause water to be trapped against metal and allow rust to take hold is unforgivable. If you intend to use your Land Rover for these kinds of activities, take it apart and coat the entire thing in some sort of water proof bed liner, like Line-X or Rhinoling. You’ll save yourself hours and hours of frustration later.

Back to the tailgate rusting. I decided, if there was rust on those parts, what on earth would I find if I pulled the carpets off. Well I’ll tell ya, more rust. Rust on a scale I did not expect to be quite honest. The rear tailgates of the Range Rover are not noted for their water tight seals.

What I found under the carpets disappointed me greatly. The good news is that as I posted yesterday, my best friend JagGuy said, “…that ain’t rust.” His observation was a comparison to the rust he finds on his Jaguars and M35 trucks. Compared to them I was mostly rust free! We know that is not the case.

The treatment for rust is to remove it with extreme prejudice by all means in your power. For that I bought an angle grinder and some aggressive wire wheels. On advice of the Evil German Dude I got a Makita from Home Depot. You can see the ear plugs in the lower portion of the picture and wearing more or less protective clothing is a must. As always, wearing goggles is key to not wearing an eye patch pirate style for the rest of your life. Patches used to cover your empty eye socket are albeit very cool and interesting conversation pieces do not help you gauge distance while driving.

The angle grinder has more than paid for itself in time already. After getting the discs for cutting and the wire wheel, I’m out about 75$(US) for this time saving device. The honest truth about it is, I don’t have the patience to use a wire brush vigorously enough to bare metal.

JagGuy suggested I get a brillo pad like wheel and just use that. I have a new air grinder and attempted to use the brillo pads. They worked pretty good but they were not getting me down to BARE METAL. Besides that I could only use the air tool for about 5 minutes and then I had to wait for my compressor to catch up. My Campbell Hausfeld air compressor is louder than its small size would indicate. When it is running you can’t hear The Clash belting out their motivating sounds. In defense of the other rust removal methods, you can’t hear the music with any of the power tools in operation. My air compressor was hot enough to melt the plastic covers when I retired it at the end of the first day.

As before there is a pre-picture and a post-picture of each area. Keep in mind I will hit everything one more time with the grinder for good measure before painting with acid etching primer. The flash lights up rust nicely and you can see the parts I missed in some of the pictures.

The question remains, which product to use for the rusted through parts? Waxoyl or copious amounts of Rustoleum? This is where you have to apply serious amounts of patience. The Rustoleum approach is using ridiculous amounts of paint, to the point it drips off the parts and then waiting at least a week for it to dry. Waxoyl is not a product I’ve used before so further research is required.

My plan is to remove as much as possible with tools and use acid etching primer. On those parts I can’t get tools on or paint directly on, are the parts that require the products listed above. There is a healthy amount of “how much of this is seriously necessary?” going on as well. It is a 17 year old Range Rover. As all cars do, it will rust. Eventually you have to get to the “this is silliness” level of labor and move on to “thats good enough”.

So from that you can conclude that I’m probably not going to do this job again. Anything short of me putting my foot on the floor board and it extending through the floor Flintstone’s style I’m most likely not going to be doing this level of project on the beloved Big White Bus. This vehicles function is to haul stuff. Primarily to haul me, to and from historical events and hopefully my family on a couple of camping trips this coming fall or spring. The mechanicals are far more important than the cosmetics. Momma likes her air conditioning if you know what I mean.

After all the primer is applied I have sourced a company in Norman to buy matching the white paint of my model year and they have a clever method of getting it on to the metal. More on that when I get to that stage.

Lets look at some rust!

Bed rear from the driver’s side to the passenger side.


I cut back the pitted and rusted metal parts on the gutter portion seen above. I will just paint this and clean up the edges a bit when I’m done. None of this is visible after the carpet is put back in.

Inside the cargo area.


Oxidation from the roof and the outer panels

The oxidation will be taken care of with a buffer and some Meguire’s. I also found some mildew under the rear bench on the bed. This is not surprising from the amount of wet gear we packed in the back during the second consecutive Fourth of July rain out at the Norman Day celebration. I have made it a habit to wipe everything down with paint thinner before continuing. So there will be no organisms living back there when I’m ready to paint.

The next post will get me totally caught up with the pictures and work I have done so far. I will show the work I’ve done on the tailgate, which you are all aware is a famously rusty bit of trouble for Range Rovers Classics. When Edd China was restoring the Range Rover for the Wheeler Dealer show he just replaced the entire tailgate in leiu of wasting the time to get the rust out and off.

You can catch the rest of the episode if you are interested by using the links on the right side of the YouTube page. This is from part 2. He (Mike) sources the tailgate and door from a breakers yard (how quaint) at 7:20 and replaces it in the ninth minute.

Well that gives you a ton of material to look at and roll around until the next post.

Thanks for reading and Happy Rovering.

So much information, so little blog posts (Post #188) 7/19/2010

I am progressing at a leisurely pace on the Range Rover Restoration Part Duex. I have run out of funds for now and have changed gears a bit. I am now working on stuff that doesn’t require any supplies. Its also kinda hard to be motivated to “bust it out” when the temperature is 100+F in the garage. As RovErica said to me the other day when she came home after a long drive around town in her unairconditioned Ford Taurus, “I’m sweating balls out there.” As she said that, I remembered the good old days when I didn’t have air conditioning. Ahhh memories. Nothing motivates a kid more than suffering.

I have started to organize the pictures so the tasks can be broken down in to manageable pieces. This hopefully will prevent me from having novel sized posts about rust removal. I know WTH! I know how you all love to read about grinding rust but I’m sorry you will have to get your War and Peace sized fix of minutia of rust removal from some Jaguar or Jeep website. 

With some new tools, I have decided I could proceed with the rust portion of the project and pull the carpets in the front of the Rover and see what kind of damage is up there. I was NOT surprised to find rust. I was surprised to find holes. The good news is it was only two holes. The bad news is they are not in easy places to work. I also believe before long another seam will begin producing holes.

This is a picture underneath the passenger side seat. You can see the hole in the floor and the rust along the seam there. There is a bit of rust a little further back that is even worse than this. Therefore the entire passenger side seat and electrics will need to be removed to get to the problem spots. If I don’t, its only a matter of time before my passenger is ejected through the floor board. I only allow people I ACTUALLY LIKE to ride with me in the Range Rover so I should really try to fix this correctly. While I’m at it, I think moving the engine management computer to place higher up would be prudent. We’ll see how that all pans out when I get closer to reassembly.

I pulled the carpets and mats and to my surprise they were still wet two weeks after the last rain. We have had 90 plus degree heat for over a month and except for a drive during the flash flooding on July 4th she has just sat in the driveway. We did have quite a bit of rain during the early part of the month so I have to assume this rain is coming from somewhere above the rust. My first guess is the windshield seal. So add to the list of things to do, pulling the windshield and replacing the seam. More expense and more time. This will have to be professionally done for I have no way to pull the windshield. The guys across the pond on the TV show Wheeler Dealer hire this out and I will take their lead and do the same. If it’s good enough for Edd China, its good enough for me.

So with wet carpet and very, very wet sound pads coming out, are we at all surprised there is rust on the floor boards? Rhetorical question! Lets get a look at it.

In these pictures there is a pre and a post picture. The PRE pictures are before any grinding was done. There were some pads glued to the floor and they were very rusted underneath. The goal was to get to bare metal and remove the rust. I will probably hit all this one more time before the acid etching primer goes down and the entire area is covered in new sound deadening material.

Driver’s side

Passenger’s side

I mentioned two holes. It was somewhat comforting to find the stainless steel screw that holds the seat facia firmly embedded in the rusty metal. Here are the pre and post pics for each hole.

I think perhaps it looks worse than it really is. I stopped by JagGuy’s shop on Saturday to show him the pictures of all this rust. He said, “That ain’t rust.” He proceeded to show me a Jaguar with rust so bad entire sections of the body were gone. The surface rust I had was not even to be concerned about in his eyes. He says a liberal application of Rustoleum paint will slow down the rust. Even better would be some Waxoyl or the like. I’m still investigating which one I will go with.

So overall I felt pretty good about that. But he had not seen the footwell pictures yet. He had only seen the pictures from the rear of the Range Rover. And those my friends, will be in the next blog post.

Stay warm and Happy Rovering.

Encourage them (Post #168) 2/12/2010

For a moment I want you to think about how your Land Rover makes you feel. Soak it all in. No matter which model you drive, be it one of the modern classics like a 90s model Range Rover or a 1947 Series 1, you know how proud you are to drive it. You are proud because you know how much work goes in to keeping that beauty ON THE ROAD (or OFF as it may be).

If you are a steady reader you know there are probably two dozen issues outstanding on my 1993 Range Rover Classic LWB. Many of you have referred to your vehicles as “rolling restorations”, and they truly are. Finish one project and there is another to start and if this goes on continuously you qualify for the title of rolling restoration.

I have taken my Range Rover off-line one time for a restoration. It was 3 years ago. I needed to get a great many things fixed in anticipation of my daughter RovErica driving the Classic as her first car. Now while the logic of allowing a 16 year old to drive such a classic Land Rover can be debated, the repairs were long over due. We could also debate whether or not a 1993 Range Rover is even classic, but lets pretend it is for this argument. I could not imagine passing a Series vehicle on to a teenager.

The Range Rover Classic was just enough different from everything else in the parking lot and had a high enough “neat-o factor” that it would deflect the inevitable scorn of her classmates. When it started to show the two years of hard driving RovErica gave her, the neat-o factor digressed to the what a piece of junk factor.

Waving at vehicles is a man thing. Motorcycle riders wave at each other with a hand extended low about where the hands of a clock would be at 4 or 8. They are way too cool to wave up high. Jeep drivers wave to fellow Jeep drivers. Jaguar drivers wave at other drivers. And following suit Land Rover Drivers wave at fellow enthusiasts. I qualify that with the word enthusiast because I have learned that in only a few cases do women wave. I’ve been smiled at once by a woman I waved at. She was in a Discovery 2. In my experience, NO WOMEN wave. Women driving Freelanders, LR2 and LR3s or any of the new Range Rover models refuse to wave. Zip, zero, zilch. I’m not sure if it is self absorption or what, but they don’t seem to appreciate other Land Rovers. This will lead me now to conclude they are not enthusiasts.

Now compare that to when you see a Discovery heading your way and a fellow male of our species is driving, you will get a wave if they see you. You can almost gauge the involvement or pride by how they wave. They are probably at the very least an enthusiast and they might even be a hobbyist if the wheel wells are full of mud and there is any measurable amount of kit hanging off their Landy.

Discussing this with my wife reveals one universal constant. Women are not automobile enthusiasts. For the most part women don’t really care what they drive. My wife, like many women, does not understand the male fascination with cars or even motorcycles for that matter.

This year’s snow storms here in Oklahoma often clear the roads of the casual driver. Your Land Rover to Everything else with tires ratio goes up drastically. This is expected, as road clearing in Oklahoma is more of a hobby of a municipality than a mission. And if the cars in your driveway were priced at 60,000$(US) or more you are 34.67 times more likely to have your neighborhood streets cleared by the city than any of the “other areas”. Squeeky wheel gets the grease, etc…

So the road conditions often dictate the vehicle you drive. Ground clearance is everything. My son’s Scion xB sat idle for six straight days. When you venture out on the snow covered roads you see a lot of Jeeps, Toyotas and pickups. This is when you see the Land Rovers. And this is when you see the enthusiastic Land Rover drivers.

You will get waves and driver’s often point and give a thumbs up when they see you passing the opposite way. They know you are in a capable vehicle. They also know that it took a lot of work to get your Land Rover out on the road to drive down to Braums to get milk.

I have found myself lately recognizing other classic vehicles on the road. And this is where I tie the whole theme together. Encourage the brave men who choose to drive a rolling restoration.. If we are to see the truly classic cars on the road we need to encourage the drivers when we see them. Tell them you like their cars. Give them a thumbs up.

One of my favorite shows on the air today is Wheeler Dealers. I’ve mentioned them before. Mike Brewer and Edd China buy and restore iconic cars (60s, 70s, and 80s) and then try and sell them on for a profit. I them on my local HD cable provider on the HD Theater Channel. You can watch these guys take a beater of an auto and transform it to a usable daily driver.

You can follow the rest of the show by going over to Youtube. Its a great show and it follows the theme here, keeping the classics on the road.

I have seen a few classic cars lately that are really great. I’ve gathered a few pictures of vehicles that are similar so you will know what I’m talking about. There are others driving around the little burg I live in. These are the latest I’ve seen and were fresh in my mind.

A classic Ford Falcon is now buzzing around Norman. I pulled up next to him on Porter Avenue and with my window down I told him I

really liked that, with a point, and said good job. His reaction was to smile and say thanks.
Ford Falcon   Wagon
My best friend drove a Ford Falcon in high school so these vehicles have a special place in my heart. The difficulty of keeping it on the road was evident the moment you got in. The passenger side floor board was completely rusted out and a speed limit sign had been commandeered to serve as a floor board.

Just this Friday morning I saw a 1965 Chevy C10 blazing down I-35. It looked even worse than this example. I rolled up next to him and drove next to him until he noticed me. I gave him a big thumbs up. The smile on his face was indescribable. It was obvious that this truck represented something special to him. It looked like a labor of love as well. The panels were mostly straight and it was in need of a paint job.
1965 Chevy C10

When the snow was falling yesterday I saw an 80s model Jeep CJ7 on the I-40 MLK off ramp. He had a high lift jack mounted next to the external spare tire. He had a winch on the front and this Jeep looked like it was well loved and well used. The scruffy fellow behind the wheel smiled and waved when I pulled up next to him and pointed and mouthed “I liked that”.

So as you are driving around waving and recognizing your fellow Land Rover owners, give a shout out to those other auto enthusiasts that choose to drive other classic rolling restorations.

Thanks for Reading and Happy Rovering.