Video Blog #3 (Post #514) 10/4/2014

Video Blog.

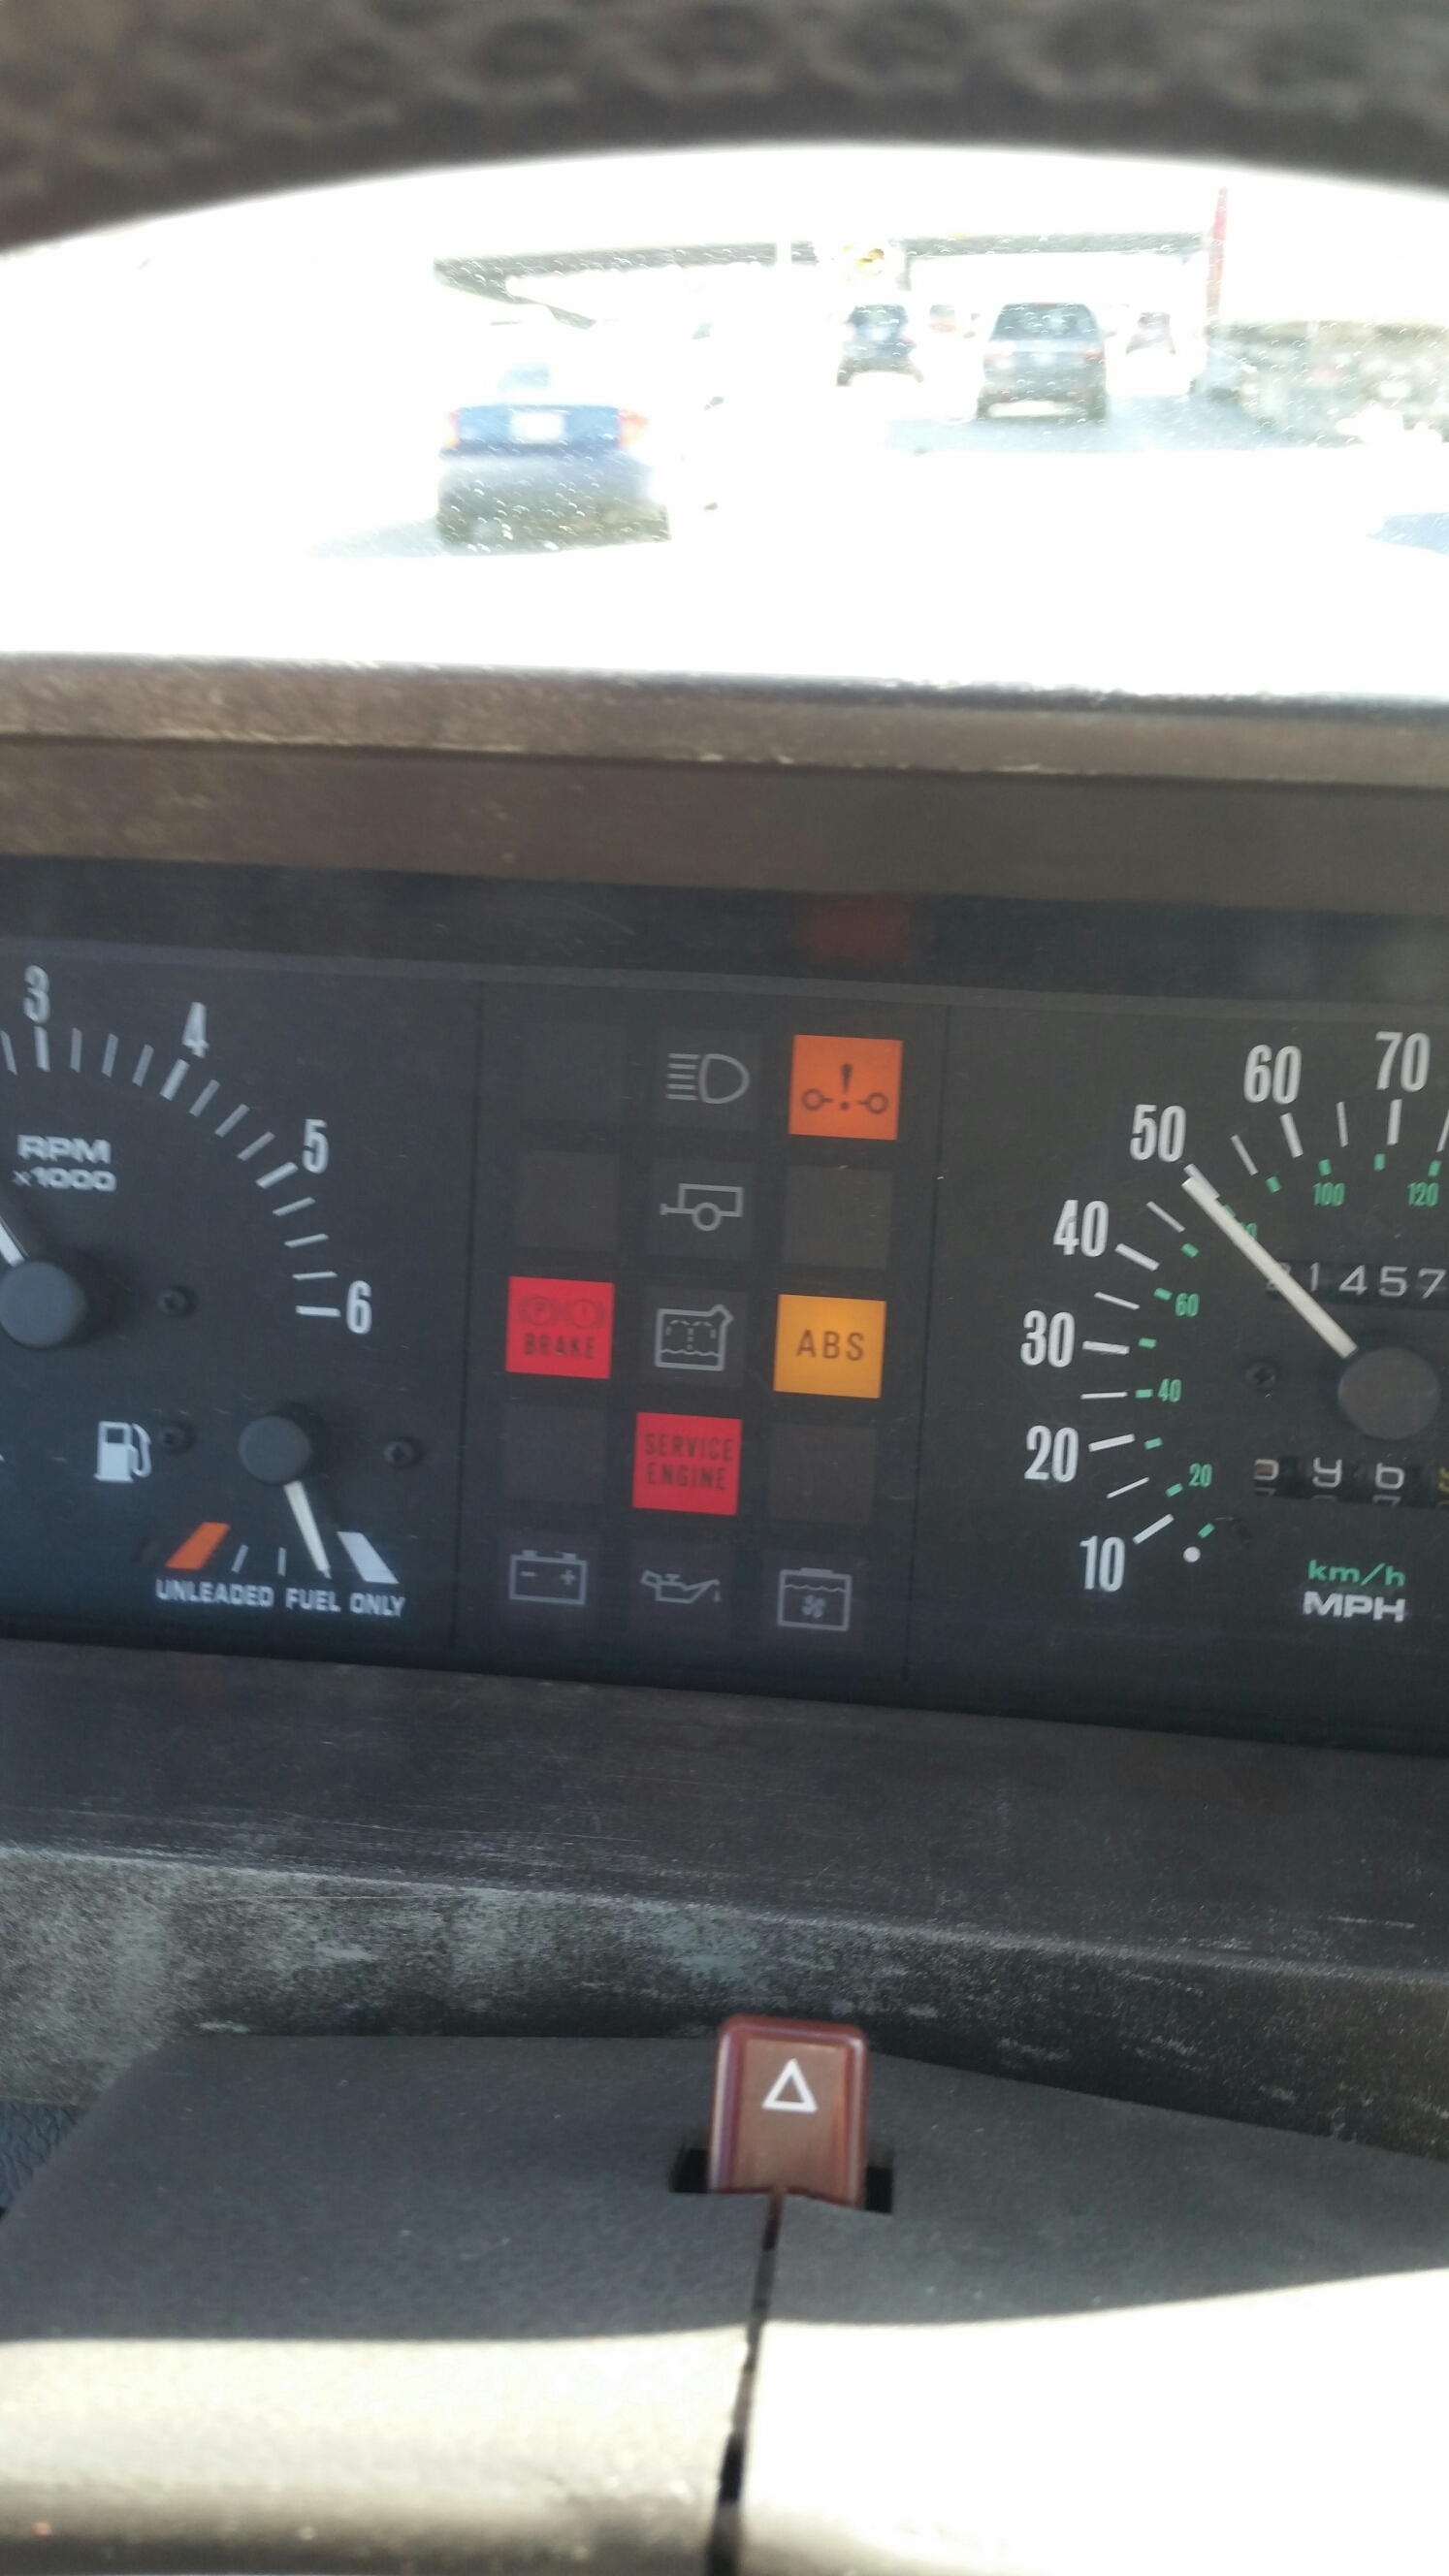
As I mentioned in the Okierover Video Blog #3, I recently got a Service Engine light.
image


I don’t see Check Engine or Service Engine lights very often. I forgot that this was not the CHECK ENGINE light. So I rambled on a bit on the video. Here’s how to reset the SERVICE ENGINE light on a Range Rover Classic.

image


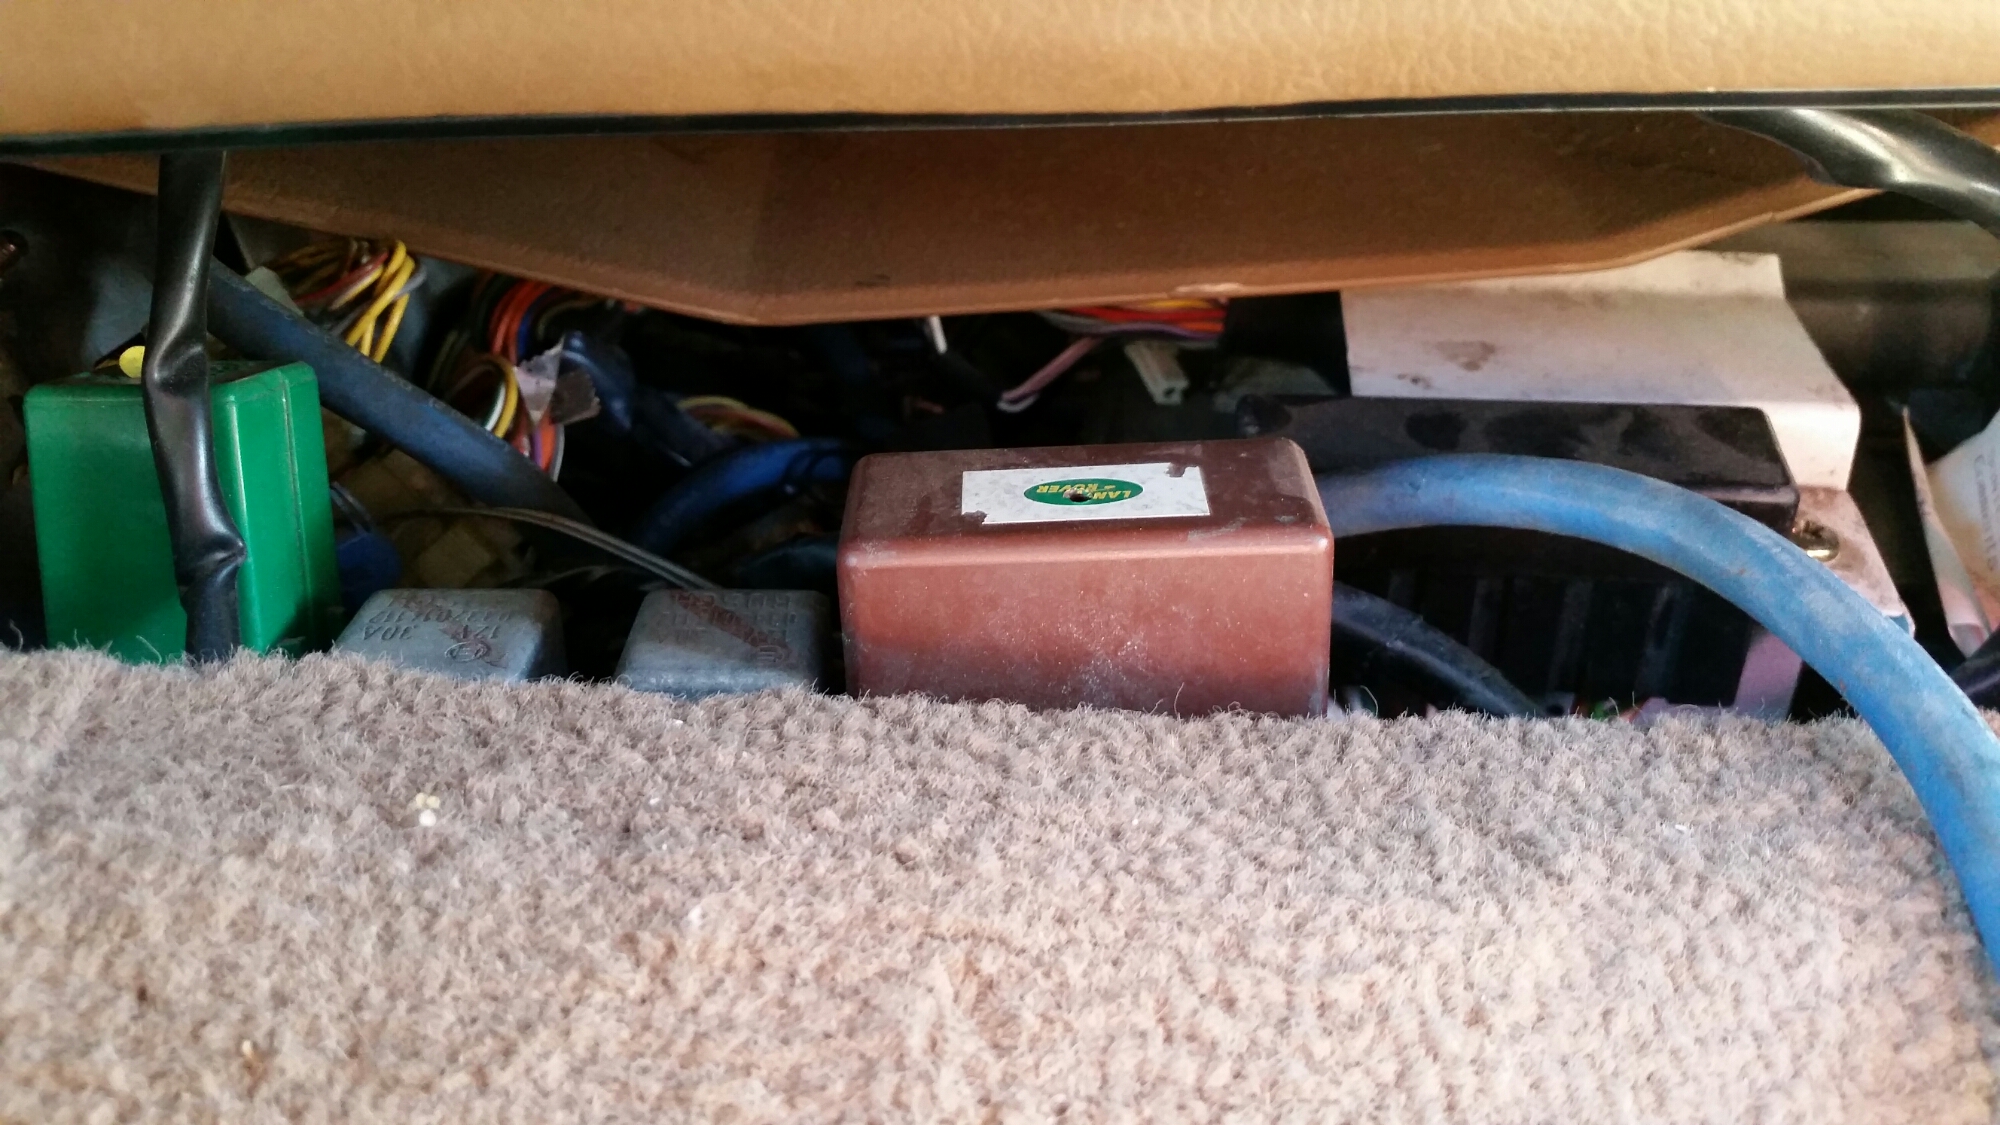
Find the SERVICE Module under the passenger seat. Just remove frustration, move the seat all the way forward and lift it up too.

image


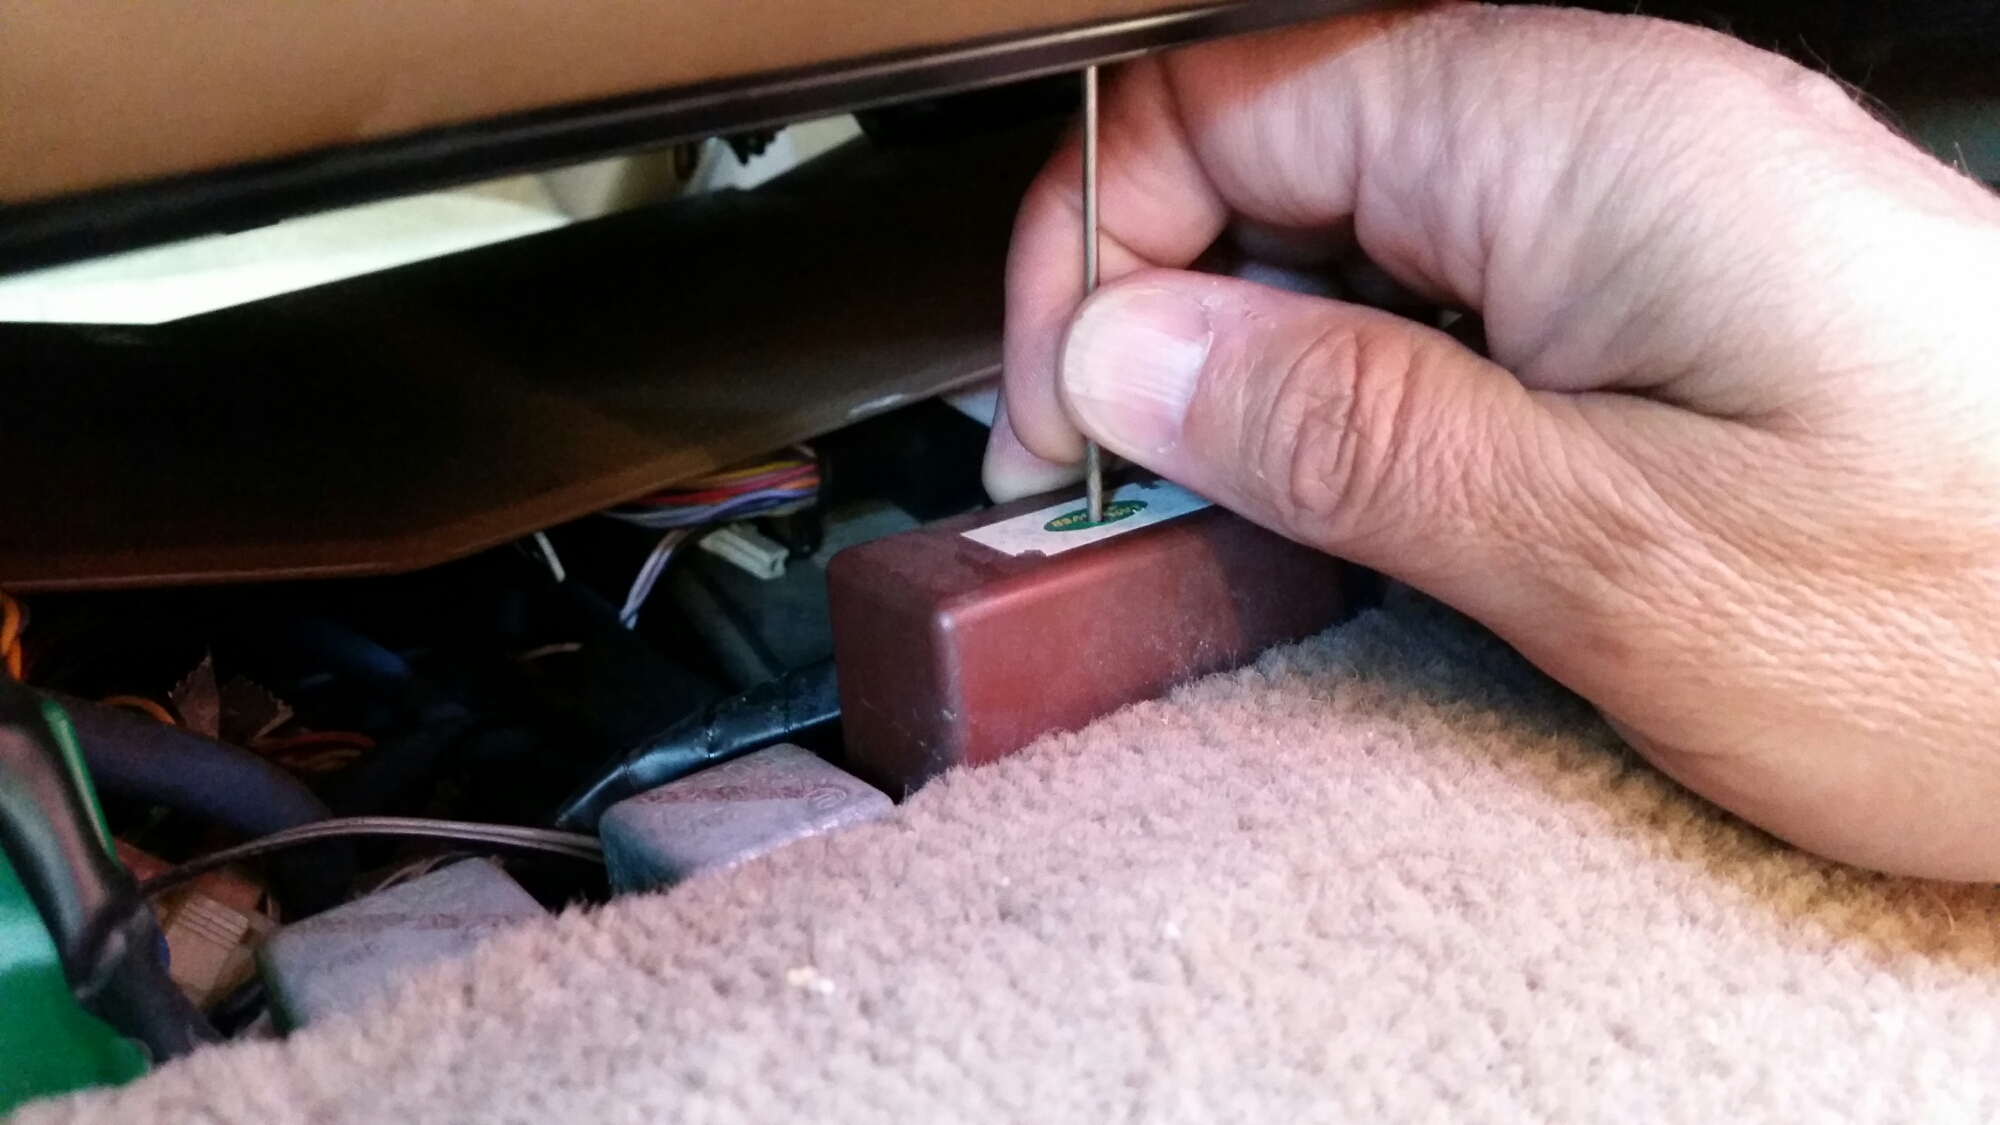
Turn the ignition on. With a paper clip or other metal bar pierce the paper sticker on the top (it has probably already been pierced) and insert the rod. You will feel the pins and if you look at the instrument cluster the SERVICE ENGINE light will go off when you have satisfied the reset.

image

Now if I could only find something to short out to fix the ABS / Traction Control problem…oh well.

Thanks for reading/watching and Happy Rovering.

CV Joint and Front Axle Seal (Post #504) 6/23/2014

Here is what will pass for a how-to video on the CV Joint and axle seal replacement. I had trouble videoing it with greasy hands. I also had trouble because the phone ran out of disk space.

That let to some choppy video and you didn’t get to see the assembly. What I do hope you get from this is that it is not as complicated or difficult as it may appear. Take it one step at a time and it will become really easy to understand.

On the Okierover Difficulty Scale this is a solid 3. You’ll need more than your average tool kit. You’ll need some help with the brake bleeding. It is a technical job but relatively straight forward.

I hope you can get something from the video. It was not what I wanted to present. But I also didn’t want to waste all the video and effort.

Thanks for watching and thanks for reading and Happy Rovering.

ABS Lights and Finding Your Fault (Post #365) 7/10/2013

My ABS light has been on so long I can’t remember when or why it came on. I will attempt to clear the error and find the problem this week. I felt like this info was so important, at least to me, that I wanted it all in the same place.

I found a video from Dariush Heydary on YouTube on how to test your ABS on a Range Rover Classic. Its a pretty good video. This is how you have to approach the procedure to find the fault.

Below are instructions on how to retrieve ABS fault codes for RRC.
I pulled this from the RangeRovers.net Forums. Go to the link to read it in its entirety.
http://www.rangerovers.net/forum/8-range-rover-classic/25706-rr-91-abs-problem.html

More after the jump….

Under the RRC’s front driver seat in the front is a blue connector used to connect the ABS testbook equipment.

1. Fabricate a jumper wire with 12 gauge wire about inch long

2. Connect jumper wire to the “black” and “black/pink” pins. Turn ignition to position 2.

3. Five seconds after the ignition is turned to position 2 the Anti-Lock warning light will extinguish, indicating the start of the cycle.

4. Observe the Anti-Lock warning light, the start phase of the blink code is signified by the following:

– Pause = 2.5 secs. (long)
– Flash = 2.5 secs. (long)
– Pause = 2.5 secs. (long)
– Flash = 0.5 secs. (short)

5. The first part of the code number is determined by a pause of 2.5 secs. which precedes a series of short flashes then a long pause. The number of short flashes is equal to the first digit in the fault code.

6. The second digit in the code number is determined after a pause of 2.5 secs. which occurs between the first and second code flashes. After the pause there will be a number of short flashes, the number of flashes is equal to the second digit in the fault code. After the flashes there will be another pause of 2.5 seconds before the system repeats the flash and pause sequence. This will allow for a verification of the code or if the initial flash and pause sequence was missed.

7. The sequence of the start phase, first and second code parts will continue until terminated by the operator. To terminate the code sequence disconnect the jumper wire.

NOTE:Termination will clear the memory of that particular fault, and the fault will not be retrievable. Do not terminate the sequence if unsure of the code number.

8. The memory is capable of storing more than one fault. To search the memory, after the jumper wire is disconnected wait until the Anti-Lock light illuminates and then turn the ignition off, the code is now completely cleared. To obtain the next code repeat the procedure from step 2.

9. If there are no faults remaining there will be a long pause of 7.5 secs. after the start phase.

10. Once all the codes have been obtained and cleared, locate the problem cause and rectification for each code and fix accordingly.

FAULT CODE LIST

KEY: IV – Inlet Valve, OV – Outlet Value, RCP – Recirculation pump (ABS pump)

Sensor check:

1. Carry out multimeter test, check electrical resistance of sensor, this should be 700-2000 ohms. Check sensor voltage output, this should be greater than or equal to 0.93 VAC RMS when rotating the wheel at 1 rev/sec.

2. Check sensor air gap. Push sensor through bush until it touches exciter ring. Sensor will be knocked back to correct position when the vehicle is driven.

3. Check run out of the exciter ring and rectify if necessary.

4. Check bearing play and adjust if necessary.

5. Check sensor bush and exchange if necessary.

*********************

The Codes:
Code 2-6 – Faulty stoplight switch or wiring. Fuse A5 blown or not fitted
Code 2-7 – Continuous supply to ECU with ignition off. Faulty valve relay or wiring Code 2-8 – No voltage to ABS solenoid valves. Faulty valve relay or wiring.
Code 2-12 – Front right, too large an air gap or the sensor has been forced out by exciter ring.
Code 2-13 – Rear left, too large an air gap or the sensor has been forced out by exciter ring.
Code 2-14 – Front left, too large an air gap or the sensor has been forced out by exciter ring.
Code 2-15 – Rear right, too large an air gap or the sensor has been forced out by exciter ring.
Code 3-0 to 3-9 – Open circuit in connection from ECU to solenoid valve in booster, or in ECU
Code 4-0 to 4-9 – Short circuit to earth in connection from ECU to solenoid valve in booster
Code 4-12 – Front right, wiring to sensor broken or sensor resistance too high.
Code 4-13 – Rear left, wiring to sensor broken or sensor resistance too high.
Code 4-14 – Front left, wiring to sensor broken or sensor resistance too high. Code 4-15 – Rear right, wiring to sensor broken or sensor resistance too high.
Code 5-0 to 5-9 – Short circuit to 12 volt in connection from ECU to solenoid valve in booster, possible earth fault.Code 5-12 – Front right, intermittent fault with sensor or wiring
Code 5-13 – Rear left, intermittent fault with sensor or wiring
Code 5-14 – Front left, intermittent fault with sensor or wiring
Code 5-15 – Rear right, intermittent fault with sensor or wiring
Code 6-0 to 6-9 – Short circuit between two connection from ECU to solenoid valve in booster.
Code 6-12 – Front right, no output from sensor, sensor may have too large an air gap.
Code 6-13 – Rear left, no output from sensor, sensor may have too large an air gap.
Code 6-14 – Front left, no output from sensor, sensor may have too large an air gap.
Code 6-15 – Rear right, no output from sensor, sensor may have too large an air gap.

My ABS light has been on so long I can’t remember when or why it came on. I will attempt to clear the error and find the problem this week. I felt like this info was so important, at least to me, that I wanted it all in the same place.

Thanks for reading and Happy Rovering.
Falconworks brings us some good news about ABS Pumps! (Post #352) 6/13/2013

I found this post hiding in the DRAFTS. It’s information that everyone that drives a Range Rover Classic should have.I have long believed that the ABS pumps we affectionately love to hate (is that possible?) are re-buildable. I’ve done a little looking around and figured it was completely possible if I could find the right shop.

Lo and behold I get this email from George.

Hey OkieRover!
Happy New Year!
Just letting you know that ABS pumps ARE repairable.
Got mine back from Al Cowan after a $US378 overhaul (vs $1500 new):
http://www.falconworks.net/ along with a new accumulator and 2 new relays.

I held off replacing the accumulator as I wanted to see what it did with a decent pump. The howling has stopped (bearing?) and all I hear is a buzz like a mosquito in my ear. I can also hear the relay click when it starts/stops. AND The Three Amigos have ridden off into the sunset too!

Stationary, I get 3-4 pedal pushes before the pump starts and it only runs for 2-3 secs. On the road, it starts when the brake pedal gets a good push but it stops pretty quickly. By referring to Al’s bible:

http://www.jewellamberoil.com/sales/index.php?

I’ve concluded the accumulator is getting near the end of its days but I’m due to change the brake fluid this year so I’ll replace it then.
Cheers
George

So I emailed Falconworks and asked them about the service. This is the email I got in return…

Yes Eric,
We still do. We also make and sell new brush-holders and armatures for them, for those who want to attempt it themselves. We no longer keep exchange units on the shelf, but will repair or rebuild clients’ old units:  turnaround is usually a couple days in the shop. Any number of Rover-specialist garages use us routinely.

Also, to aid in diagnostics, we have a full bench-test fixture, and can test pumps, accumulators, and pressure switches for folks: it runs $59 to test all three.

And, of course, we still sell the guide to Range Rover ABS brakes, “Getting Comfortable ….” online as a download.
Cheers!
Mobile message from
Alan / Falconworks

Thanks goes out to George for finding this service. And thanks goes out to Alan of Falconworks for responding so quickly.

Sorry it took me so long to publish this info.

Thanks for reading and Happy trouble-free stopping Rovering.

Electrical Gremlins (Post #331) 4/20/2013

I’ve resolved that this weekend will be mostly electrical in nature on the Range Rover. This is not my favorite thing  to fix. I took electronics at Mid-America Vo-tech school when I was still in high school. I was only mildly interested in it. My dad was an electronic technician for the Federal Aeronautics Administration (FAA). He learned it in the Navy and wanted me to have the same life. That was not to be. I didn’t fall far from that tree, I went into the computer industry.

I have quite a list to address this weekend:

  • Sunroof
  • ABS Sensors
  • Utility light
  • Clock

Those are the electrical issues. This is not to mention my radio is still not working. But that is another post. I decided to start with the sunroof tonight. Mrs. OkieRover was going out to a Pampered Chef party which left me at home to drink beer work on my Range Rover.

I opened up the PDF of my workshop manual and found the location of the sunroof’s relay. I have already tested for power at the switch. The fuse is good and I’m pretty sure now it is the motor. I think I have a few more things to test but I’m mostly convinced either the controller is dead or the motor.

Next up was the ABS sensors. I mentioned in an earlier post that I wanted to test each one for conductivity. I did that tonight. I required me finding the ABS sensor plugs. The fronts are located inside the engine bay on the fenders. A quick pull and measure, done. The rear are located on the bottom of the bed just above the rear axle. I pulled those and measured, done. All four have the same value when run through the ohm meter. As does the other end when checked toward the computer.

That’s mostly disappointing. As I was hoping for a Sesame Street easy, this one is not like the others and I could swap it and my life would be ABS complete again. The second thing to test is that the sensors are fully seated against the ABS rings. This requires a dowel rod and hammer to knock the rear sensors back into place. When you start rolling the sensors are set at the correct distance and should start functioning correctly.

I haven’t got her rolling yet so I’m not sure if this made any difference. Hopefully I’ll find its all good. I said hopefully, I’m not insane, I know it won’t, but until tomorrow there’s still hope.

Not excited about the blue plastic dust shield.

Having had so much success with my projects so far, I thought I should do something I knew would be completed. I decided to fit the new Terrafirma steering damper. That was pretty easy. The old Bilstein I bought in 2000 was probably ready for a swap. If you are thinking of this job, its a One on the Difficulty Scale.

Tired Bilstein

I then looked into the Utility light under bonnet. I went to a breakers yard in 2001 and parted a light off of a Chevy Suburban. It’s a low watt light with a long extension cord. For some odd reason this “amazing piece of American technology” (end sarcasm) had stopped working. I checked all the wires back to the battery and everything was in order.

Mounted near the radiator overflow tank.

From the driver’s side across the top of the engine.

 This left just the light itself as the problem. I tested the bulb and concluded either the cord or the switch had failed on the light. The cord was the less likely so I pulled the light off and decided to fix the switch. The switch it used was a simple friction switch. Turn the switch 90 degrees and the a wedge presses a tab against another tab for contact.

I cut the plastic casing away and found a very gunked up contact point. I cut away more and then fitted a proper toggle switch. I soldered it all up and now have a working light again.

Tomorrow I’m out to Newcastle to see a T-ball game and then back in the garage.

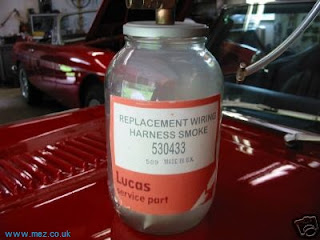
Take a minute and visit this clever fellow’s site (http://www.mez.co.uk/lucas.html). He has several funny jokes about Lucas, The Prince of Darkness.

Thanks for reading, and Happy Rovering.

Roof Rack Dilemma (Post #308) 12/16/2012

I was visiting the Atlantic British website (Did you know that have partnered with British Pacific?) yesterday looking for springs and shocks. I think I have that sorted out and am ready to purchase them. Bilstein shocks and Old Man Emu/ARB springs, medium duty. I may still look at TerraFirma equivalents but short of that I’ll go with this solution. This should give me a little lift and still be able to be loaded a bit. Heavy duty springs would stiffen the on highway ride too much. I won’t be using the Range Rover hard enough or often enough to require springs of that caliber.

So after I was scoping out the springs and shocks I got to thinking about stuff to ready the Range Rover for our Circumnavigation of the Great State of Oklahoma. I’ve been thinking about a vehicle wrap and other such silliness. Sponsors? Hey now that’s an idea.

A realistic concern is getting too far from a petrol station. The range on the fuel in the tank is just short of 250 miles. I am thinking perhaps I should plan to carry additional fuel in jerry-cans. And if you are going to do that, you need a roof rack. Seriously, trust me, that is sound logic.

I was also thinking how cool a roof rack would look on the Range Rover. We are going on an expedition, we need to look the part! Am I wrong? I don’t think so!


So I was looking through all the great posts on making your own roof rack at Expedition Portal. Guys have made some seriously awesome roof racks. I know I could made a roof rack. I’d need a welding unit, some grinding wheels, cutting wheels, a ruler, some angle magnet thingies, welding goggles, pipe benders, and some material. It would have to be metal so should I use round stock or square stock?

By the time I spent the money on the tools and stock I still wouldn’t have a roof rack. I could go to my mate JagGuy’s awesome shop and have the welder, bender, and goggles sorted out. A four pack of Boddington’s and perhaps a nice bottle of wine and I’d probably have the basic training needed. But I still wouldn’t have a roof rack.

I could just buy a roof rack. WHAT? You have to be insane. Why buy when you can make? Well, time mostly, that’s why.

I am still in school and next semester is a busy one. Also I’m thinking weight is a factor. So I’m thinking of buying.

$199.95 50″x50″ Roof Rack
$54.95 Roof Rack Gutter Mount
$29.03 FedEx Ground Home Delivery

For around 285$(US) I could have a functioning roof rack. Easy-peazy. No welding, no sourcing steel, no new tools. Hotsy-totsy! I bet you thought hotsy-totsy meant something else didn’t you?

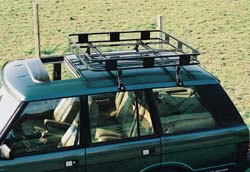
Doesn’t that look great? That rack would look great on my Range Rover. I’ll still need to fabricate some jerry-can brackets. The price on-line was a bit too much for what I saw. The brackets are more expensive than the cans. That seems a bit silly.

If I hit the lottery tomorrow I could probably drop 3000$(US) on kitting out the Range Rover and would probably be short a few items. As it stands I’ll be out shipping and nearly 800$(US) for springs and new shocks. The price above for the roof rack plus 2-4 fuel 20 liter jerry-cans. With all this bolt on poser stuff I still haven’t addressed some serious issues.

  1. The air conditioning is still non-functional.
  2. The transmission still needs to be refurbished.
  3. The ABS system is still in fault.

The repair parts for that stuff will probably run up to 2000$(US). At the end however, I’ll be pretty confident I have a rig we can use at some events. Perhaps I’ll even be able to get Mrs. OkieRover to go camping with me. Wait…how much more money will I spend for that?

On this day there was a terrible tragedy in Connecticut  Remember it isn’t guns that kill kids, sick people kill kids. That sick bastard was going to commit a horrible crime. If he didn’t have a single firearm he’d have used a car or something else.

Say a prayer for the families that lost their children, say a prayer for the people who will deal with this for the rest of their lives.

And finally say a prayer for our country to come together in these difficult times.

Thanks for reading and Happy Rovering.