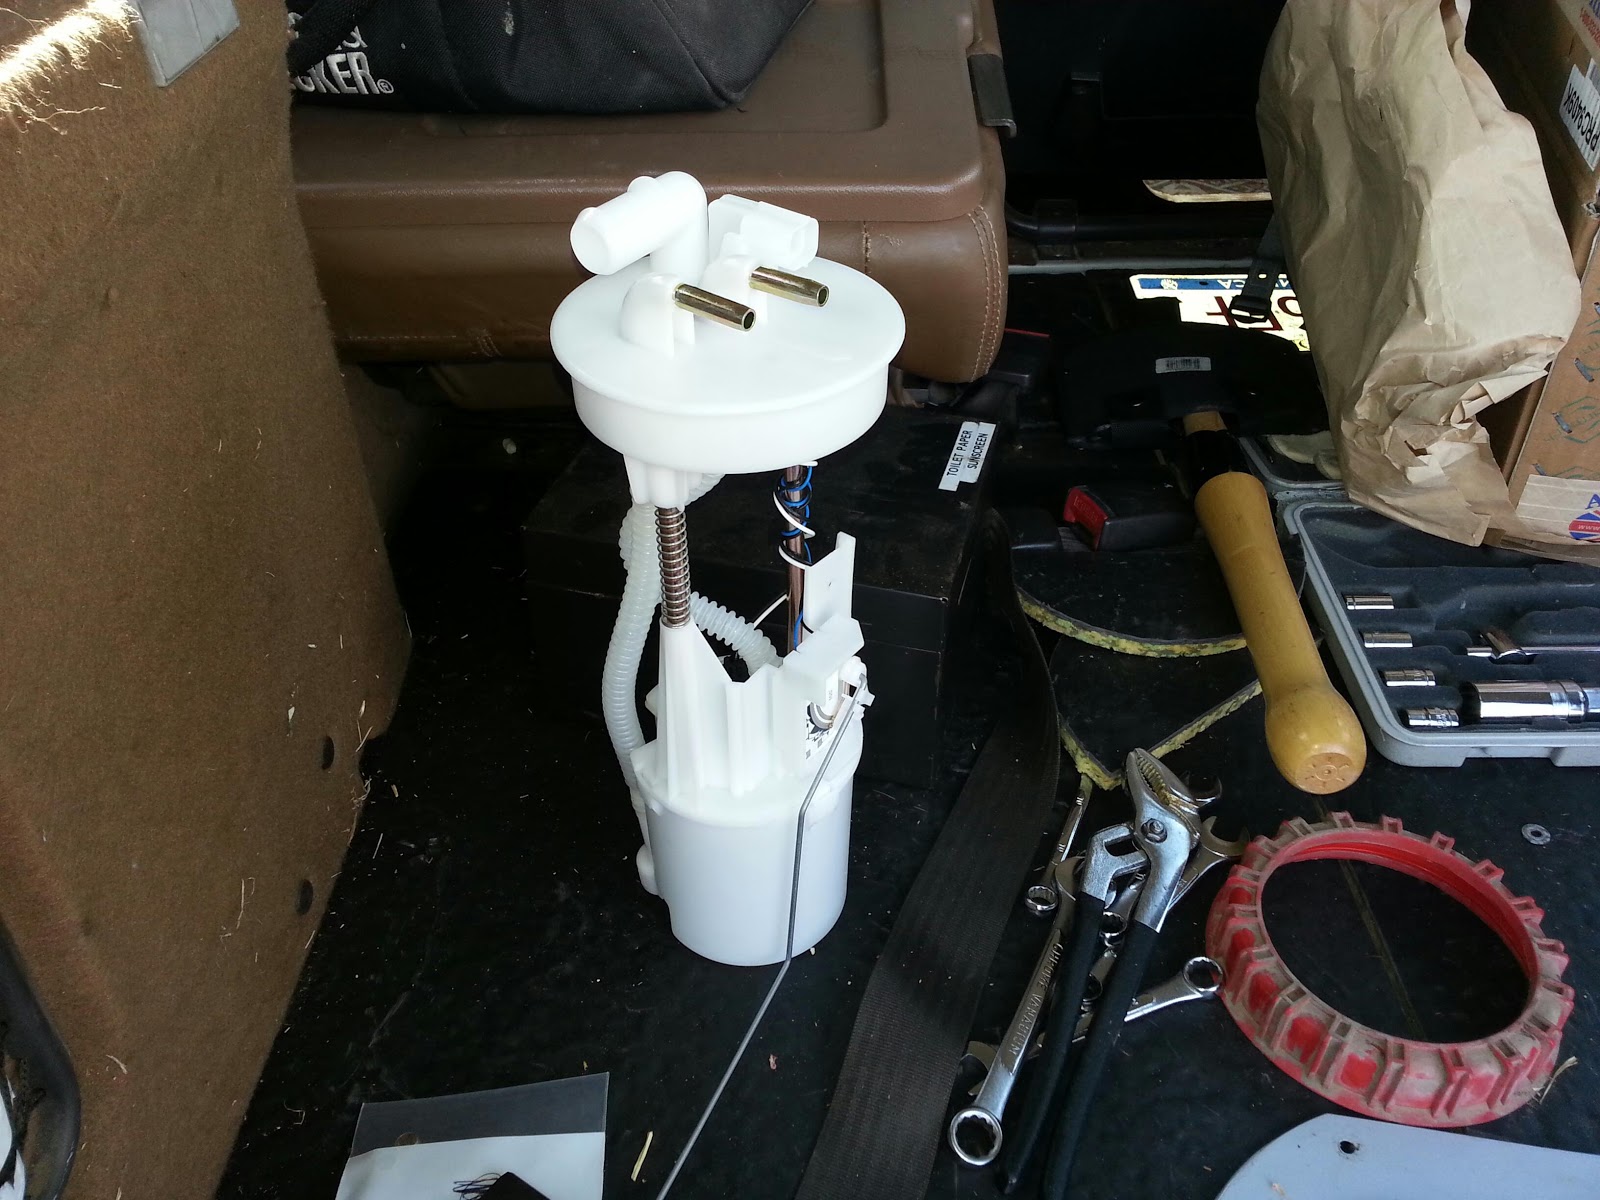
Replacement Fuel Pump Part Numbers (Post #447) 2/10/2014

I was reading a post on the Facebook Land Rover Owners page about the replacement of a fuel pump on a Land Rover Defender. The North American model Defender uses many of the same parts as a Range Rover Classic and Discovery I. If you are a regular reader of the blog you know I’ve just recently replaced my fuel pump and now have a spare unit waiting for the electric pump on the shelf.

https://okierover.com/fuel-pump-replacement/

I’ve posted many times about the prices dealers charge for parts. The major parts houses have good prices but often charge more for a part when an equivalent part can be fond for cheaper if you only knew what the part numbers were.

Auto zone in Boise tried quoting me over $1,000 and I called BS. Is there a certain part number so they don’t try misquoting the price? – Cameron Eugene


We all try to find a cheaper price. It is common for a parts supplier to hear Range Rover or Land Rover and they immediately think the owner is made of money.

MONEY-BOAT-web-image-blog
Nearly every one with a television has seen the Geico “Made of Money” commercials.

The gentleman doing the swap is John Monaghan. John works for GB 4×4 Radios. These are the fine folks that upgrade and repair the radio units for Land Rovers.

He had a friend that worked at an Autozone and he let him “browse” the stock to find the right parts. The following quotes are John’s from the thread:

Thank God I have a buddy at Autozone that let me go to the back and look in every box. Ask for this EP375 from a Chevy, now they have it and for just $87. This is priceless info for my fellow American Land Rover brethren, enjoy and save a mint.

acdelco

Even the top electrical connection is the same.
Or you can use US auto store O’Reilly’s. Part numbers there is Delphi: FE0110. And sock filter is Delphi : FS0001.

delco

There are two small plastic lugs on the bottom of the new pump that have to snipped off, dead easy, this way it sits fully in your old base, then you will have to use a new fuel line with two metal hose clamps or in UK Jubilee clips. Job done and a mint saved!

clampWhile I’m here I might as well add this pics, shows both lugs snapped off as needed with needle nose pliers, clamp and the hose size you need

Jeffrey Baker added this for the thread:

Pump fits many V8 GM fuel injected motors. $72 for the Delphi or Bosch part#69218 at NAPA. Carter equivalent is $52 part #p74006. Airtex also makes this pump not sure of number though.

Denis Guyvner added this helpful tip:

I have also heard that what causes these to fail is continually running your fuel level at a low amount. The fuel pump needs the fuel to keep it cool. Heat is what kills the pump.

And finally John Monaghan added this final note:

FYI: I’ve done this A/C Delco fuel pump swap many times on different Rovers in my collection and have saved a fortune over Dealer and OEM Land Rover parts vendor $$$$ pump prices. Looks like I’m going to be doing another this week (will add DIY pics here and A/C Delco pump part numbers), seems my 1988 Classic’s pump is toast too, sat too long low on gas without starting it, so the fuel dries to a varnish up inside the pump’s rotor… locking it solid, then you try several times to start it, the armature in the pump’s electric motor does not move so it burns the carbon brush mounts, rendering the pump dead and beyond repair! So never leave your fuel injected Rover parked up with out starting it monthly and with less than 1/2 a tank of petrol. Lesson learned 🙁

So much great stuff in one post. This might seem like a complicated project. It is not. I walk through it almost step by step in my link above. With a little deductive reasoning most anyone should be able to swap the pump out of the unit especially if it is a near direct swap.

Thanks to all the guys on the thread and thanks to John for great details. It will save us all several hundreds of dollars.

Thanks for reading, check out the Facebook group Land Rover Owners, and Happy Rovering.
 

Fuel Pump Replacement (Post #326) 4/5/2013

196,000 miles out of one fuel pump. That’s pretty good. But as you have read in previous posts it was time for a new pump. Let’s first sort out the process for testing the fuel pump.
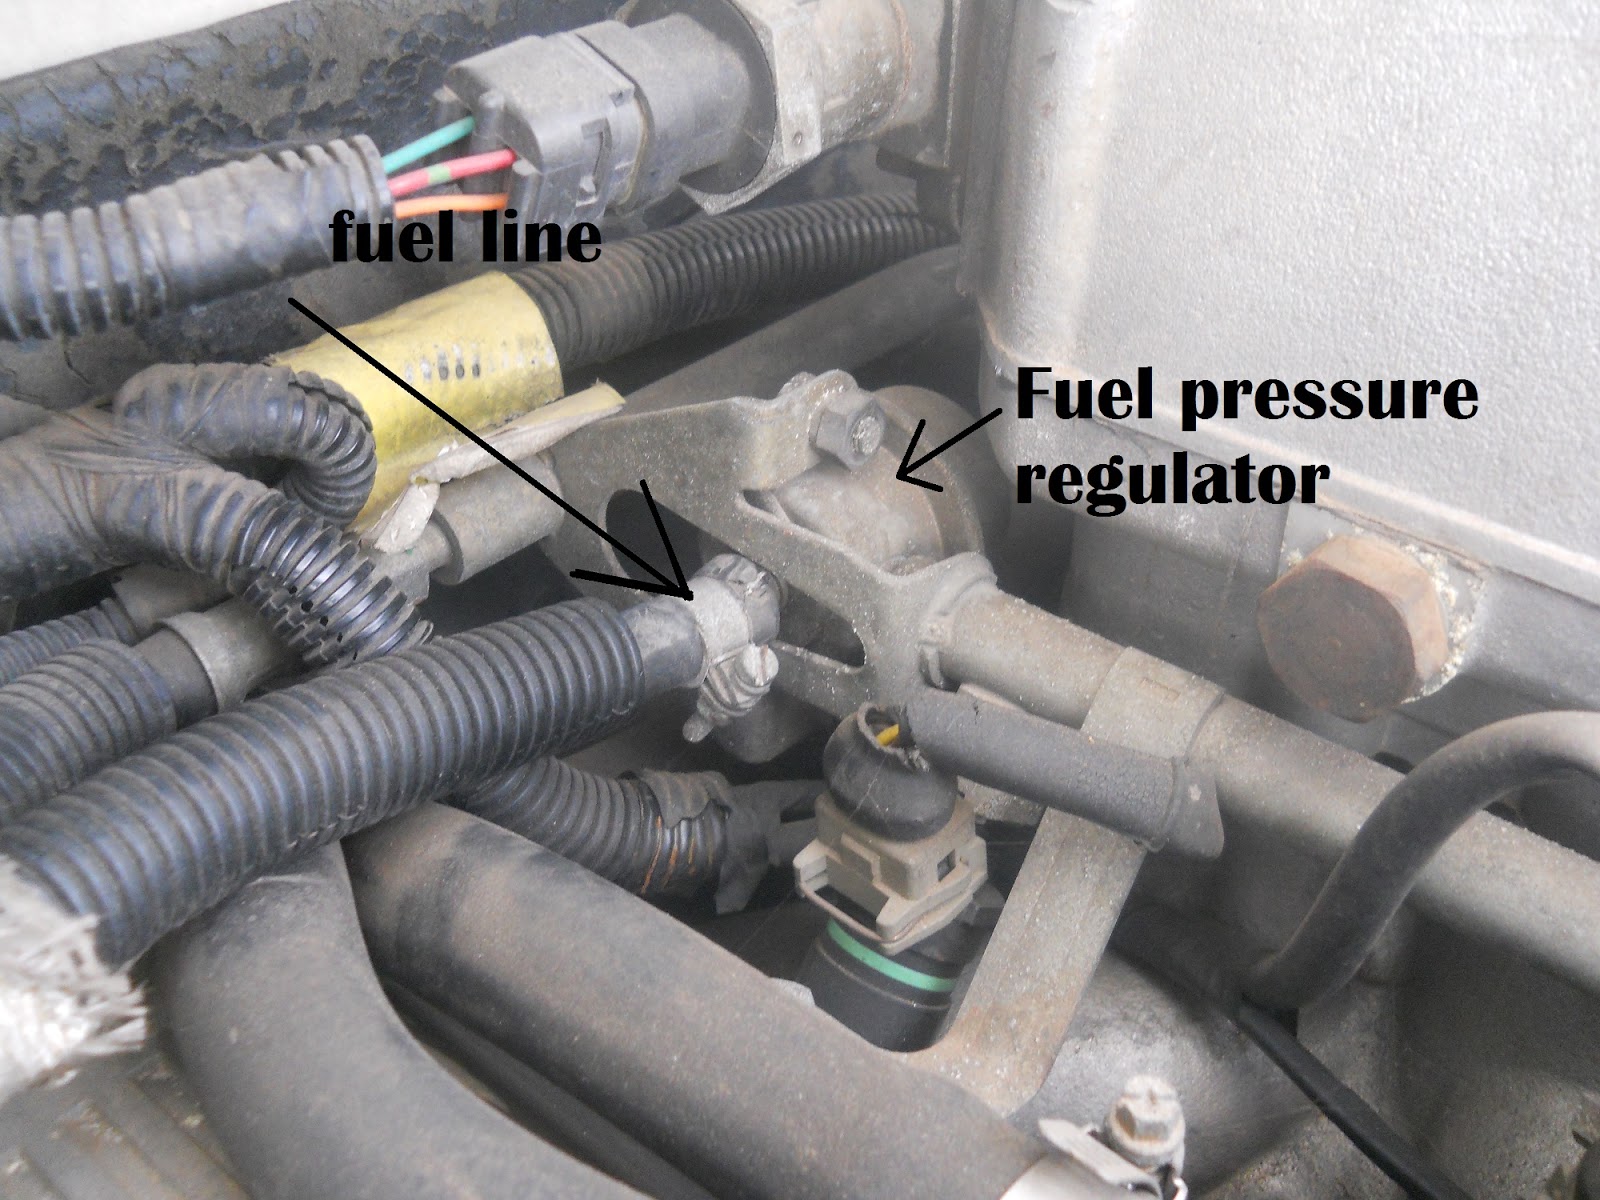
Checking for fuel at the fuel rail was first. I disconnected the fuel line from the fuel rail.
Remove the hose clamp. Place a rag, preferably a large one like a t-shirt under it. You are checking for fuel coming out. WARNING. When you turn the key to the on position it activates the fuel pump. The fuel pump will run for a short burst to pressurize the rail. It will then shut off. A lot of fuel will come out when you turn on the key. It may even shoot out on to the engine. DO NOT DO THIS WITH A HOT ENGINE.
When I disconnected mine, no fuel came out. So that told me the pump did not run. So I climbed in the back and disassembled the back to get to the fuel pump access panel. Some time in the late 1990 models they started manufacturing an access panel to repair the frequently failing pumps.
I wanted to first check to make sure I didn’t have a blown fuse. I couldn’t remember which fuse was the one for the pump. So I pulled all of these and checked for a blown one. I also reseated the fuel pump relay (silver one) located between the green and brown items. All the fuses were good. On to the pump.
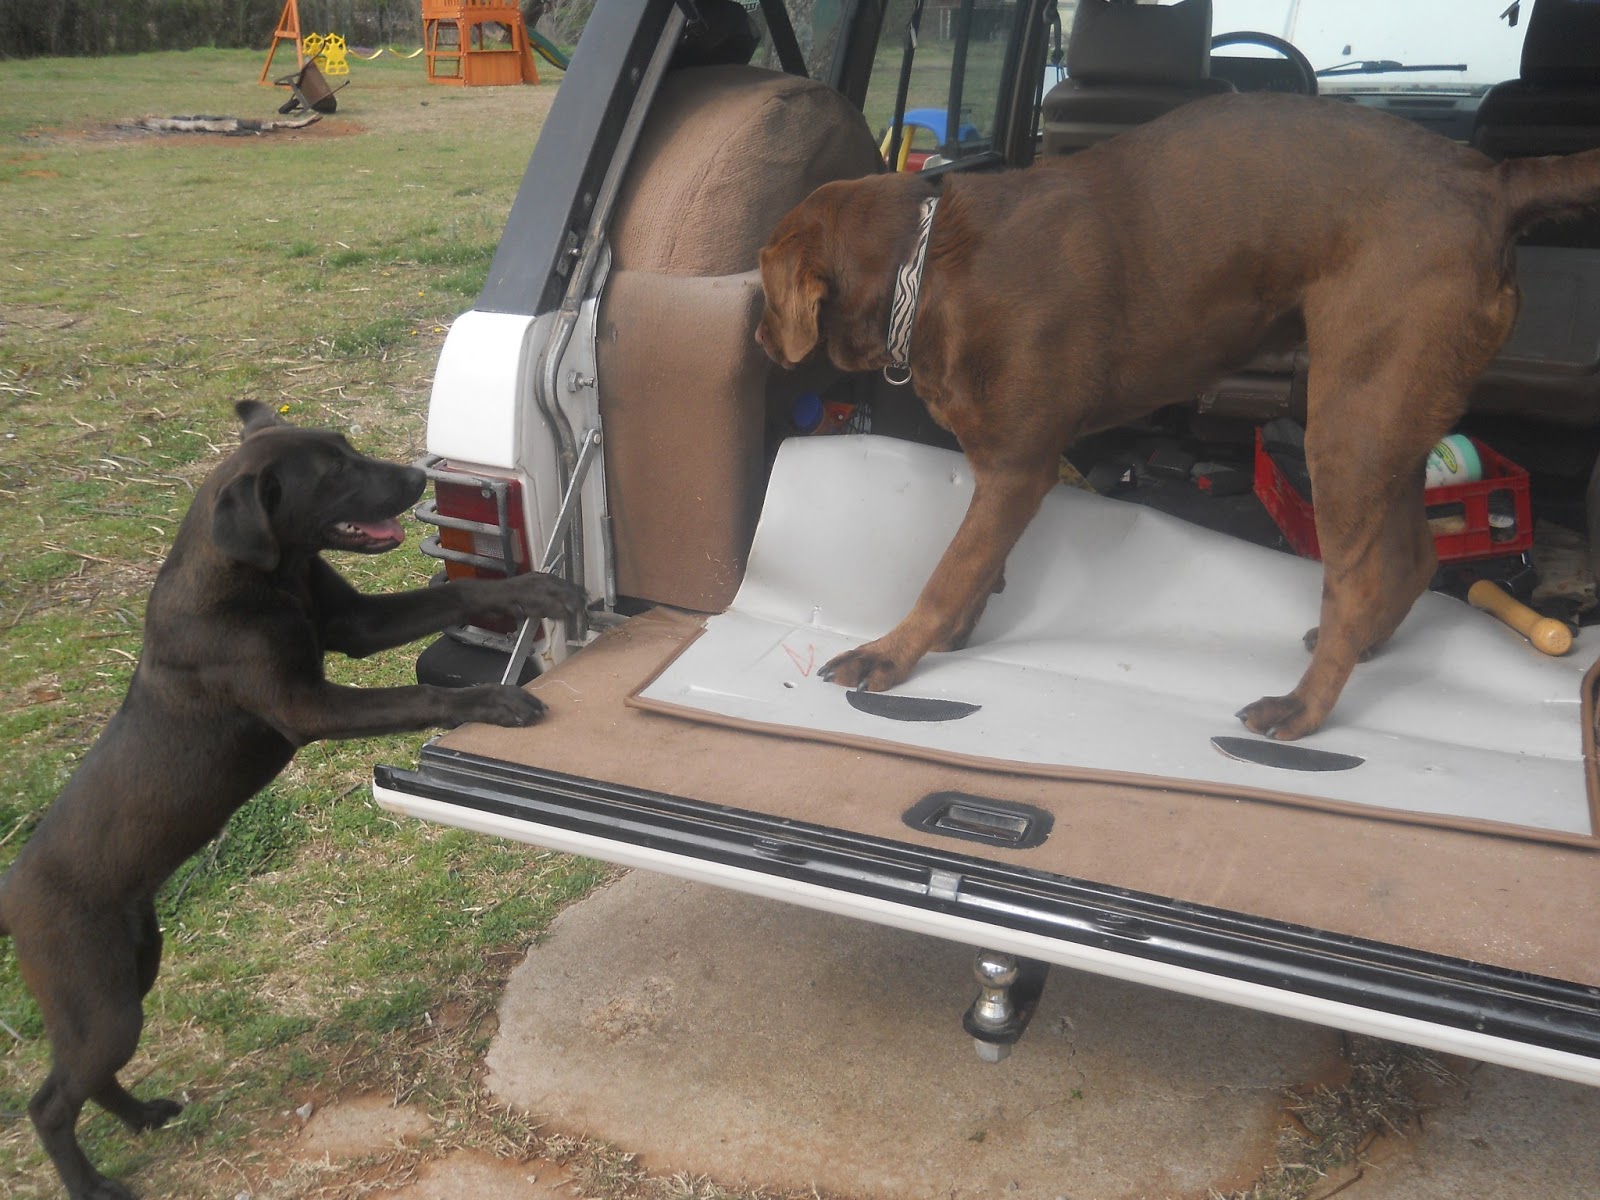
Remove the carpet and the dogs from the rear of the vehicle and access the panel.

I don’t know why they think it is okay to get in the back of the Range Rover.
Luna and Paisley
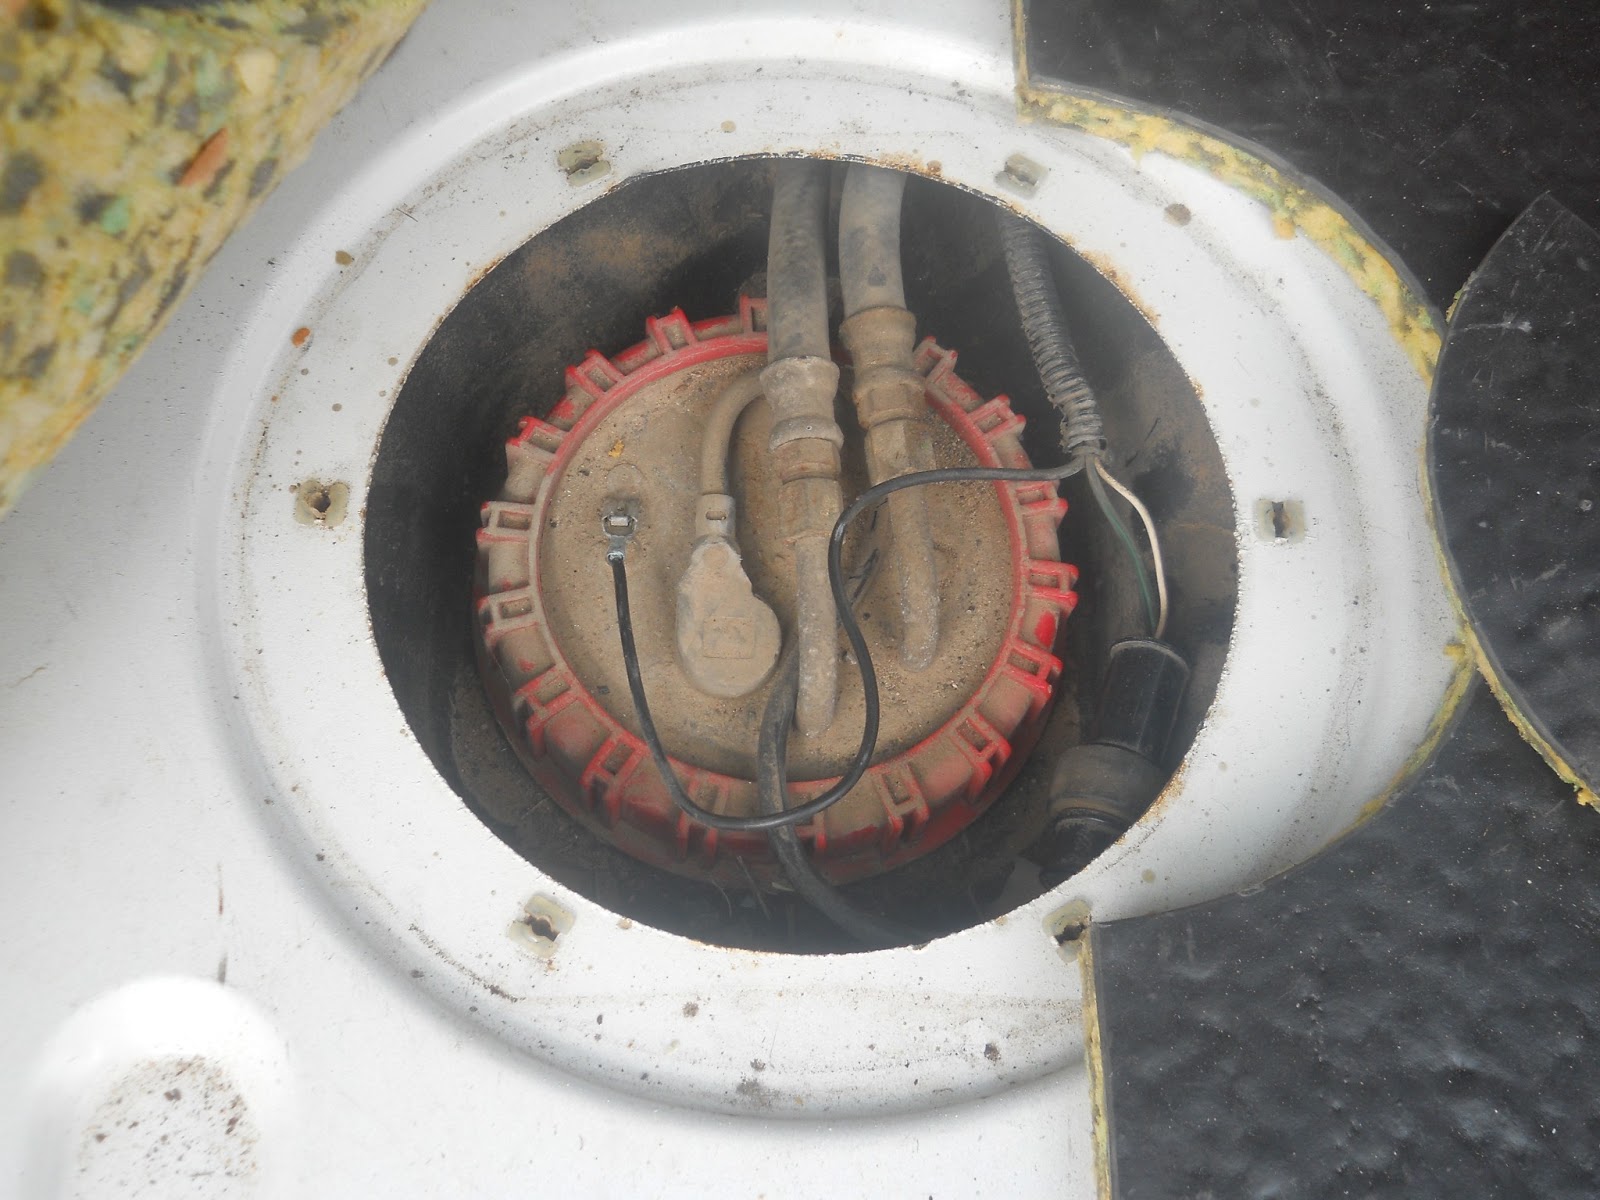
Remove the six screws. Move them to a safe place. Remember you are about to open the fuel tank. If you have something that might fall in the tank…it will fall in the tank. Secure all loose items NOW.
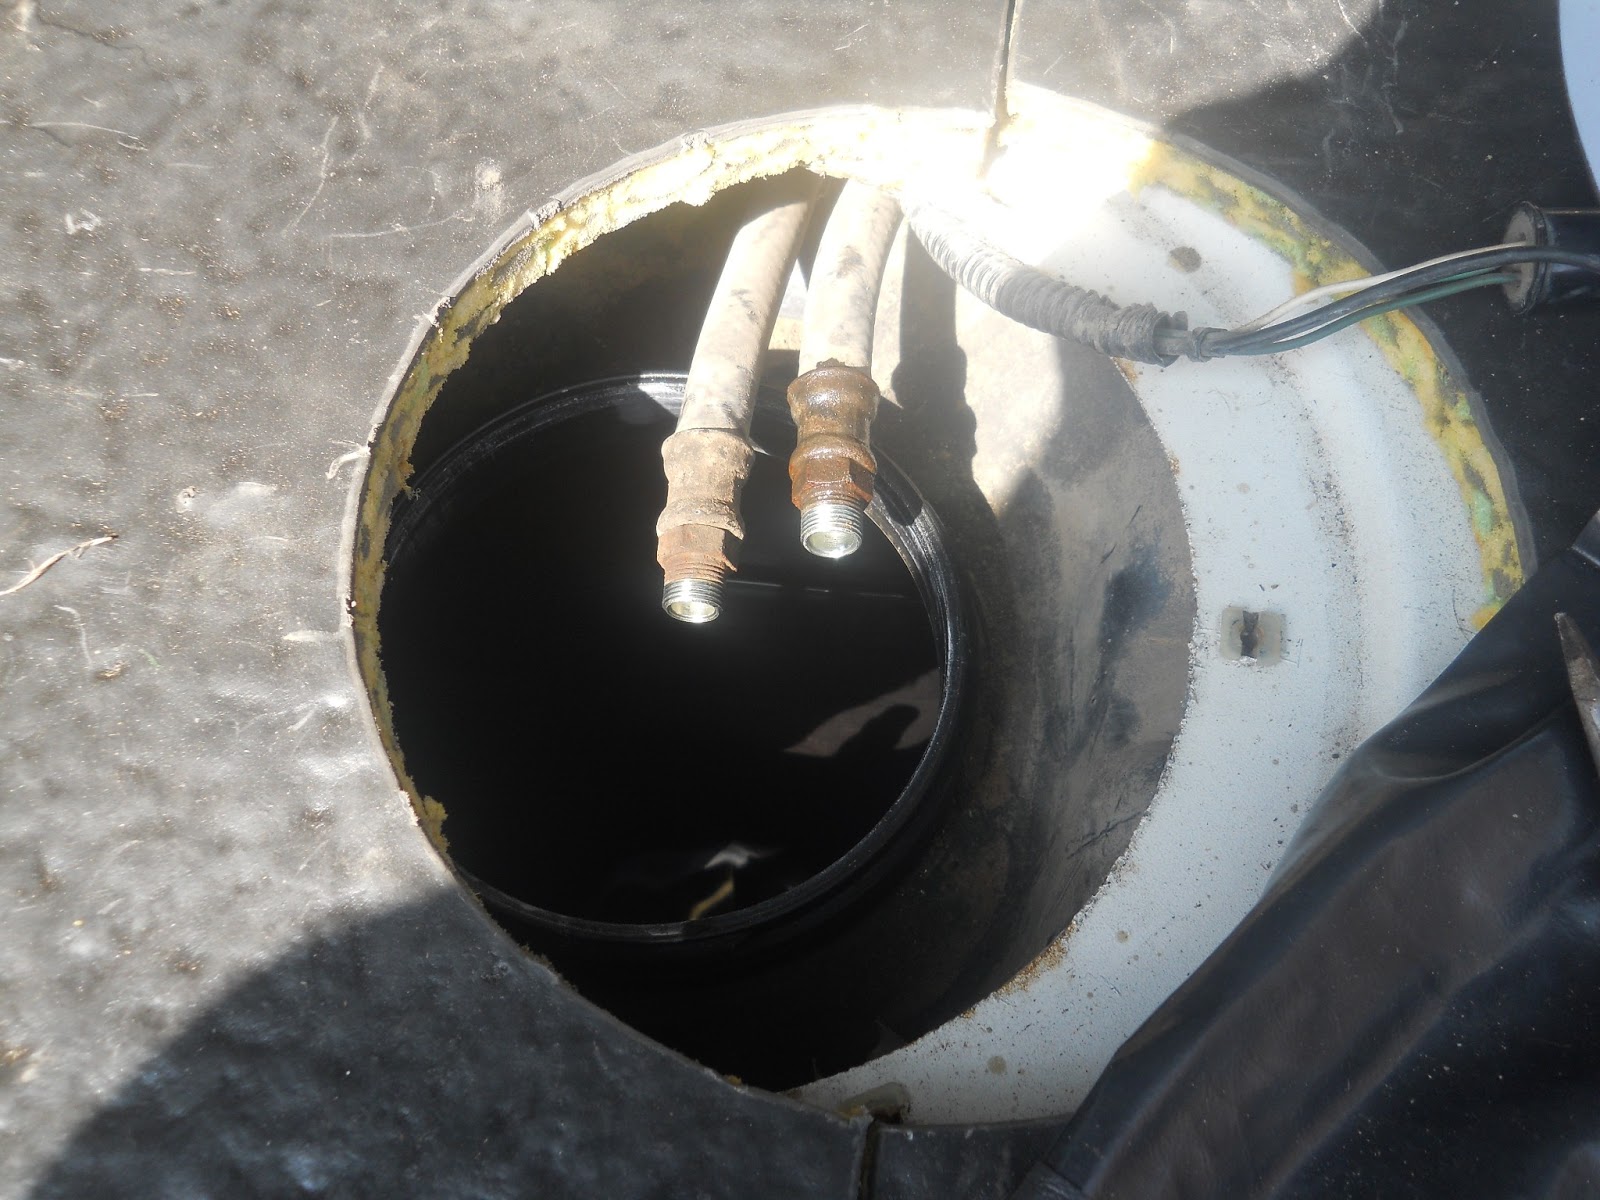
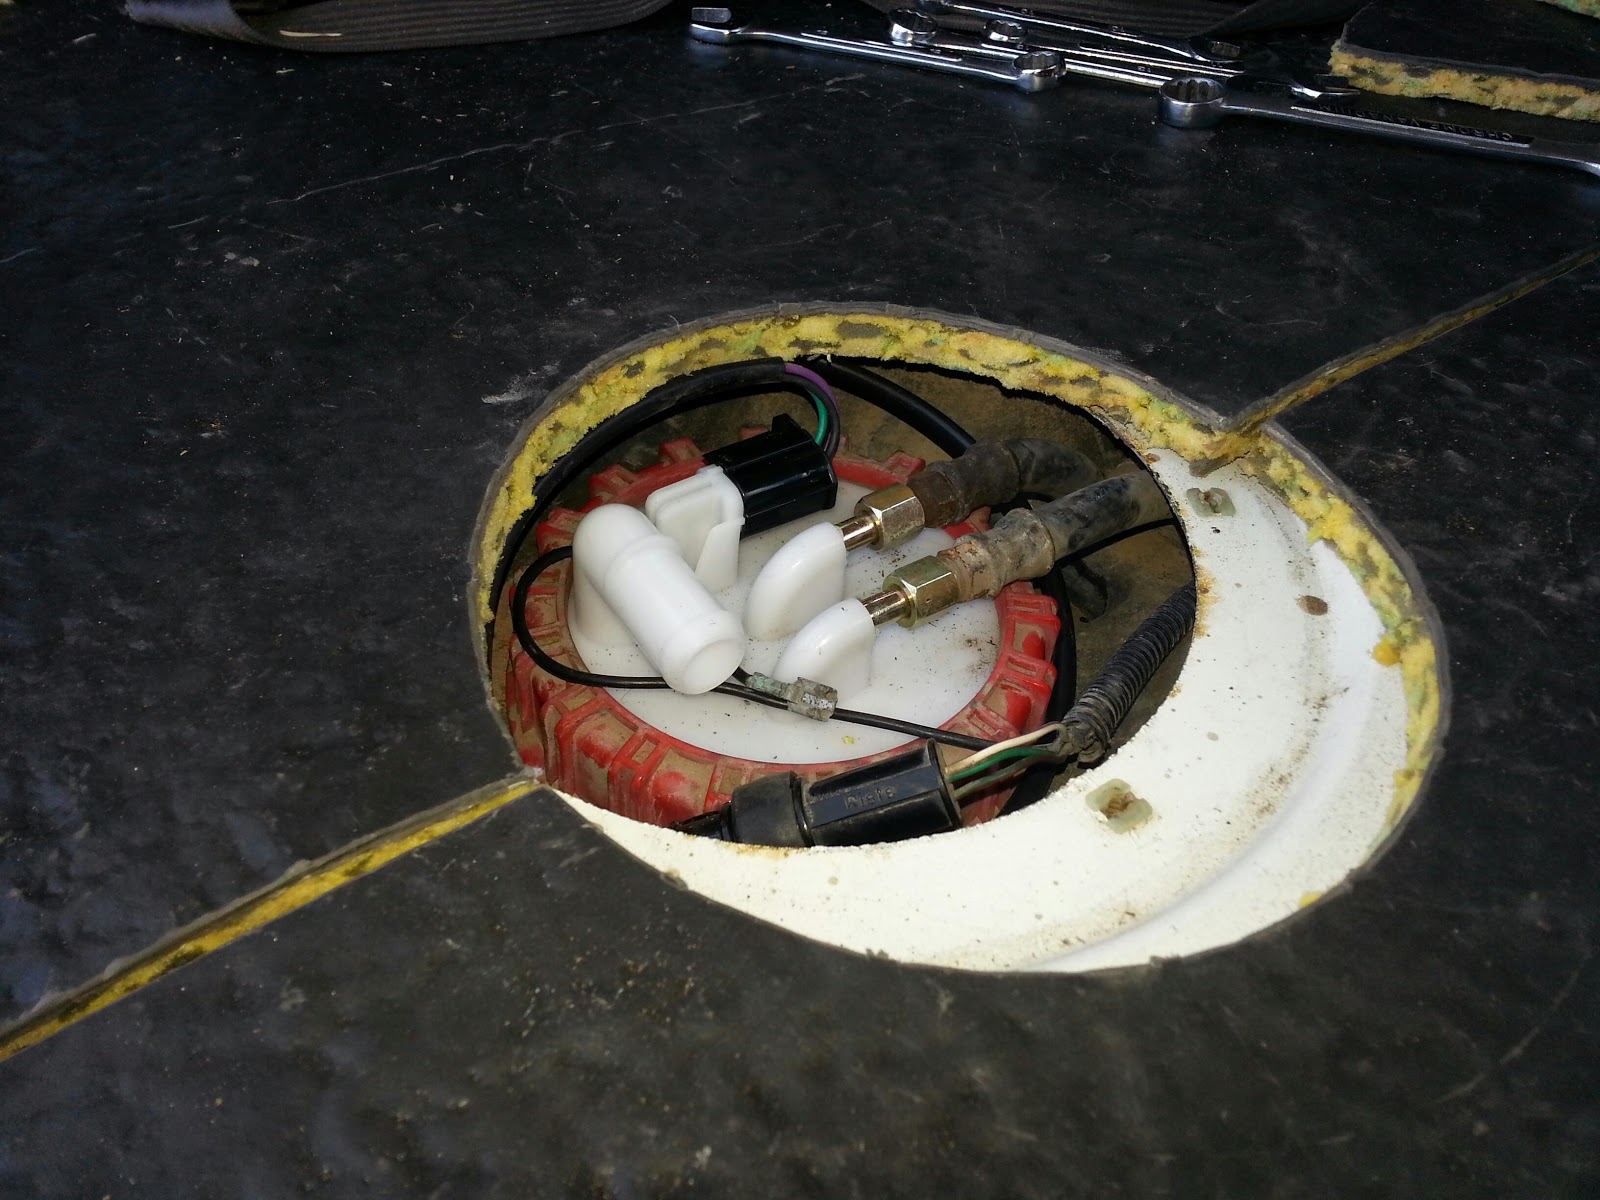
After you are open you are dealing with two fuel lines, a ground wire, and the power connector.
There is also a fair amount of dirt under there. I used a shop vac to get as much as I could to eliminate debris from getting in the tank. Vacuum before you start to remove any bits. Vacuum again after you have knock the wrenches against stuff.
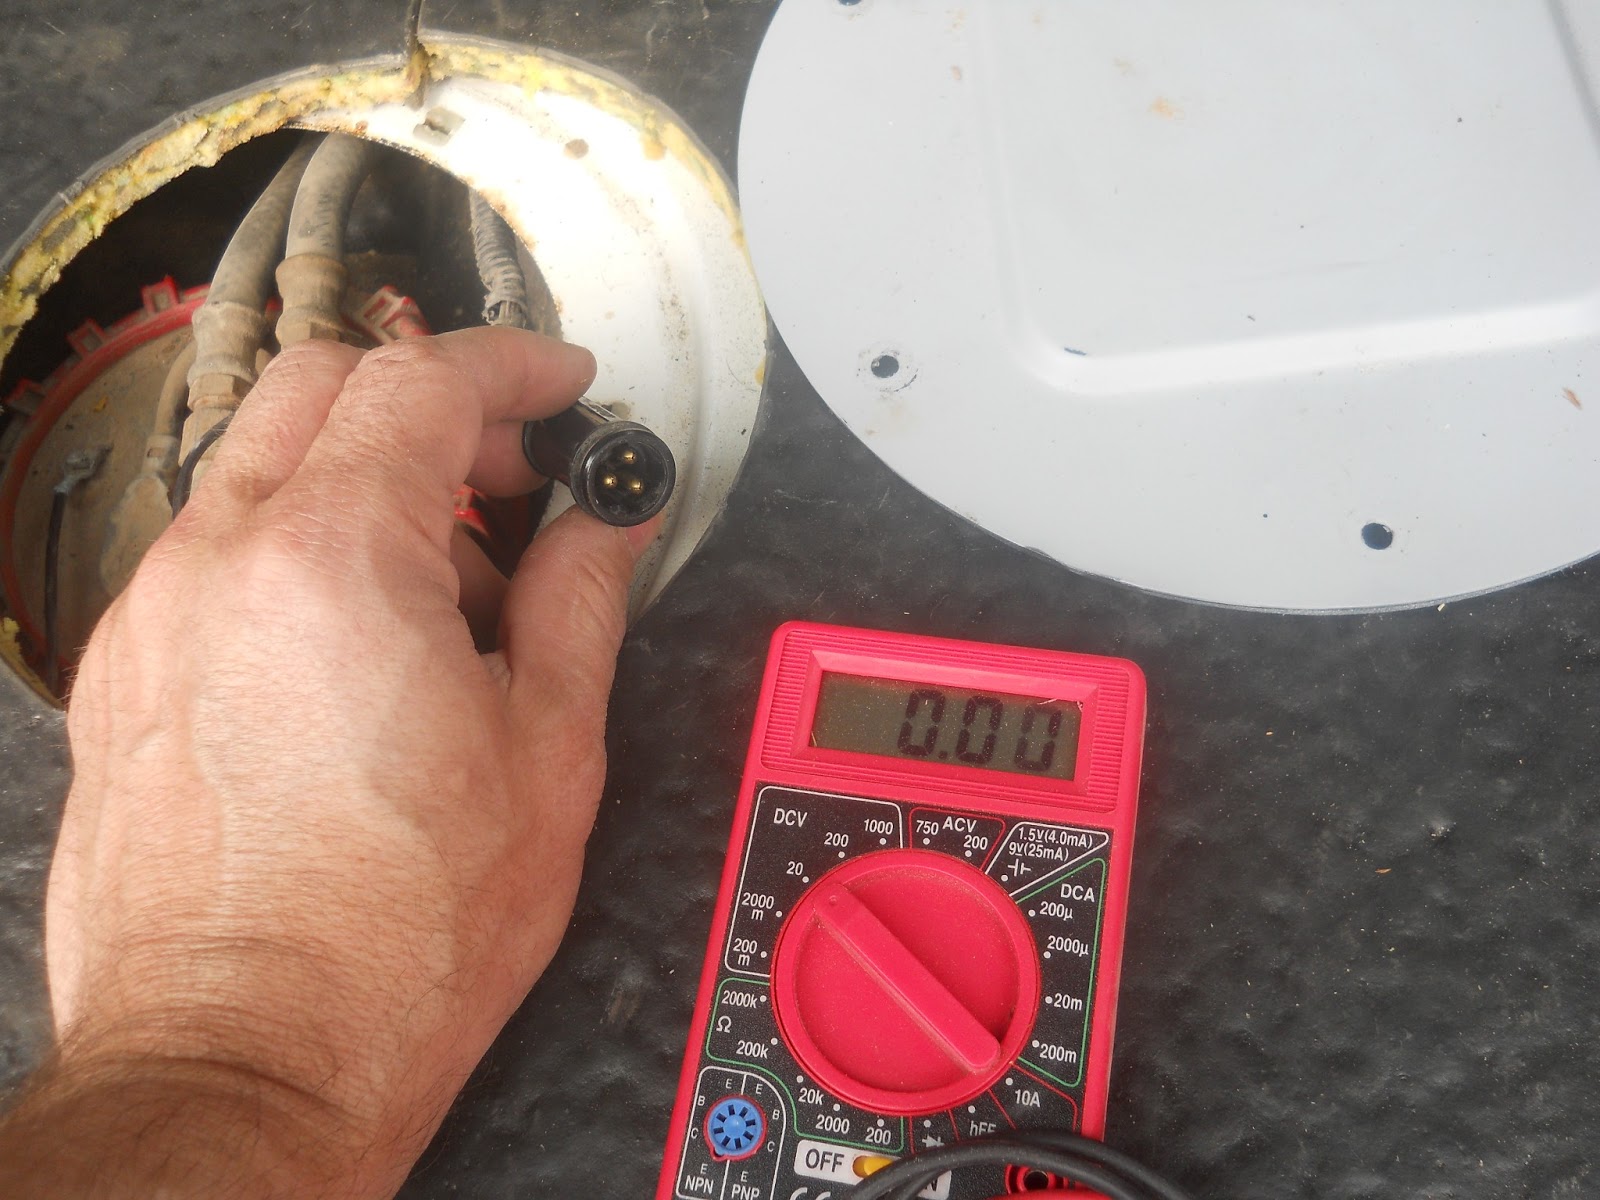
Pull the connector and set your volt-ohm meter to volts. Have someone turn on the ignition. You will see a voltage spike for a few seconds. Remember the pump only runs for a few seconds. I checked across all the combinations of wires. I had power to the plug so….it had to be the pump.
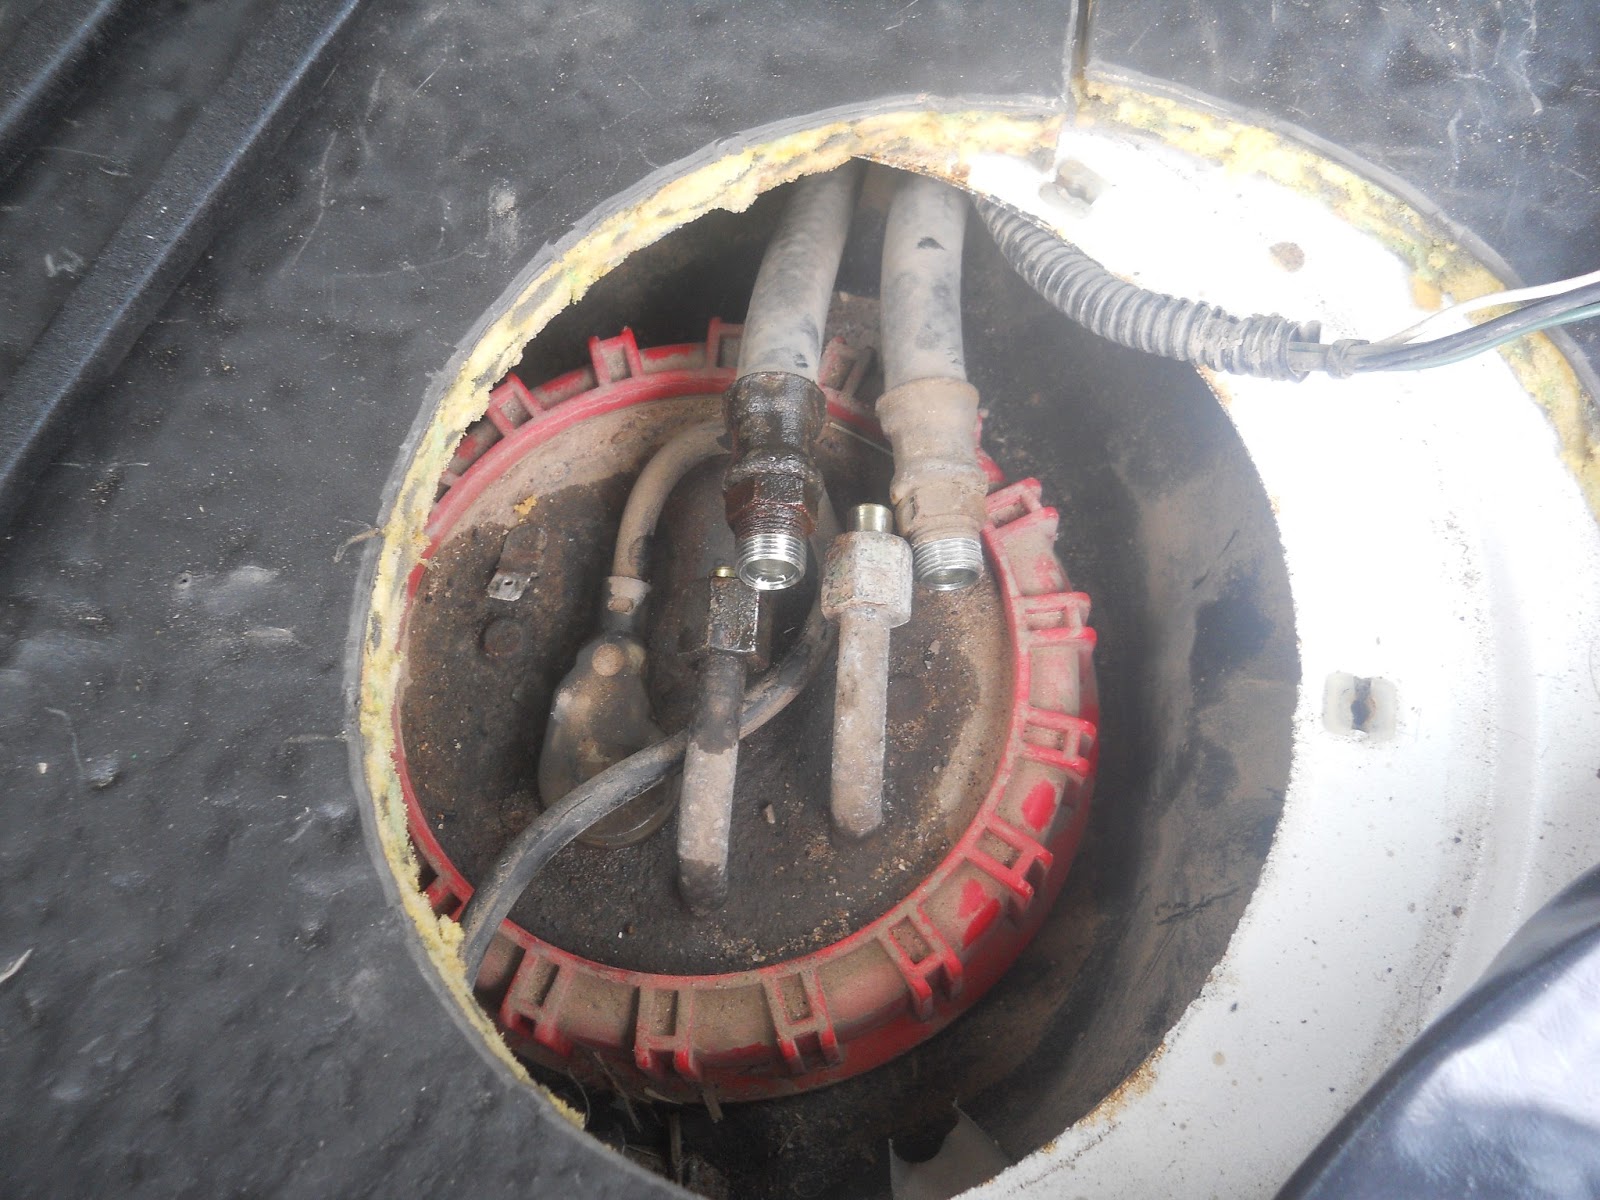
Disconnect the fuel lines and the ground wire.
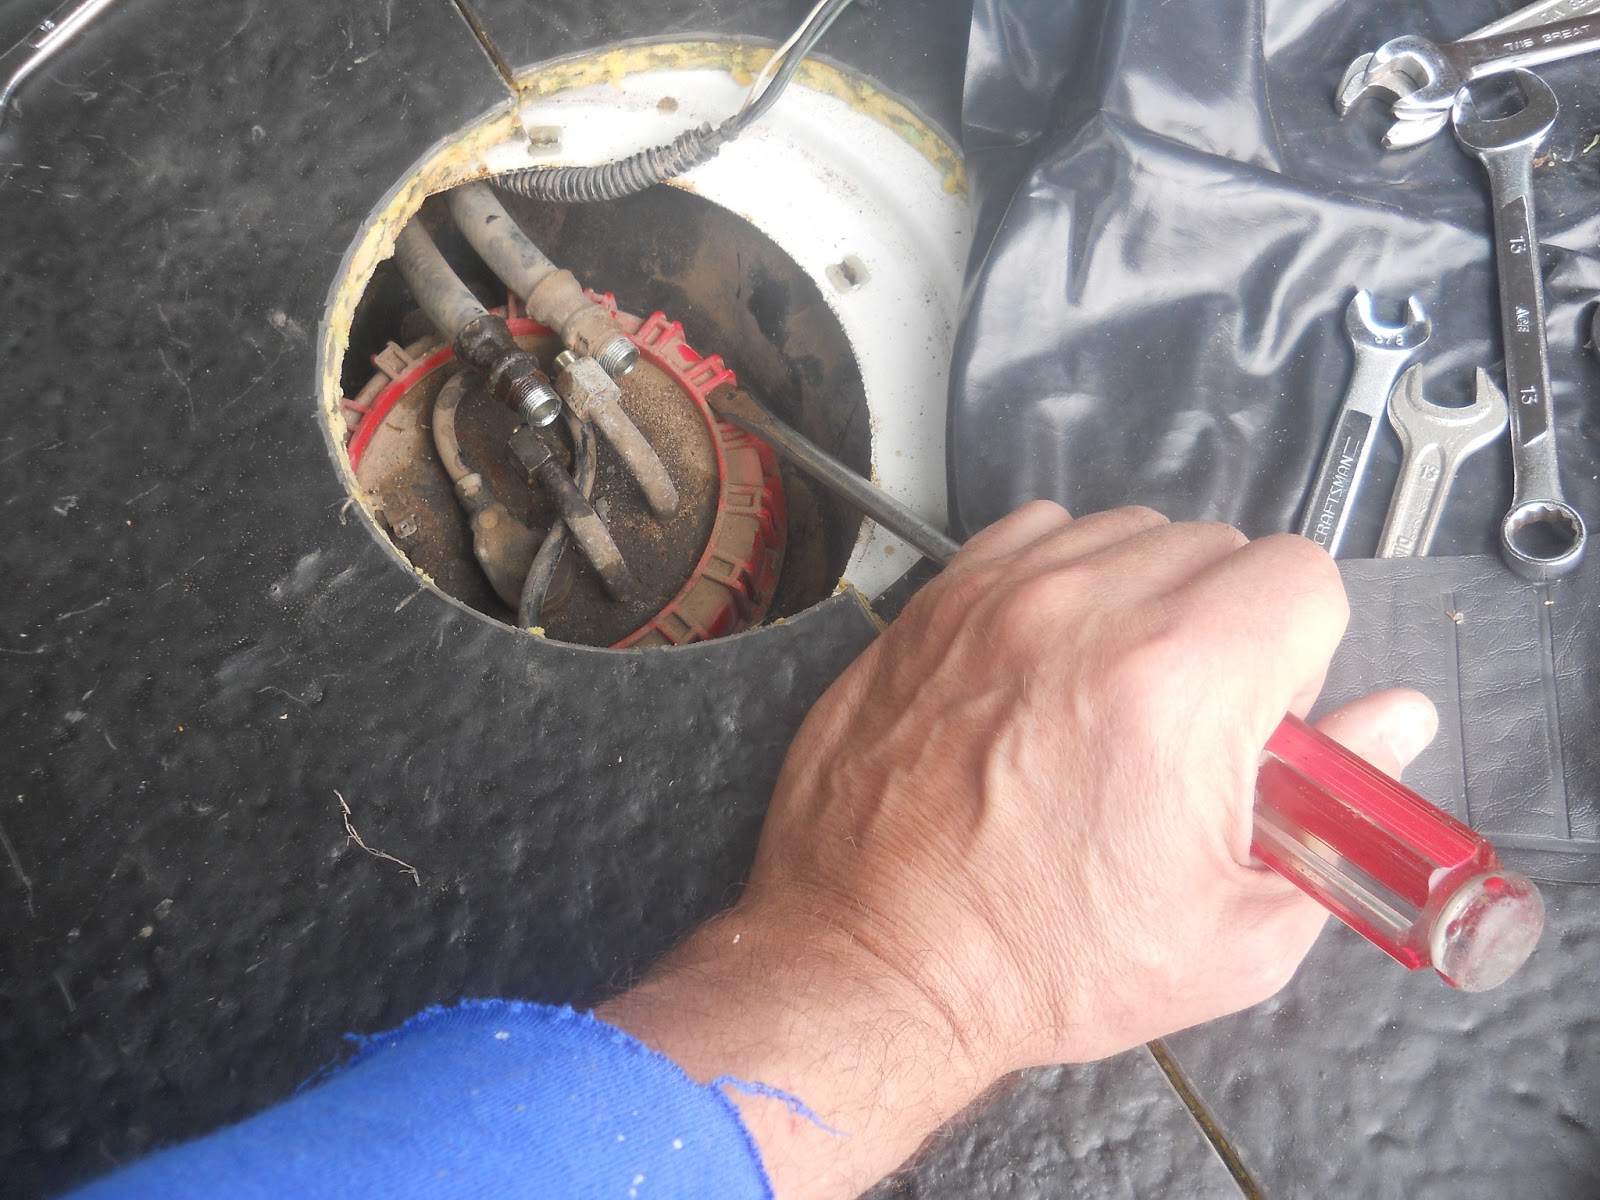
You are going to use a mallet (I used a rubber one) to hit a large flat-head screwdriver to turn the ring. They make a special tool for this…I didn’t buy it. Take your time and lightly tap this ring until it spins enough times to remove it.
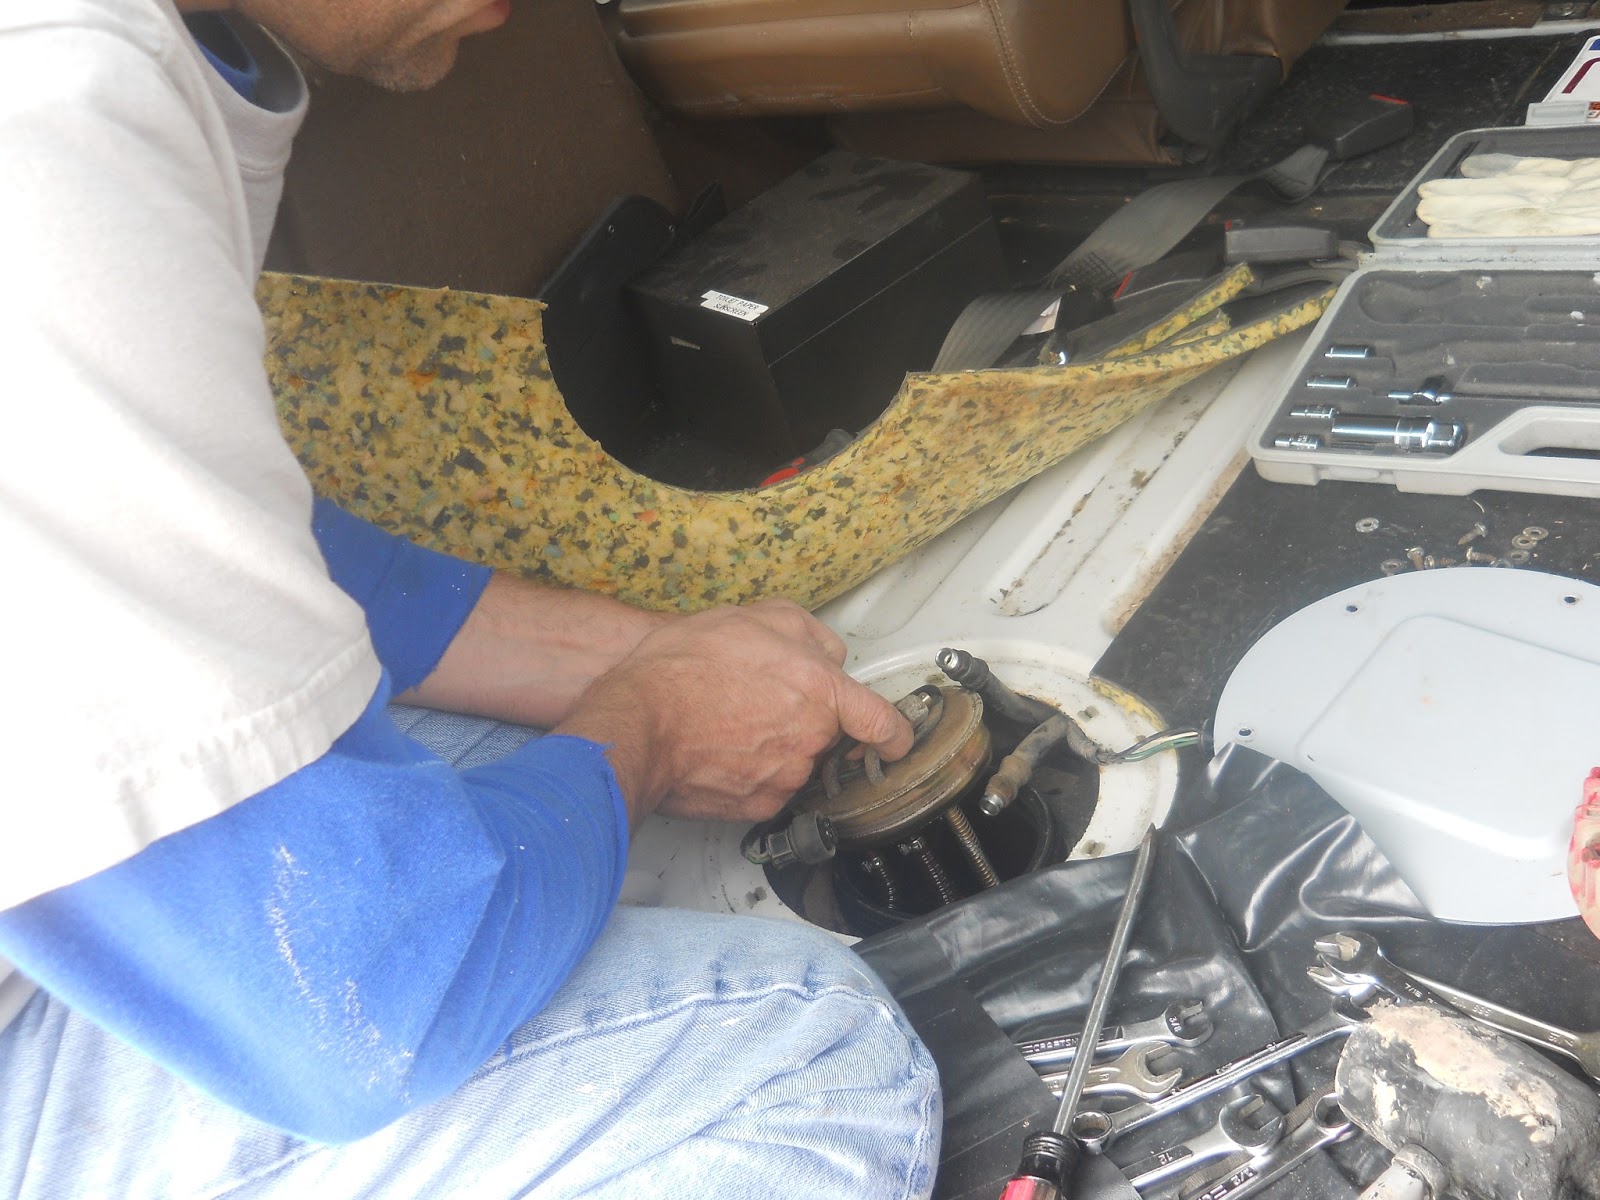
The next series of pictures is me pulling the pump from the tank. 

Holding the fuel supply lines out of the way.

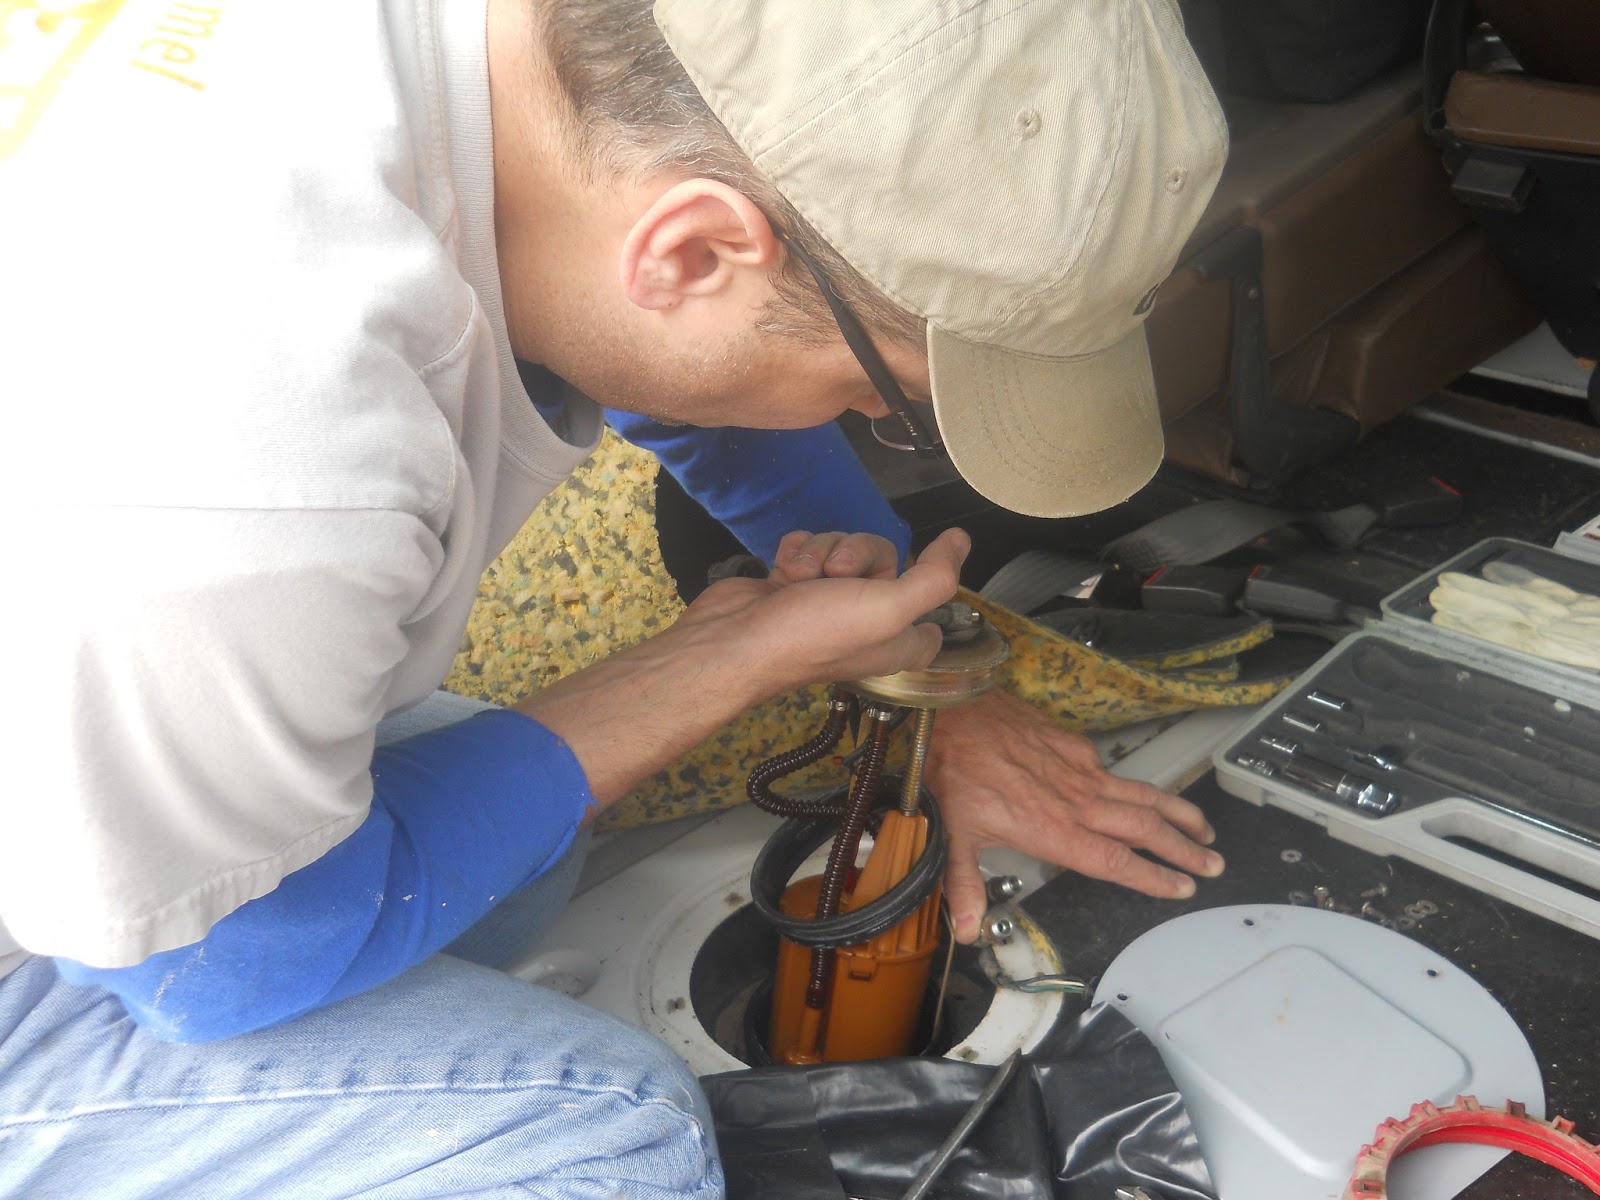
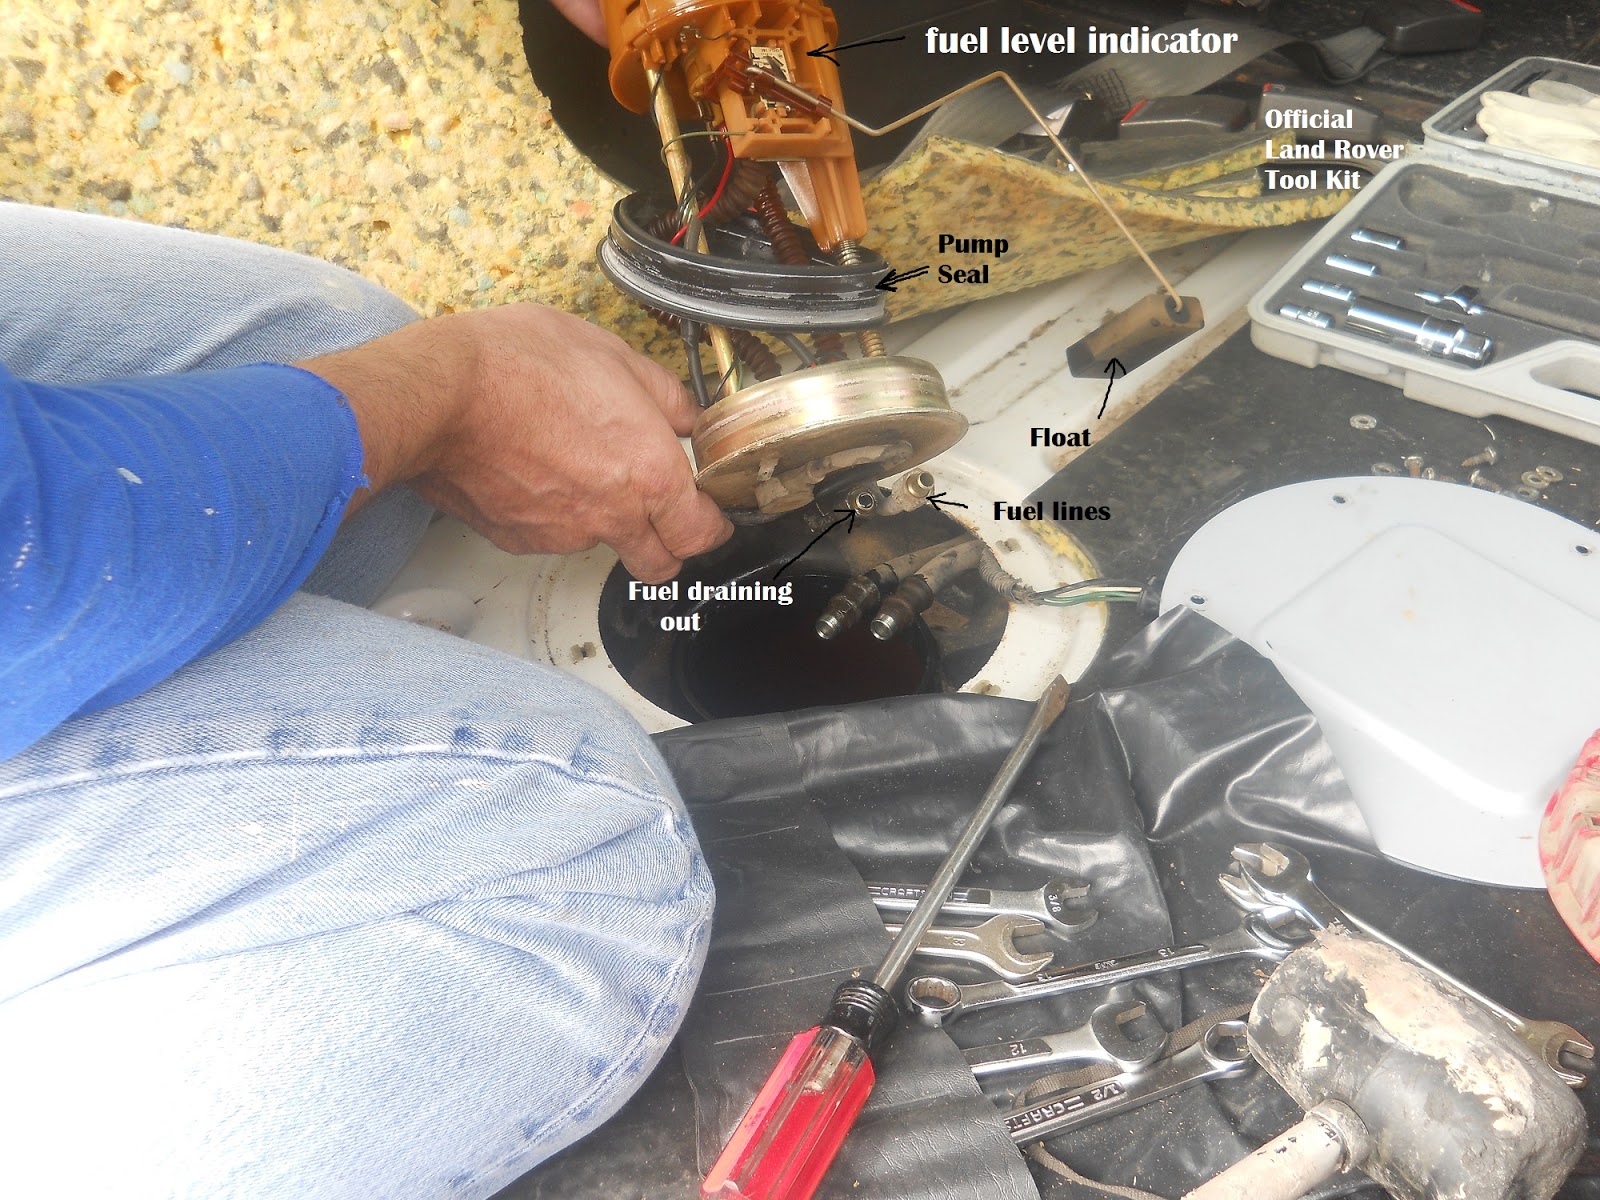
Remember the fuel level indicator is connected to the float. So as you are pulling it out you will angle the pump to slide it out. The lower part of the pump is a sump that keeps fuel around the base of the pump. This way the vehicle is not starved for fuel when the tank is low and you turn a corner and slosh the fuel to one side.

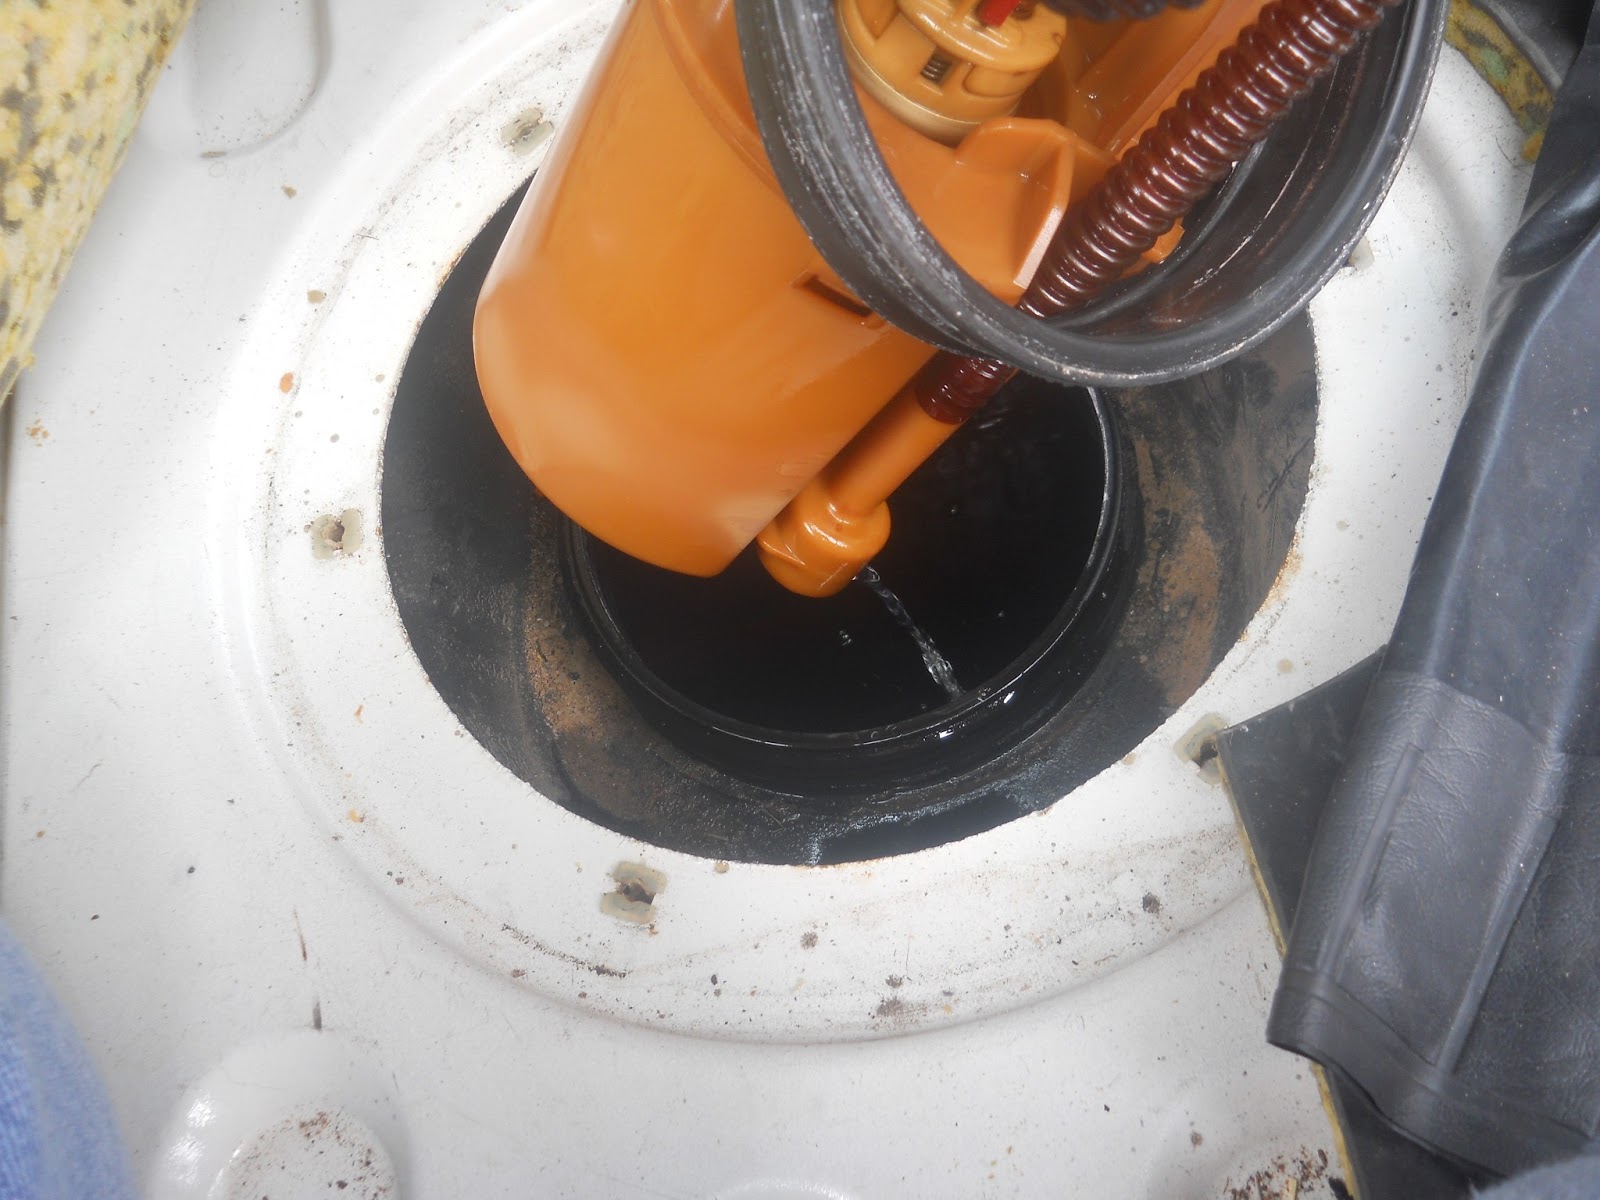
So as you are pulling the pump assembly out. Let the fuel run out of the pump. This will prevent fuel being spilled in the cab.

Fuel draining out.

I inverted the pump and drained more fuel out. You can see the official Land Rover Tool Kit in this picture. I needed to use it due to having an insufficient collection of tools in my tool bag. I remedied this by purchasing a socket set for the on-board tool bag.

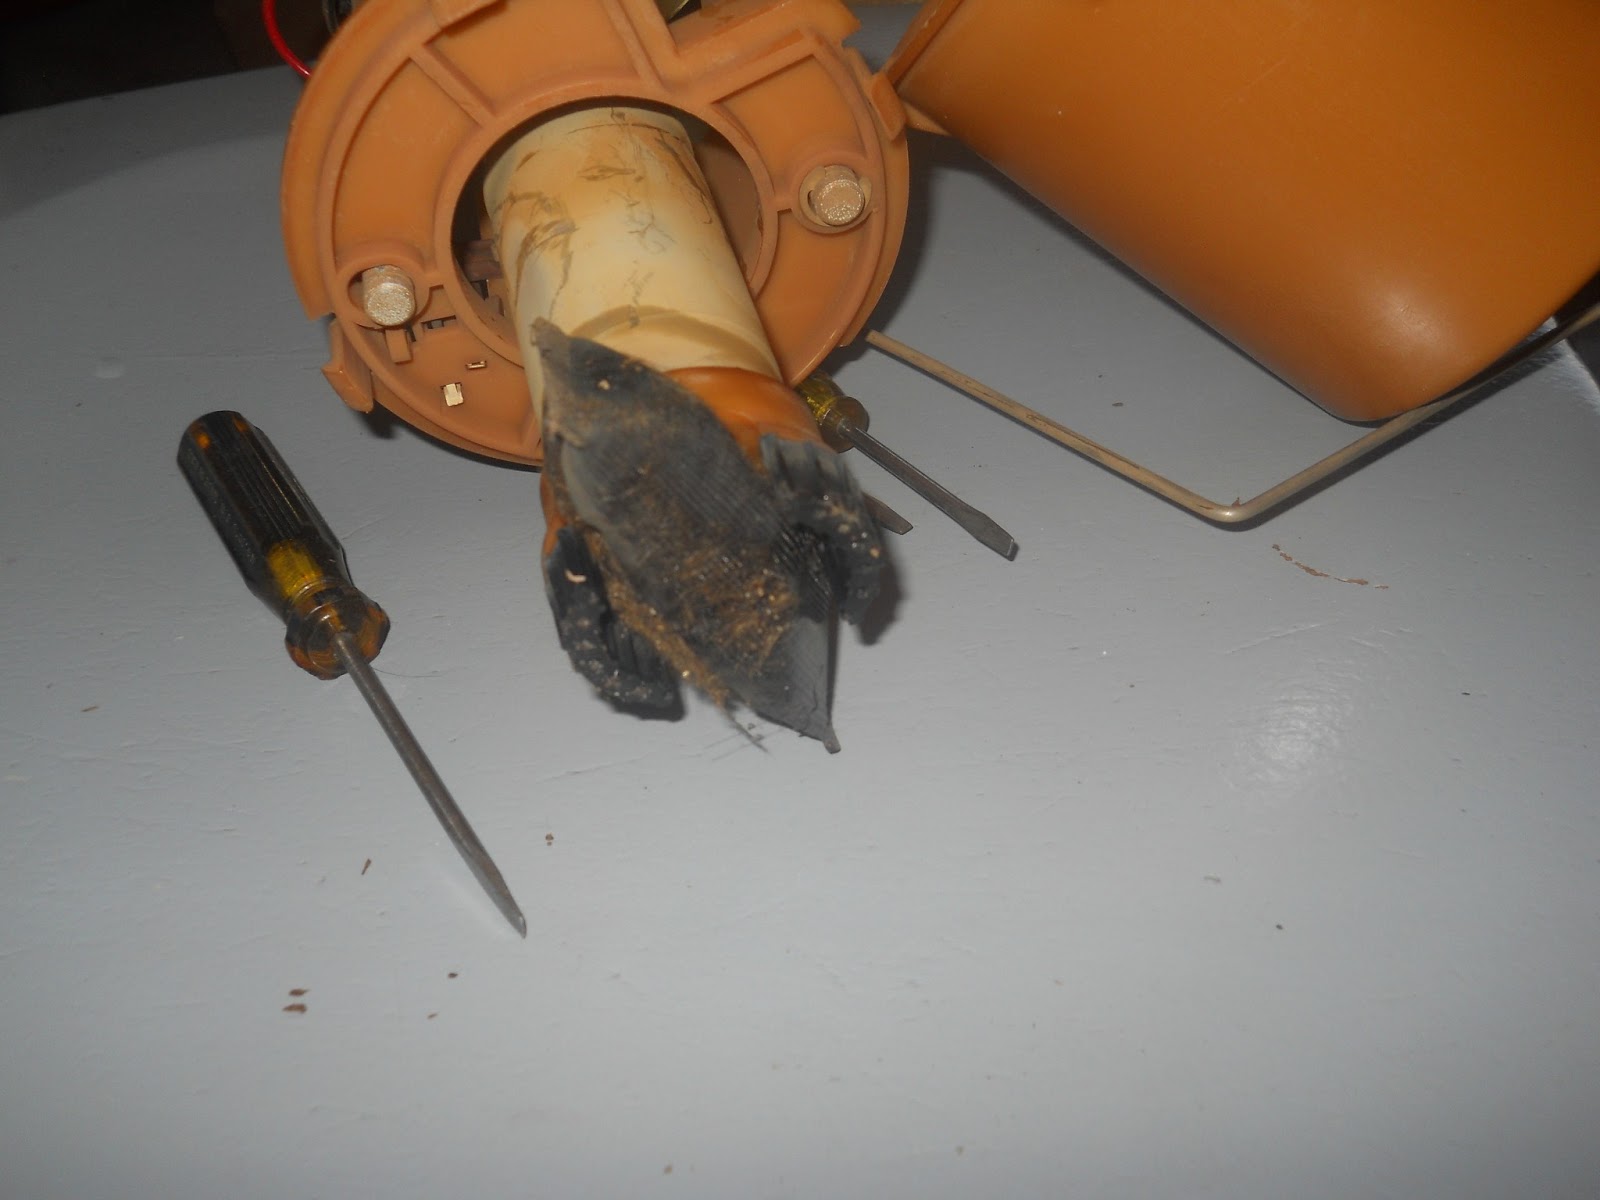
Once I was back in my garage I took the old pump apart. Look at the debris attached to the filter. NASTY!

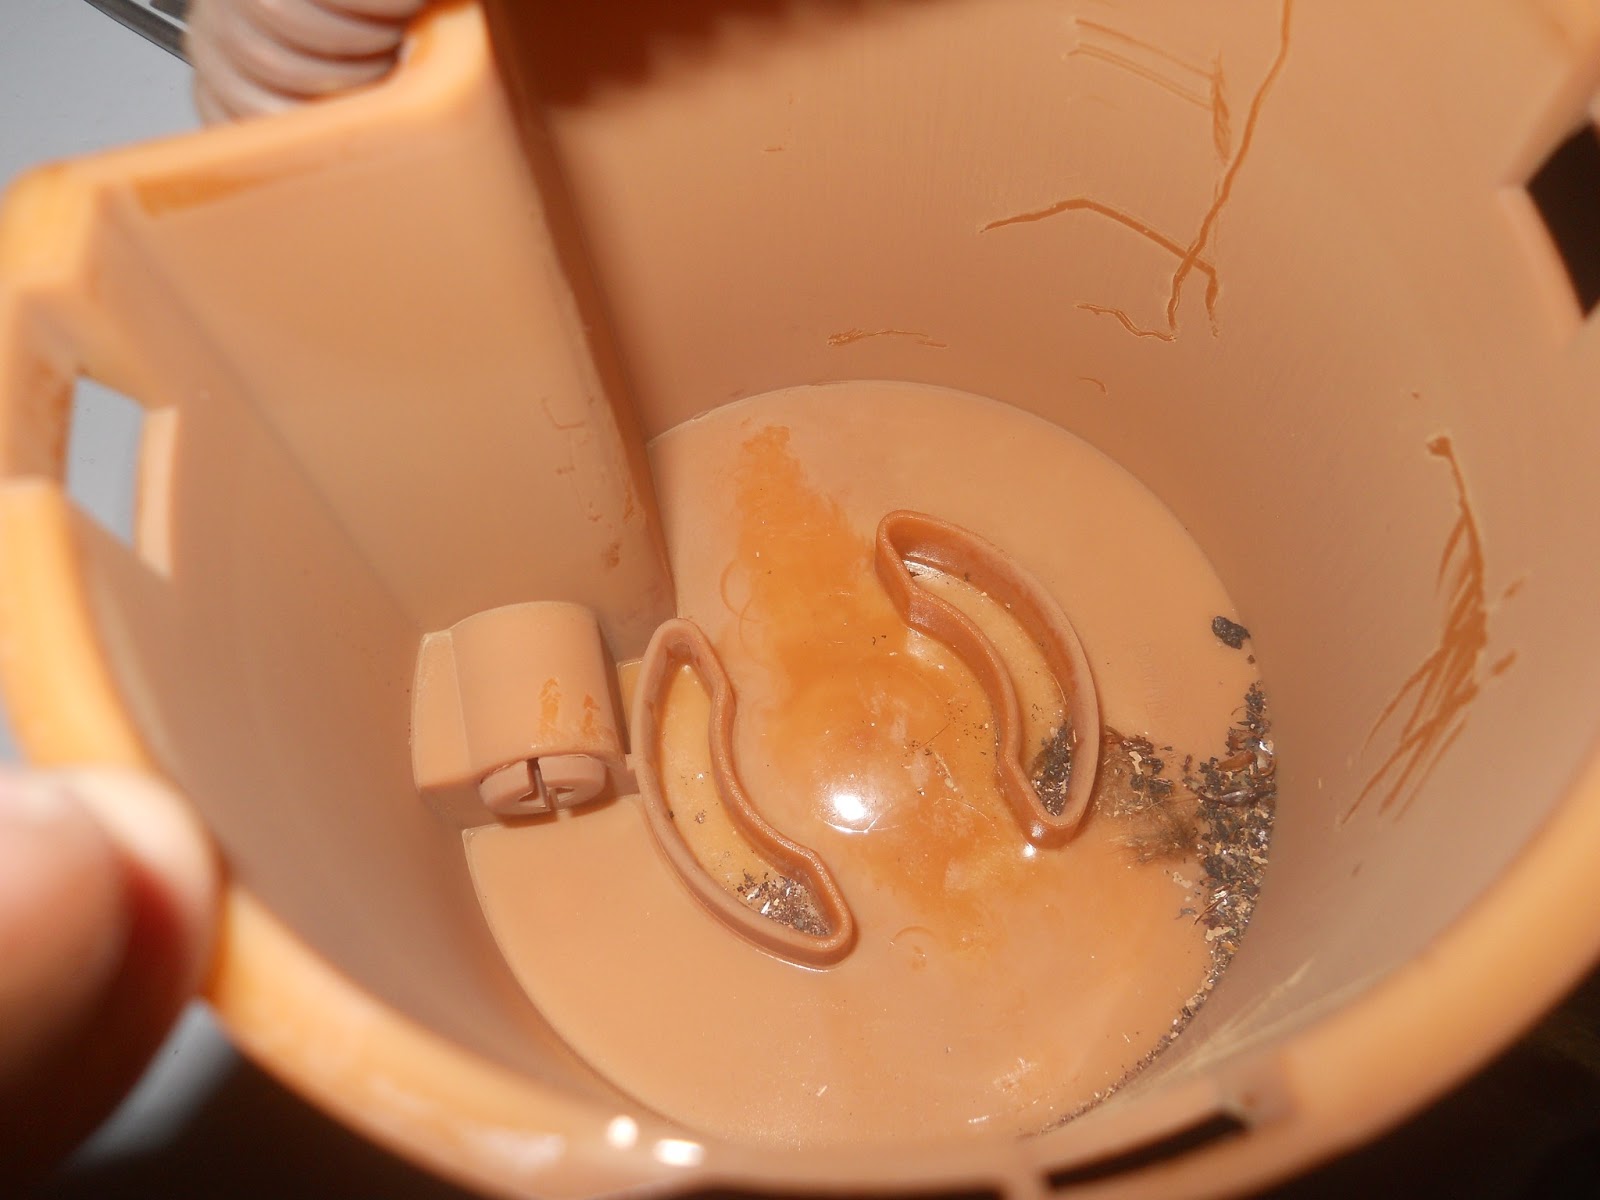
Look at the debris in the bottom of the “starvation tank”. 

While I was sourcing a new part I just placed the access panel over the hole and replaced the carpet.

I ordered a new pump from Atlantic British and paid the up charge for it to be delivered in 3 days. 300$ for the kit. I originally intended to repair the old one. I talked myself out of that due to my schedule this week. Two assignments, a test, and the weather (four inches of rain in four days, thank you God.) made this an easy decision. I will rebuild the old pump with a replacement pump. I expect it will cost less than a hundred dollars to replace the pump portion.

With the new pump in hand, I went about installing it.

I placed the rubber seal in the tank and then fitted the pump through the seal. It was a tight fit. You then screw down with the red securing ring. Use the screwdriver and rubber mallet. Take it easy and take your time. No need to use the mallet like Thor uses Mjölnir (Wikipedia).
Connect the power connector pig tail thing they send in the kit. Reconnect the fuel lines. 
With the access panel still open, I started her up. I watched for fuel leaks. NONE. So I buttoned everything back up.
I drove the Range Rover over to Braum’s in Tri-City to have ice cream with my grand kids (and my daughter and son-in-law). I had a single dip of chocolate chip on a sugar cone. Yummo.
The Range Rover ran great. I noticed the fuel gauge had me at a quarter of a tank. With a new pump and new indicator I thought it prudent to fill the tank and make sure the gauge was working correctly. It was all good and showed a full tank.
I pulled over in the parking lot of the Chickasaw Nation Training facility. This is the old T.G.&Y. building. I really loved that job. I called JagGuy and chatted about lots of stuff and he looked up replacement pumps will we gabbed. I’m lucky to have him, both as an automotive resource and friend.
As I was chatting I saw the state bird of Oklahoma, a Scissor-tailed flycatcher fly by. Spring has officially come to Oklahoma.
On the Difficulty Scale I’d rate this a 2. It is not difficult, just a tad fiddly.
Thank you to Justin and Lecia for letting me maroon the Range Rover in their driveway. Thank you to Lecia for helping me check for electrical continuity by turning the key while I was in the back.
I am heading to Fort Washita for the annual rendezvous this weekend. Get out and support your local historical society this spring.
Thanks for reading and Happy Rovering.

Delinquent Posting (Post #325) 4/2/2013

Sorry for the delinquency of my posting. I have been busy I swear it! You know the Range Rover is marooned at my daughter’s house. It was initially thought to be a coil issue. While the coil was probably a problem, but it turns out to be the fuel pump.

I know! How could I miss that? Well I didn’t. The three things you need to make a Land Rover are AIR, GAS, and SPARK. Contrary to popular myth MAGIC has very little to do with it. If you break it down to those three components it is really quite simple to figure out why your Land Rover stranded you in the parking lot of a rural post office.

I diagnosed the spark as “failed”. It was. It was so weak it was probably going to give me a problem in the near future. That is sorted out with the new Flamethrower coil.

I called JagGuy and confirmed how the fuel system worked. So it’s the fuel pump. I am really wanting to repair the old one by swapping out just the pump. For convenience I will replace it with a replacement pump. I will repair the original by rebuilding it. That way I will have an on-the-shelf-spare.

Sorry no pictures. I have a test and an assignment due on Wednesday. I don’t have the time to play right now. I gave myself a break on Saturday and Sunday. Lately it seems I’ve been exhausted for no apparent reason. The rest was appreciated greatly by this old sack of bones.

Next week will have two posts, one to repair the Range Rover and the other the results of the Fort Washita Rendezvous which is this weekend. April 5-7.

Aaron checked in and left a funny email.

“I thought of you the other day.
I changed the oil on my 93 Range Rover Classic and I didn’t even burn my eyebrows!”

My reply,

“LOL. Eyebrows are over-rated.”

Thanks for checking in Aaron, it was good to hear from you.

Today was April Fool’s Day. I pranked NO ONE.
It was also Killer Dave’s beautiful wife Elizabeth’s birthday. Happy Birthday Liz.
It was also one of my Marine brother’s birthday, Happy Birthday Wally Beddoe. He has a Marine-centric blog (http://www.usmc81.com/) which is quite well regarded in the blogosphere.

Thanks for reading and Happy Rovering.