
I’ve gotten several requests for the details of the fan resistor for the Range Rover Classic. The latest one came in from Patrick in France. Yes, that France, the one in Europe. He is the happy owner of a 1991 Classic Vogue SE with 4 doors and the 3.9 not catalysted engine in magnificent Beluga Black. Sorry no pictures.
His problem is the same as several of you had last winter that of trying to find a heater resistor to purchase. They are often difficult to find. He sent me a picture I posted the last time I replaced mine. Unfortunately for him the picture was not high enough resolution to make out the part numbers. You see, he is keen to make his own.
So I went out and removed mine and took down the details and took some photos.
Getting to it is relatively simple.
You remove the louver from the passenger side intake. It just takes a flat-head screw and a gentle touch. Remember your plastic bits are 20+ years old and are prone to breaking.
Once it’s out of the way remove the filter material. I have replaced mine with some air filter material I picked up from one of the big box stores. It’s cheap and sturdy.

I had to drill out the rivet. You can see it on the far side in the picture below. That was easy enough. Yours may also be riveted. Whatever, you need to be able to rivet it back or use a screw.
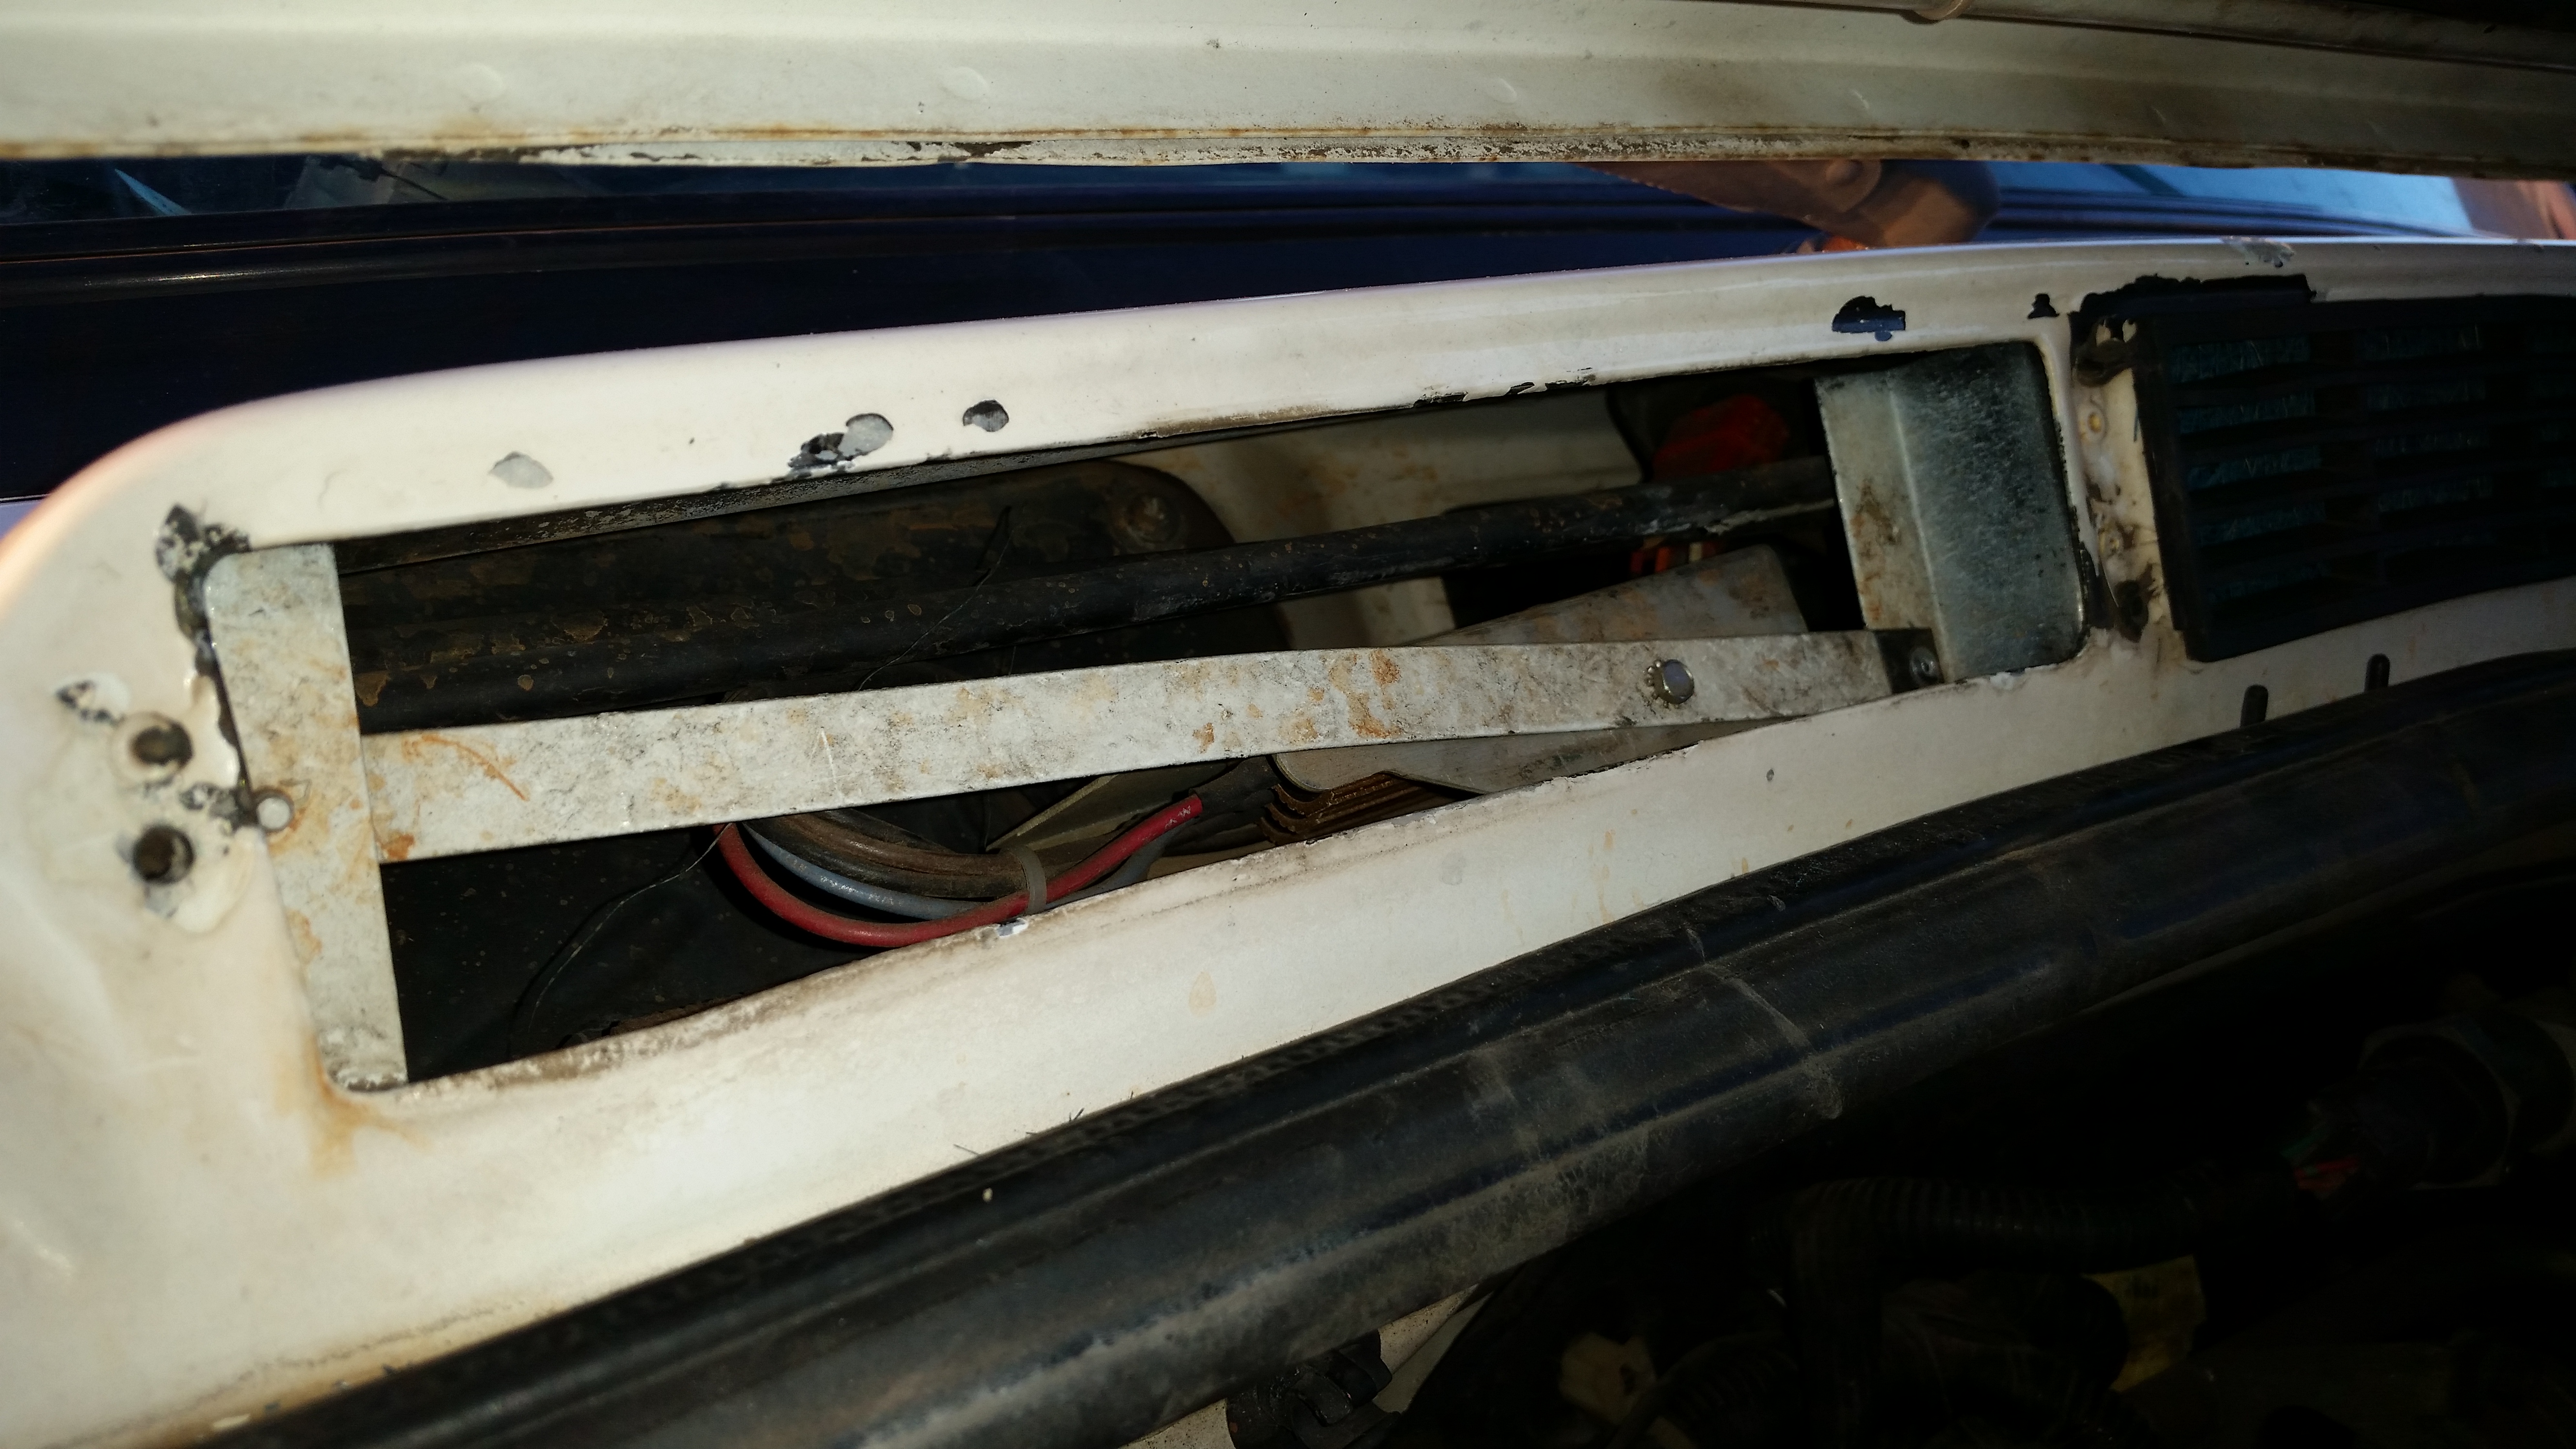
And you have the resistor…simple.
The official part number for a resistor pack is PRC 8010.
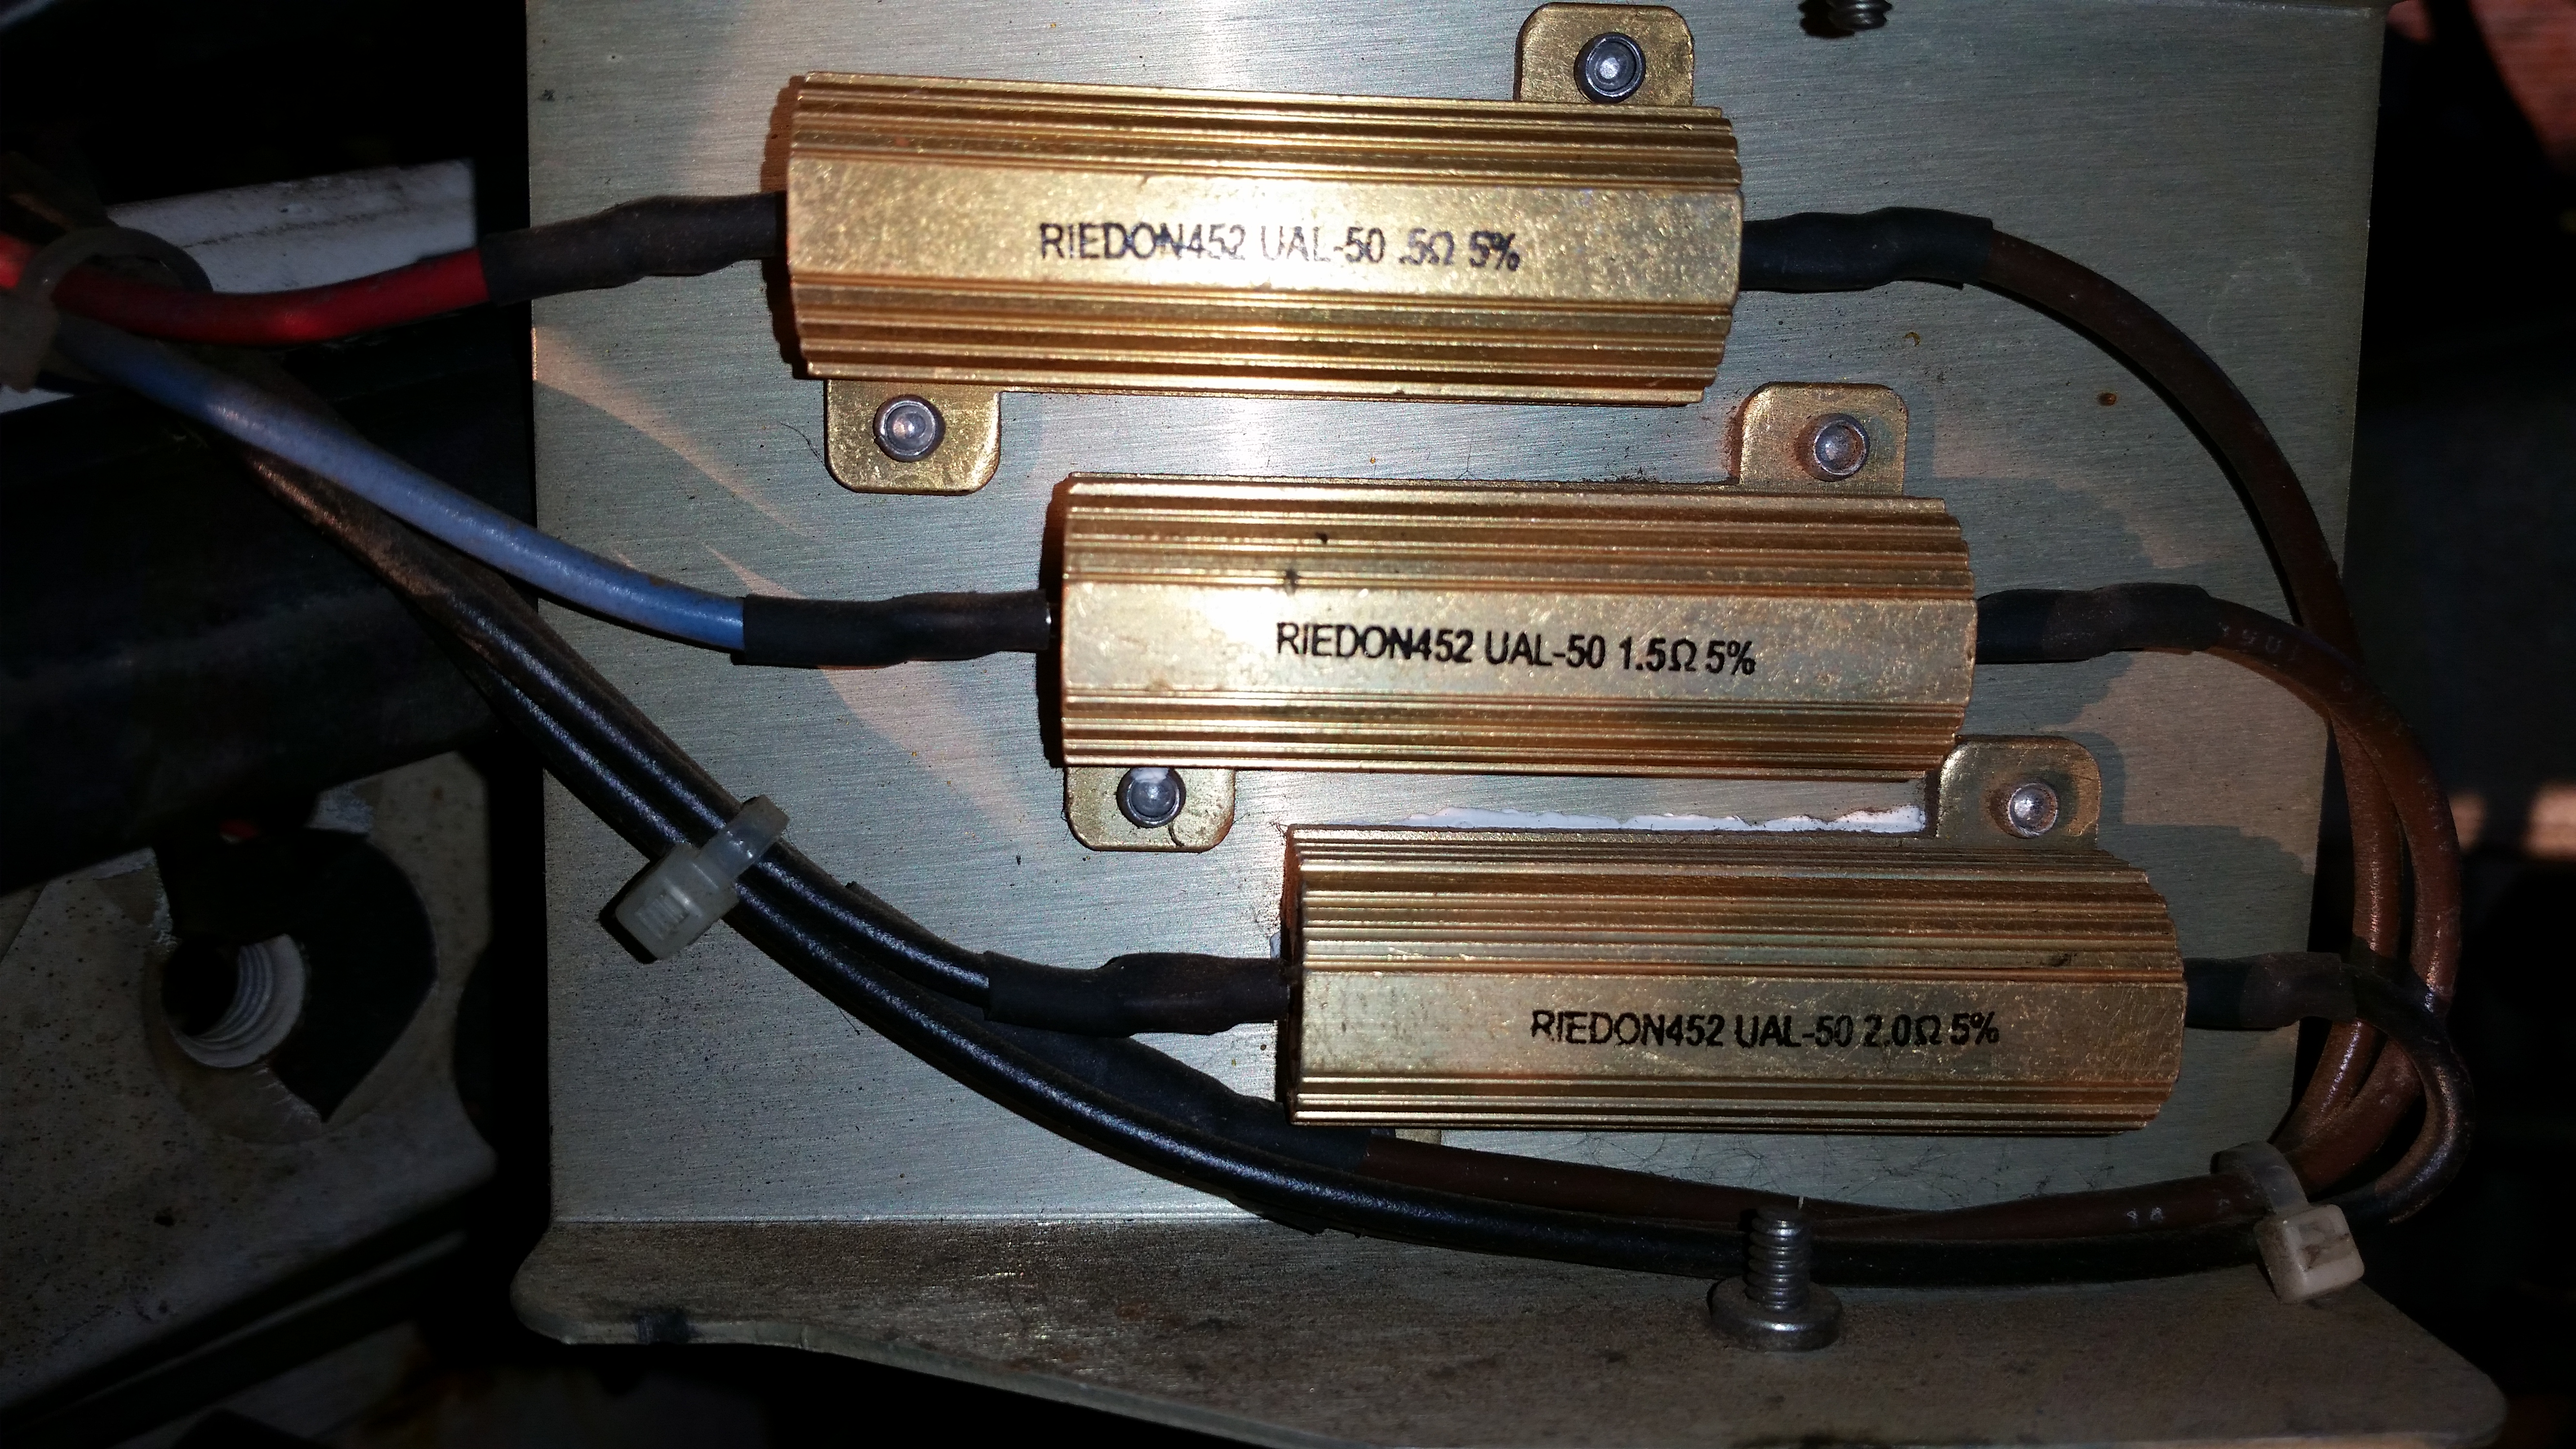
The part numbers on the resistors are…
RIEDON452 UAL-50 .5Ω 5%
RIEDON452 UAL-50 1.5Ω 5%
RIEDON452 UAL-50 2.0Ω 5%
This one is an Atlantic British version. According to their website as of today March 10, 2015 they are in stock.
http://www.roverparts.com/Parts/PRC8010
This is cost prohibitive for Patrick due to the crappy exchange rate of dollars to euros, shipping, import tax, duty tax, it road in the back of a truck tax, more than one person handled the package fee, and five more taxes we’ve never even heard of I’m sure. SO, I also found them at Island 4×4 in the United Kingdom, currently in stock. Hopefully this won’t be so bad.
http://www.island-4×4.co.uk/heater-resistor-britpart-da4178resistor-p-7373.html
So if you are keen like Patrick you can source the resistors from the interwebs for just a few dollars and if you are handy with a soldering iron you can put your own together.
http://riedon.com/resistors/view/aluminum-housed-wirewound-resistors-ual
I wish you the best of luck getting a ready-made one or making one yourself.
Merci beaucoup Patrick for emailing.
UPDATE:
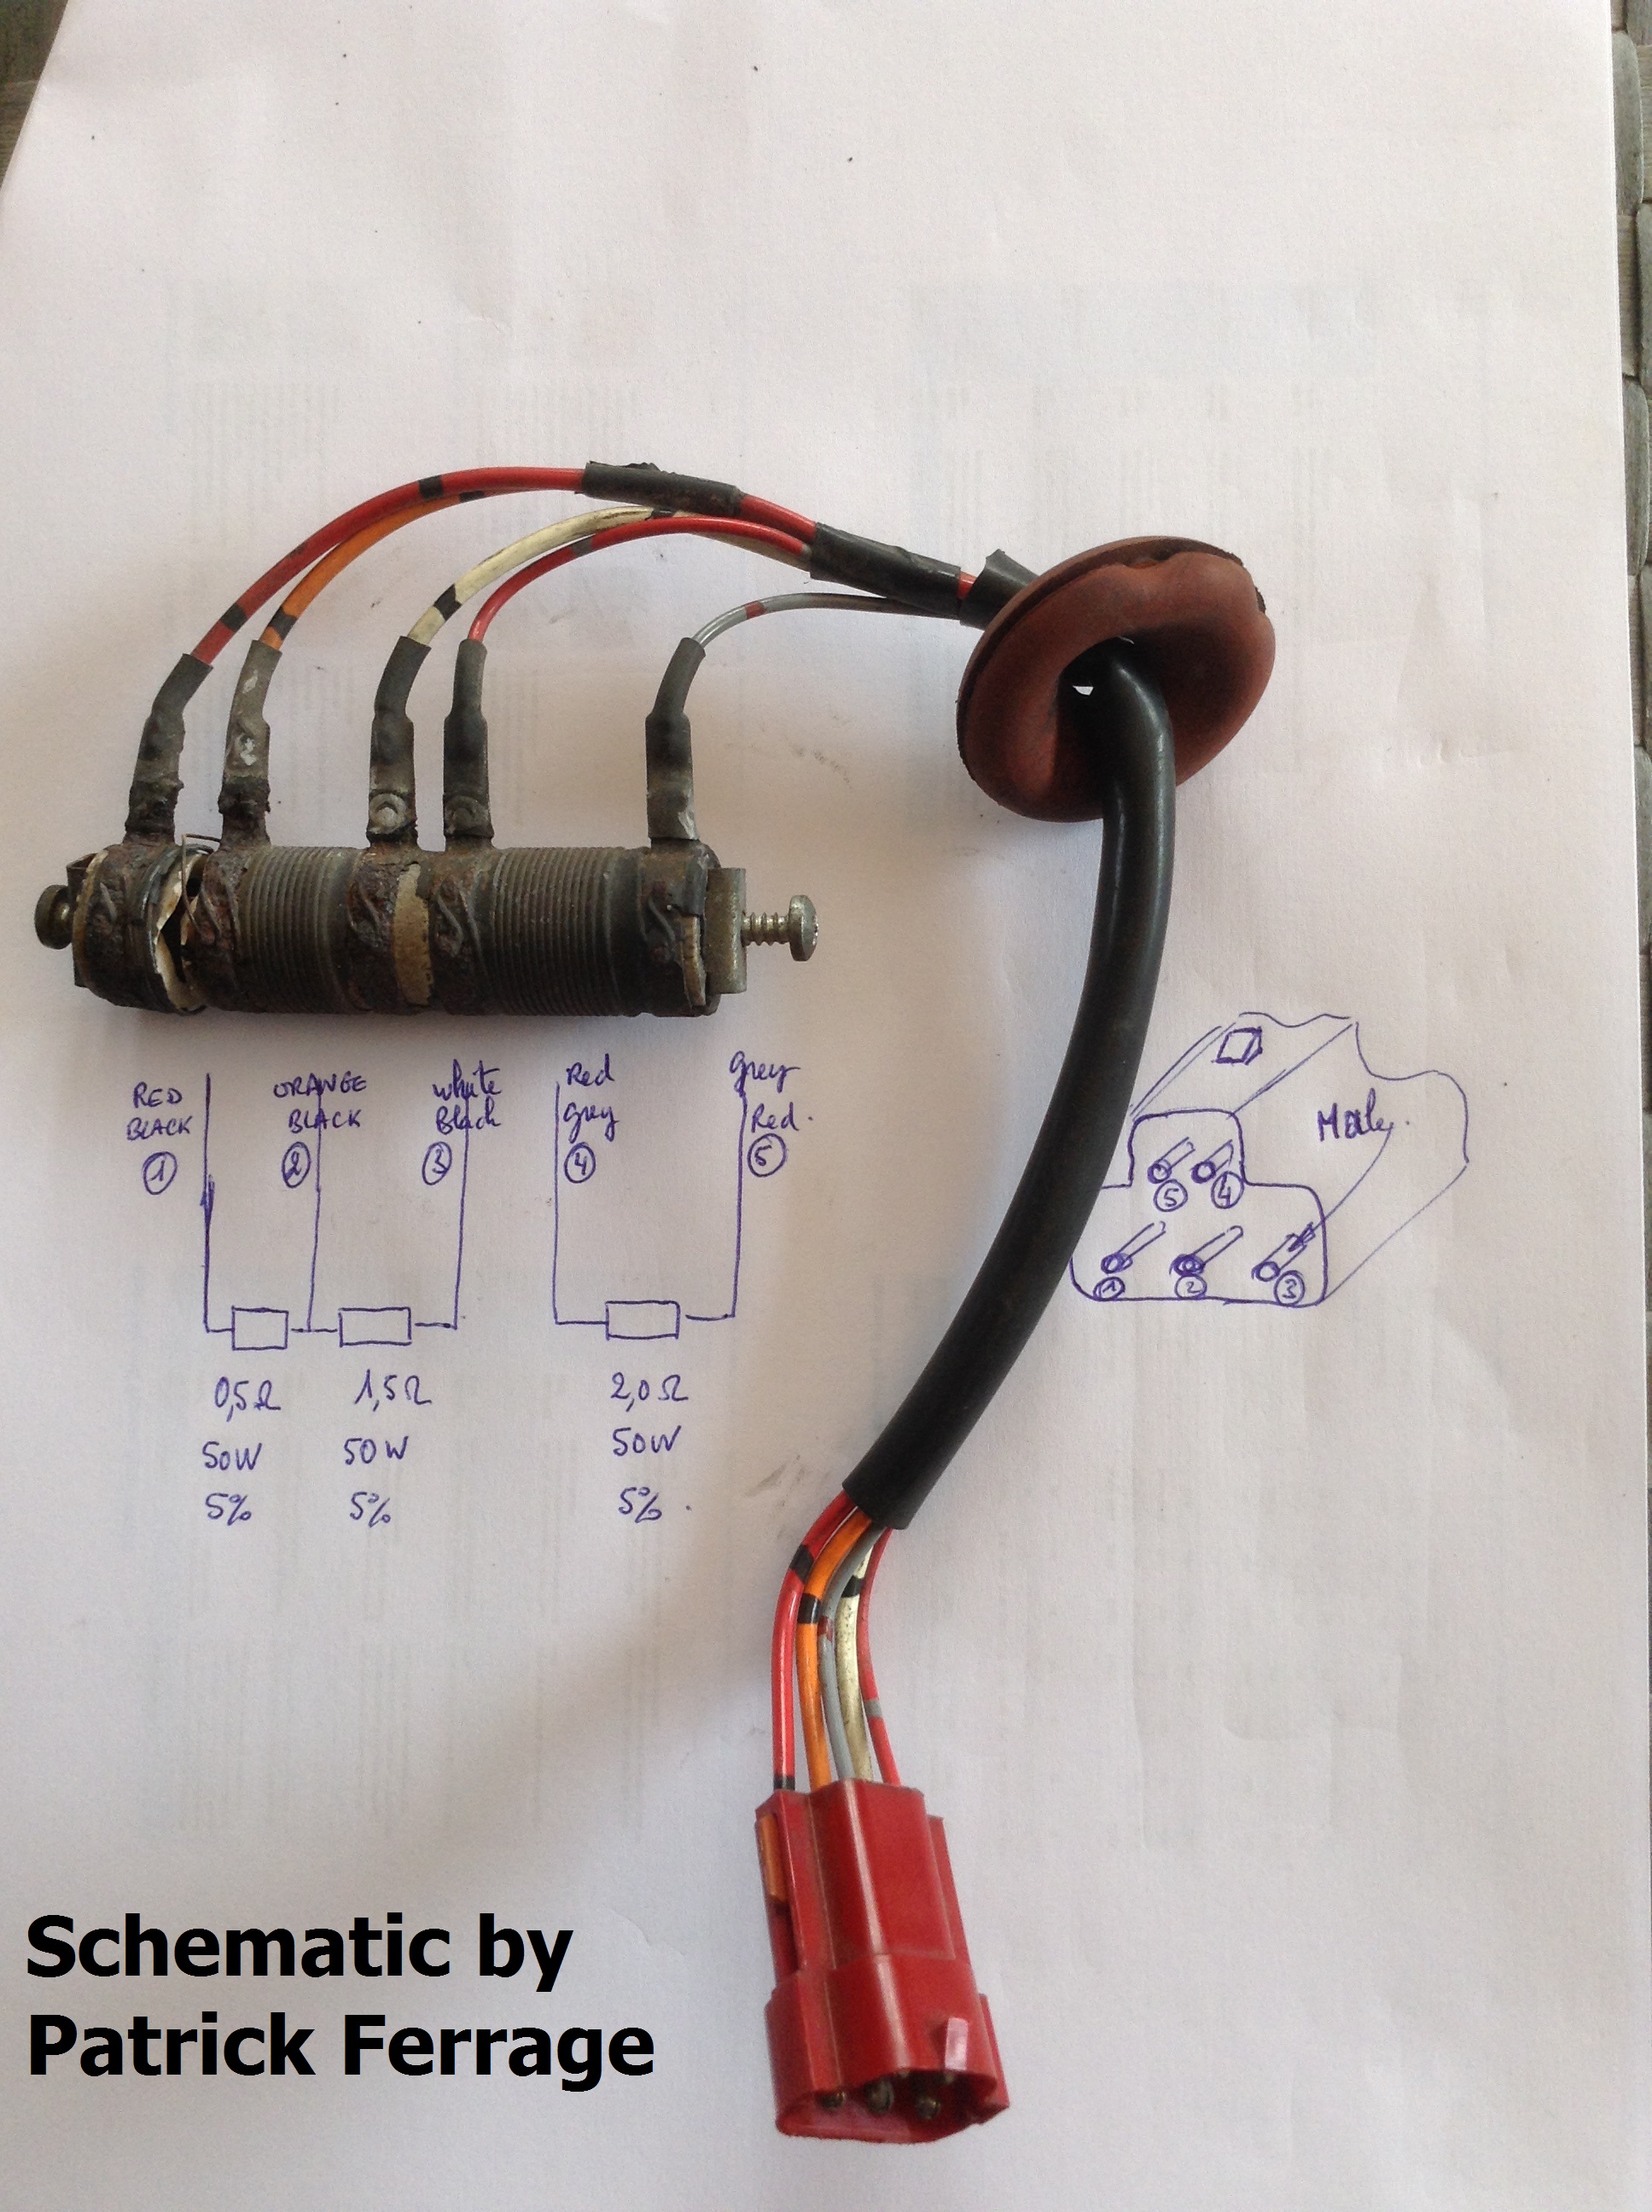
Patrick Ferrage emailed us a very nice drawing and schematic of the resistors and the wiring harness. This is top work and makes building one by hand a very simple matter. Once again thank you Patrick.
To the rest of you, thanks for reading and Happy Rovering.