Land Rover at Lowe’s and a New Muffler (Post #461) 3/11/2014

20140308_155449Over the past weekend I stopped at Lowe’s to pick up paint for my Coleman Stove Project which was part of my gearing up for S.C.A.R.R. When I came out this Discovery was sitting next to me. With the parking lot nearly empty parking directly next to me meant this guy must be an enthusiast. So I scribbled a note inviting the driver to check out my blog and to keep in touch as we were forming a Land Rover Club, Red Dirt Rovers, and invited them to check out our Google Community.

Later that day I got an email from John Joyce the owner of the Discovery. He has reached out to me with a couple of emails and I look forward to meeting him at S.C.A.R.R.

His rig looks well used. Seeing this Discovery next to me in the lot has told me I’m pretty sure if I ever get another Land Rover it will be a Discovery I. So much awesome in such a little package. Like anyone I’d love to have a classic Series 2a but for a daily driver that is probably not a realistic nor practical option. There’s more after the jump…

Power Steering Hose Trouble Part Duex (Post #430) 1/3/2014

I went out to find my power steering leak on New Year’s Day. It required me to remove the power steering fluid reservoir and several of the hoses. If you’ve ever swapped these hoses you know they come with a factory installed friction protector. It’s a simple piece of coiled plastic.

It is good for the accidental rubbing of the hoses. It will not protect you from any of the high speed rotating objects under the hood for any length of time. They are only plastic.

What they are also good for is HIDING where a leak has sprung in your hoses. Once the magical fluid in the hose escapes it is quickly held against the hose and spreads down (gravity) the hose fairly evenly. This also coats everything near the hose in fluid as well.

I noticed that the wetness of power steering fluid extended nearly to the top of the low pressure hose. This had me worried that the reservoir might have a crack or break. The amount of fluid I’ve been loosing is actually puddling up on the drive at night. So this on the surface seemed pretty bad.

I pulled the reservoir and it was undamaged. I cleaned it up with an old wash cloth and set it aside.

I then went to inspecting the hoses. The high pressure hoses all looked dry. I’d replaced these in the past and I had purchased new ones from Atlantic British thinking the worst. I took the low pressure reservoir to pump hose off from the bottom. In the removal process I noticed the hose was not tightened very well at the pump.

I remember installing this hose and what an absolute joy pain in the ass it was to reach up and tighten the hose clamp on the hose at the pump end. It came off the bottom of the pump without me even getting to the hose clamp. I’m going to go out on a limb here and say some of the fluid leaking could be due to the looseness of the hose clamp. I know it’s a stretch, but I’m just going to put that out there.

The reservoir end was very wet and I am not entirely sure the hose clamp was functioning within design specifications on that end either. I took the hose and cleaned it up. I did a visual inspection and found what you see in the picture above. A rub spot and a couple of holes.

I couldn’t determine if any fluid escapes from that area. There is no reason to put that hose back in there. If you recall that hose is by my reckoning the cheapest replacement part available for a Range Rover Classic. I will stop by the John Deere dealer on the way home and get a replacement length of hose. I will also stop and get some NEW hose clamps. You’d think I’d learn not to re-use hose clamps but apparently I’m hard-headed that way.

I’ve got a few more items to get and then I’m back on the road. Like other projects when you start one you find another to sort out.

Thanks for reading, don’t re-use hose clamps, and Happy Rovering.

Electrical Gremlins (Post #331) 4/20/2013

I’ve resolved that this weekend will be mostly electrical in nature on the Range Rover. This is not my favorite thing  to fix. I took electronics at Mid-America Vo-tech school when I was still in high school. I was only mildly interested in it. My dad was an electronic technician for the Federal Aeronautics Administration (FAA). He learned it in the Navy and wanted me to have the same life. That was not to be. I didn’t fall far from that tree, I went into the computer industry.

I have quite a list to address this weekend:

  • Sunroof
  • ABS Sensors
  • Utility light
  • Clock

Those are the electrical issues. This is not to mention my radio is still not working. But that is another post. I decided to start with the sunroof tonight. Mrs. OkieRover was going out to a Pampered Chef party which left me at home to drink beer work on my Range Rover.

I opened up the PDF of my workshop manual and found the location of the sunroof’s relay. I have already tested for power at the switch. The fuse is good and I’m pretty sure now it is the motor. I think I have a few more things to test but I’m mostly convinced either the controller is dead or the motor.

Next up was the ABS sensors. I mentioned in an earlier post that I wanted to test each one for conductivity. I did that tonight. I required me finding the ABS sensor plugs. The fronts are located inside the engine bay on the fenders. A quick pull and measure, done. The rear are located on the bottom of the bed just above the rear axle. I pulled those and measured, done. All four have the same value when run through the ohm meter. As does the other end when checked toward the computer.

That’s mostly disappointing. As I was hoping for a Sesame Street easy, this one is not like the others and I could swap it and my life would be ABS complete again. The second thing to test is that the sensors are fully seated against the ABS rings. This requires a dowel rod and hammer to knock the rear sensors back into place. When you start rolling the sensors are set at the correct distance and should start functioning correctly.

I haven’t got her rolling yet so I’m not sure if this made any difference. Hopefully I’ll find its all good. I said hopefully, I’m not insane, I know it won’t, but until tomorrow there’s still hope.

Not excited about the blue plastic dust shield.

Having had so much success with my projects so far, I thought I should do something I knew would be completed. I decided to fit the new Terrafirma steering damper. That was pretty easy. The old Bilstein I bought in 2000 was probably ready for a swap. If you are thinking of this job, its a One on the Difficulty Scale.

Tired Bilstein

I then looked into the Utility light under bonnet. I went to a breakers yard in 2001 and parted a light off of a Chevy Suburban. It’s a low watt light with a long extension cord. For some odd reason this “amazing piece of American technology” (end sarcasm) had stopped working. I checked all the wires back to the battery and everything was in order.

Mounted near the radiator overflow tank.

From the driver’s side across the top of the engine.

 This left just the light itself as the problem. I tested the bulb and concluded either the cord or the switch had failed on the light. The cord was the less likely so I pulled the light off and decided to fix the switch. The switch it used was a simple friction switch. Turn the switch 90 degrees and the a wedge presses a tab against another tab for contact.

I cut the plastic casing away and found a very gunked up contact point. I cut away more and then fitted a proper toggle switch. I soldered it all up and now have a working light again.

Tomorrow I’m out to Newcastle to see a T-ball game and then back in the garage.

Take a minute and visit this clever fellow’s site (http://www.mez.co.uk/lucas.html). He has several funny jokes about Lucas, The Prince of Darkness.

Thanks for reading, and Happy Rovering.

Steering Issues Solved…For the Most Part (Post #297) 8/19/2012

 If you recall, I left off with the last post with a cross-threaded power steering hose. Sorting it out would take a few phone calls and a lot of hope.

First thing I needed to do was find a tap to correct the threads I managed to mangle. There are LOTS of types of taps. And there are lots of names for those taps. It seems everyone has their own name for each type of tap. I’m sure it varies by region too. I did not know that before this project. I also did not know the name of the tap I needed. JagGuy told me I might need a bottoming tap.

Bottoming tap: 1-2 lead threads ground. Used for continuing to thread a blind hole close to the bottom of the hole. It’s difficult to start threading a hole with this tap.

Looking at the taps its easy to see the bottoming plug was best. Why? Well that is a good question. There are only 5 or 6 threads in the hole. If you use a taper tap you might not have enough threads make contact. Same issue with a plug tap. I needed the bottoming tap.

As it turns out, that was pretty easy. I just visited the amazing J&E Supply and Fasteners. I have sung their praises before. Finding the bolts and nuts for this project required me to visit them twice. Twice because I didn’t have a list of all the nuts the first time. The tap had to be a blunt or

In any event I took the “test fitting” with me and we matched it up to a tap. I was shocked they had it, but they did. I was so stoked or chuffed or happy, maybe all three at once. This tool saved me several hundred dollars American in replacing the steering box.

Having NEVER successfully tapped anything in my life…I chose to call JagGuy and ask for some sage advice. he was full of all kinds of advice for this. First bit of advice, pull the steering box. It turns out I probably would have been able to tap it in place. But, pulling it made it easier and I was able to clean it up while it was out. Second bit of advice, keep the shavings out of the unit.

To do this he suggested dipping the tap in grease. The grease captures the shavings and you just have to wipe it off to eliminate the shavings. This was easy enough.

With the advice in mind, I lined up the tap, and started it and gave it a turn. I backed it out and turned it again, like I had seen on countless TV shows. I turned it all the way to the stop and backed it out. I took the sample fitting and screwed it in. My awesome neighbor Mr. Fisher had walked over and was witness to the successful tapping. I have never been so excited. This was really awesome.

I took the new hose and threaded that as well. I was convinced now that it would not leak and I was ready to clean it up and give it a coat of paint.

Following my habit of painting everything I pull off the Range Rover and replace I gave the steering bits a couple of coats of primer gray.

I managed to get her all together. I filled her with power steering fluid. I turned the steering wheel to the bump stops in each direction three or four times to clear out all the bubbles. I saw that on the TV as well, in fact Mr. Edd China from television show “Wheeler Dealer showed me that.

Okay, now that the steering box is all back together. Where am I on all this? As it turns out the steering box probably has some damage from running with low fluid. There are “spots” when I turn the wheel where I get some negative feedback from the steering. It is either this or an in accurately aligned steering shaft. The shaft has two universal joints and if you don’t have it “just right” it binds a bit. I might be having this. To sort this out I will have to get back under the hood and see if I can adjust the bind out.

On the OkieRover Difficulty Scale, this job is a three. I say three because the job is actually removing the steering box. So if you are going to swap your steering box this is a difficult job and there are lots of things to get back in place correctly.

Thanks for reading and Happy Rovering.

Steering Nightmare (Post #296) 7/8/2012

I recently purchased new power steering hoses. The pressure side of the steering assembly is plumbed by two hoses that form a “U”. The hoses allow for the flex between the steering box which is mounted to the frame and the power steering pump which is mounted to the motor.

It’s usually an easy job. I’ve replaced the hoses once before. You get a little oily but over all it is not that bad. This time was different.

I got the old leaky hose off and was ready to put the new hose on. I lined it up and wrenched it down, or so I thought. I filled the reservoir and watched the power steering fluid pour out and thankfully into a pan I had down. I was pretty upset about this. First it was messy and second that fluid ain’t cheap. I took the hose off and began to investigate.

I looked at the fitting and as sure as rust will find you Land Rover, it was cross threaded. I tried to thread it again but it was a no go. I tried filing the fitting’s thread so they would turn with out cross threading but it wasn’t going to work.


I figured I would need to tap the hole and to do that the steering box would have to come out. I was not excited about that, but JagGuy confirmed it. I would have to pull the steering box.


There are a few things that need to come out before you can pull the steering box. You have to pull the shock tower and the steering shaft off.


To pull the steering box off you have four bolts that mount the shock tower to the frame. I removed the shock and then pulled the bolts for the shock tower. I should have left them in place because the steering shaft was difficult to remove with the steering box moving all around.


I pulled the rest of the low pressure setting hoses because they were in the way. You have to also pull the pitman arm. This takes a wheel puller.

Looking from the wheel well.

Looking from the front to the back.

This is a brutal tool and it releases a lot of energy when the pressed in wheel comes free. With everything disconnected I wrestled the steering box out.


I have it out and on the work bench. I attempted to thread the spare hose in the jacked up hole. It is really jacked up. It will have to be tapped out or (audible gasp) replaced. It costs 549.95$(US) from Atlantic British.com. Maybe after 193,000 miles I might need a new steering box. But I’m hoping this steering box will be able to be sorted out.

Like all things Land Rover…if you start working on something and things go wrong. You will experience more things that go wrong. This time I have a broken shock mount on the frame. How does this kind of thing break?

That is gonna have to be patched. I’m not sure if welding it as it is will fix it sufficiently. I’m thinking a rather large washer welded in place. Perhaps I’ll have the crack welded and a washer added and welded in place as well.

So I need to find a set of taps. Perhaps I should take the steering box to a machine shop and ask them to tap it for me. This might be the most expedient way to get it fixed.

I was surprised a how little rust there was. If you think about how much steering fluid has been leaking under there it would be nearly impossible for rust to form. There was some rust on the shocks but they seem to be working still. I’m pretty sure they could be replaced by now, they’ve been on the truck for 10 years. I need springs too but that will have to wait until I can steer again.

Thanks for reading and Happy Rovering.

UPDATE: I’ve done some Googling and found a rebuilt steering box for 265$(US) from Car Steering Wholesale.

THE CHEAPEST REPLACEMENT PART for a Land Rover EVER (Post #226) 12/11/2010

I started this Saturday out with a cup of hot cocoa in my Fox Battery 2nd Battalion 14th Marines mug and a hope of getting a lot done. The weather report had today getting worse as the day progressed. By the time I knocked off for the day to watch the Army / Navy (Go Navy) football game, the wind was gusting over 30 mph from the north. With an air temperature around 48(F) that makes for an unpleasant work environment in my north facing garage. At a minimum, I wanted to finish what I had started last weekend.

Last weekend I was supposed to be scraping deer hides with my friends. Those plans changed and I was instead home for the weekend. Mrs. OkieRover and I went to a friends house to watch the last Big XII championship football game between our beloved University of Oklahoma Sooners and their long time rival the Nebraska Cornhuskers. The company of my friends is always welcome and it was good to sit and all six of us fuss about the play calling in a tight game. The Sooners triumphed over the bug eaters from the North.

My friend had prepared quite a spread for us. We had chili, lots of finger foods, sushi, and lots of sweets. We enjoyed a bottle of wine and had a great night. Well I can say it started great and ended the next morning with me in the toilet with either a food allergy or food poisoning. I ate the sushi as I always do, but something served did not agree with me. I say food allergy because at one point my hands and feet and ears itched. In any event it ended my weekend early.

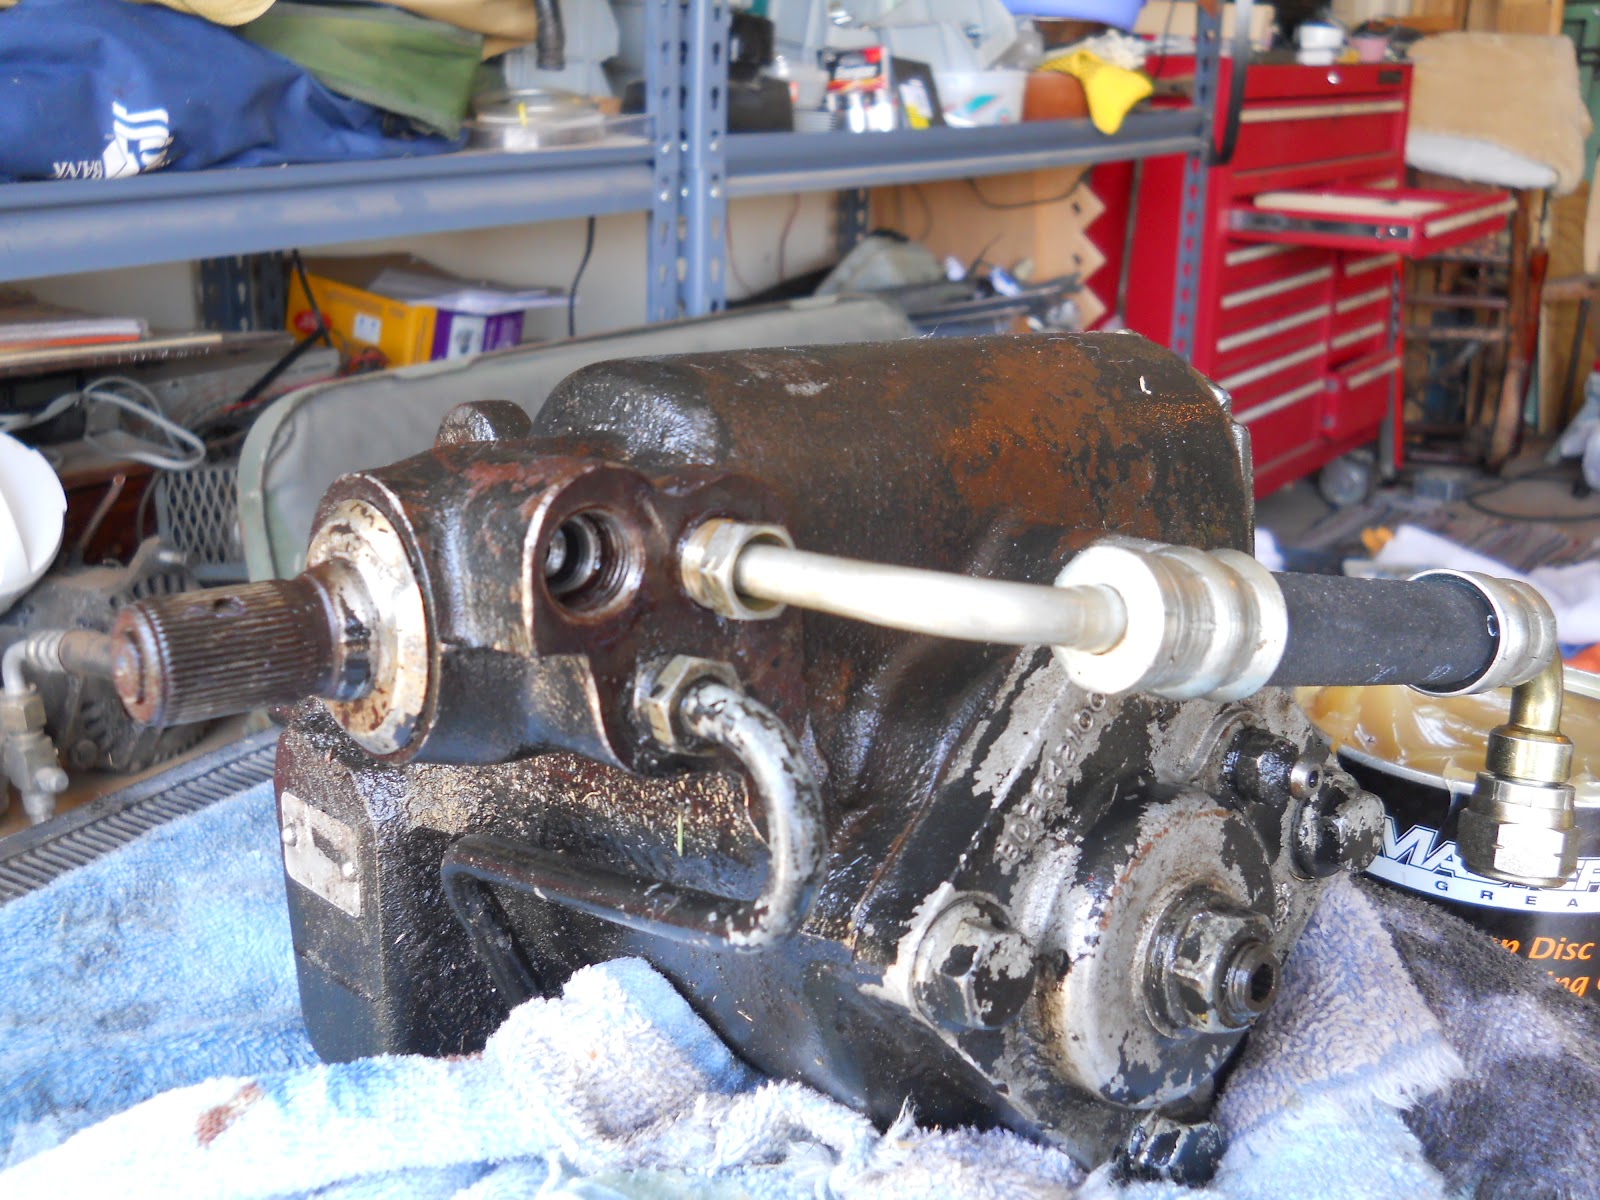
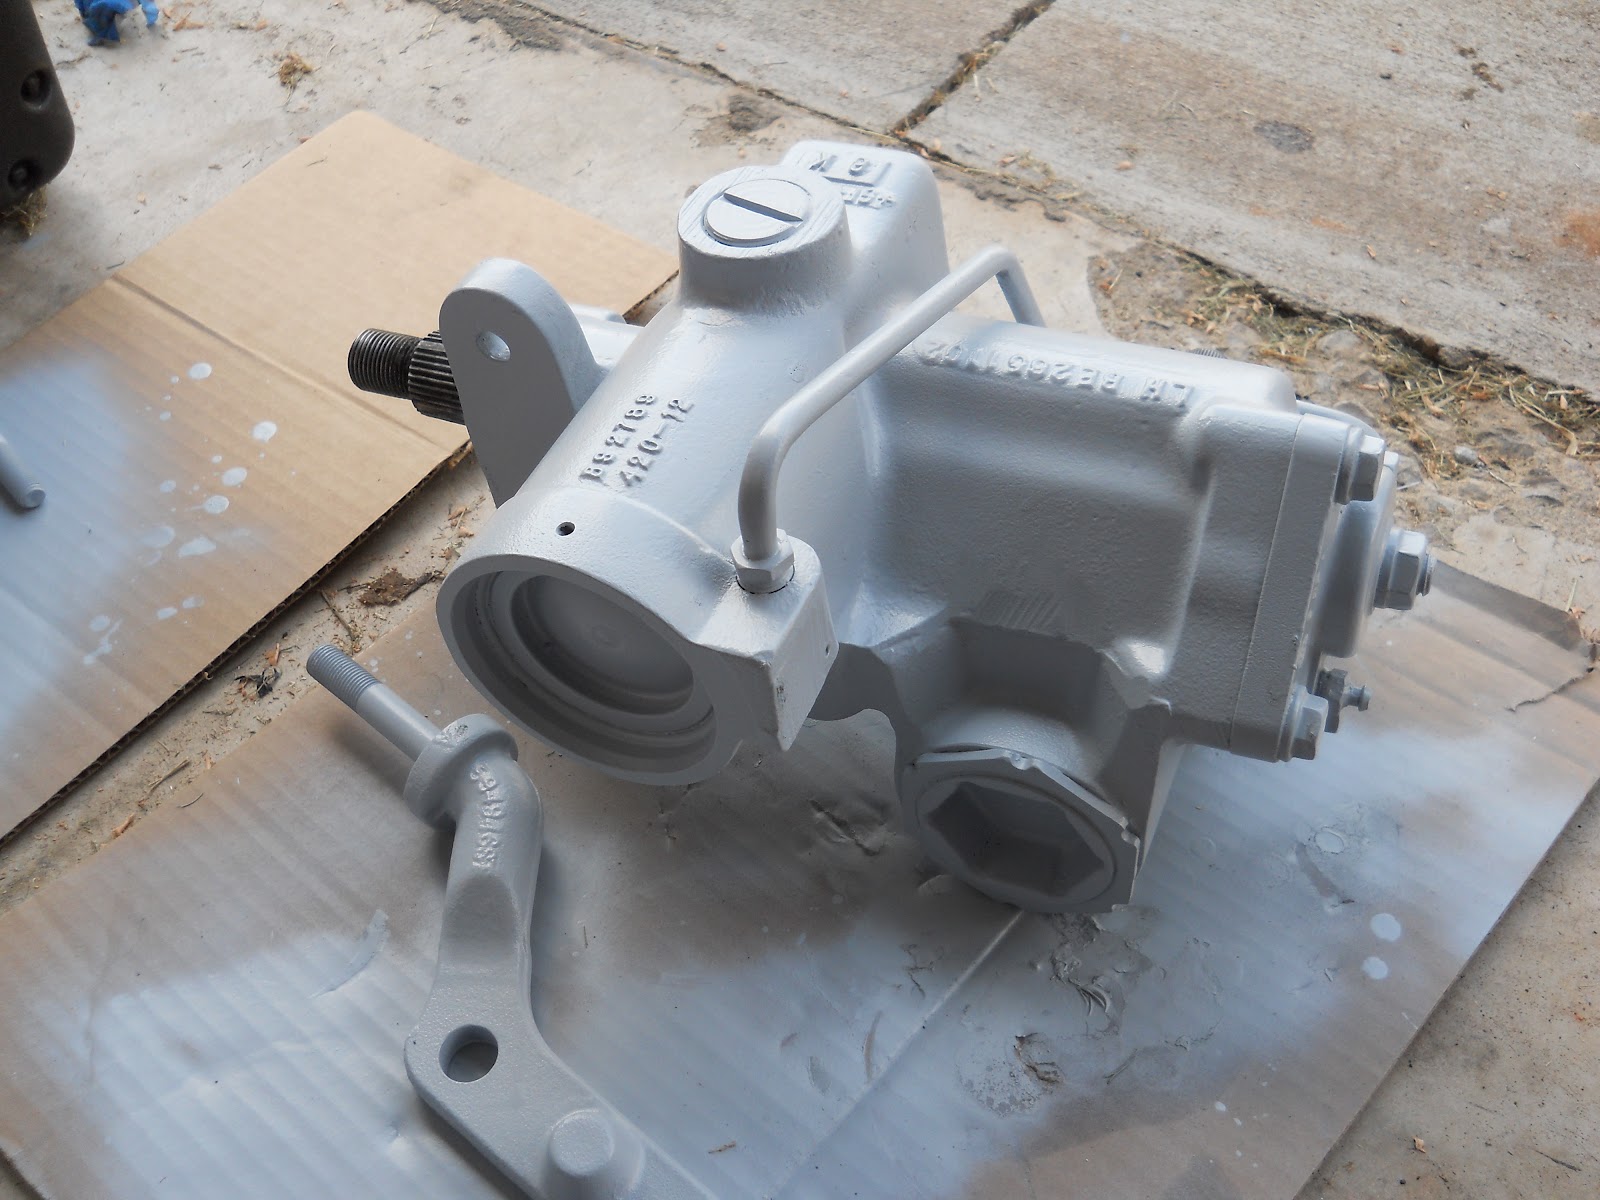
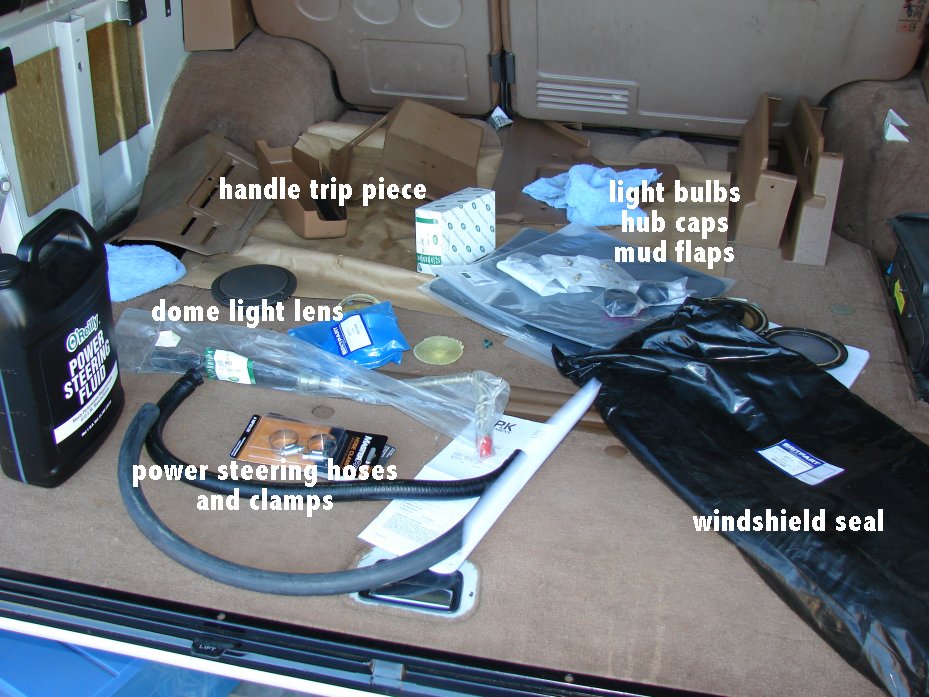
The day before all the parts I ordered arrived. I went through the parts and sorted them.

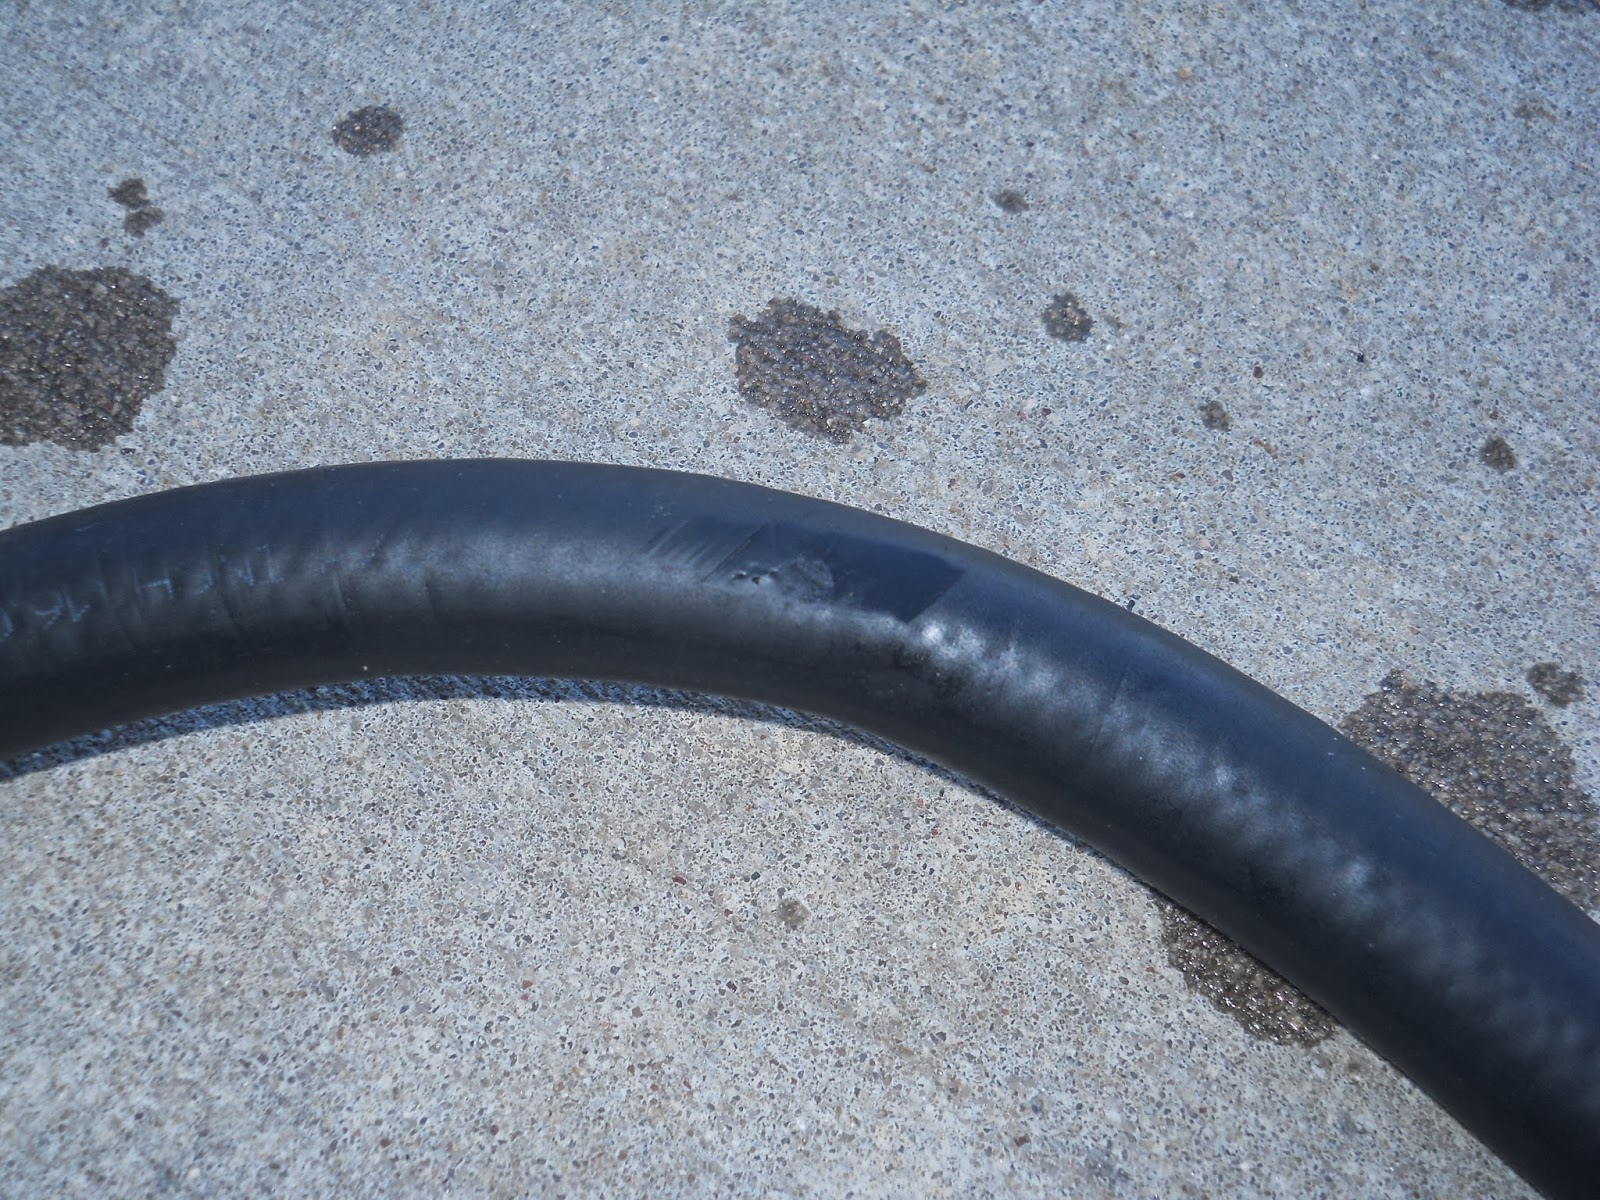
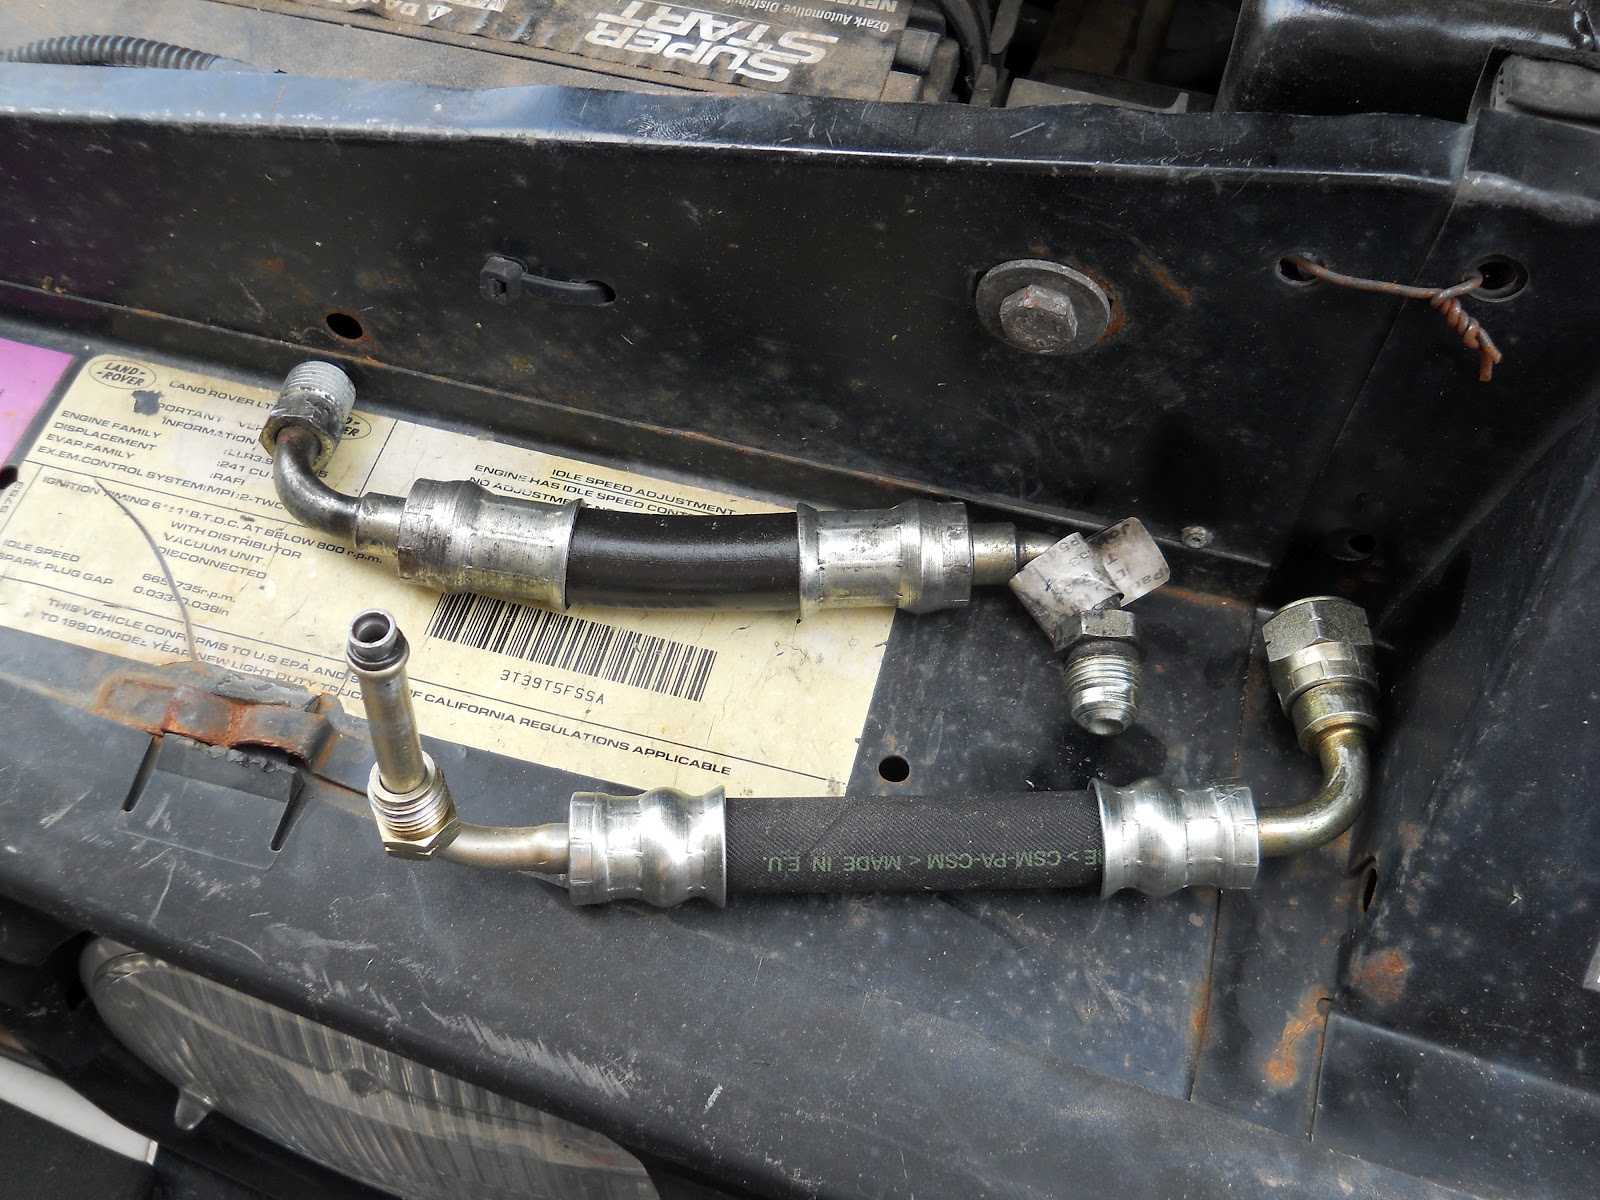
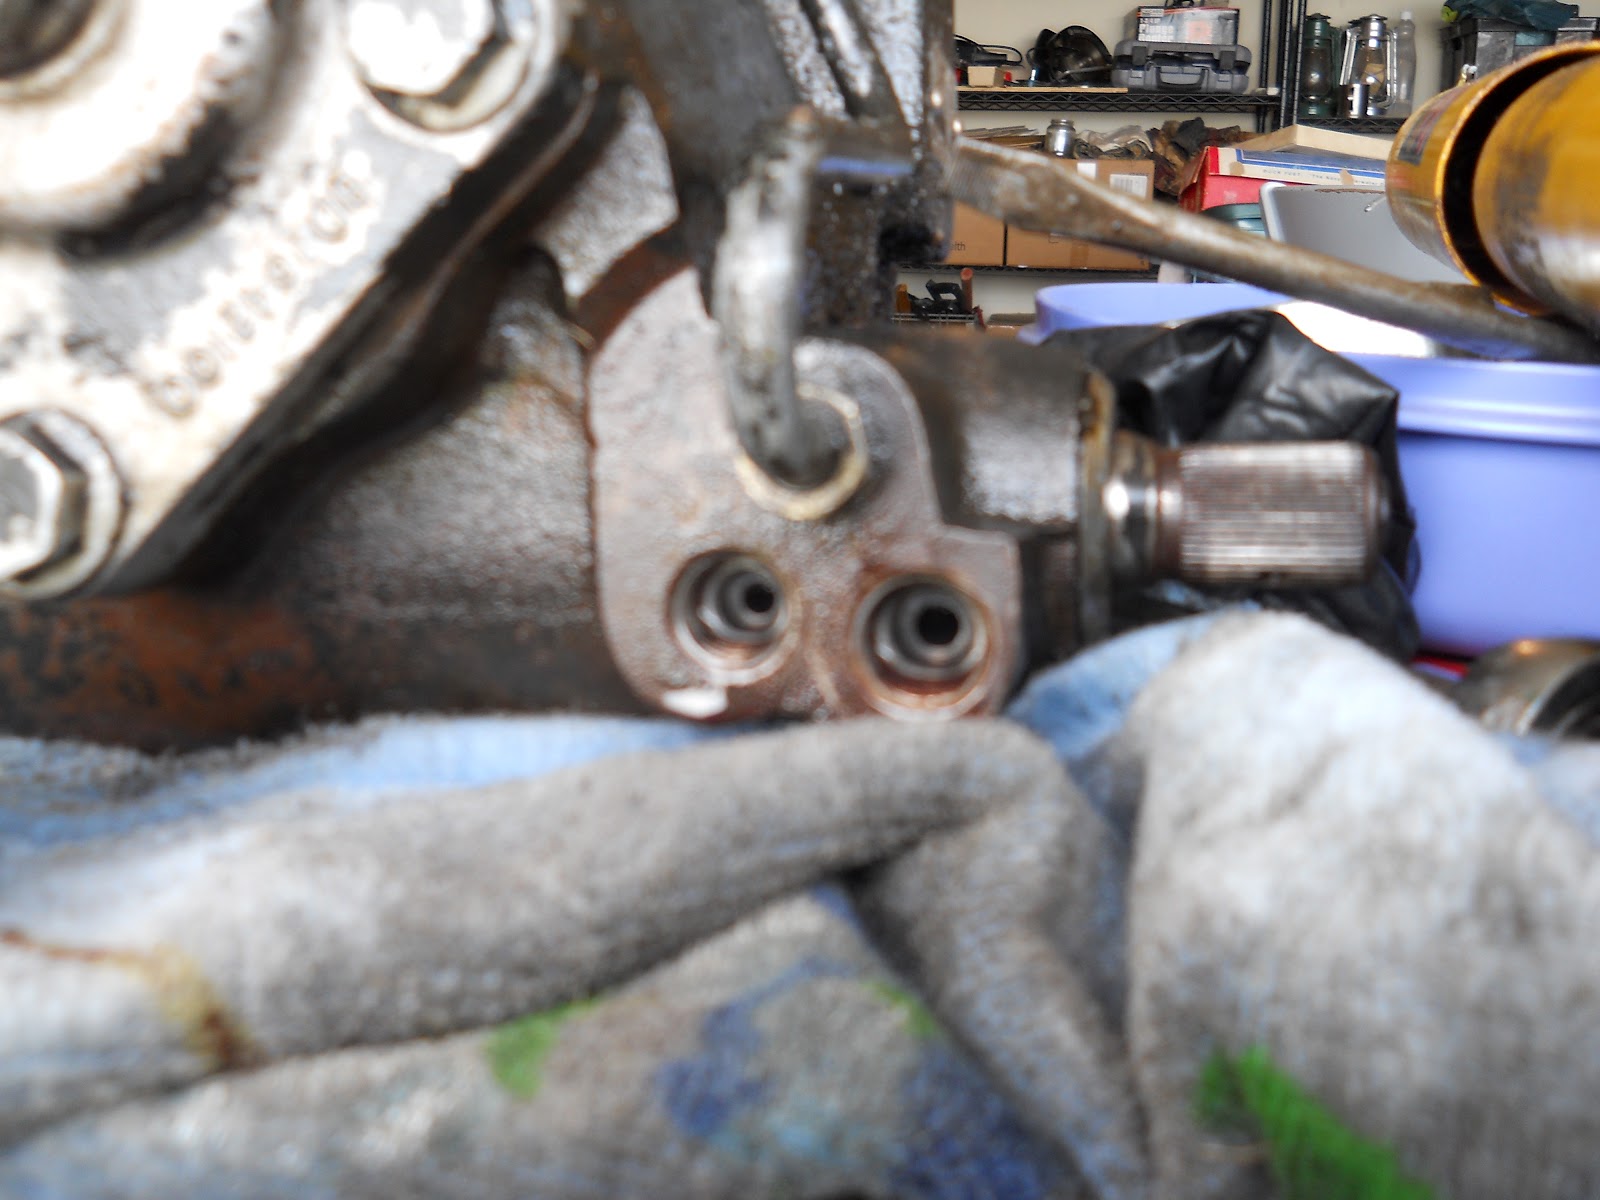
Before the evening activities I was able to go to O’Reilly’s and get some power steering fluid and spare hose clamps. I also asked about replacing the power steering hose that runs from the pump to the reservoir. It is just a length of hose, no pressure fittings. O’Reilly’s did not carry any hoses that would hold up to oils and together we came up with P & K Equipment. They are a John Deere (TM) dealer and do a steady trade in equipment and parts.

View Larger Map

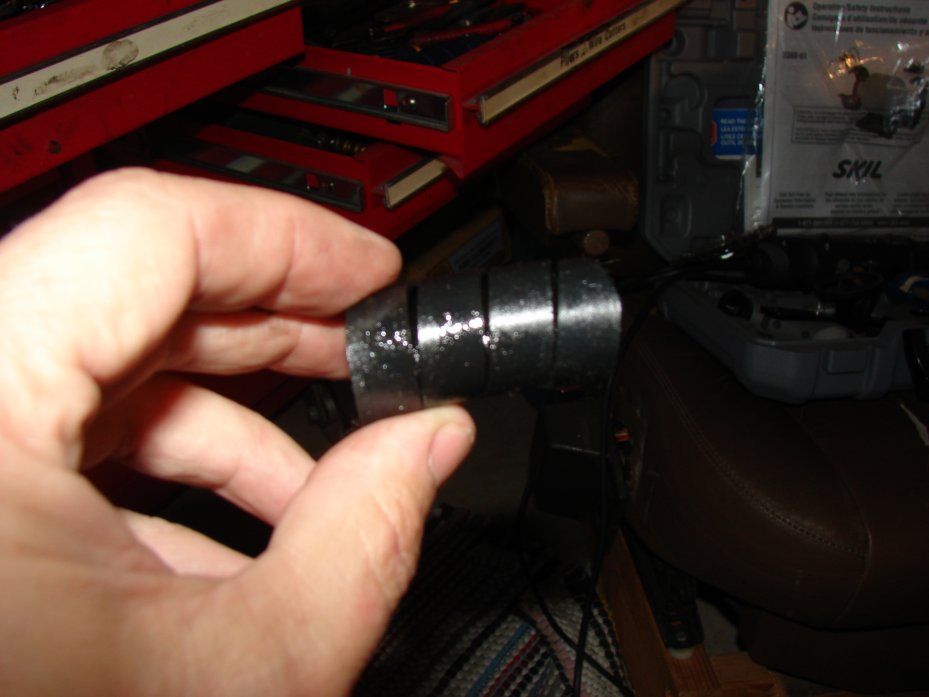
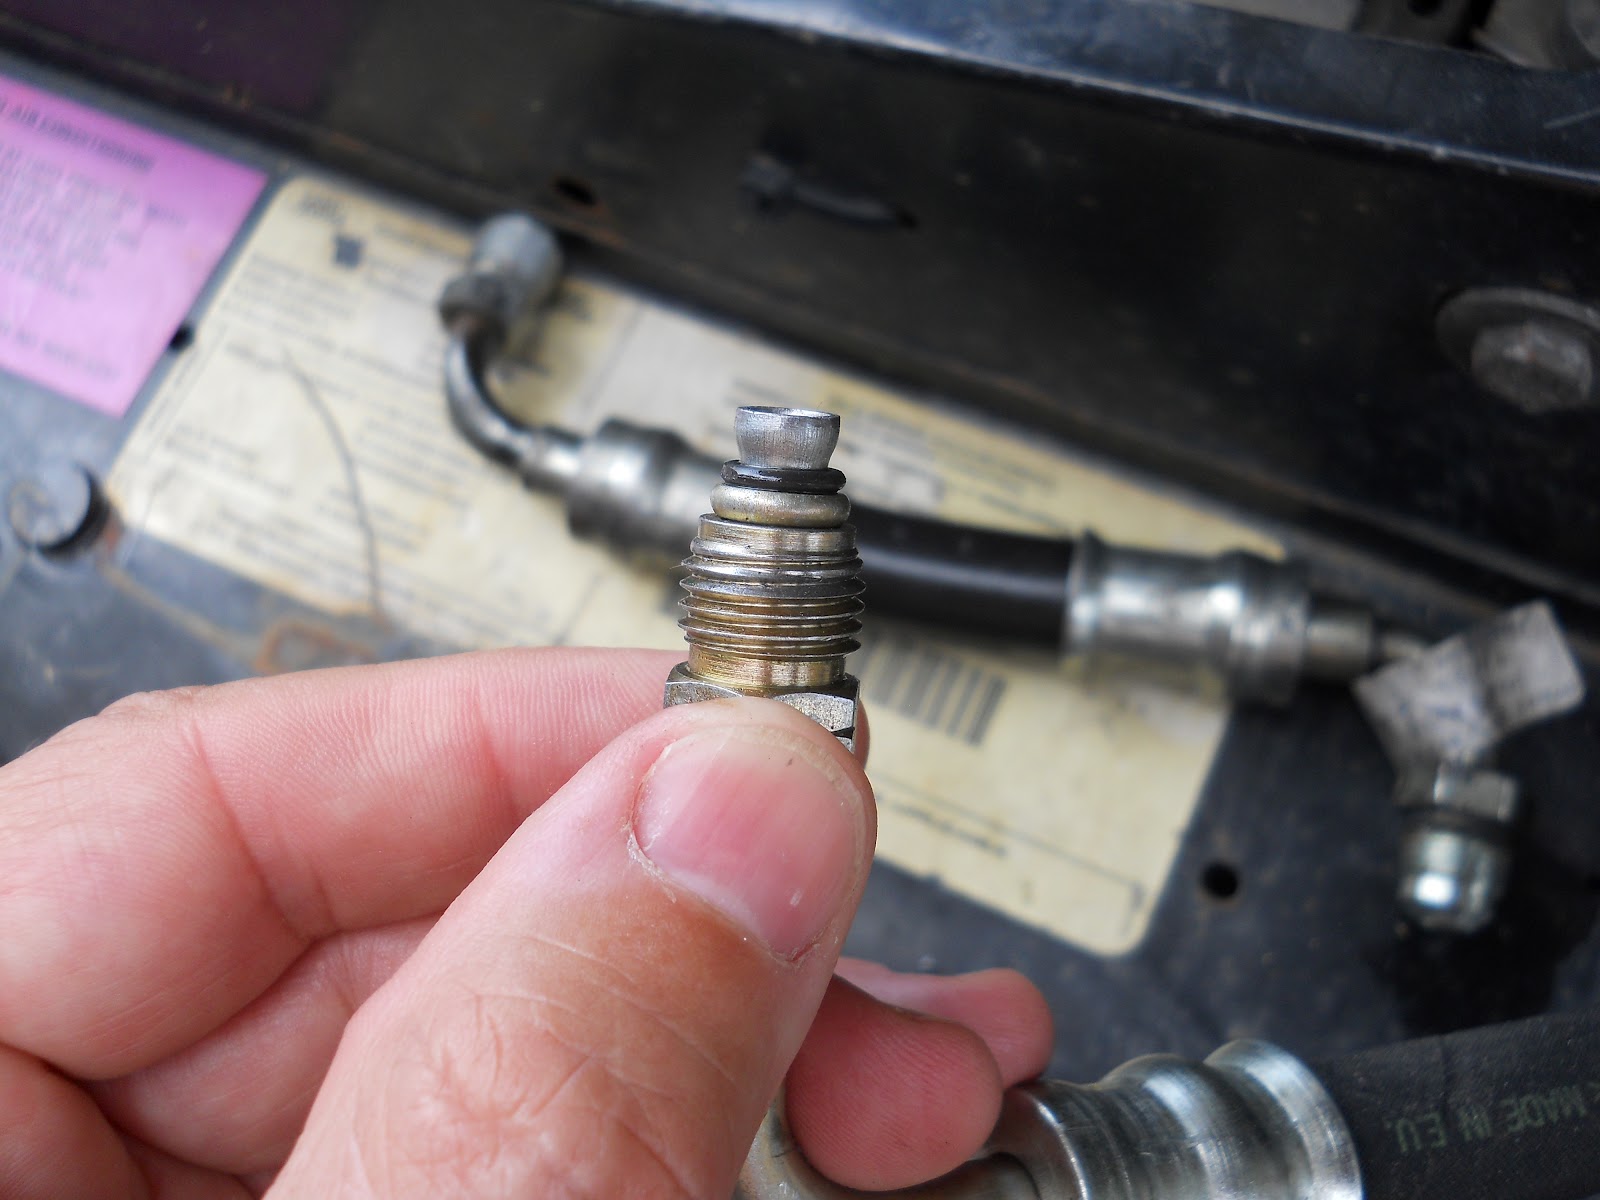
As I arrived I learned from the sign posted there at the counter that they make hoses. So that was good news for me as I knew they would have the type of hose I needed. I handed him the length of hose I wanted to replace and off he went. He was back in a few minutes with a cut length and asked if there was anything else. I described the flange types Land Rover uses for the power steering hoses and expected him to either stare blankly back at me or shrug me off. Instead, he said, “yeah that’s an inverted flange, we can make those.” No shit? No shit. I told him I’d bring the next hose that leaked down to him to see if he could make a replacement.

I was ready to go and he rung me up. I retrieved my debit card to pay for the hose and the young man said, “that’ll be a dollar fifty five.”
I said, “1.55?”
He said, “yep”.
I said, “hang on” as I had that in change in the car and went out to fetch it. With this purchase, I think I have set the record now for THE CHEAPEST REPLACEMENT PART for a Land Rover. Atlantic British lists this hose for 47.95$(US). For you math nerds out there that is a 96.77% savings. YES!

I’m very interested in seeing if they can indeed make the high pressure hoses and how much they might cost. I love finding savings like this.

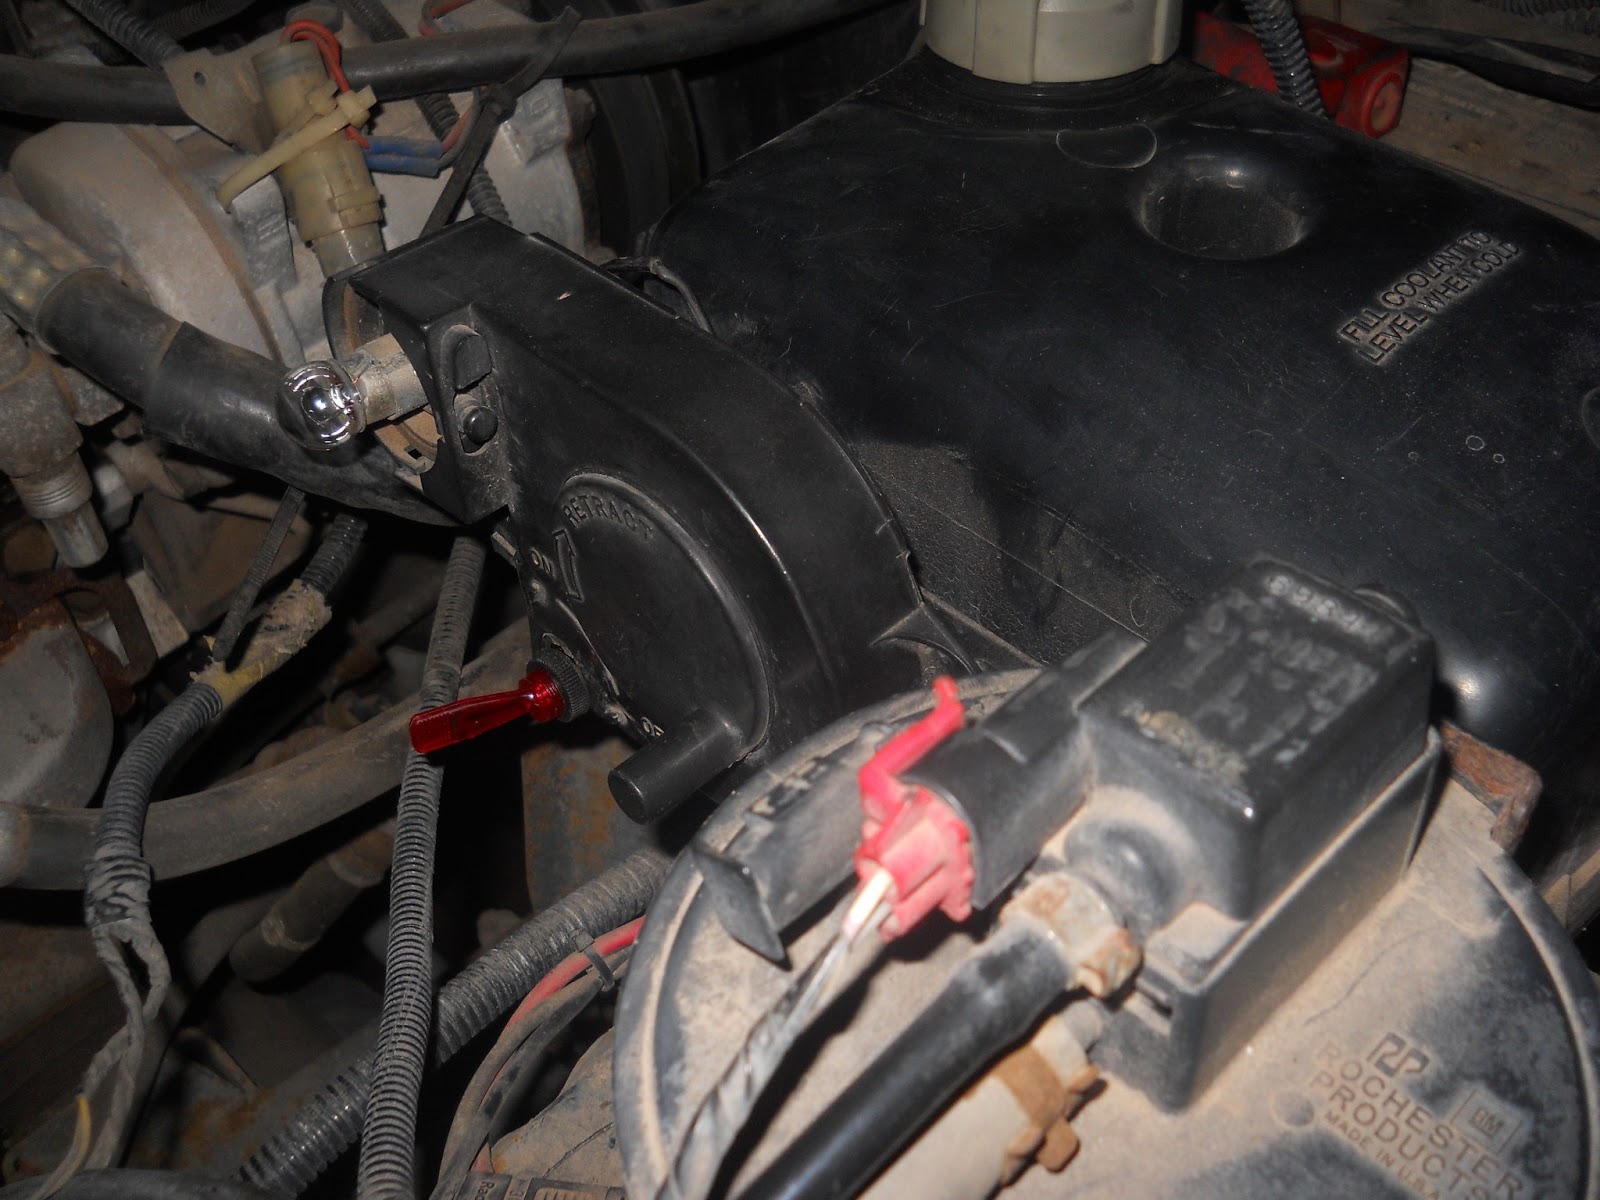
I reattached all the hoses and today I filled it with power steering fluid. I chose power steering fluid instead of my normal routine of using automatic transmission fluid (ATF). I am looking for leaks and this area is already the location of the transmission cooling lines. We know those have the crimson ATF fluid running through them. So to differentiate I put power steering fluid in the power steering fluid system. The power steering fluid I bought is clear, that way if either are still leaking I’ll know which system has the leak by the color of the fluid leaking out.

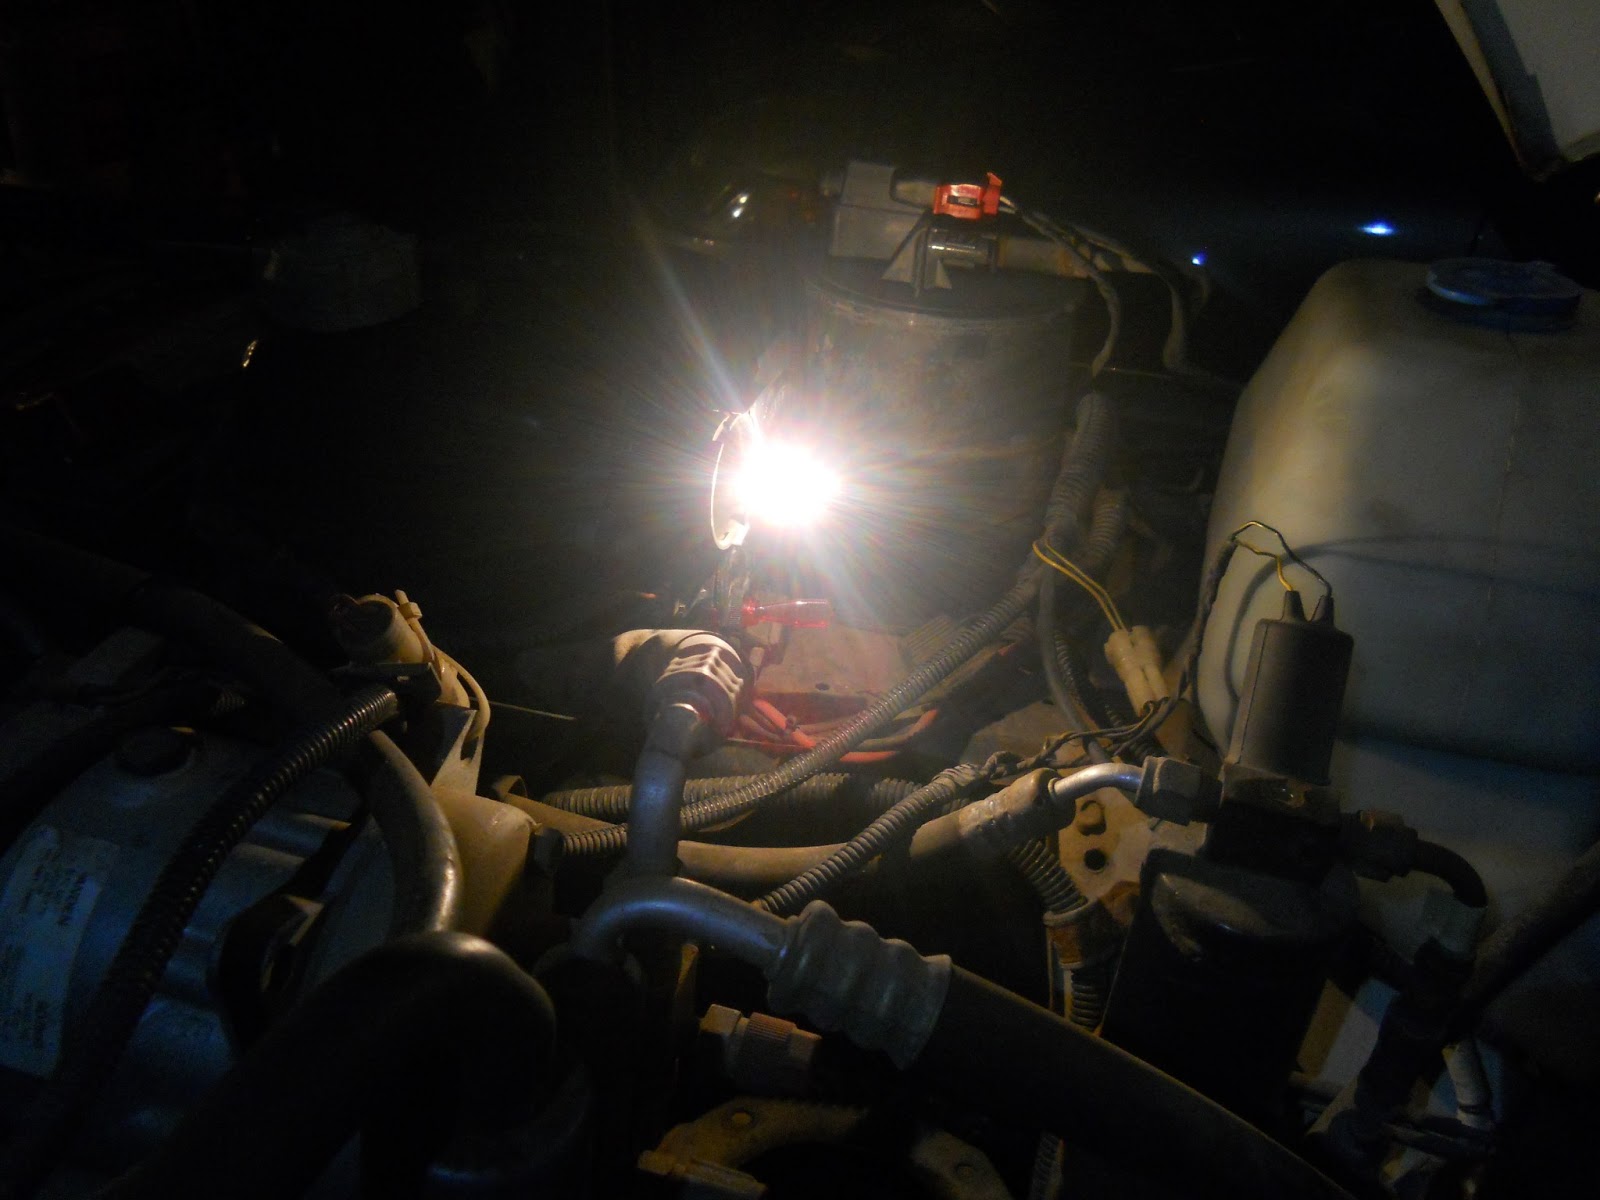
In addition to all this steering work, I put the lamps in their sockets where the bulbs needed to be replaced. I then decided to take the Rover to the car wash to put some hot soapy water on the hoses. I need to find the leak and with clean dry hoses if there is a leak it should show up quickly. I should see weeping on the hoses or even a drip on the butcher paper I put down to watch for new leaks.

On the way to the car wash I was able to get the Range Rover through all the gears. As you remember I think I may have burned the 4th gear in my transmission. I put in fresh fluid and the shift points couldn’t have been better. I know this is no measurement of the condition of my transmission, but I was happy to see it shifting well.

Here is the list of projects as of today. I’ve struck the projects I’ve completed.
Projects

  • Brake discs
  • Brake reservoir
  • Bushings
  • Viscous Coupling
  • Rust in the bed
  • Rust on the lower tailgate
  • Rust in the front footwells
  • Broken axle
  • Transaxle shifter solenoid
  • Complete fluid service partially done
  • Power steering hoses
  • Head liner
  • Sun roof
  • Rusted floor pans
  • Windshield Seal
  • Tires
  • Sound system
  • Door locks
  • Transmission problems

Not vital but needed eventually.
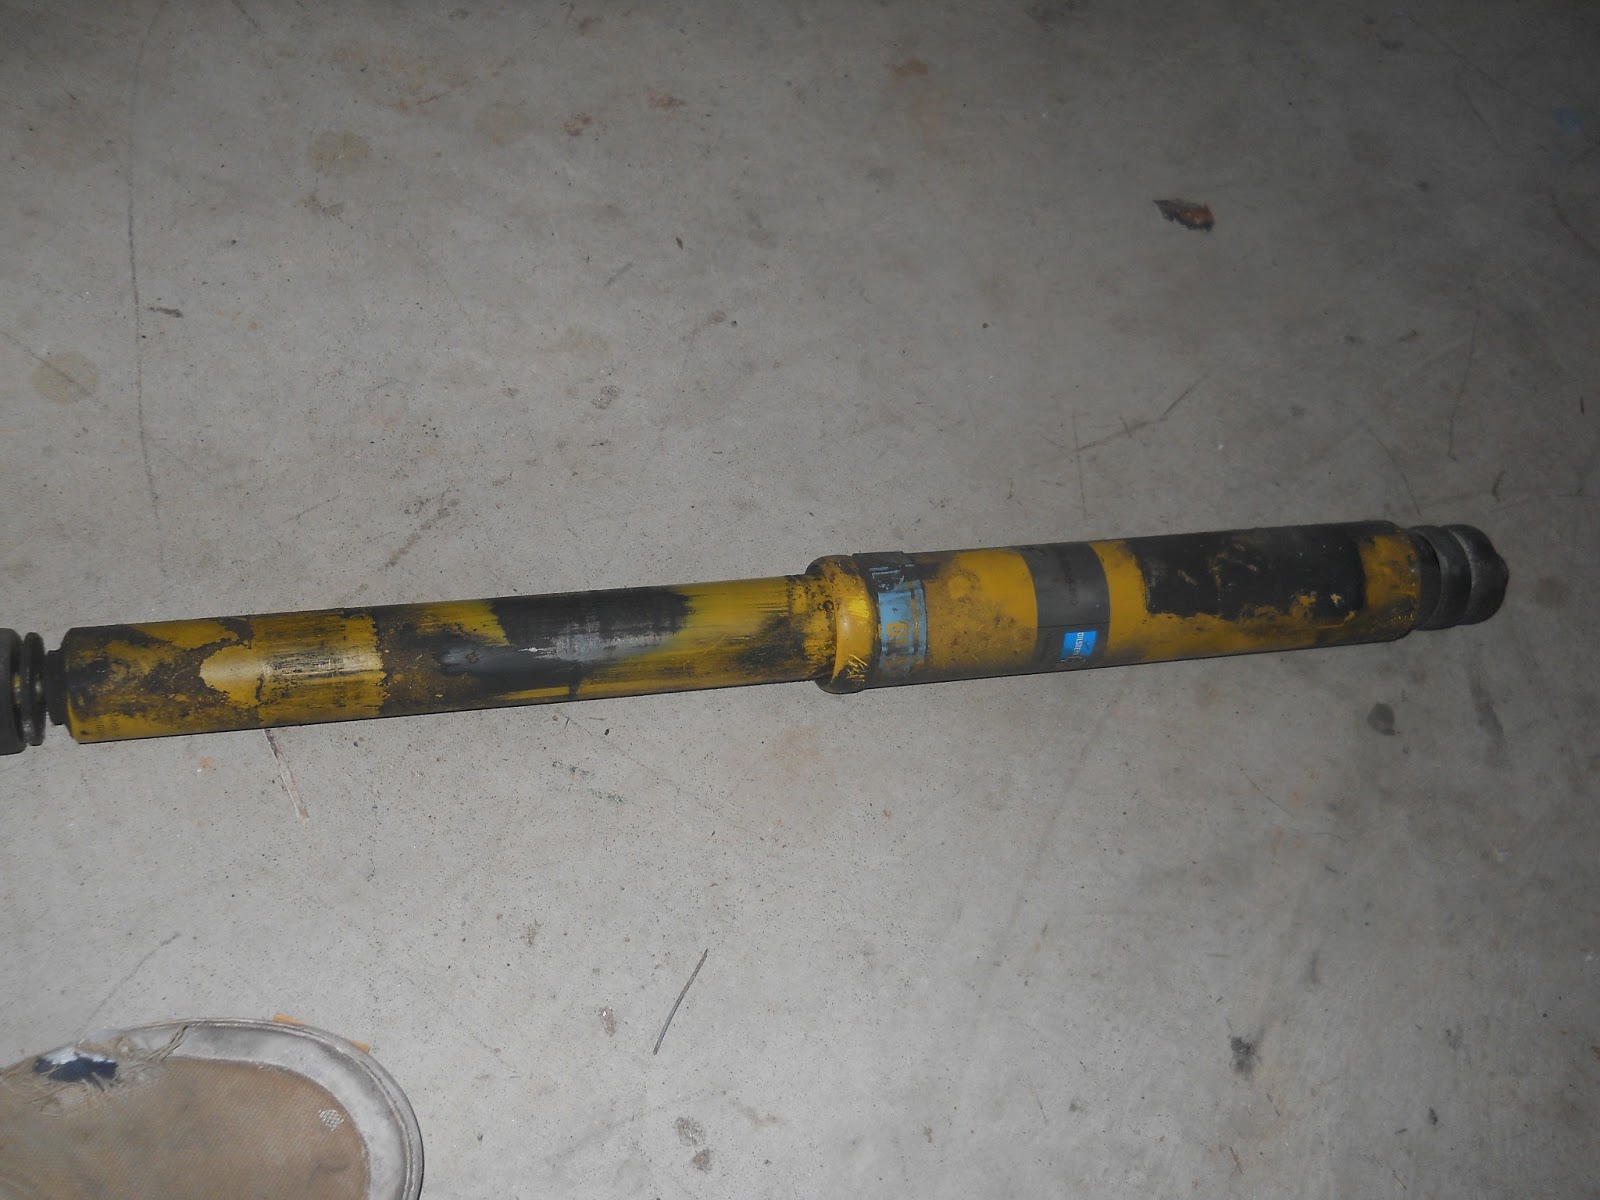
  • Springs and shocks
  • Air conditioning

That is all for now. Thanks for reading and Happy Rovering.
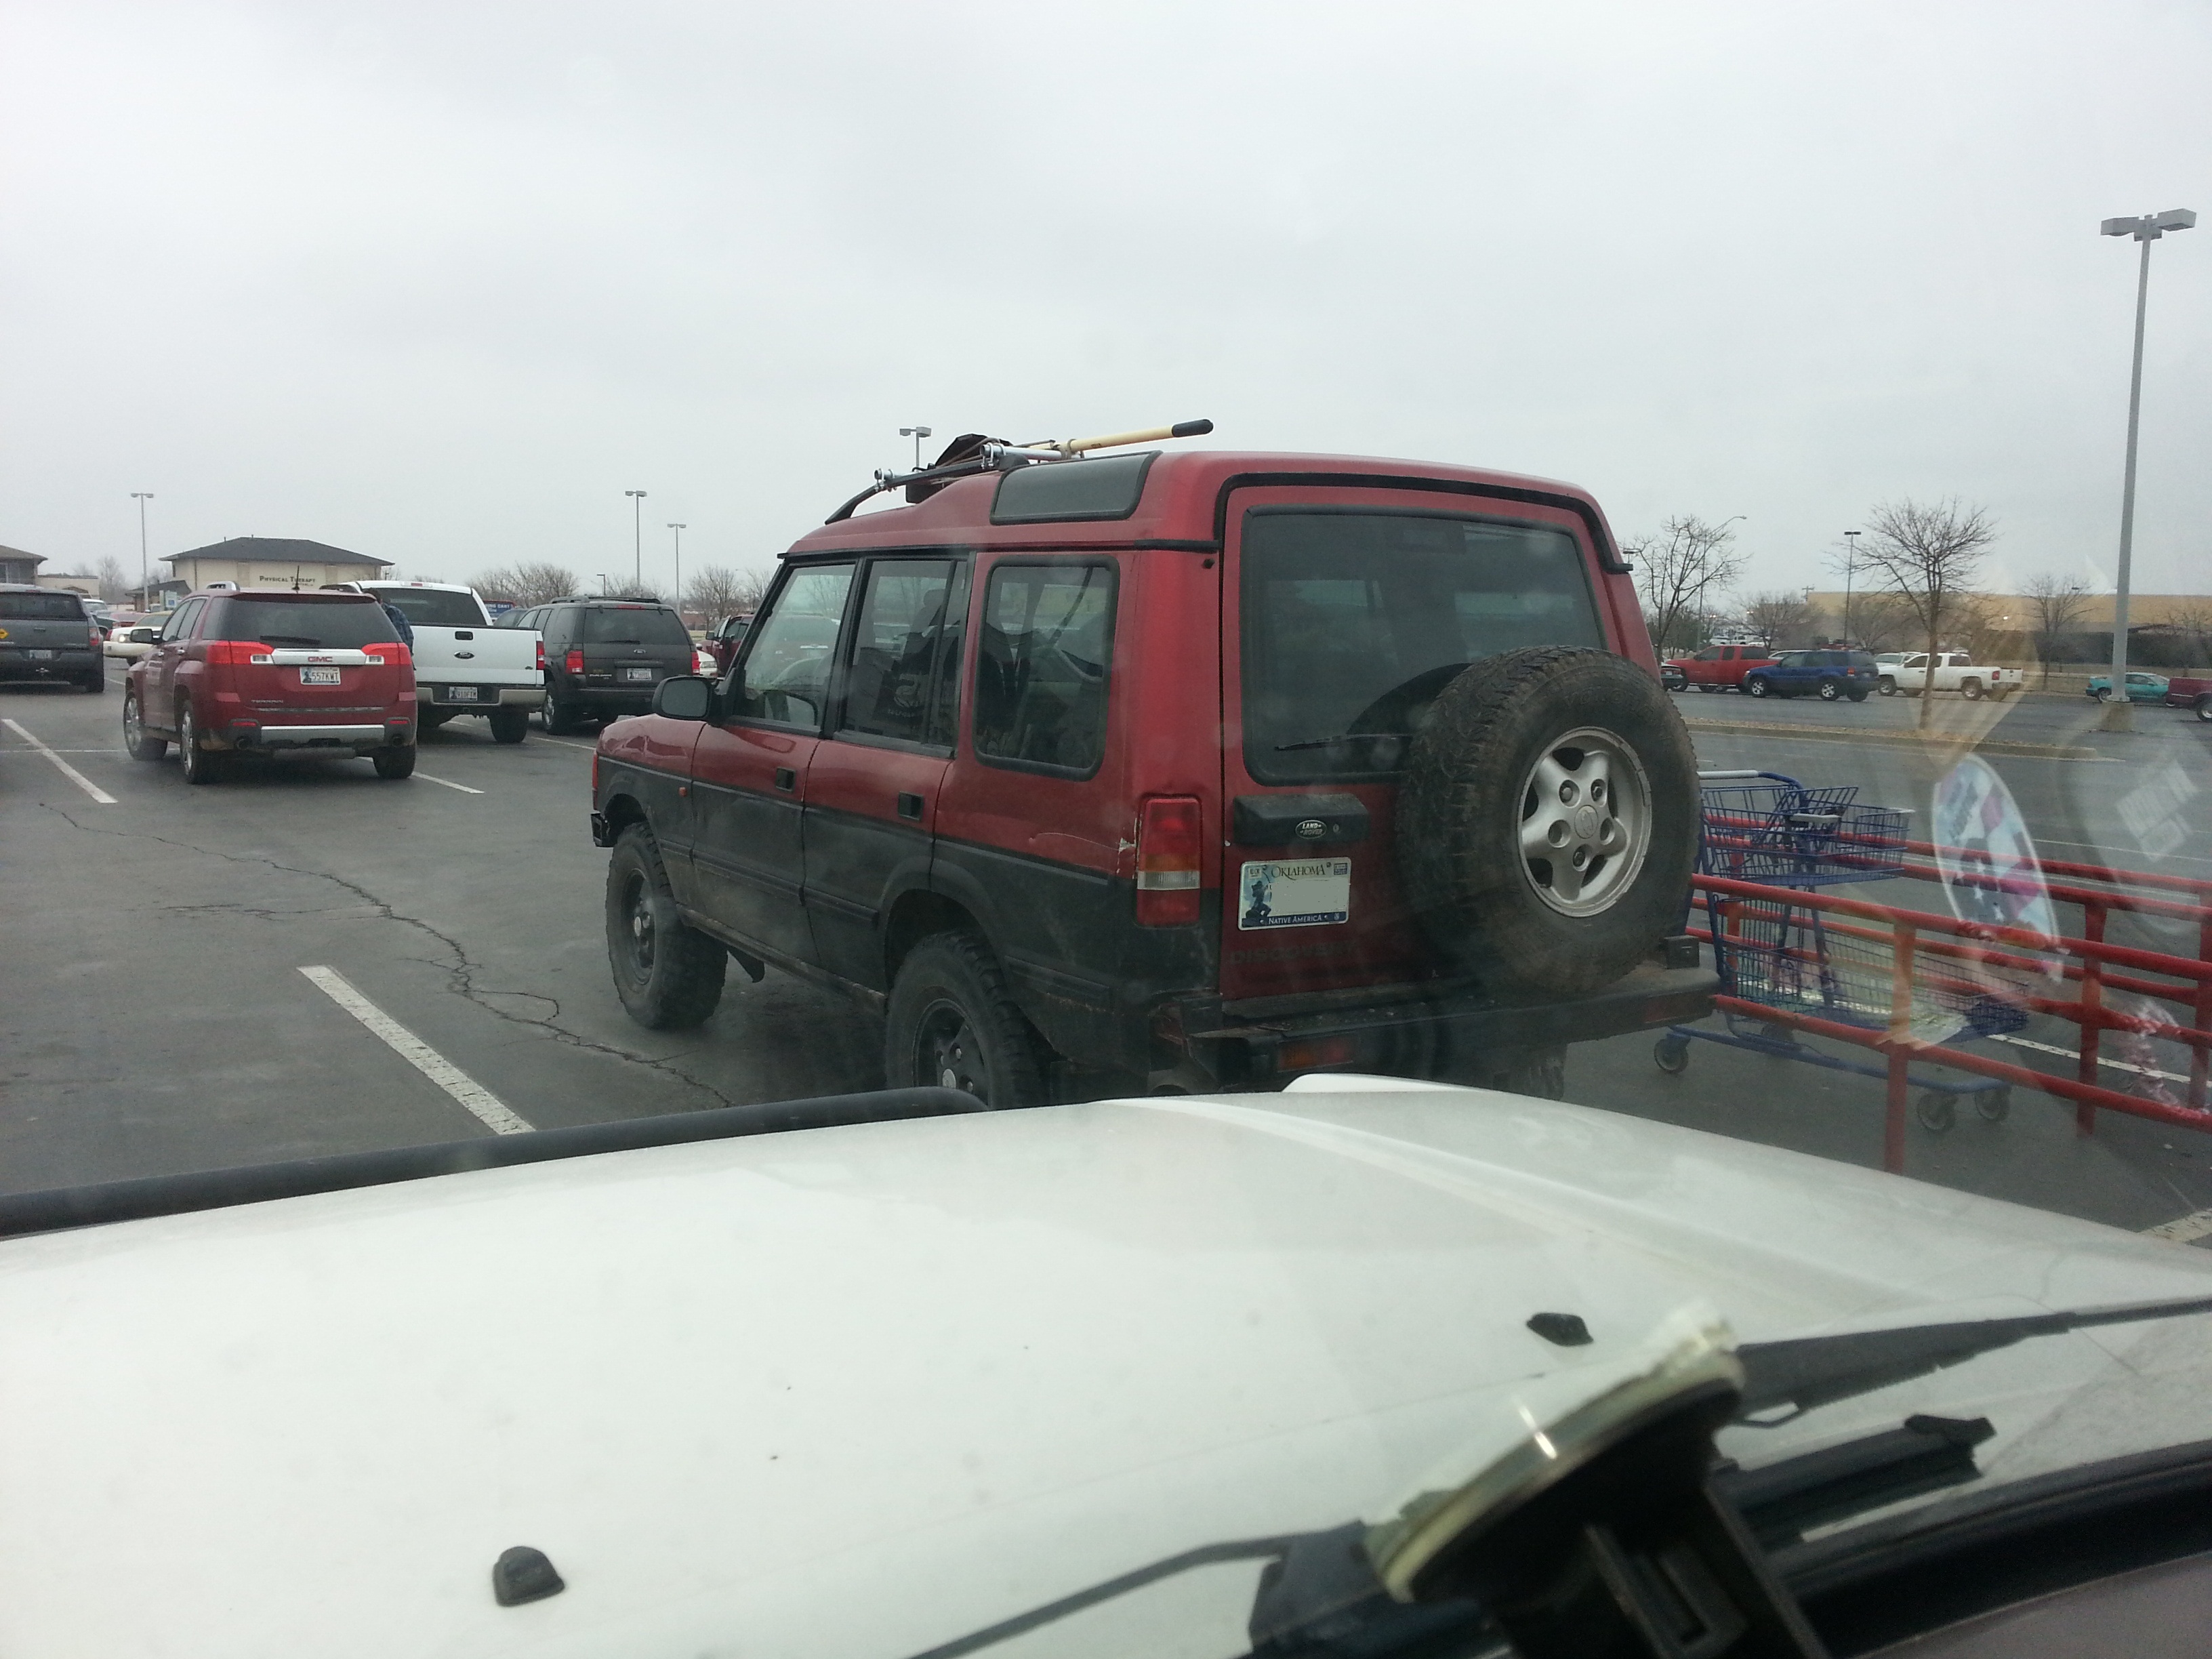