Rust and the Art of Welding (Post #332) 4/22/2013

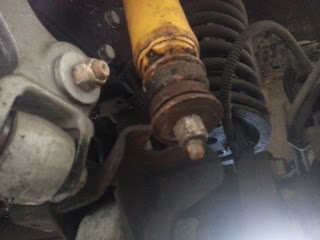
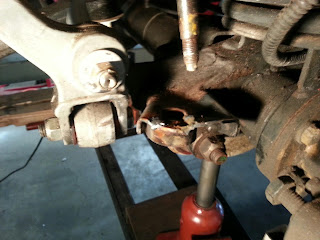
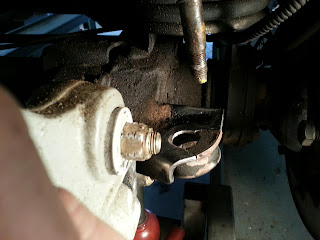
Do you know what this part is?

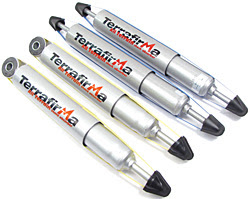
Nope, it’s an upper shock mount on a Range Rover Classic. Wait, what? You guessed that right? Bully for you. This weekend I climbed under the Range Rover to swap out the old and tired Old Man Emu shocks I bought in 2001. Before it was over, I had ordered two of these.

I sourced a set of Terrafirma shocks from Atlantic British and they had been languishing in their boxes on my garage floor. It was time to replace them.

The front shocks on went without a hitch. However the rear shocks were quite the ordeal to remove. It required me using the electric impact wrench. (Brilliant tool, by the way. If  you don’t have one, get one.) The rust was terrible. I have pictures to share in another post.

The nuts were welded to the shafts with corrosion and after hitting them with the impact wrench they just spun on the shafts. I had always wondered why people buy shock mounts, they are made out of metal right? How pictures have you seen or witnessed in person a person breaking a shock mount on the trail? I used to think these things were from hard use. Apparently they are from “use”. The part is shipped from the factory unpainted and you know what that means. RUST.

This means that after just a few years the rust has begun and the structural integrity of that part is being compromised. After climbing around under the Range Rover this weekend I was really surprised at how much rust was forming on the parts I had painted with Marhyde Self-Etching Primer just a summer ago.

If I had the budget and time I would probably pull the major bits and have them all powder-coated. But that is not really practical nor affordable. If I were doing a FULL RESTORE it would be. But I’m not, so I’ll just chase the rust around, part by part.

Speaking of rust, I noticed the brake calipers on the rear are really nasty. I replaced the right rear brake caliper a year or two ago when I noticed my second caliper rebuild failed. Frustrated I sourced new brake calipers. I did not paint them at the time thinking if I needed to return them under warranty they would not take them back. That left them with what ever they were coated with to rust. Turns out they were coated with Pre-Rust ™. Yes, I just trademarked that product. I will show a picture of the right side rear caliper in a future post.

After pulling the wheel to remove the shock, it turns out, I will need to replace the left side brake caliper as well. It does not seem to be contacting the brake disc. I may or may not have mentioned already that I have a pop when I apply the brakes and I would bet 100$(US) that this caliper is sticking and the culprit.

So what started as a Difficulty Scale 1 shock replacement, is going to be four jobs:

  • Replace Upper Shock Mounts
  • Rust Abatement on Right Rear Brake Caliper
  • Rust Abatement on Left Rear Brake Caliper
  • Replace Left Rear Brake Caliper

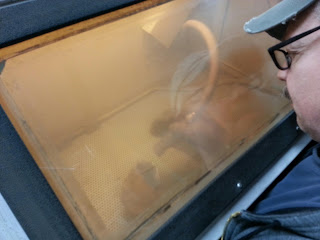
I think I will pull the right rear caliper and take it to JagGuy’s shop this coming weekend and sand blast the rust off. Then everything will get two coats of primer and get slapped back on. I wonder if anyone makes a “portable sand blaster”? I’m guessing Google is going to get work out on that search string later today.

I missed SCARR this weekend (http://scarr.texasrovers.org/) I really wanted to go but the time was not available. And as it turned out, my Range Rover wasn’t ready either.

Happy Earth Day. I hope it was awesome for you. In honor, I cut down a tree Sunday which was encroaching on my swimming pool. Up with people! (there will be no singing).
Smoke’m if you’ve got’em.

Thanks for reading, and Happy Rovering.

Electrical Gremlins (Post #331) 4/20/2013

I’ve resolved that this weekend will be mostly electrical in nature on the Range Rover. This is not my favorite thing  to fix. I took electronics at Mid-America Vo-tech school when I was still in high school. I was only mildly interested in it. My dad was an electronic technician for the Federal Aeronautics Administration (FAA). He learned it in the Navy and wanted me to have the same life. That was not to be. I didn’t fall far from that tree, I went into the computer industry.

I have quite a list to address this weekend:

  • Sunroof
  • ABS Sensors
  • Utility light
  • Clock

Those are the electrical issues. This is not to mention my radio is still not working. But that is another post. I decided to start with the sunroof tonight. Mrs. OkieRover was going out to a Pampered Chef party which left me at home to drink beer work on my Range Rover.

I opened up the PDF of my workshop manual and found the location of the sunroof’s relay. I have already tested for power at the switch. The fuse is good and I’m pretty sure now it is the motor. I think I have a few more things to test but I’m mostly convinced either the controller is dead or the motor.

Next up was the ABS sensors. I mentioned in an earlier post that I wanted to test each one for conductivity. I did that tonight. I required me finding the ABS sensor plugs. The fronts are located inside the engine bay on the fenders. A quick pull and measure, done. The rear are located on the bottom of the bed just above the rear axle. I pulled those and measured, done. All four have the same value when run through the ohm meter. As does the other end when checked toward the computer.

That’s mostly disappointing. As I was hoping for a Sesame Street easy, this one is not like the others and I could swap it and my life would be ABS complete again. The second thing to test is that the sensors are fully seated against the ABS rings. This requires a dowel rod and hammer to knock the rear sensors back into place. When you start rolling the sensors are set at the correct distance and should start functioning correctly.

I haven’t got her rolling yet so I’m not sure if this made any difference. Hopefully I’ll find its all good. I said hopefully, I’m not insane, I know it won’t, but until tomorrow there’s still hope.

Not excited about the blue plastic dust shield.

Having had so much success with my projects so far, I thought I should do something I knew would be completed. I decided to fit the new Terrafirma steering damper. That was pretty easy. The old Bilstein I bought in 2000 was probably ready for a swap. If you are thinking of this job, its a One on the Difficulty Scale.

Tired Bilstein

I then looked into the Utility light under bonnet. I went to a breakers yard in 2001 and parted a light off of a Chevy Suburban. It’s a low watt light with a long extension cord. For some odd reason this “amazing piece of American technology” (end sarcasm) had stopped working. I checked all the wires back to the battery and everything was in order.

Mounted near the radiator overflow tank.

From the driver’s side across the top of the engine.

 This left just the light itself as the problem. I tested the bulb and concluded either the cord or the switch had failed on the light. The cord was the less likely so I pulled the light off and decided to fix the switch. The switch it used was a simple friction switch. Turn the switch 90 degrees and the a wedge presses a tab against another tab for contact.

I cut the plastic casing away and found a very gunked up contact point. I cut away more and then fitted a proper toggle switch. I soldered it all up and now have a working light again.

Tomorrow I’m out to Newcastle to see a T-ball game and then back in the garage.

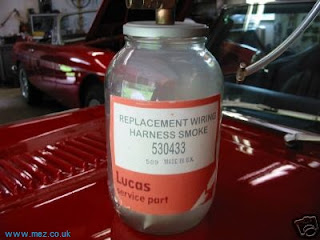
Take a minute and visit this clever fellow’s site (http://www.mez.co.uk/lucas.html). He has several funny jokes about Lucas, The Prince of Darkness.

Thanks for reading, and Happy Rovering.

Sooooo Incredibly Busy (Post #320) 2/20/2013

I thought I’d drop a note so you would know I’m not dead. I’ve been really busy with work and school. I completed the fundamentals for Lean/Six Sigma Green Belt (Strong America Now) over the last three weekends. I’ll finish my Green Belt project this summer. My SQL Server (Wikipedia) class at Oklahoma City Community College class is starting to kick my butt. Big test tonight. This is going to require more cycles if I am to be successful with it.

The weather also hasn’t cooperated. I woke up and drove in this morning (February 20) to GIANT snowflakes coming down. This is the second time this year, shoot fire, this month! I was sitting in McNellie’s Pub in Midtown OKC when it did this last. It looked like we were sitting in a snow globe.

We need the rain and/or snow desperately so I am not complaining. I hope it rains a lot more. The drought is the worst I can remember seeing it. Makes me wonder if I shouldn’t read up on the Dust Bowl (PBS) again. The days it did cooperate, I was sitting in the Carson Engineering Center at OU learning Six Sigma and Lean principles. I’m barely smart enough to open the doors of this Nerditorium, however, Scuba Seamus (Diet Mt. Drew’s friend) who is studying mechanical engineering was in my class, so I was able to sneak in with a kind word from him.

I’m at 37 birds for this birding season. I was pleased to see an American Kestrel on the way home the other day. Even more exciting was seeing the Redhead swimming in a local pond. They are migrating back to Canada and it was quite a treat for me to see one.

Grand baby #3, Prestyn, is doing swimmingly well. She is cute as a bug and we have pictures to prove it, lots and lots of pictures. Her Mimi is happy when she gets to visit. When Mimi is happy, everyone is happy.

RovErica is now engaged. She met a young man that Mrs. OkieRover and I really like. Best of all he thinks RovErica hung the moon. Bonus for us (the readers of this blog and I), he’s mechanical. And not the Fat Jack “I can fix it, I’m mechanical.” and then he starts wailing on the outboard motor with a hammer from the movie Splash (1984) either. He graduated from Wyotech while working on his Masters. Yeah, my evil plans to have him fix the ABS relay buzzing problem are already in the works. He needs a nickname for this blog…but I’m working on that.

Diet Mt. Drew is considering moving back in with us and going back to school. It’ll kill him to do it, but I think he’ll like the amount of cash in his pocket and the well stocked pantry and the free internet service and cable TV.

I’m going to the South Central Coalition of Historical Trekkers meet this weekend at Fort Gibson. I’ll take lots of pictures, not that you want to see them, but I want to take them. It will hopefully be a nice break for me. I need to let the flywheel spin for a few turns without me having to spin it if you know what I mean.

My new TerraFirma springs and shocks are in and have been sitting in the garage for nearly a month. I hope to put them on the first weekend of March. Mrs. OkieRover will be away from the house for a lady’s retreat so unfettered Land Rover mechanicing should ensue. I can fix it, I’m mechanical.

Thanks for reading and Happy Rovering.

Terrafirma Springs and Shocks (Post #314) 1/17/2013

Last week I ordered a set of Terrafirma shocks and springs for the Range Rover Classic from Atlantic British. They should be arriving any day now. The springs and shocks on her now are a bit tired.

I currently have a set of Old Man Emu shocks that I bought the same month I bought my Classic. That was June 2000. I figure they are probably ready for replacement. While working with the front shock in my recent attempt to repair the left front shock mount it seemed to perform as expected. I’m not a suspension expert but I figure 120,000 miles on a single set of shocks is a bit much. For the record, I did not have a single complaint with the Old Man Emu shocks.

The springs in my Range Rover were put in to replace a failing air ride system. I’ve always felt they were a bit tired and the install was always a concern too. I have it on good authority that it was done “as standard”. But with out retention rings I always thought something was going to go horribly wrong. Luckily it never did. So next week baring winter snow storms I’ll have new springs to install.

I’ll need to source a spring compressor but I think I can rent one from my local O’Reily’s Auto Parts store. That is if JagGuy doesn’t already have one.

I think the silver color will go nicely with all the gray bits I’ve painted over the last couple of years, don’t you?

 Thanks for reading and Happy Rovering.

Shocking (Post #311) 1/11/2013

If you are a regular reader you will remember, or perhaps you will not, that I found the broken shock mount back in July 2012 when I was working on the steering box. At the time I did nothing about it.

As you can well imagine that would come back to haunt me. While driving the Range Rover during the latest little bit of snowy weather I heard some new clunking from below. I was pretty sure of the location and source.

I knew this would require welding so I called up my buddy JagGuy. His superior shoppe and skills to go with it were just the ticket for this project.

I drove up to the shoppe on Saturday morning. We never really do any work before lunch. We spent that time chatting and catching up on the latest news on our children and grandchildren’s progress to and through adulthood.

We share stories and generally solve all the world’s problems and as the Grinch so eloquently puts it in How the Grinch Stole Christmas (2000), “Solve world hunger, tell no one.”

When Paul and his son arrives it is time to get on the road and get some food. We headed off for lunch at Earl’s Rib Palace (I know classy name, right?) It’s hard to beat their chow. The owner was Elvis’s personal chef at the time of The King’s death. With yesterday (January 8th) being the King’s birthday I thought this tidbit was appropriate to this story. After reading the history of Earl, it’s not too far a stretch to say, “Earl killed Elvis.”

Due to the conversation we had at lunch, I almost put black bars across everyone’s eyes to mask their identities.

After we put on a couple of pounds and drank a half gallon of tea we returned to the shop. We cleared the rack and ran the Range Rover up on it and lifted her up for an inspection.

The steering damper is showing some wear. I have a post prepping for that. The rear differential is showing a leak on the drive shaft seal. After I pointed that out, JagGuy quipped, “That’s not a leak, when you have to put a receptical under it to catch the fluid, then it’s a leak. I’ll keep an eye on it just the same.

We lowered the Classic so we could get the work done on her. I removed the left front wheel and wired the shock up out of the way. I took the busted piece off and we examined what would need to be done to fix it.

The shock mount is welded to the axle and is thus not a part you can readily buy and bolt on a new one. It requires a repair.

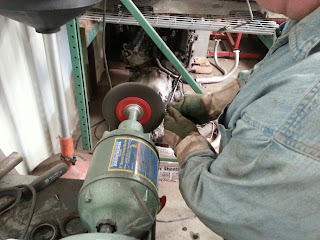
JagGuy took the mount off to the sandblasting cabinet for clean up. I got the angle grinder and wire wheel out and cleaned up the remaining part of the mount. I wiped the bits off with some degreaser and was ready for the welding to begin.

JagGuy cleaned up a large “military grade” washer. The plan was to use the washer to splint the broken bits back together. His work with the “Ma Dueces” he bobs provides lots of left over bits such as washers. The fact that the splint came from a vehicle our military used to keep Mr. I Hate America at bay makes me proud.

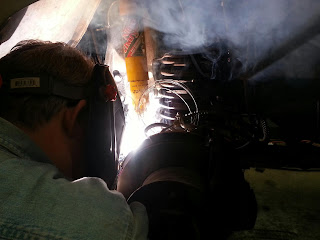
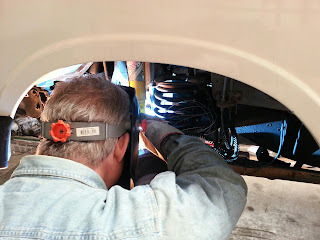
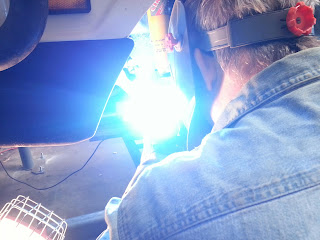
JagGuy started by “tacking” the broken bits in place. A few bursts of light and some sparks meant the TIG welds were in place. I learned a lot about TIG and MIG welding between coolings. This makes me wish I had taken that night class at the Vo-Tech when I worked there. Oh well, as long as I have Evil German Dudes and JagGuys willing to ply their skill I don’t have to learn it.

JagGuy then set the washer in place and used a “C” clamp to hold it in position for the first tack. This caused some issues with the bits of the original part. It moved and caused him to start over. I was happy to fetch the tools while he sorted out where it went wrong.

He got it all back in place and proceeded to weld her all up.

JagGuy finished up the welding. He was quite funny about the job. He said don’t show this to the Evil German Dude. “He wouldn’t like it, but it’ll work.”

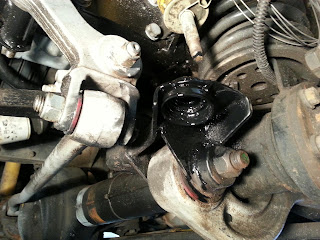
I got some rust resistant paint and put a coat on it. After it dried…more or less…I started bolting everything back up. That’s when the slight difference in thickness of the washer caused me some problems.

The added thickness caused me to have trouble getting the nut started. JagGuy produced a different nut an after some effort I got it started and tightened up. The alignment of the bottom cup of the shock bushing is slightly skewed but shouldn’t cause any trouble.

The good news is, the weld made it all the way home and is working out well. I don’t anticipate any more trouble. If it does fail, JagGuy said we would just cut out the old one and weld in a new one. If that happens maybe I’ll invite the Evil German Dude and put his welding skills to the test.

Thanks go out to JagGuy for helping me out.
Thanks for reading and Happy Rovering.

July 15th, 2004 (Post #48)

July 15th, 2004
Shocks On, Radiator Woes, Work and Weather
Over the Fourth of July weekend I finally got all four shocks on. I took some pics
and will have an update with that when I can get around to it.

As I had just finished the last shock, I was collecting tools and getting everything gathered up and noticed a puddle under the front left side. Antifreeze was dripping out. What? I didn’t even
touch the radiator. I wasn’t even up there for anything. Being as it was a million degrees outside I took the Rover down to Sooner Radiator on Porter Street in Norman. Sports and Classics uses them a lot and I have had them work on the Rover before. This was July 5th and I was hoping they were open considering the government holiday. They got it done and told me it was a bad tube and the tank had started leaking too. Both due to pressure most likely. Pressure, as we all know is coming from the head gasket most likely. $100(US) later I’m back on the road. So I take my wife to the Target store and when I come out there is a huge puddle of antifreeze under the truck. I was none to happy about it I can assure you. I got under bonnet and sure enough a hose clamp not properly secured. It dawned on me that they did that last time I had it in there too. No big loss but you would expect that if I had been out on a trip and I lost that much coolant I would have been in trouble.

I’ve been really busy with work lately and have not been working on the site or the Rover. It is now summer here and you can’t really comfortably work on anything without suffering.

I’ve got a great idea for a camper but I’m not ready to tell you about it. But I think it would be a one of a kind and be a lot of fun to make.