Passenger Side Rear Wheel Well Rust – Part 1 (Post #631) 11/14/2023

rats

Now that I have the Range Rover flopped in the shoppe I can start on the rust abatement. But first, I thought I should get some oil and some other fluids and do some fluid refreshing. That was a great idea if I had done that BEFORE I started the Big White Bus. But the fact I was doing it AFTER I ran the engine, -2 points.

I loaded up one 5 gallon barrel of oil and headed to my favorite O’Reilly’s. When I got out of the truck my folly was apparent. I had successfully done an Exxon Valdez [Wikipedia] imitation. The metal barrel had rusted through the bottom and dropped 5 gallons of used oil all over the back of my F-150 and on to their Prince William Sound parking lot. I ran in and bought two bags of kitty litter/oil soaker stuff and with the help of one of the guys we spread all that all over their parking lot. I haven’t been that embarrassed in a long time.

I finished up the clean up of the back of my F-150 when I got home and started getting the rear passenger wheel off to start the investigation. The video shows I had a mostly optimistic view when I started scraping the rust. In comparison…the passenger side is no where near as bad as the drivers side wheel well. The rear window is another issue entirely but let me attack these one at a time.

I’ve got two holes SO FAR. I still have to get the wire wheel out and take the rubber back to metal where there are brown spots. The worst looking SO FAR is the bottom of the C Pillar is rusted out. The reason for the rust there is the sunroof drain hose exits there and the crappy plastic grommet did not keep water out. And it is entirely likely that there was nothing inside the C Pillar that would pass for paint. So that was an obvious place for rust.

I’m going to replace the sunroof drain tubing and possibly fit a “Hose Barb Thru-Bulk Head Hex Union 90 Degree L Right Angle Elbow Barbed Brass Fitting with Flat Washer Gasket Water/Fuel/Air” fitting. Something like this….

I’ll add a rubber washer to assist in keeping the water out. I’ve got to measure the tubing and get the right one ordered. They can be found on Amazon.com. Not sure if they are using ID (inside diameter) or OD (outside diameter) to determine if I get 3/8″ or 1/2″.

This may be complete folly but what the hell right? If it works, I’m a genius. If it doesn’t work, I’m still a genius, just a terribly misguided one. Half of me says extend the drain line to behind the mudflap. It would not be that hard to add a little more distance to the hose and NOT put it back in the same poorly designed place. I mean seriously, lots of water and ice and mud and road salt and roadkill chunks (mostly opossums and armadillos and skunks) and all kinds of crap fly off the tires at extreme tangential velocity [Study.com]. The fact that plastic gromet is even able to not be dislodge is a miracle. So…let’s try to make it better!

The headline came out also so I could get the sunroof drain. It had to come out anyway, because it needed to be replaced…again. This will be the third and final. If this is needed again while I own this rig, it will be painted and forgotten.

More next week. Like and subscribe my Youtube channel. Send me a comment too…I love to converse with you.

Thanks for reading and Happy Rovering.

patreon.com/okierover

Reviewing the Painting of the Interior Trim (Post #628) October 16, 2023

I painted the interior trim last year. I didn’t publish it…not sure why. Anyway, I cover some of the details of painting the interior trim while looking like Kip from Kip’s Big Boy fame. We had a Kip’s in OKC 40+ years ago…I remember eating there once.

Anyway…I guess I hadn’t looked in the mirror that day and my hair is doing it’s own thing. And apparently I can’t dress myself either. I’m slowly moving toward “crazy old man who don’t give a damn” mode.

In this installment I talk about my work on the interior and what might be next. Like stripping the shellac off the wood trim and re-staining it a darker color to match the dark chocolate interior.

I added two USB charging ports that show the voltage from the battery. I don’t smoke in the Big White Bus so I really didn’t need the cigarette lighters. These are way more functional for all the USB powered “everythings” that we all need to carry. I’m fooling myself that I only need four of these. When I wire up the rest of the battery system for the back I’ll have quite a few more that will be pulling from the auxiliary battery I’m planning to have onboard.

It’s a short video shot back in November of 2022.

Thanks for reading and Happy Rovering.

Replacing the Fuel Pump (Post #626) October 2, 2023

Fuel Pump Swap

In my previous post I talked about the fuel pump and it’s lack of suckage of fuel to make the Big White Bus go down the road. Or more importantly in the short term, get out of the shoppe so I can proceed with the rust repairs.

I ordered the fuel pump from Atlantic British. As I’ve said earlier. If you order from them the part will not officially ship until the day after the first business day in which they receive the order. So if you order on Saturday, they will see the order on Monday, and it will be picked up on Tuesday. Then it will be in transit. For us here in the central southern plains that means a minimum of 6 days to arrive. I think I got this one in 7 days. I’ve come to accept this as the way it’s gonna be. Since the Range Rover is not my daily driver this does not upset me anymore. It just takes extra planning when you need something.

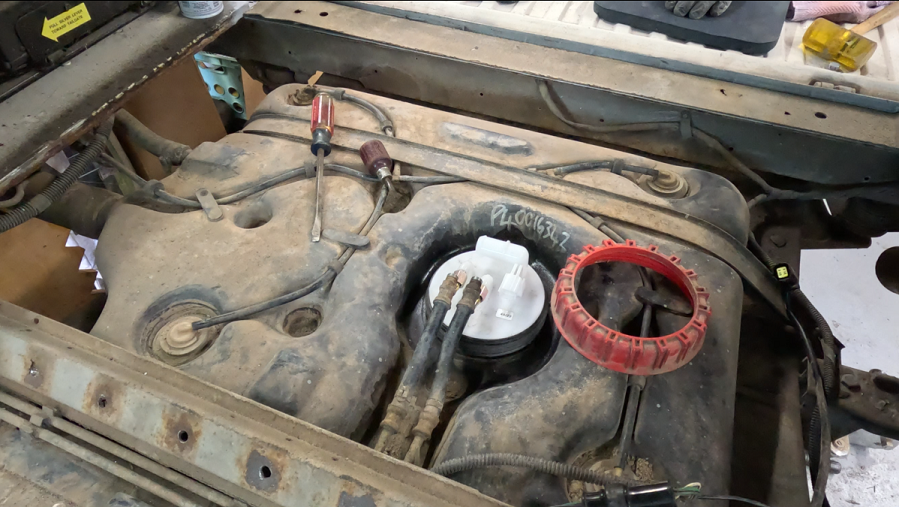
Removing the derelict pump is pretty easy. Turn the ring first. This may take some tapping with a screwdriver and a hammer. Take it easy and take your time. Don’t damage the ring.

The second step if it wasn’t your first step is take the fuel lines off. You will need a pair of 15mm wrenches. Once the lines are out of the way you can rock the fuel pump back and forth while pulling up. It will eventually come up.

The “bowl” will have fuel in it commiserate with how full the tank is with petrol. Pour this out while the fuel pump is still over the tank opening. Be prepared to clean up some petrol if it spills.

Reassembly is a reverse of the process. The most difficult of the tasks is getting the rings of the seal past the tank opening. You can gently coax it past the lip with a flathead screwdriver and steady pressure pushing down on the pump.

Is there a way to use a lubricant…maybe, I didn’t research that. I’ve never used lube for the install, so its not necessary for success.

Take it easy with the float and its electronic bits. Don’t bang it around.

That’s about it for the swap. I need to test the pump and get the the BWB running again. I’ll give it some test cranks to get fuel back up to the fuel rail then reinstall the plugs and fire her up. If I’ve sorted everything we should have a running Range Rover.

Thanks for ready and Happy Rovering.

Like and subscribe if you want to stay current on my video posts.

Contribute to my Patreon account if you are also inclined.

patreon.com/okierover

The Big White Bus Will Not Start (Post #625) September 25, 2023

spark plugs

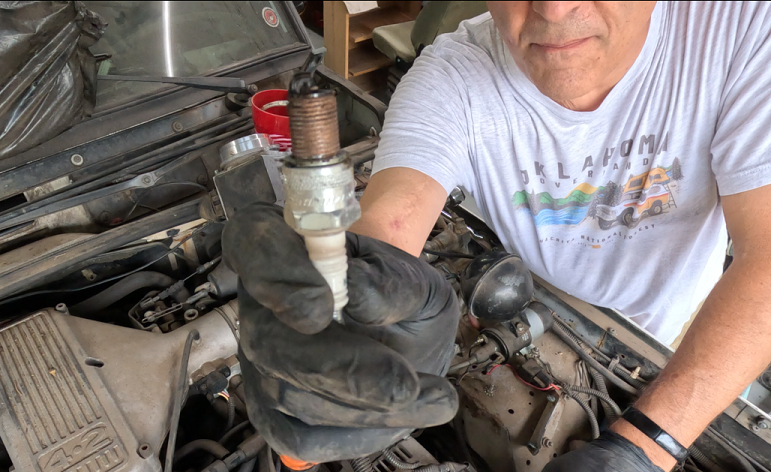
In this post I am sort of after the fact prepping the motor for it’s first start in several years (at least 3 years). I was given some advise that I should lubricate the cylinders prior to starting for the first time. The reason is obvious. The cylinders are dry.

I’ve already tried to crank the engine. That was evident in the last video. So perhaps doing this NOW is a bit superfluous. Meaning I’ve probably already damaged something. But maybe not, I’ll know when I get the engine started.

I’ve pulled plugs and I’ve squirted some WD-40 inside each cylinder. How much you say? That’s a great question. I was told at least a couple of seconds of spray. The WD-40 fluid is going to adhere to the cylinder walls and if the rings were stuck, would have acted on them hopefully freeing them. They make a special “foggy spray” for this application but I was told just to use WD-40. I highly recommend you do your own research on this. I’m damaging my own stuff. I don’t want you to damage your stuff if I’m wrong.

The fuel pump is on the way and might arrive today 9/25. That would make it 8 days since I ordered it. They don’t work on Saturday or Sunday so Monday was the first time they started to “fullfill” the order. I am also in the farthest away region from their shipping hub. So a minimum of 5 days of transit. Looking at their location, I could have driven up there, picked up the part in person, and arrived back at base camp before the shipped part arrived.

Next step is to get a fuel pump installed and the Big White Bus started. Drive it to the top of the driveway. Hose off the parts so I can coat them with rust conversion paint. I will then turn her around and have the starboard side on the same side of the shoppe as the welder. I have some rust under the starboard rear wheel well the might need some patching. I also have the repairs to the existing rust spots identified in other videos. B pillar, D pillar.

You can support me on Patreon if this content is appealing. I would be greatly appreciated. Like and subscribe to the video channel.

Thanks for reading and Happy Rovering.
Fender Repair Part 6, Reassembling the Fender and Mud Flap (Post #623) September 9, 2023

What?

Finishing up.

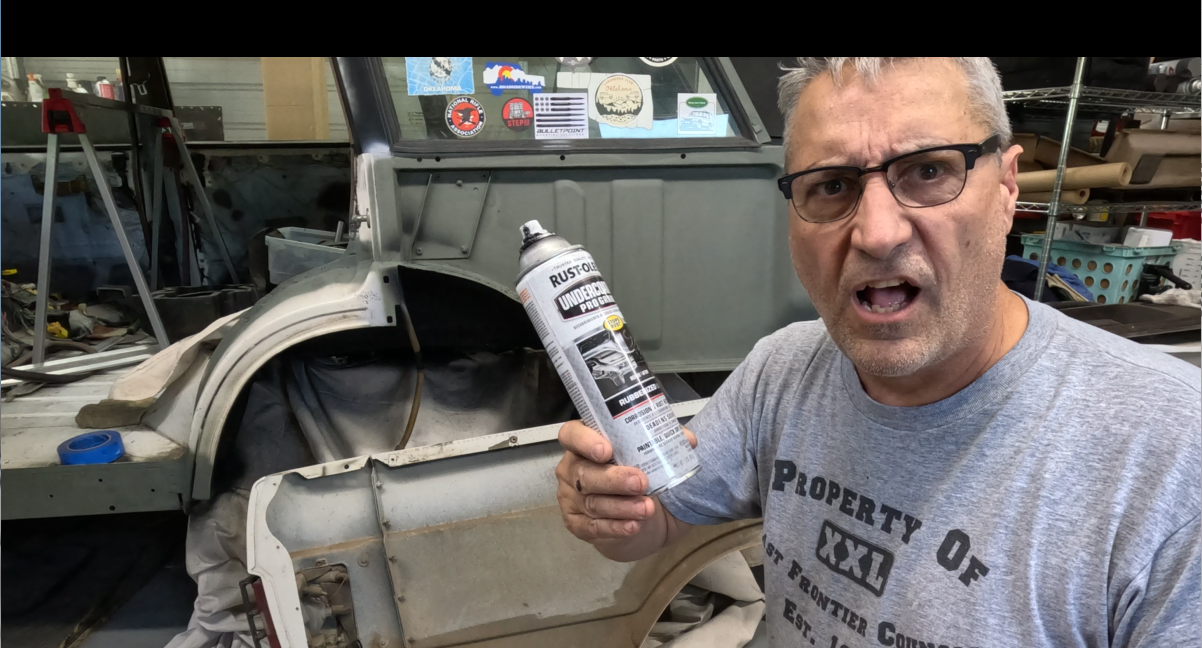
In this video I’m wrapping up the quarter panel rust tasks. I got a rattle can of “bed liner” sprayed on. It took the entire can! I will probably apply another application just to be sure.

The fender install went “smoothly” until I realized later that I forgot to plug the light cluster in. So I got to do that job twice. You only get to see the excruciatingly painful initial time. I saw a funny meme. The scene is a spring install with the narrator saying something to the effect that doing a job required on both sides of the vehicle.

  • First time 2 days and 89 hours.
  • Second time 29 minutes.

Ain’t that the truth though! So it’s been a hot minute (as my kids say) since I reinstalled a fender. So it went not quite so well the first time. I did cuss some. But that’s the nature of working on cars after all, is it not?

I talk about having to remove the glass on the passenger (starboard) side to complete the welding that needs to be done on the D pillar. I also talk about how outrageously expensive new window seals will be.

I did watch a couple of videos on how to do it. One of them is listed here:

The the hell is “duck water”??

So you can see getting the window AND seal out in one piece is going to save me a LOT of money.

Lastly I tried to start the Big White Bus. After charging the batter over night, she would not start. I got one cough, but otherwise a whole lot of nothing. The relay is working, but I am not hearing the pump run. I’ll need some help with diagnosing spark and electrics at the pump. So I put this off until next weekend when I can either get my buddy Larry over, or press my son into service.

I also tried out a new camera. My son had a GoPro Hero 5 just sitting around so I

confiscated it indefinitely borrowed

asked him if I could use it. Yeah, he’s not likely to get it back. I bought a new SIM for it. The SIM I was using doesn’t work in my Hero 11 and gives me a message about that. The Hero 5 did not give me a similar message so I thought it was good to go. It was not. So you missed out on 5 minutes of riveting footage of me walking back and forth in front of the camera and using a dustbin to sweep up and spraying bedliner. I’m sure it was the difference in this week’s video being a smashing success. Que sera, sera.

Thank you for reading and Happy Rovering.

Fender Repair Part 5, MORE Crappy Welding of the Large Fender Patch (Post #622) September 2-3, 2023

Super happy

In this installment I finish the left rear fender panel. And by finish I mean I had to completed replace the outer fender I had previously welded up. I added a strap to attach the inner fender to the outer fender.

The outer fender’s welds were compromised because I ran out of shielding gas halfway through. The panel was 16 gauge and I swapped it with an 18 gauge. The right thing to do was replace it and “do it right”.

Now, I’m no body man and right to me is probably not right to someone who actually knows what they are doing. As I mentioned in the video I need another 10 or 20 years of welding experience to be “competent”. Over all I’m a lot happier with this replaced panel. The 16 gauge panel would not have worked. It would not have been watertight no matter what I did.

I covered everything with yet another coating of primer. I also put seam sealer in the appropriate places. This only seemed prudent as I am almost certain this will rust again. My hope is it will take at least 20 years to rust out.

I thought some of the welding went a lot better than the previous attempts. I want to say, “I’m getting better.” but I’m pretty sure I’m fooling myself. Most people could probably weld if shown how and a little practice. Welding WELL however is really hard.

So add to the fact I’m saying welding is hard…and welding UPSIDE DOWN is another level. We did not go over this scenario in my class. I’m half tempted to take the class again and do the entire class upside down. I finally figured out the I could weld sideways that worked pretty good. Even with my new sideways technique it didn’t stop me from getting some new holes in my PPE and my skin from hot slag dripping down. My grandson Grady was horrified by the scab in the crook of my elbow. The chunk that got me on the chest made a similar hole there.

I also did quite a bit of cutting and the sparks flying back on me warmed me up a bit. Thankfully my Round House Overalls1 deflected the sparks and only “warmed” my family package. If you remember this post from December 2010, “The one where I catch myself on fire in the furtherance of Land Rovering” [Okierover] I caught myself on fire cutting the passenger side floor panel. What I learned from that was:

  • Blue jeans are not safety gear and are a sad substitute for PPE.
  • Longjohns [IBC] (aka long handles [Collins], thermal underwear, etc…) will keep the flame off you for a brief time.
  • Your best friends don’t want you harmed, but also want to take videos of you when you are on fire so they can tease you later.

Thanks for reading and Happy Rovering

1This is my unsponsored review of Round House Brown Duck Overalls. It is a solid 10 out of 10. They are made in Shawnee Oklahoma (Home of Brad Pitt) and at $60.00 a pair (on sale at the time of this posting) a real bargain.