Busted Differential (Post #555) 3/7/2016

I headed to work this morning as I always do. About two miles from the house I heard the “sound” again. This is the binding sound I’ve heard twice before. I thought for sure it was a CV joint going out.

The two times before I was able to make a three point turn and the sound went away. In my mind this seemed logical as if a CV was binding up it would be fully articulated across the axis and perhaps unbound.

Today, the sound did not go away after the three point turn. It also did not respond to a figure-eight turn in a large parking lot near Mickey’s Garage. As my friend JagGuy says, “if it explodes it’ll be easier to find the issue.” Determined to drive it until something catastrophic happened I turned out onto Flood avenue. About a mile later I got a very satisfying crunch sound.

“I guess its broken now,” I thought to myself.

I have a new CV on the shelf so I wasn’t worried about getting a part. My elbow has just now begun to recover from the severe tennis elbow I’ve been battling for 3 months. And wet weather was coming in today. So with those thoughts I dropped the Big White Bus off at Mickey’s Garage.

I went home to file my taxes, do laundry, and blog. He called me in the afternoon and sent me a picture. I was on the way home from physical therapy and stopped by.

I told Mickey I was 72% sure it was a CV but I was 28% sure it might be a differential. It was a differential.

Bolt Chunk and Washer
differential
Bad Differential

You can see the bolt that is not seated. The top is shaved off. The missing bolt is the one that broke off. Several of the others were FINGER TIGHT, yes, finger tight. The oil in the diff and CV housing was a lovely shiny metallic mess. That metal was most likely in the bearings in the differential making it a total loss. We could have bolted her back up but it would have failed eventually.

Mickey said the bolts required proper torquing and setup with the pinion, etc, etc,… I’m taking his word for it that it would be an ordeal to put right. I can get another used differential for 150$(US) from Rover Cannibal.

We could speculate for days about why it failed like it did. Suffice to say there is a lot of “slop” built into the axles of a Range Rover Classic. This is good and bad. Bad because it causes things like this to happen. Who knows, perhaps someone in this Rover’s past rebuilt it and did it WRONG.

In any event, I’m driving my son-in-law’s Audi tomorrow and will be back behind the wheel on Wednesday. Considering the Saturday afternoon I spent with Mr. Fisher and with JagGuy on the phone trying to find my problem in the ignition that was keeping the engine from starting, I’m getting a little frustrated. I know its a rolling restoration, but damn it, I need reliability. You can laugh at that if you like, but the Big White Bus has been pretty good to me for all of 188,000 miles I’ve put on her. Land Rover and reliable? Say what you like, but they make a purpose built vehicle.

Funny thing, Ehimare, a young man from Brooklyn NY that drives a 1993 RRC and occasionally calls me for help, had his break a half shaft this week too. He’s looking for a differential as well due to his shop’s inability to get the chunk of shaft removed. Must have been a rough week for 1993 RRC drive trains.

Thanks for reading and Happy Rovering.

CV Joint and Front Axle Seal (Post #504) 6/23/2014

Here is what will pass for a how-to video on the CV Joint and axle seal replacement. I had trouble videoing it with greasy hands. I also had trouble because the phone ran out of disk space.

That let to some choppy video and you didn’t get to see the assembly. What I do hope you get from this is that it is not as complicated or difficult as it may appear. Take it one step at a time and it will become really easy to understand.

On the Okierover Difficulty Scale this is a solid 3. You’ll need more than your average tool kit. You’ll need some help with the brake bleeding. It is a technical job but relatively straight forward.

I hope you can get something from the video. It was not what I wanted to present. But I also didn’t want to waste all the video and effort.

Thanks for watching and thanks for reading and Happy Rovering.

Slow Days of Summer (Post #497) 5/31/2014


Coke and a Smile, well a Coke anyway.

Sorry for the post drought lately. I finally have a new job and haven’t had much time to do much of anything Land Rover. I ordered a CV joint and some other bits to sort out the axle problem that I referred to in Front Half Shaft Oil-Seal Failure. I thought they’d be in this weekend. Rovers North told me the CV joint was on a container ship last week. I thought for sure I’d have it by this week. By Saturday morning it had not arrived.

So Saturday I took the long drive up to Jones, Oklahoma to help the Evil German Dude. The sunroof was open and the windows down and I had a Mexi-Coke. Life is good. EGD has had some trouble with his swimming pool of late. The original liner failed after a few years and a new liner that was installed a couple of weeks ago required yet another new liner. Many hands make light work. Porsche Mike and his sweet wife Mel came out to help as well. Mel is keen to do some “off-roading” with us and very much enjoyed the comfort of the Big White Bus when trying out the seats. I hope to see more of Porsche Mike in the future…like maybe at a Garage Day, hint, hint.

We were thinking of Paparazzi Ford who was unable to attend due to the loss of his father this past week. My buddy Mr. Fisher lost his sister this weekend too. She succumbed to a long battle with cancer. Our thoughts are with both of their families in this difficult time.

209,000 miles
209,000 miles

We finished everything we could do and all that was left was to watch the water fill the pool at 6-8 gallons a minute. I drove home and stopped on the way home for some petrol and the BWB’s odometer was sitting on 209,000. The now twenty-one year old Range Rover has shown us some great miles. I managed to get 15 miles per gallon out of this last tank full. That really surprises me because my new commute has a lot more stop and go traffic due to the new hours I have at my new employment. I am stuck in “five o’clock traffic” on the way home and that is usually terrible for gas mileage ratings.

I guess I’ll schedule next Saturday for an axle tear down. I’m almost reluctant to swap the CV joint. The sound I’m hearing is not there very often. The  noise could also be explained by the wrong fluid being in the reservoir. If I do swap it, the old CV would be an excellent shelf spare if it should ever be needed.

That’s all I have for now. I’ll be videoing the axle tear down and will post it all up when I have the time.

Thanks for reading and Happy Rovering.

Front Half Shaft Oil-Seal Failure (Post #493) 5/1/2014

How many of you remember this commercial?

So the problem I’m having is exactly like that commercial, except that it’s not delicious, I haven’t bumped into a cute girl, and there’s no creepy old man helping solve the problem, there isn’t a happy ending, and it’s 2014 not 1982.

You got swivel housing grease in my differential oil!

No you got differential oil in my swivel housing grease!

Continue reading “Front Half Shaft Oil-Seal Failure (Post #493) 5/1/2014”

Worth Every Penny (Post #393) 9/21/2013

I can’t remember if I had blogged about getting an in the floor tornado shelter. In any event I did. I had ulterior motive. And the picture at left demonstrates it.

It made a perfect oil change pit. I am standing on the floor of the shelter. Every thing was in reach. Once I drained the oil pan, I moved the stairs up to the top and used them as a shelf for the oil filter.

It all worked like a dream. I am really chuffed about it.

I also investigated the oil coming from the left front hub. My dust cap has failed and the spare I got from Rover Cannibal disintegrated when I installed it. I guess my only option now is buying a new set from Atlantic British.

I cleaned the tire up and while I did it occurred to me that the oil coming out was from the differential. That means the seal for the drive shaft is also toast. And that will mean a total hub removal to fix. I’m not terribly excited about that project.

Thanks for reading, and Happy Rovering.

Axle Halves and Hub Rebuild (Post #201) 9/7/2010

Busy, busy weekend.
Lets start by saying this was a three day weekend. Meaning in America we had a federal holiday that gave us an extra day off. Labor Day. With that in mind labor was indeed what I did this weekend.

This weekend also kicked off the 2010 College Football season. For those of you in lands other than America this is like the World Cup opening weekend and your team is favored to win the whole thing. Favored right up until the team’s first snap of the ball, then you realize your team doesn’t have a chance, but you are excited anyway.

This year found us actually attending the game. A friend of my wife gave us his seats and we got to watch a football game in person. We normally watch from home as nearly every game the University of Oklahoma plays in, is televised. We had great seats, six rows up from the field on the 50 yard line. You can’t ask for better seats. (we won, defeating the Utah State University)

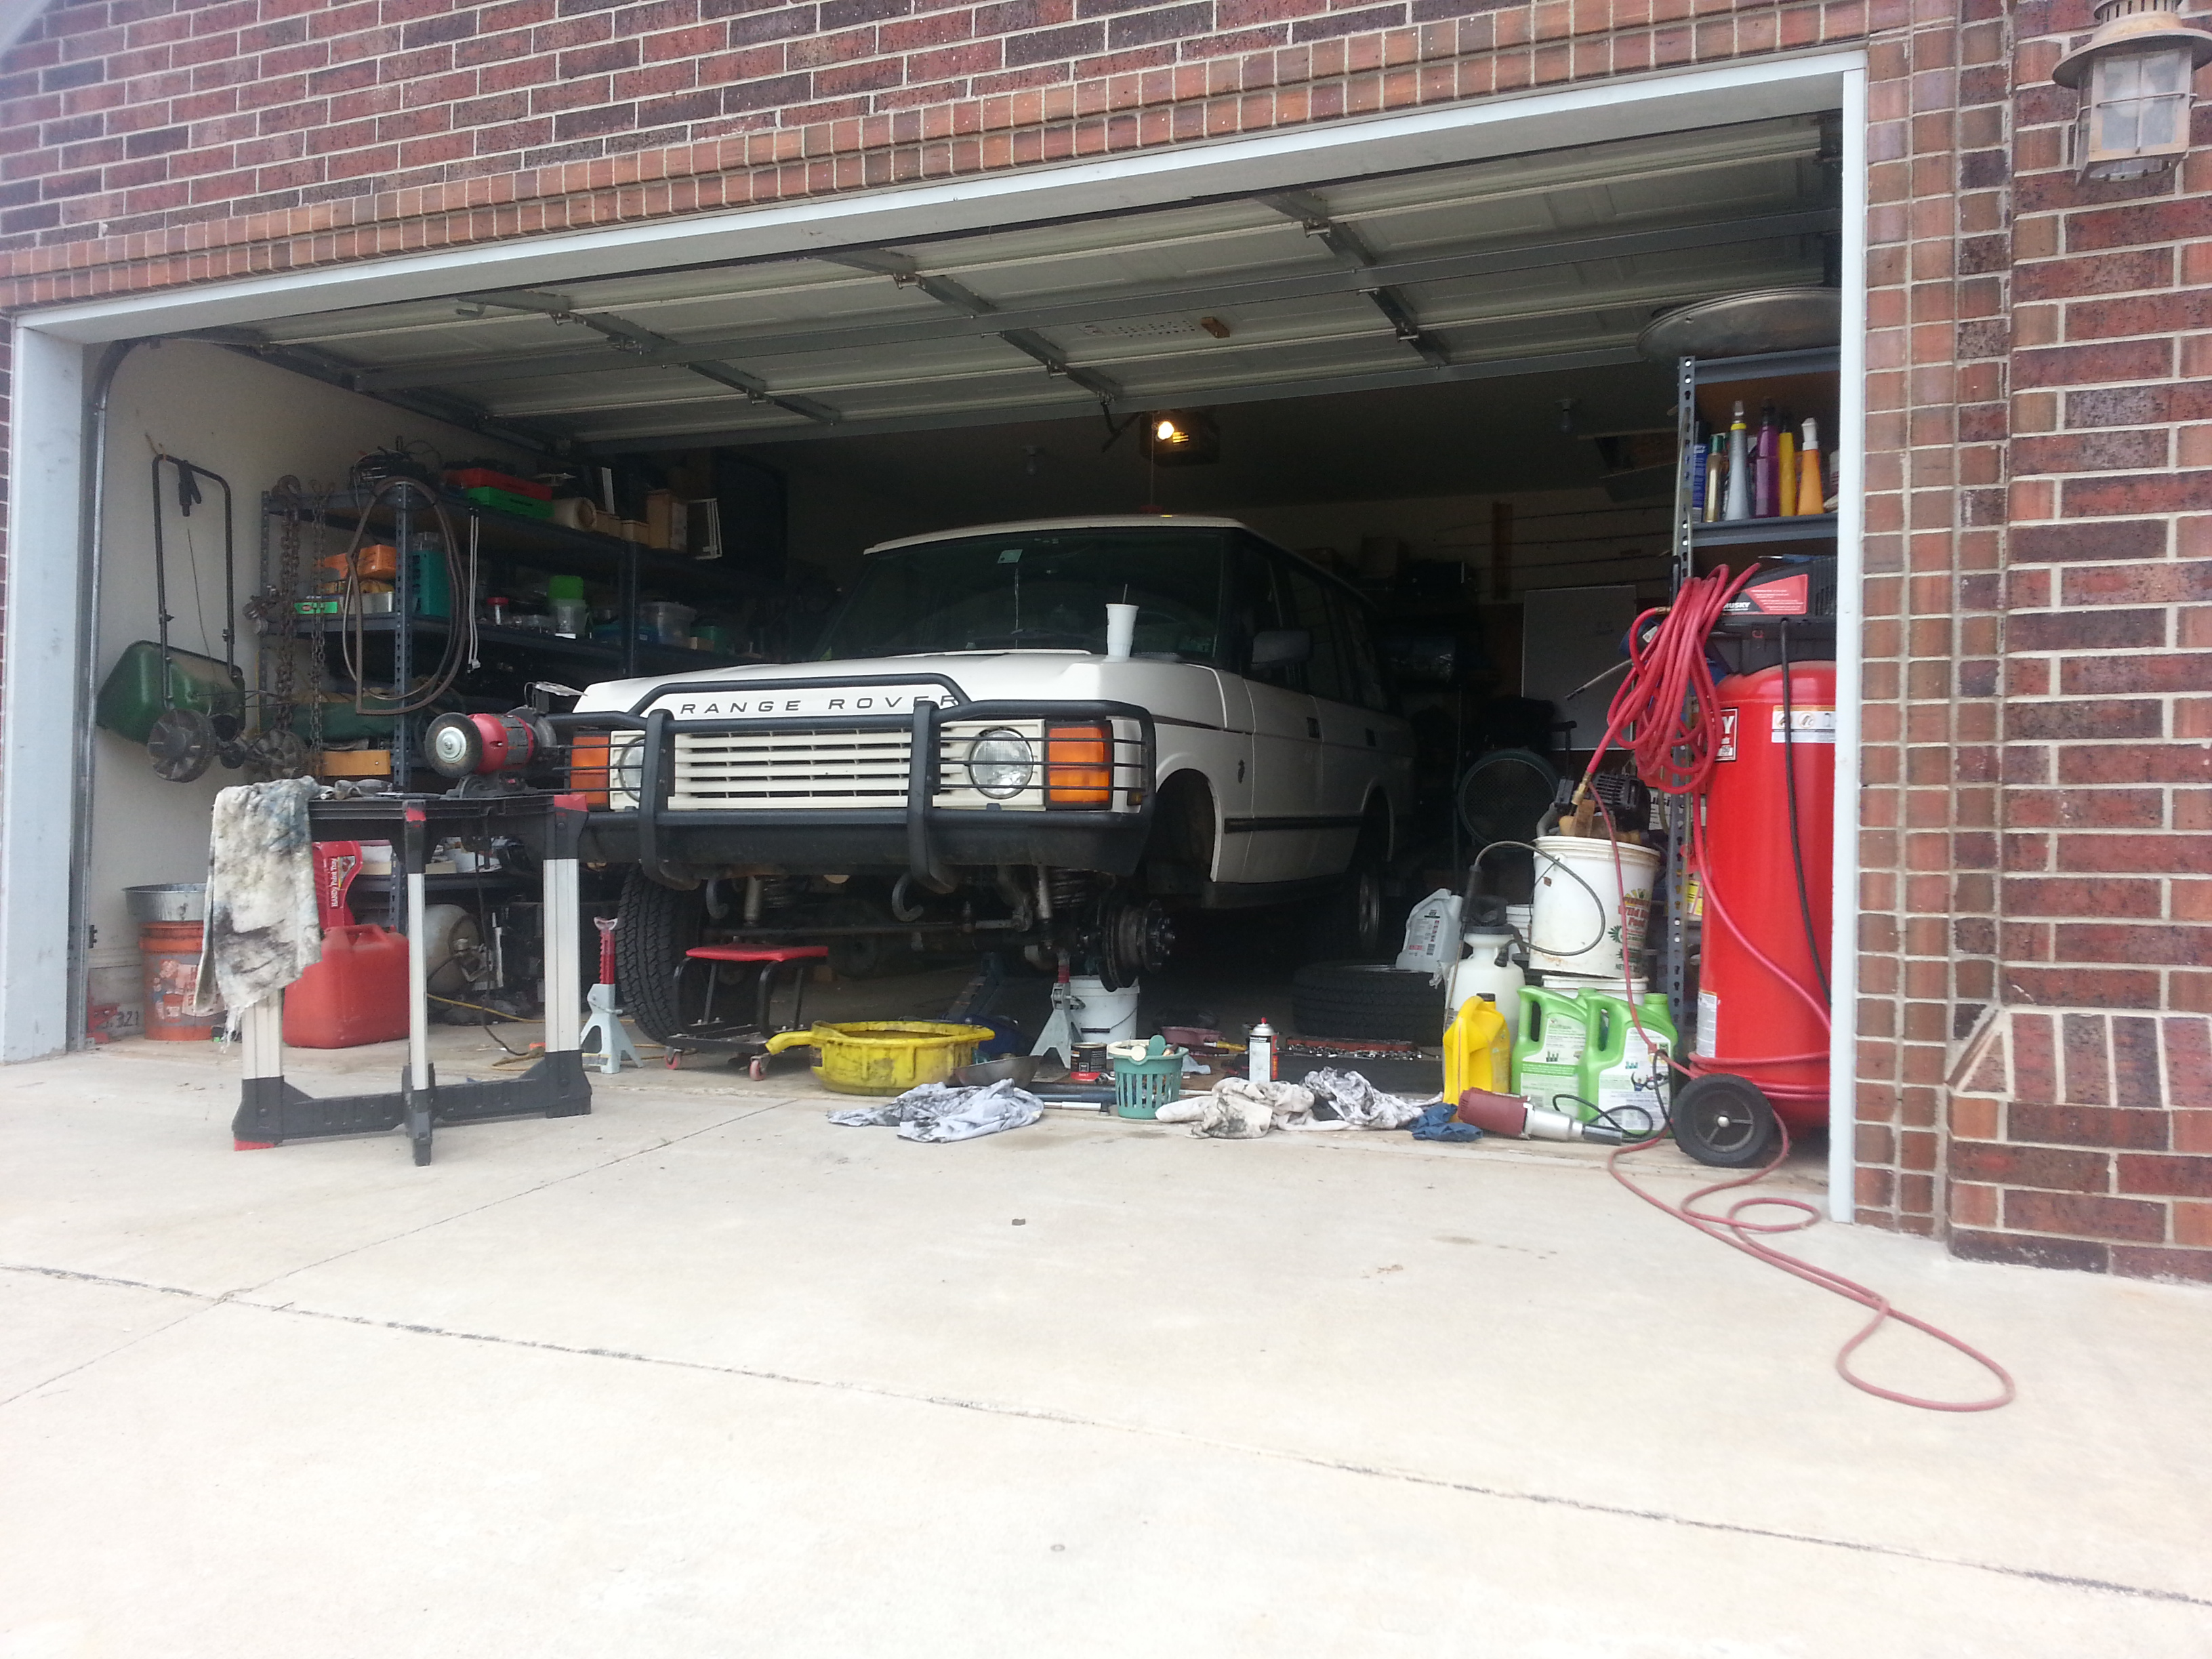
So, as you can imagine Saturday was all football and a little bit of house cleaning. Sunday was scheduled to be my designated work on mom’s house day. But with Mrs. OkieRover on call at the hospital I swapped it to work on the Range Rover day.

I skipped church and dragged myself out of bed at 0800. I broke out my Rovers North Coveted Mug (1 each), made some tea (with honey) and went out to the garage to tackle the hubs and axle half shafts.

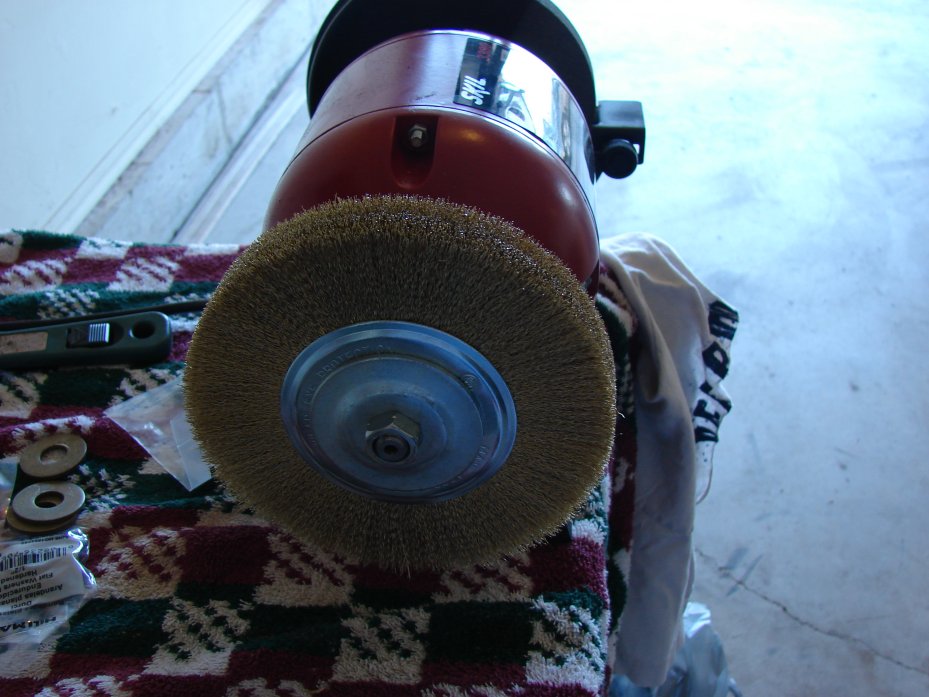
My first task was to put the wire wheels on my new bench grinder. I wanted to buy the big 8 inch model but settled for the 6 inch because it’s not something I’ll use EVERY weekend. I mounted the two fine wire wheels on the shaft. I had purchased some washers and shafts but as it turned out, they were not necessary. I’ll keep them around for the course wire wheel I bought with the grinder.
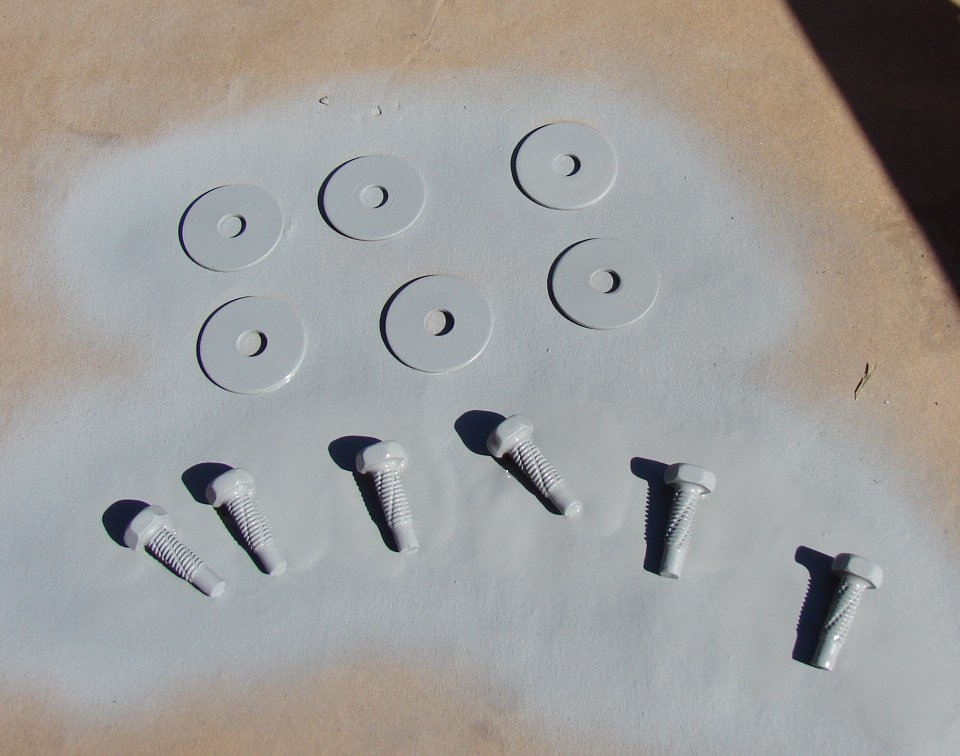
The first part of the job was to get the splash shields mounted. The bolts and washers were corroded from years of use. I polished them with the wire wheel and then gave them a nice coat of Rustoleum primer.

I got the splash guards finished and then looked at the hubs. As I mentioned in a post some time ago I have a set of new bearings for the axle. I was a little wary about installing the new races but with some reassurance from JagGuy that it was easy I went about getting the new races installed.

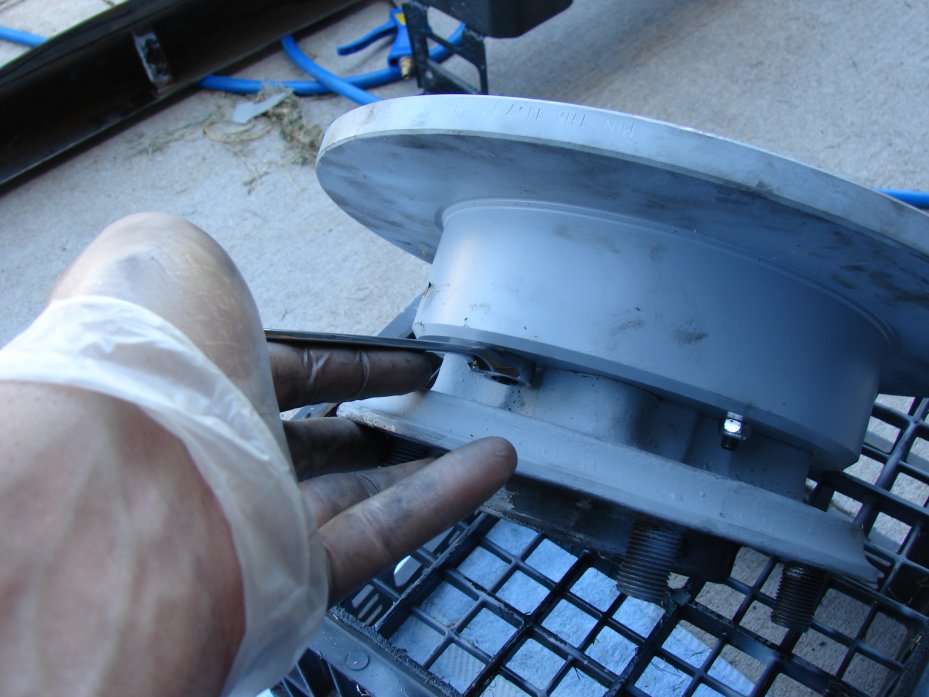
I reassembled the hubs. This is mounting the brake disc to the hub and bolting them together. Then you need to install the ABS sensor ring. I prepurchased the nyloc crown locking nuts just for this occasion. You slide the ABS ring into the holes and punt the nuts and tighten. Not hard by any stretch. The next photo has me positioning the ring. You cannot do this without tightening the bolts you see in the picture as not run down to tight.

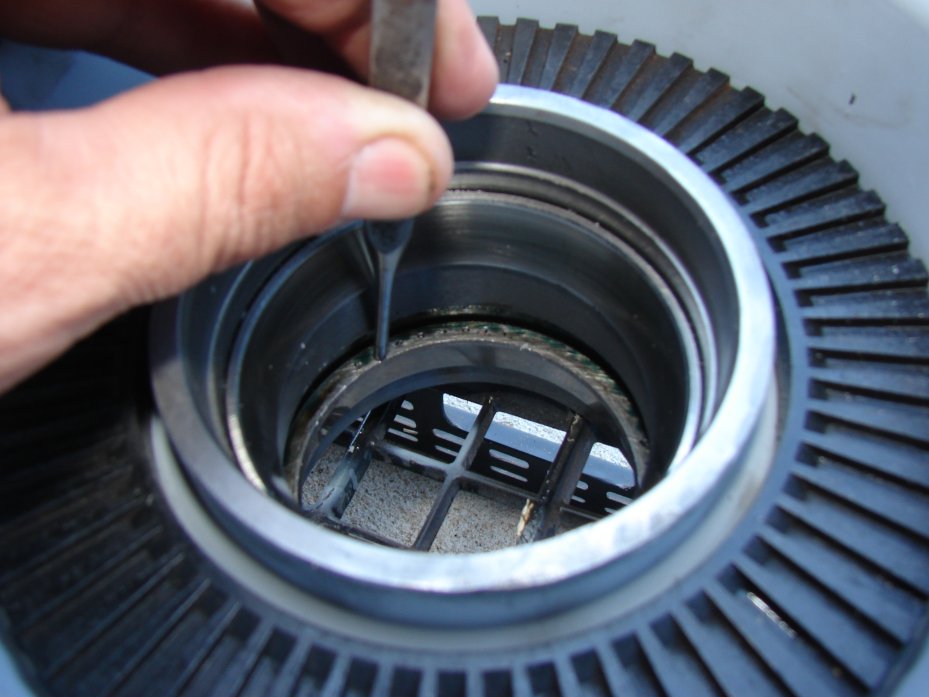
Getting the old race out requires using a punch and a hammer. The theory goes that you tap on alternate sides until the race falls out. As you may or may not know the race fits VERY tightly in the hub. I’m sure in an ideal world you would have these pressed out and the new ones pressed back in by a machine shop or the like.

My garage is not the ideal world. So I set about with the punch and a hammer to knocking them out. There are two races, an inner and an outer, per hub. As JagGuy said, its no big deal getting them out. Avoid hitting your hand with the hammer is the only advice I can offer.

You put the new races in just like you take the old ones out. The advice I offer here is striking the race about every 45 degrees as you move around the ring, slowly inching the race into place. Something to note here is having quality tools. Cheap punches will fail you on this project. Think about hitting a wooden stake with a hammer. The softer the wood the quicker the top of the stake with flare out and then splinter.

The same thing happens with cheap punches. I had the two punches my dad had in his tool chest. They are both Craftsman by Sears. Craftsman tools are replaced no questions asked. They will both be warranty replacements on my next trip to Sears along with a screw driver that no longer has a tip. The first punch was terrible and quit me about half way through the second race install. The second punch managed to finish the first hub and the second. The tool casualties are starting to mount.

The only real tip to race installation is making sure they are full seated. When you are fully seated you get a different feel from the hammer striking the punch. That is the first clue you are seated the second is by visual inspection.

So with the races installed I packed the bearing with grease and inserted it into the hub. The back side is held in place with a ring. I mounted mine with a plastic hammer very carefully. The bearings fit VERY tightly on the shaft. I know they are the same part number but in both cases only one of the two bearings fit on the inner portion of the hub shaft.

I packed the bearing spaces with more grease. I then slipped the bearing and hub into place. This took some doing but I finally got them on. You then mount the bearing washer in place and put one of the hub nuts on and tighten. I used a large set of channel lock pliers. These don’t have to be screwed down real tight. Its best you put them back the way you found them.

You then put the crush washer on and bend a flap over to hold the inner hub nut in place. You then put on the outer hub nut and tighten. I remember the tightness from the tear down. I did my best to match that.
I then packed the hub with wheel axle grease. I can comfortably say it would not take any more grease when I was done.

I applied the gasket material. There is a paper gasket included in the kit. I did not install it. Instead I just used the gray gasket material. This will probably come back to bite me in the ass. I wiped the surface as clean as I could and applied the gasket goo.

I wiped away the excess and made sure it was uniform in its application.

I installed the brake caliper and bolted it down good and tight. I then attached the brake line. I inserted the new brake shoes and got them clipped in. I will have to find a brake wear sensor plug or wire them directly. I’m not sure when the plug went missing but I remember seeing an extra somewhere.

I then slid in the half shaft. This takes a little bit of finesse but is no big deal. Get them seated as close as you can. Then take the bolts and using the same pattern you would to put on lug nuts alternate around the axle tightening until you get to the “I’m gonna need some help” point. Using a 1/2 inch break over bar, which should be standard kit in your Land Rover, use the break over bar to brace against as you tighten the bolts down.

If you remember you needed the cheater pipe to get the damn bolts off. So you can probably guess you’ll need something to get them back on there just as tight. I was running out of steam at this point and our friends were expecting us so I called it quits for the day with only the driver’s side hub bolts left to tighten and the brake caliper left to be installed.

I’m only a few more steps from having the Range Rover mobile again. On my next work day I will finish the axle. I will then install the new brake reservoir. While I have the system nearly dry I will install the new brake discs on the front axle. I understand this is not the task the rear turned out to be.

With the brake system restored, I will then remove the dead viscous coupling. I will then pray that the one I sourced used is good and install it. If everything goes well here I am on to painting the rear door by the end of the month of September. I will have to put all the electrics back together under the passenger seat. At that point I can drive the Range Rover over to the Evil German Dude’s shop and have him assist me in welding in the new floor pieces.

After those are in I need to seal them from the bottom and from the inside just like the driver’s side. I will then make a call on the sound deadening material, buy it and get it installed.

While the dash is out I’m going to remove the malfunctioning piston that prevents me from dropping the transaxle into low. I can then reassemble the carpet and interior.

I have a camping trip scheduled for the third week of October and I hope to drive the Range Rover down there.

It may be an ambitious and optimistic goal much like my hopes for a National Championship in football for my alma mater, but it’s a goal for now.

Thanks for reading, Go Sooners and Happy Rovering.