I’m getting real close to finishing the C pillar repairs. I had one final repair to finish. The patch over the rust at the bottom of the C pillar. If you know Range Rover Classics this is where the sunroof drain comes out and runs down the back of the wheel well. This is a popular place for rust to setup shop and eat your precious Range Rover Classic.
So instead of “fixing it” just like it was designed, which was poorly executed. Poorly because they didn’t protect any of the inside surfaces. Poorly because, seriously, holes in a wheel well where water, salt, sand, dirt, animal parts, and just about anything else you can imagine can hide? Super stupid. That sounds harsh, but you shouldn’t design an offroad vehicle that descended from the amazing history of Land Rovers in such a way that you can’t use it in the environments it was designed to live in.
I spent a lot of effort to shape the patch. I also devised a way to hold it in place so I could weld it there. A strategically placed bottle jack and a length of pipe. I called it the trapeze of stupidity in the video. I’ve done dumber things. This one actually worked really well.
After turning up the welder a tad, and increasing the wire speed to compensate the upside downed-ness of this welding. I saw a couple of videos where guys were welding some structural steel and they suggested uping the wire speed and voltage. That seemed to work. My problems were with the primer I painted on the fender and the patch. And at some point I think my ground was not very good. This lead to some very poor welds which I had to grind off…. several times. Eventually I got everything sorted out and the welds started holding.
Once I had the patch in place and covered in primer I took a look at the rest of the rear quarter panel. I cleaned up some surface rust and coated it with primer. I know this is only to slow the rust down but it felt good to do it.
I got all the patches on the quarter panel covered in seam sealer. Everything also got a final coat of primer. Over the primer, under the wheel well, I put on two coats of rattle can bedliner. It is my sincere hope that this will keep some rust at bay for at least a few years.
I have all the wrap up to do now including reassembling the quarter panel and reinstalling the mud flap assembly. That will be the next video. After that, I will be working on the passenger side B pillar.
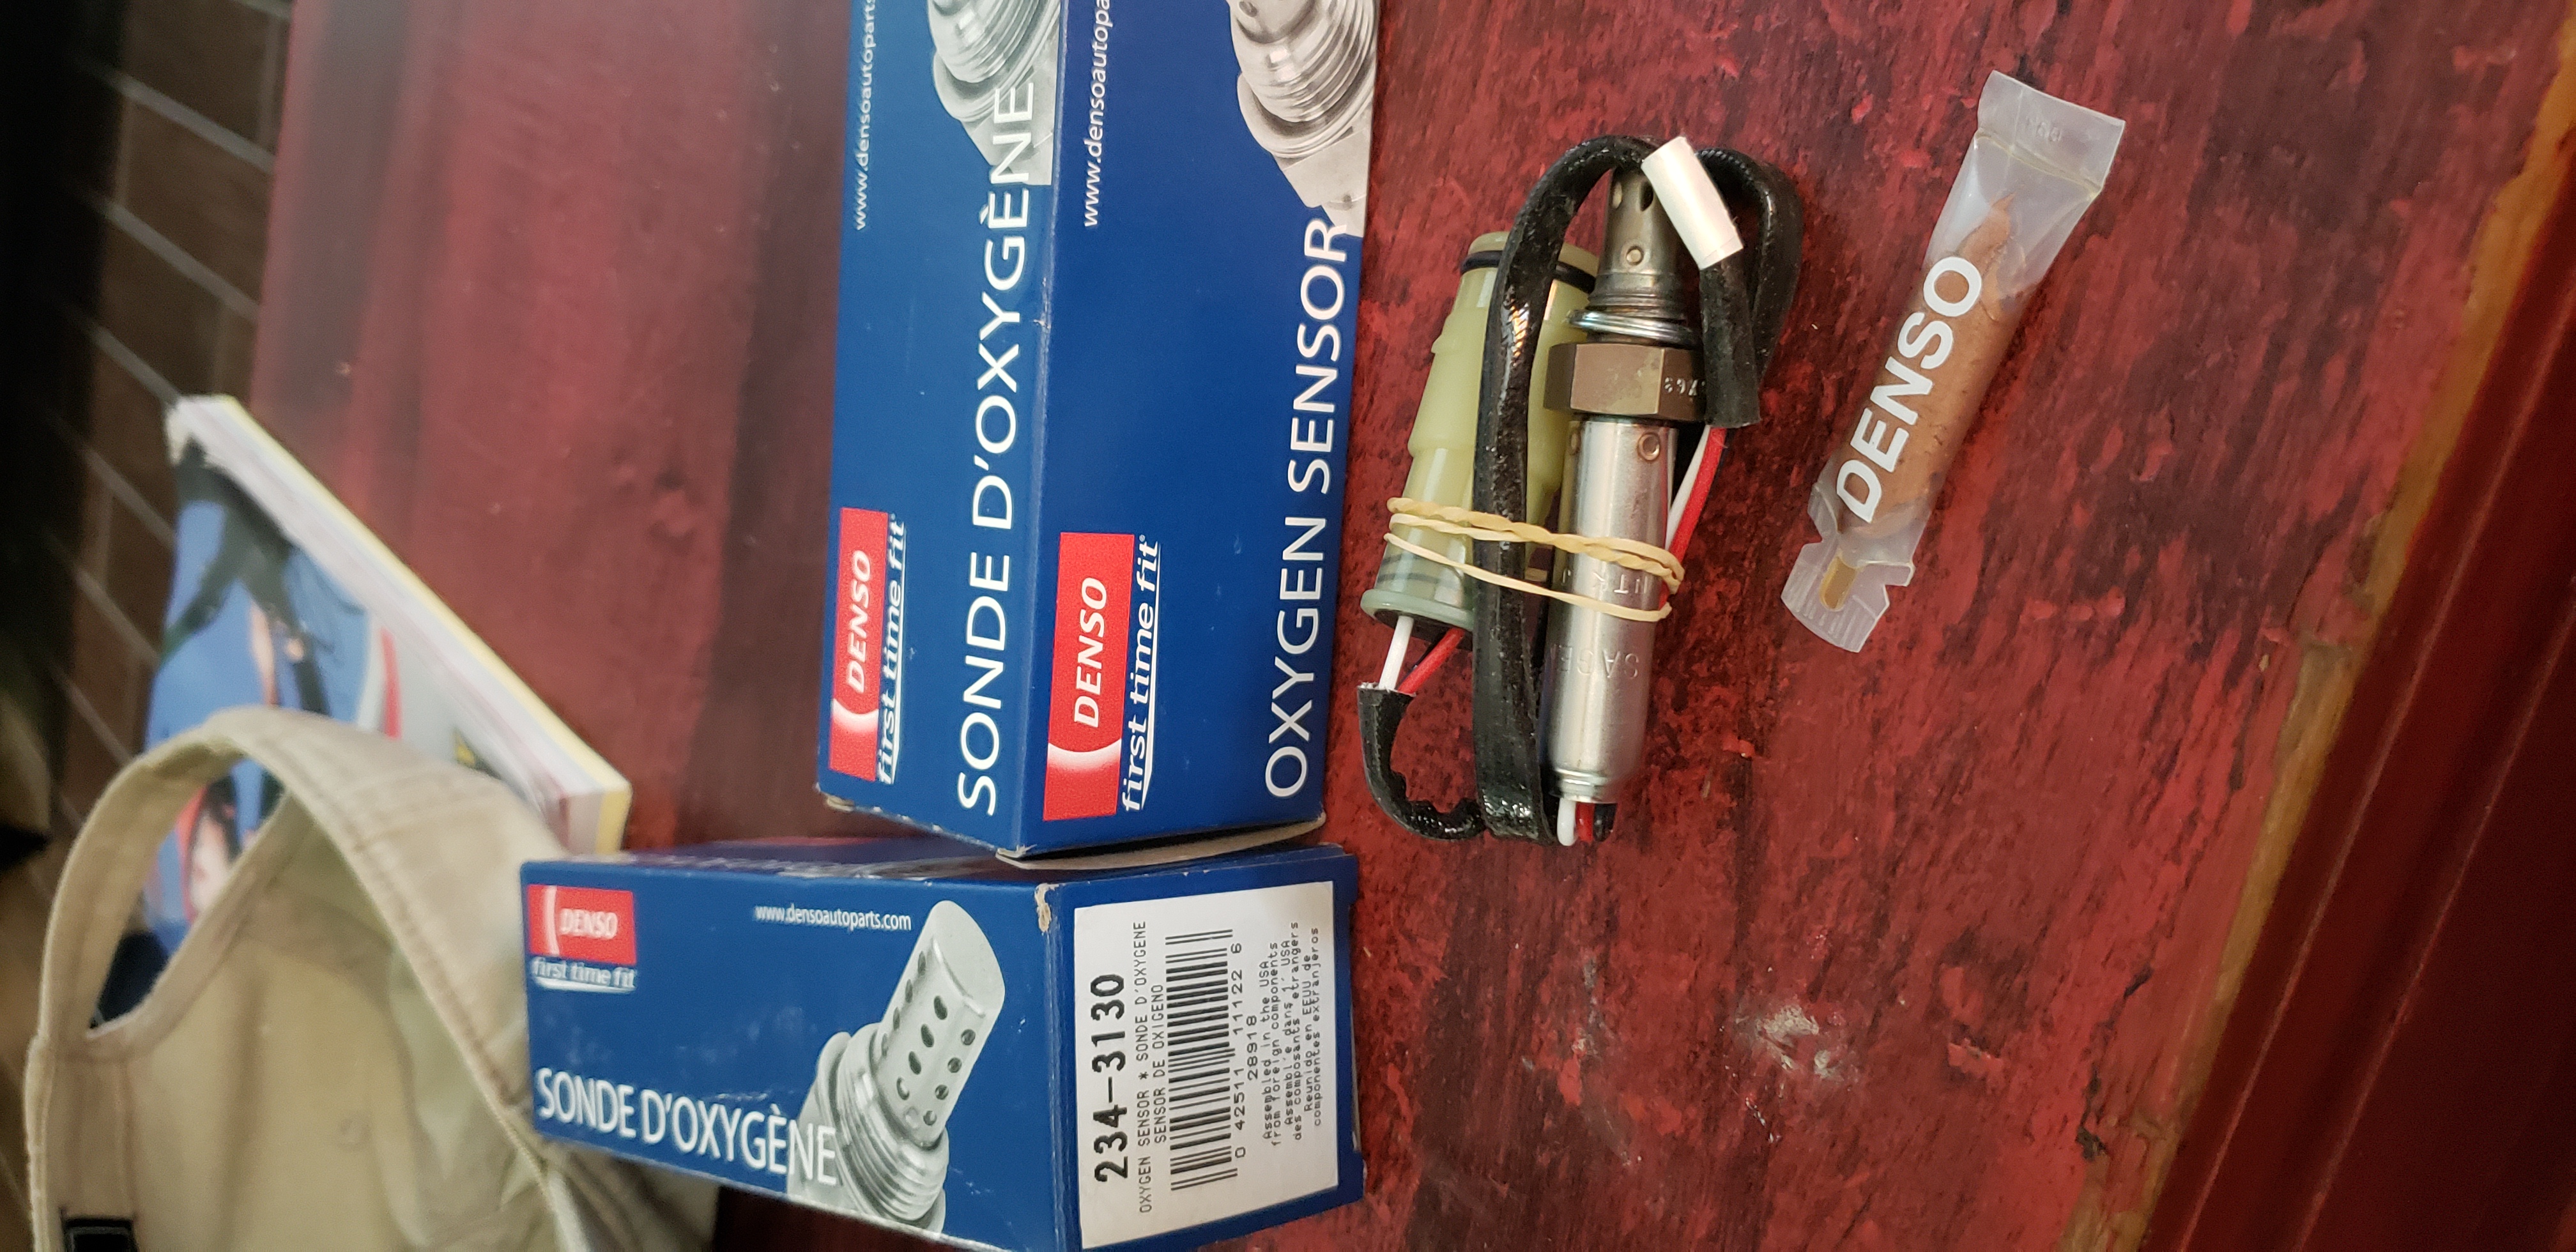
I’ve had some issues with the idling on the Big White Bus. Once she is warmed up when I come to a stop sign the idle drops to something like 300 rpms. And eventually she drops lower and finally dies.
I read online that the O2 sensors could be the culprit. I couldn’t remember the last time replaced the O2 sensors. I am not getting Code 43 or 44. As I am not driving her daily I don’t have a good idea what the gas mileage had dropped to. So I decided I’d spend the money and replace. Continue reading “Oxygen Sensor Replacement (Post #587) 9/16/2019”
This is a brief explanation of the Difficulty Scale. I am not the most mechanically inclined person on earth. I am not even in the top 20% of the population. Obvious questions come up when someone who owns a Rover makes that statement. A few of my favorites are,
“Why did you buy a Rover then?”
“You’re not the sharpest knife in the drawer are you?”
There are others I’m sure you’ve heard. This is my scale. I have some friends that my 5 is their 3, notably the Evil German Dude and Jag Guy. They can disassemble motors in the dark, asleep, and not lose any parts. So this is the scale that I use to gauge how hard a project might be. There are five levels one being the easiest, five being virtually impossible for me.
Level One
Easy.
A talented 5 year old could do the work. If you can’t do this level, get a 5 year old they would love to help.
Level Two
Technical.
You may have to read the instructions. Usually requires more than the Official Land Rover On-Board Tool Kit. You’ve heard “It ain’t rocket science.” That is a common term used for this level.
Level Three
Moderate.
You are gonna get dirty doing this level. Mistakes like taking it apart and putting it back together more than once are common. At this level after you render the vehicle undriveable you will find you may need a new or special tool you don’t own, and must reassemble the vehicle to go and purchase it because your wife has the minivan.
Level Four
Hard.
Higher math skills desired. You will have the vehicle apart for more than a few hours. Pray for good weather or decent shop where the work can be done in a semi-climate controlled environment. Three-dimensional spacial skills are used at this level. A high degree of praying to the Rover gods wouldn’t hurt either.
Level Five
Impossible.
The ability to understand particle physics is good here. Find a mechanic or an automotive Superhero that will work for beer or who owes you money. Often this level has conversation like, “No, I don’t know what happened, send a tow truck.” or “I think I have a Visa card with that amount available on it.”
If you follow me on the Okierover Facebook Page you read that I needed to replace my oil sump gasket. And as I predicted the weather did NOT cooperate. It stopped snowing at 1030 that morning but the wind was blowing 20-30 mph all day. It was very chilly in the garage.
If you are from Oklahoma or drive a domestic automobile (Chevy, Ford, Dodge, just kidding no one drives a Dodge) you can translate oil sump to oil pan.
I had trouble with the term too. Try Googling “oil pan gasket” when your British motor car has all their parts listed as “oil sump”. The same thing happens when you are searching the RAVE manual looking for an oil pan. Thankfully when I ordered the part from Rovah Farm it was easy to find.
Back to the leak, the Big White Bus has recently been leaving a nice puddle of oil when she comes to a stop. I know all the jokes about British cars and leaks. If you don’t see a leak, it’s probably dry. Well, I don’t care for leaks. I do my best to find the leaks and eliminate them. Like the steering box, it leaks like a sieve. I should have a rebuilt unit next week. And I will have it installed by the end of that Saturday. That will be the last of the petroleum based fluid leaks. It only took me 3 (three) years!
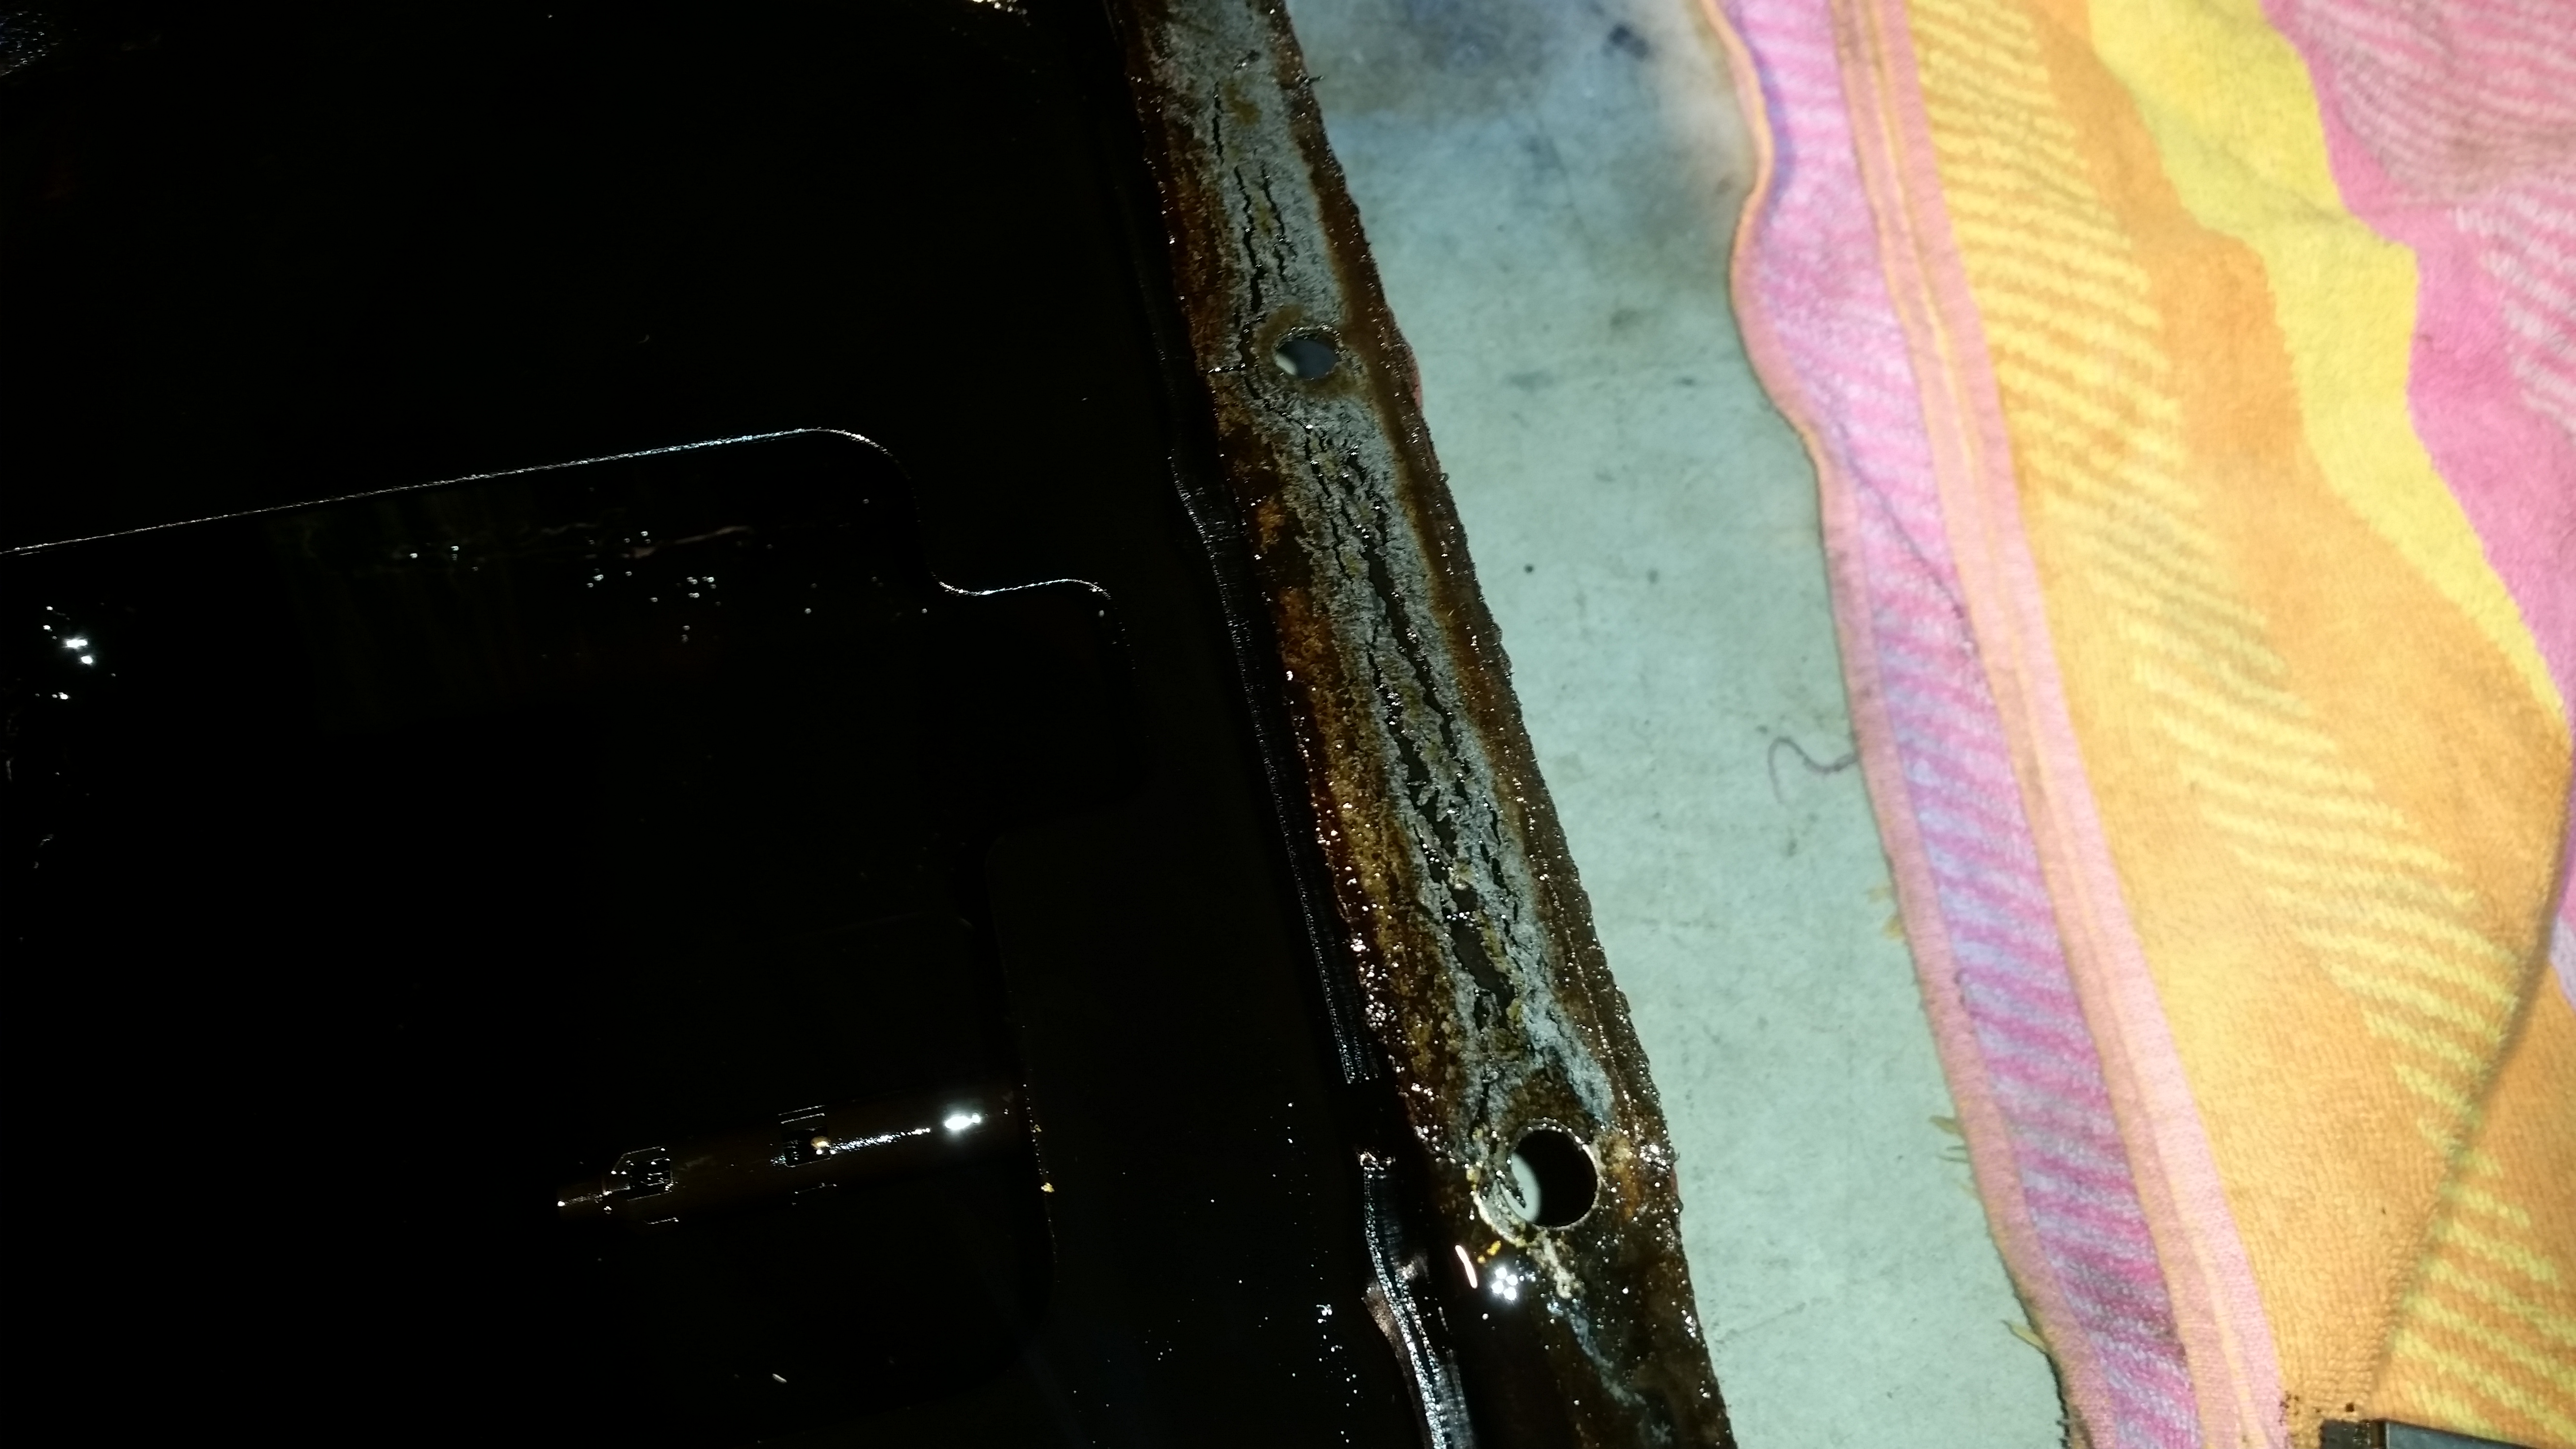
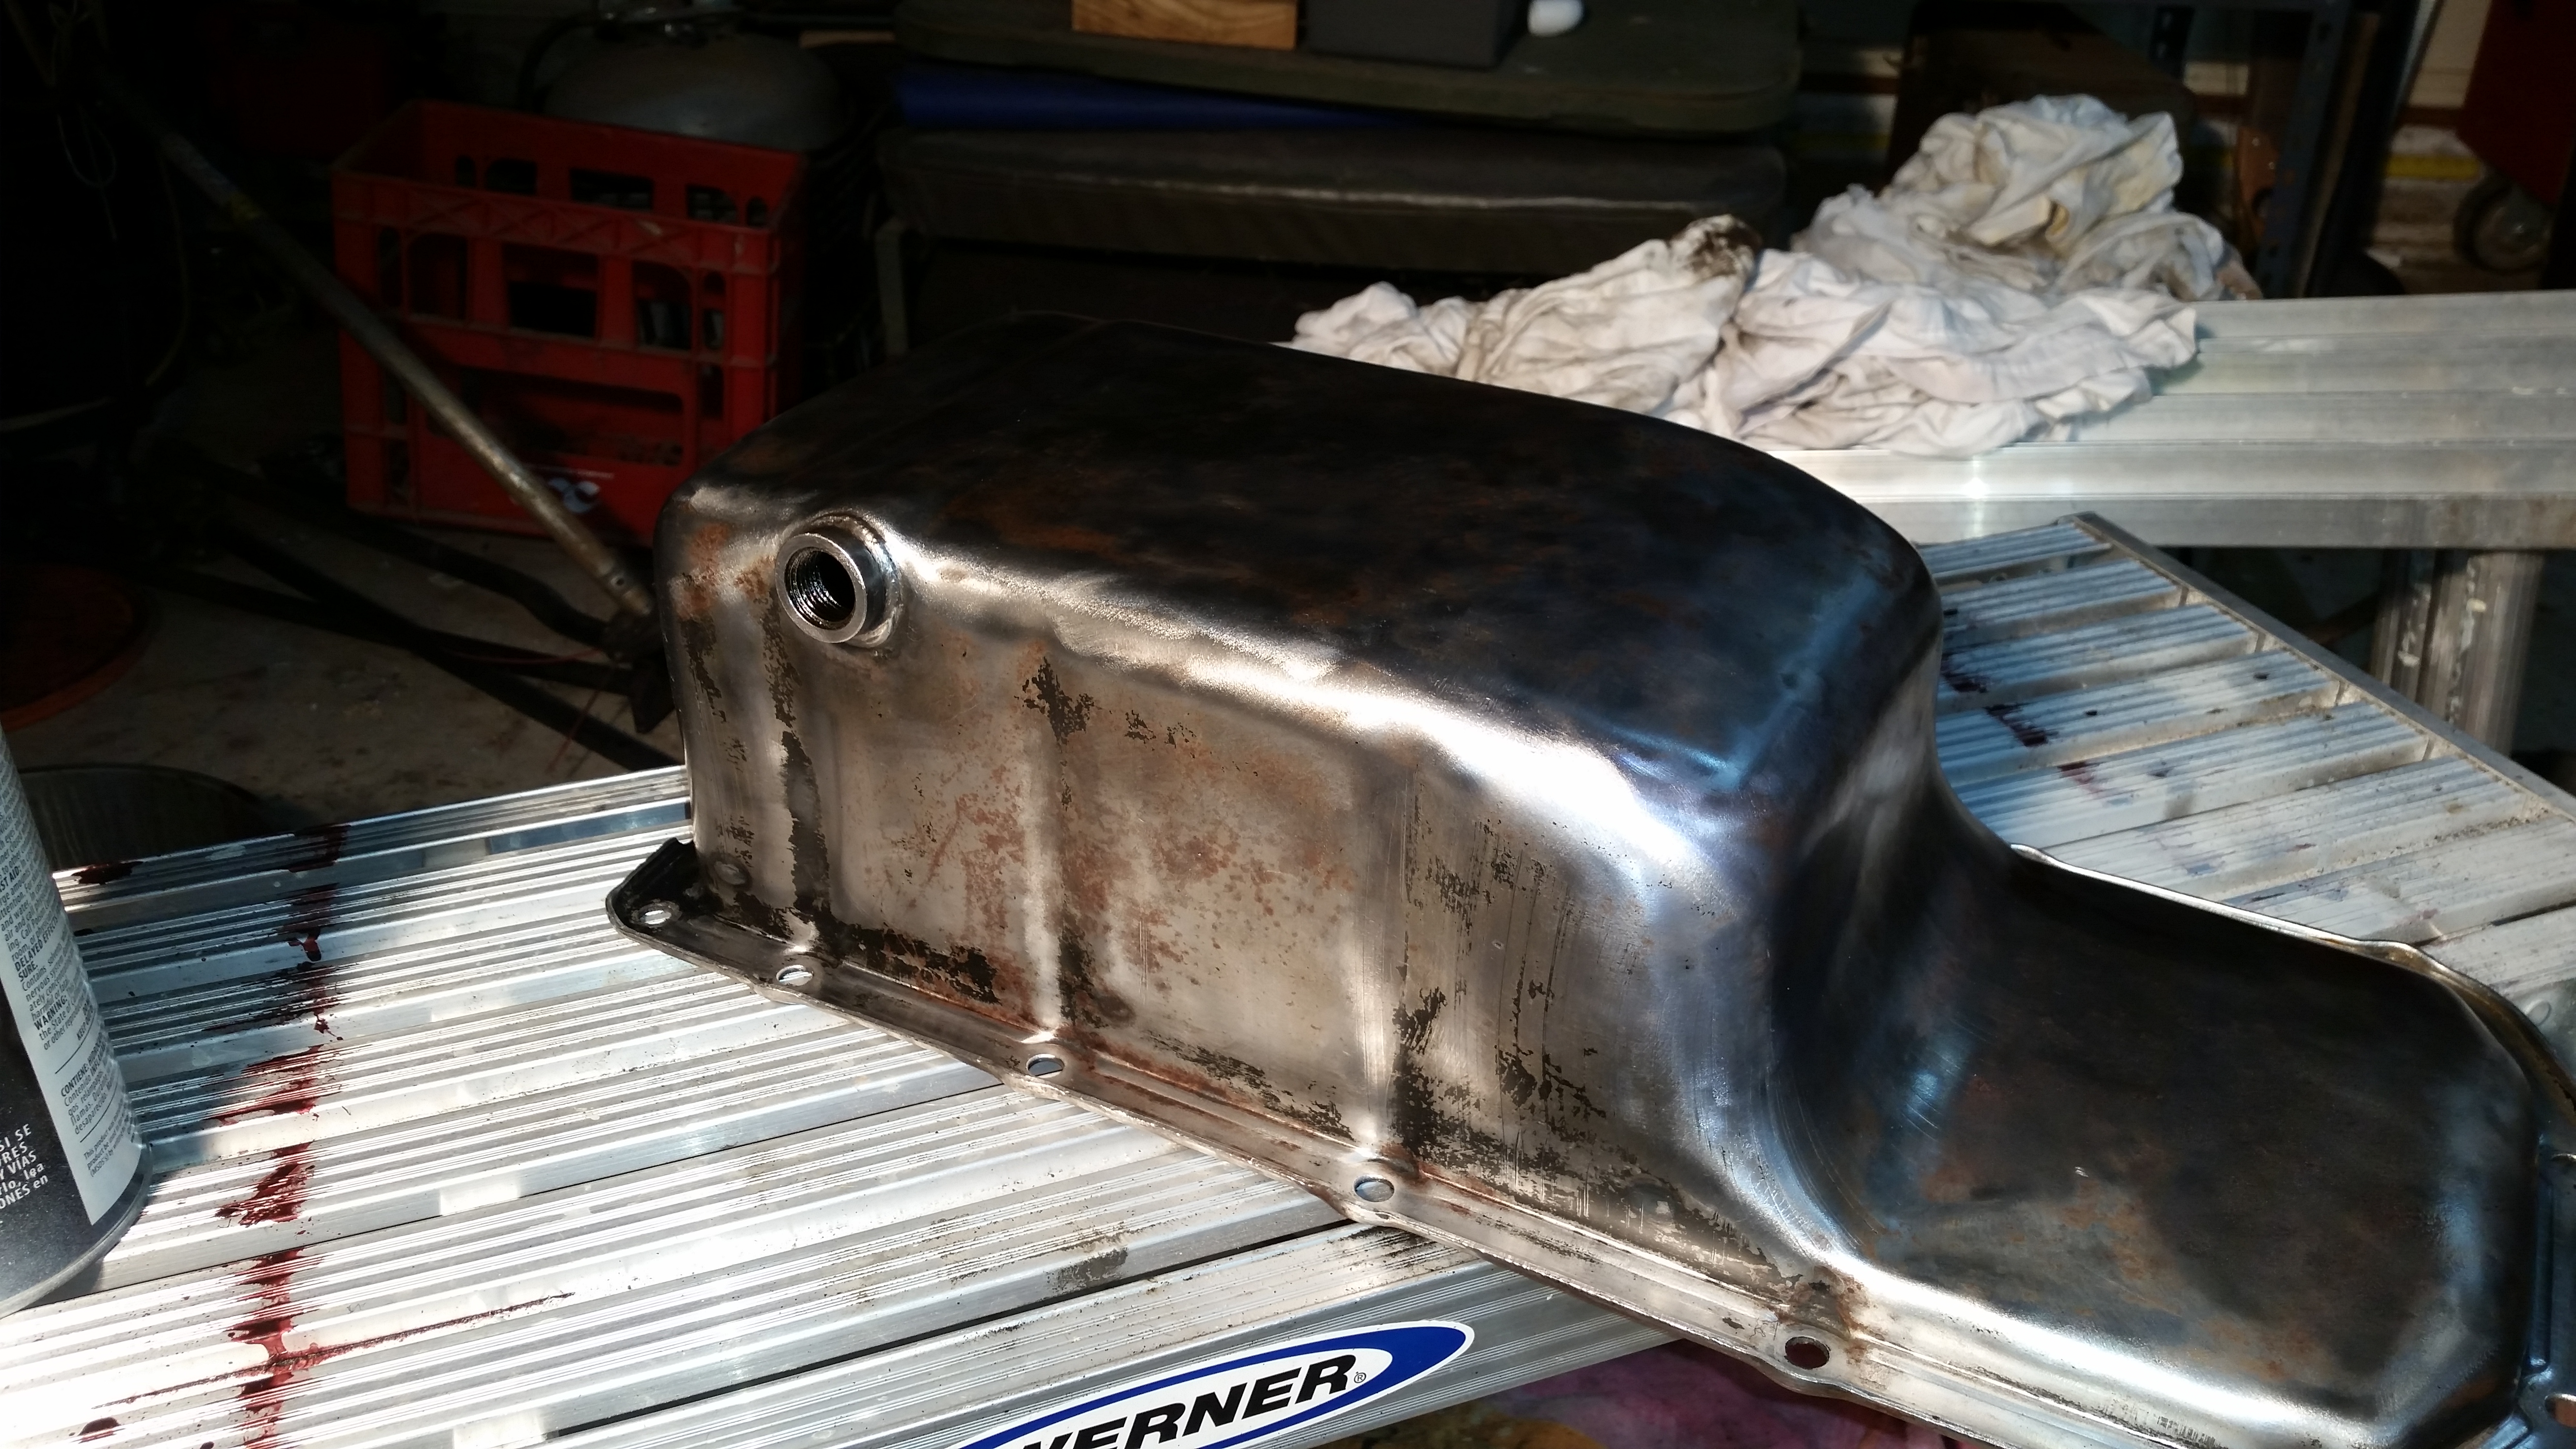
The sump dropped away from the block. Labeled for your reference.
The source of the leak? the oil sump gasket or to be more specific, the LACK of a gasket. I am the second owner of this motor. As you can see below, someone used Permatex Ultra Gray for a gasket. First, Ultra Black should be used, not Gray, and there should be a cork gasket completing the seal. If you have done this I’m not criticizing, I’m just pointing out now you probably know why it’s leaking.
That is a bit too porous to hold oil back.
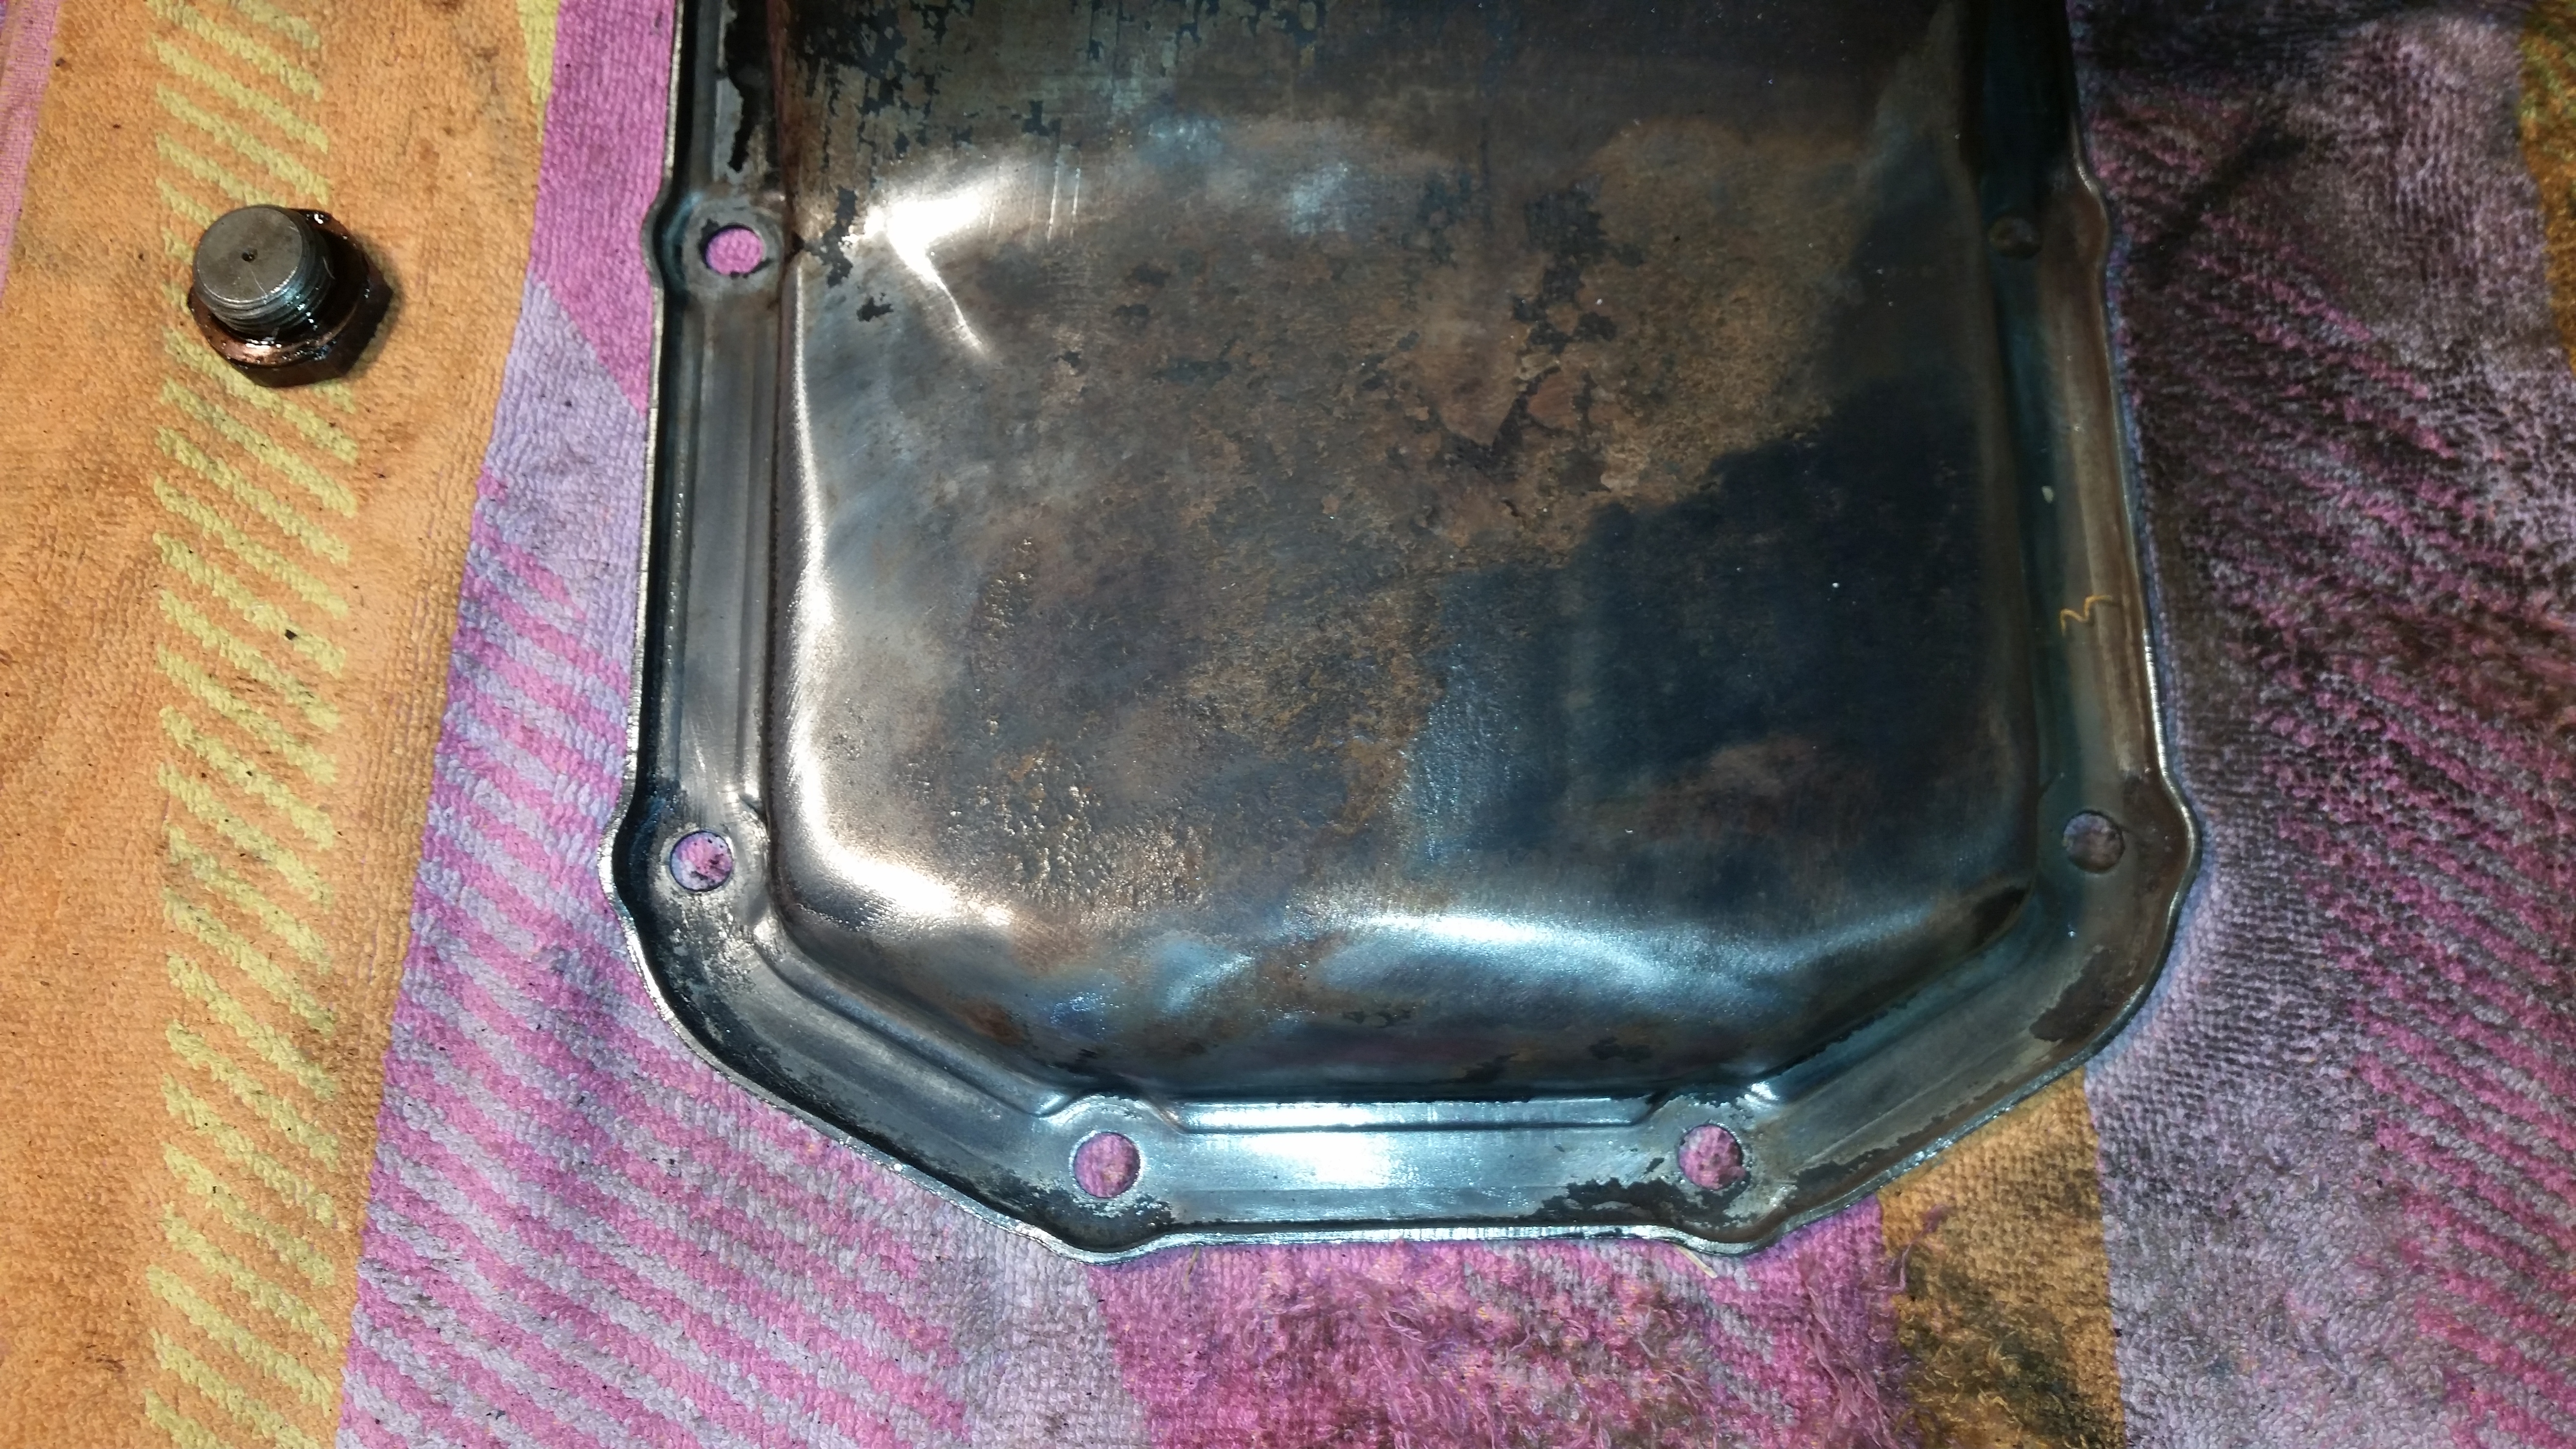
My oil pan sump had to be removed and serviced. There was rust and chipped paint and what was left of the “gasket” had to be removed prior to putting a new one in. I was surprised that something that has had so much leaked oil on it could rust, but it did.
The oil sump with a bit of the rust removed (on the right).
I got the trusty angle grinder out and hooked up a wire wheel and scraped off the rust and the factory paint (black). The challenge was getting the oil and grime off. I used brake cleaner, a lot of rags, and in the final stage before painting I used some pre-paint grease remover.
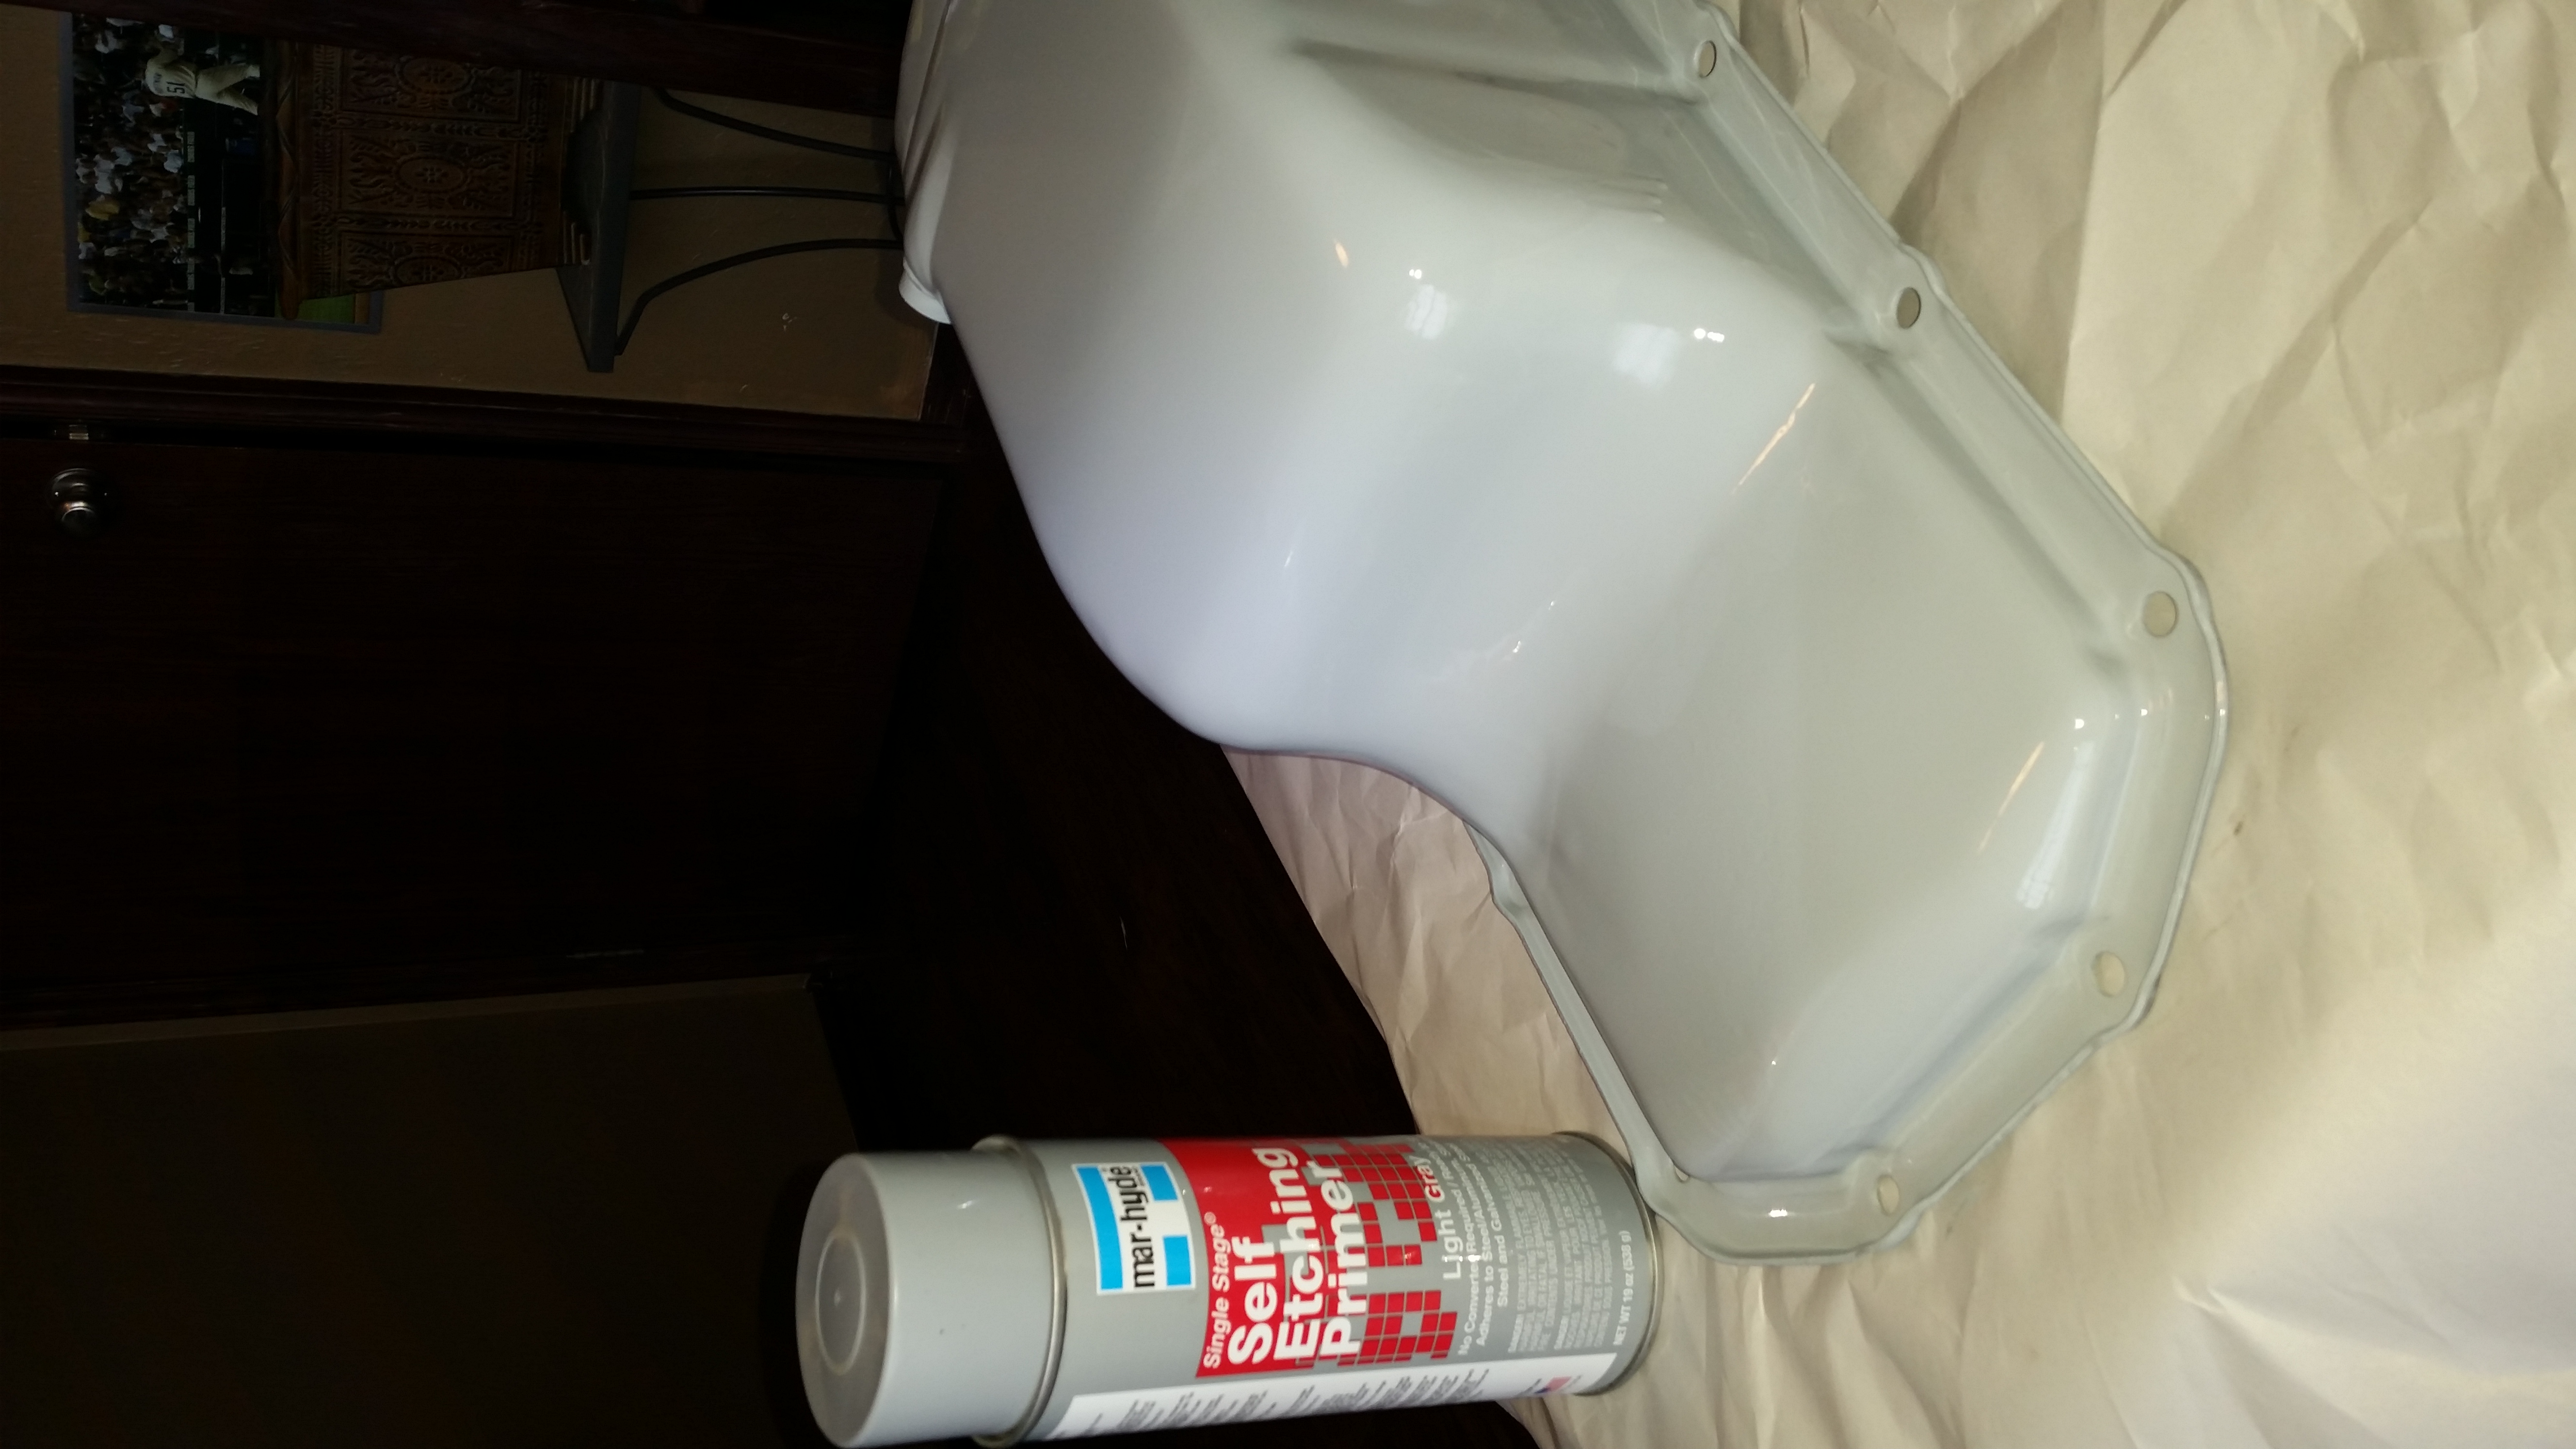
Ready for paint.
While I had it off I cleaned some of the grime and muck out of the sump. I used a flat razor scraper. I was careful to make sure I left no “chunks” in there. Short of a sand blaster there was no way to get all the baked on muck out of there. My sand blaster cabinet is not big enough.
The sump was ready to be painted. I got the Mar-Hyde Self Etching Primer from inside the house where it was being stored at a temperature that allowed it to be used. I painted the pan with the first coat and then brought the pan into the house and into my office to dry. I gave it an hour to dray and when back out to clean up the underside of the motor. I also swapped out the last poly bushings on the radius arms.
I don’t know why WordPress won’t let me rotate this picture. Fresh paint looks good.
I put the second coat of paint on and after some waiting I started to put it all back together. The first thing that is required is getting the Permatex Ultra Black gasket maker on and letting it set up. I did this in my office. I wasn’t even sure if it would setup in my garage at 30 degrees Fahrenheit. Once it set up I put the cork gasket on and lined it up. The Permatex acts like an adhesive at least enough to secure the gasket from moving during install.
The next challenge is to get the sump back in place and bolted up to the block. Take your time and don’t rush. The cork gasket can slip and if you break it, you are done. After it is in place you bring the bolts up to snug. The manual calls for you to tighten it to specific torque settings. The idea here is that you don’t crush the gasket.
From the manual you can see that is not a lot of torque needed. I don’t have a torque wrench that I could get my 13mm sockets on. You have to use narrow walled sockets, etc… in short my tool chest is inadequate for this. So I was careful when I was tightening them. A note here, the rear bolts are not labeled but I assumed it was the ones on the row nearest the transmission tunnel.
I finished up the oil change and and then the moment of truth came. I got the oil up to temperature and watched for leaks. None were found. I drove the Big White Bus to church the next day and still no leaks. I’m going to mark that down as a success. I will of course be watching it for the next week.
On the Okierover Difficulty Scale this job is a 2 (two). You will have the oil sump off, you will get oily and dirty (and not the good kind). You also have to remove the sway bar to get the sump out. If you aren’t going to clean it up you can skip the removal and just clean it up while under the engine.
Thanks for reading and Happy Rovering.
PS the Oklahoma Land Rover Group is still on track to #Hibernot and take on a section of the Oklahoma Adventure Trail. If you are interested check out the details on the Oklahoma Land Rover Group on Facebook.
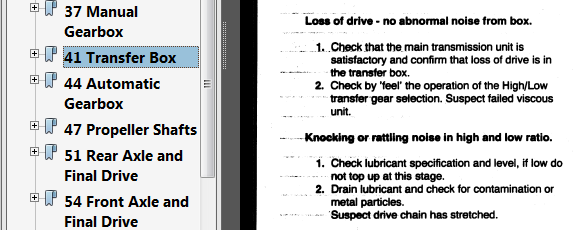
There it was in black and white. Knocking or rattling noise. It doesn’t get more obvious than that. The picture above is from the RAVE CD. It clearly describes the problem I was having.
Here is what will pass for a how-to video on the CV Joint and axle seal replacement. I had trouble videoing it with greasy hands. I also had trouble because the phone ran out of disk space.
That let to some choppy video and you didn’t get to see the assembly. What I do hope you get from this is that it is not as complicated or difficult as it may appear. Take it one step at a time and it will become really easy to understand.
On the Okierover Difficulty Scale this is a solid 3. You’ll need more than your average tool kit. You’ll need some help with the brake bleeding. It is a technical job but relatively straight forward.
I hope you can get something from the video. It was not what I wanted to present. But I also didn’t want to waste all the video and effort.
Thanks for watching and thanks for reading and Happy Rovering.