D Pillar Vinyl Replacement, Part 1 (Post #596) 3/24/2022

D Pillar Vinyl Replacement

In this video post I investigate my cracking vinyl on the D pillar of the Big White Bus. The Southern Plains is very unforgiving to fabric, even plastic fabric. Mine is cracking and looking pretty terrible. Time to pull it off and get it replaced.

I’m going to need to refresh the black paint on all the pillars and the door frames. I found the part number for a rattle can of Beluga Black. Lots of cleaning, light sanding, cleaning, taping, priming, sanding, and painting, and more painting coming this summer.

And…the headliner is going to need either regluing or replacing…..again. I might go with a fabric that I can stick my souvenir event patches can stick to, just.like.a.real.overlander.

I also find a lovely whole rusted in the passenger side D pillar that will need some repair. Lots of grinding away the rust (rust abatement), welding in a new piece of metal, priming and painting. Good thing I took a welding class last year.

This is part one of possibly two or three videos.

Thanks for watching and Happy Rovering.

The last of the 70 degree days (Post #223) 11/27/2010

I caught a break on Wednesday. The temperature was above 70 (F) degrees. That may not seem like much of a break. If you knew that last Tuesday I pulled the sagging headliner off my overhead with the thought I would replace it after I was done running my mom to her doctor appointments. What I didn’t plan for was the application temperature for the spray glue.

Yes, spray glue has an optimum temperature with a minimum and maximum temperature use range. 70(F) is the lowest you should attempt to use their product. As the temperature was a pleasant and hovering in the mid 50s(F) that day I thought I’d be fine. But after reading the side, I thought I should probably call the information line. The lady on the other end of the line, said, “seventy, seventy degrees”. Well that was disappointing.

So I went on with my sanding of the old glue away from the overhead and generally cleaned up the surface in anticipation of NEXT MARCH! when I know the temperature would creep above 70 degrees. I used some 60 grit sandpaper and a foam sanding block. It’s light sanding, just enough to remove the glue. It is apparent that this will be the last swap with this fiberglass overhead. The fiberglass layers are starting to separate and will either need to be repaired or replaced.

So I rolled out the new headliner material that I bought from Gipson’s Trim in Oklahoma City. This place is a throw back to the old warehouse style shops in the olden days. Every thing about this place is retro. They still hand write receipts. You can see the rolls of materials behind them in the dusty and unkempt shop. So I told the counter man my application and he suggested the thin foam fabric due to the sunroof, and pointed me to the samples board, “Just match it up the best you can.” So I did, selecting W1913. I am mostly unable to distinguish one shade from another, my internal color wheel doesn’t work all that well.

I purchased three yards and two cans of glue. I remembered after I got home and cut the fabric that I made this same mistake last time. I needed 3.5 yards, factoring in the fabric for the sunroof cover and a little over two cans of glue. I had two extra cans of glue so I was good there, but will need to buy another yard (half yard if they will sell that little) for the sunroof.

I laid out the fabric and decided to use the “glue a foot, stick a foot” method. My friend EGD said that is how he had done it before. The last time I did the job I glued a few feet and tried to stick it with mixed results.

I am now ready to offer the secret to getting the liner into all the corners. I didn’t do this, and only came up with the solution AFTER I finished gluing. Get some weights in bags, place them on the fabric in the corners to insure they fabric meets the contours and stays in place as you stretch and match the fabric to the contours. I have a few places that the fabric after stretching it here and there pulled loose from the headliner overhead. I may try a injection technique I’m dreaming up in a lame attempt to fix my mistakes. A bag full of shot might be too heavy, while a small bag full of beans might be too lightweight. I think some five pound leg weights, the kind in bags might work. More on that if I try it.

The last time I did this project I attempted to cut the fabric “to fit” the openings. But after I saw what it was doing I decided to try a different technique. The first time I did the project I used masking tape to hold the fabric. It worked well, and was still in place when I removed the old fabric this time. On this headliner swap I decided to use glue and glue the fabric on the underside.

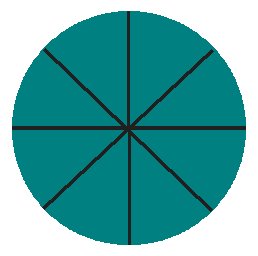
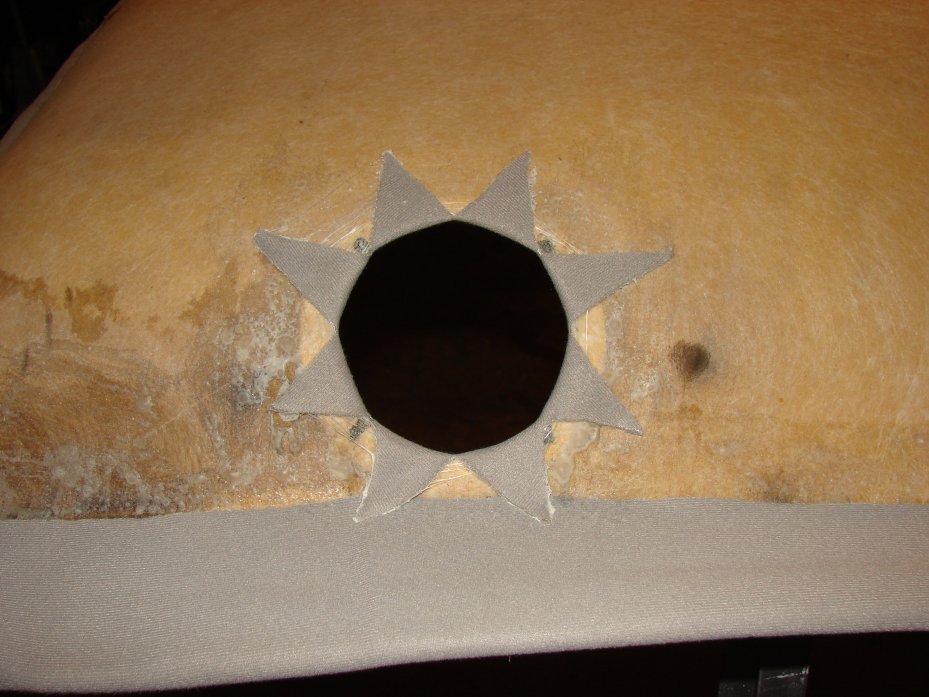
I also cut all the holes using a pie pattern which I hope will provide good results.

It produces a star pattern when you glue it back.

I used this or a similar method in all the openings. The sunroof, I cut to the corners and then cut out the middle to within 3 inches of the edge. The same with the front dome light opening.

You can see my multi-function ladder which transforms like a freakin’ Transformer in to all kids of forms. This is the scaffold configuration which made a good surface for me to work on.

So with that, the temperature was dropping each minute so I was in a hurry. It shows in my work. Pro tip: Avoid being in a hurry and take your time. It will result in a much better product when you are done. Like EGD said while checking out my work at our Thanksgiving feast, “Just think, a few more times and you will be pretty good at that.” Maybe so, maybe so.

Thanks for reading and Happy Rovering.

December 27th, 2004 (Post #55)

December 27th, 2004
Head liner, New tires, Recovery points, Got stuck, FTP down, Lense project, Transmission service

Head liner
I pulled the fabric off the moon roof cover this past Sunday. It seems the cover is made of fiberglass. The fabric came off faily easy. I was surprised by the noises you normally don’t hear when the head liner is removed. I will try to refit a new liner cover on the moon roof cover hopefully this weekend if the weather holds.

I have decided NOT to take the moon roof cover out of the truck to put the fabric on. I have several reasons for this but the biggest is: I don’t know if the cover will come out of the moon roof assembly. I will have pictures in the write up but it is not easily assertainable how this would be accomplished. So I will cut the fabric just short of the edge and glue it in place while the roof is still in the truck.

As the glue is “spray glue” this shouldn’t be too much trouble to get the glue on there but the potential for mess is high. So I will treat it like a painting project and use a drop cloth just in case. Check the head liner page for more details soon.

New tires
I have been researching new tires. I originally wanted to put 235s on the Big White Bus but after asking several friends it seems a body lift and lift kit would be advisable. So I would need to also replace my springs and probably do my break lines while I was at it. So I will wait a bit and see if I can get off-road instead. While I would love to do all this I just can’t justify it right now
and will put Bridgestone Dueler A/T Revo (235/70R16) on the BWB. They seem to score really high. I’d love to put Michelin XZLs on the BWB the pocket book and their availability due to the war in Iraq and Afghanistan prohibit me from pursuing that option. Some boards say I could get a used set from Canada but I will wait.

Recovery points
A recent episode of getting stuck reminded me that I have no recovery points on the front of my Rover. This is a major problem. So I did some asking on several message boards and decided to get a couple of simple hooks from one of the many domestic trucks available in the U.S. I went down to Del City Pickup Parts salvage yard in Del City, Oklahoma (405)677-2431. They had a few hooks on a display but did not have two of a kind. So I asked about a Ford F-250 and he directed me to the yard where I found an F-250. It had a closed loop “hook” on the truck and the base of the hook was too wide for the mounting point I was hoping to use. Right next to
it was a Suburban. It’s too hooks were easy to see and were very long on the attach side of the hook. That would give me enough distance to clear my brush guard. I believe I will have to drill a hole in the hook to match up with my connection point but that shouldn’t be too much of a problem.

I had considered J.A.T.E. rings available from OKRovers and other sites. They have a ‘cool factor’ of 10 but I would have needed to manufacture a connection point and I would have to remove my air damn permanently. I am not ready for that as I like the look of the truck with the air dam on it. I know the air dam will need to go if I am off-roading. It only gathered a bit of mud in my recent incident getting stuck.

I am planning a quick release method for quickly removing the air dam. I already have the lamps wired with plugs so they can be disconnected.

Getting stuck
Many of you have probably read my posts titled “NOT AS FUN AS IT SHOULD HAVE BEEN”
and “Dumbassery”. Dumbassery is my new catch phrase and I hope I can get it registered as a trademark. Sorta like Trump and “you’re fired”. Just kidding. You all are free to use the word as much as you like.

I wish I could say I had fun doing this but it was just pure and simple stupidity. When I had nearly given up hope I found a tow truck driver with some moxey and with his 100 foot of cable and my newly purchased 70 foot of tow strap and 30 foot of chain we got it out.

I was doing pretty good until I hit the giant red sandstone rock. Then all my progress was going down instead of forward.

I know now my tires must be replaced. And my transfer case wouldn’t go into low range. I have an appointment about the transfer case and the tires are coming pretty soon.

Check out the Got Stuck page for pics and more text describing my recent episode of dumbassery.

FTP service down
My host CRT Online has been having FTP problems as of late and I haven’t been able to update. Hopefully each of you have been busy with projects and toys Santa brought you to miss any writings I may or may not have been putting up.

Lens problem
My right turn signal indicator lens fell out of it’s position a couple of weeks ago. As you know my truck was wrecked way back before I bought it and this was a simple problem that finally failed. I have a write up about the lense repair you can check out on the Lens repair page. Getting the right materials was the key.

Transmission service
My recent episode of getting the center console back in the Rover and my getting stuck pointed out that my transfer case would not go into low range. I am having Cottman’s do a transmission service on the BWB on Wednesday of this week. I asked them investigate why the transfer case was also stuck. Cottman’s rebuilt my transmission a few years ago and I so far have trusted them with fast service and have had no problems with the rebuild. So again they will get my business to do a service on the fluid that is now approximately 2 years old.

November 9th, 2004 (Post #54)

November 9th, 2004
Head liner, oil change, noisy lifters, head gasket failure, leaking seal, console back in

The hur-rah for good weather seems to have been this weekend. It was perfect weather on Sunday so I took advantage to wrap up a few jobs.

Headliner
The head liner on the moon roof/sun roof cover came off today. I decided to close it before I got to work and it fell right off. I managed this summer to get it wet when I forgot to close the sun roof. As usual one of the very frequent rain showers broke out and got it really wet. That was it I guess and it decided to come off today. So I guess it’s time to revisit the liner project and try to match with the liner I replace sometime ago. Which means taking it all out AGAIN!

Lifters noisy, change oil
I have been noticing for a few thousand miles that I have a very noisy engine sound. I couldn’t decide whether it was an exhaust leak again or if a valve was sticking or if I was having some other engine related problem. It is time to change the oil and I have noticed since using the Castrol Extended Life oil sometime ago that the oil seems to fail a little faster than before. Unfortunately I can’t seem to find that flavor of oil any longer. Either they don’t stock it any more or Castrol quit making it. Either way the good ole fashioned Castrol 20w50 I use seems a little too thin at the end of it’s 3000 mile life in my engine. To kill one bird with two
stones I bought a bottle of Chevron TECHRON® Concentrate Fuel System Cleaner and put it in and I changed the oil.

The noise is, I am glad to say, no longer there. I’m not sure which of the solutions solved the problem. But my engine is nice and quiet again. Well relatively quiet.

Head gasket leak
As I have been reporting for I don’t know how many years the head gasket has been pushing fluid out of the system. In a desperate attempt to put off the obvious top end engine repair I tried some “horse pills” which sadly have failed to stem the tide. Good news is another engine is in the works. But it will be after Christmas before we get started. So I’m hoping I’ll make it through the winter like last with not too many problems. The price of coolant/antifreeze is too high to pour it on the ground like this.

Leaky seal
My swivel joint seal on the right side had a nice big blob of grease on it this weekend. So I will eventually have to replace it. I have the seal in the garage, but not the place to work on it right now. I’m not really looking foward to removing the CV joint again. But it will give me a chance to document in pictures the procedure again. This time hopefully everyone will heed my advice and replace EVERYTHING that could fail when you tear something down.

Console back in
I have the center console back in. It was more challenging getting it back in than it was to take out. I’m guessing they assemble it in two parts and attach the two pieces afterwards. I had to loosen the emergency brake bracket, pull the big screws and hold my mouth just right for an extended time to get it back in, in one piece.

But I have it all hooked back up and it looks great. I got a little to carried away with the dremel and had to correct with a couple of washers. Which made the window switch panel screws a close fit. I’ll write it up when I get the pictures off the camera tonight probably.