Organizing the Boot (Post #543) 9/18/2015

The boot of the Big White Bus is a mishmash of bags and lose gear. You can see from this picture that I carry around quite a bit of kit.

Quite a bit of kit.

In no particular order, mostly because there isn’t really any order in the rear of the vehicle right now, you may find…

  • Jumper cables
  • Fluids and grease
  • Various bits of recovery gear
  • Electric air pump
  • Bag of tools
  • Tire repair kit (won at SCARR 2015)
  • Box with toilet paper and sunscreen and bug spray
  • Rags
  • Blanket
  • Spare T-shirt
  • Table/package shelf
  • Machette
  • Spetznaz shovel

Continue reading “Organizing the Boot (Post #543) 9/18/2015”

Gearing Up for SCARR, Part Two (Post #462) 3/12/2014

I’ve been getting my kit together for S.C.A.R.R. the past few weeks. I am going to be putting up a few posts about new, new-old, and old kit for the trip.

Recovery Gear

hookinstalled

I needed a rear recovery shackle. I don’t expect to get stuck but you have to be prepared for such things. I have a Class Three Hitch and have various hitches for pulling stuff. I have a pintle hitch and a standard hitch with multiple size balls, I’m well covered in the hitch department.

I have installed hooks on the front of the Range Rover. They have been up there quite a while. You can read the original post in my Technical Tips section. I pulled them off a Chevy Suburban in a breaker’s junk yard. I’m sure they never used them. I attached them to the frame with Grade 8 bolts.

So to solve the rear recovery problem I bought a shackle hitch off Amazon.com. I researched them and bought one that was Made in the U.S.A. It is a Bestop 42922-01 HighRock 4X4 2″ Receiver Recovery Hitch Insert with D-Ring Shackle. I sent Bestop an email asking them where it was manufactured. They responded it was in the good old U.S. of A. Doing my part when I can.

UPDATE: I received the hitch with a sticker that said MADE IN CHINA. So as you can imagine I’m pretty pissed. I sent them a nasty email and I rated the transaction poorly on Amazon. This is the problem with buying on the interwebs, trustworthiness of vendors. So if this is important to you I suggest you confirm with your own eyes.

Bestop HighRock 4X4
2″ Receiver Recovery Hitch Insert
with D-Ring Shackle

There were some “sexier” versions of this device out there. But for 35$(US) I couldn’t justify spending twice that for a “named brand”. Especially if they couldn’t tell me where they were made.

So now I have front and rear recovery points. I have what might be considered “lesser” quality recovery straps which are in fact tow straps. I will need to purchase a recovery strap set in the future if I am going to do this correctly.

Gearing Up for S.C.A.R.R. Part One. and Part One UPDATE

Thanks for reading and Happy Rovering.

Slow Down, Part Duex: Electric Boogaloo (Post #343) 5/25/2013

As I mentioned in my post Slow Down, Buy Fewer Tools to Fix Your Mistakes I cross threaded one of the bolts that is used to mount the brake caliper to the hub. This brake caliper is the one I posted pics of that had completely rusted over. I used my new sandblasting cabinet to remove most of the rust.

I learned that the bolts for the caliper are a common 7×20. I put some oil on the tap to collect the metal bits that are cleaned off when the tap does its magic. As you are aware, you turn left and then turn back, easing your way into the bungled threads.

Here the caliper is back in place and the brake pads are back in place. I am breaking one of the cotter pin rules, “Never reuse a cotter pin.” by reusing the pins for the brakes. I did not plan to have the brakes out so I didn’t source the parts for this job.

The tapping went fabulously well after a bit of a rough start. I put the painted brake calipers on. As I mentioned before I had to replace the left (driver’s) side caliper. It had failed. The cylinders had rusted in place and were not actuating to apply the pads to the brake disc.

I will put the Range Rover through he paces this weekend when I take her out for a test drive.

The comedian DC Benny checked on us via email. He is a on-again, off-again Land Rover owner. Owning a Range Rover Classic in Brooklyn without a garage to work on it is a special kind of dedication. His wife lost her home business when the basement of their home was flooded by Super Storm Sandy. It was good to hear from him.

I collected a couple of comebacks for my cross country concerns with corrugated conveyances. (See what I did there? Do ya? do ya?) I need to check the forums and see what else they have to share.

Thanks for reading and Happy Rovering.

Rust and the Art of Welding: Part Deux, Electric Boogaloo (Post #333) 4/23/2013

Here are the pictures of the install and the damage from the rust. I like the silver gray color. The front shocks went in with very little trouble.

The corrosion and abuse are evident on this shock.

Here’s what’s left of the rear shock mounts. Look closely at the one on the left in this picture. That is terrible. The threads being destroyed are evident in this picture too.

I’ve got lots of stuff coming to the hacienda de OkieRover. My buddy JagGuy is letting me swap him a lunch at Earl’s Bar-B-Que for a sand blasting cabinet. It needs new gloves so I ordered those today as well.

I also ordered two Tennier Industries Intermediate Cold Weather Sleeping Bags from Uncle Sam’s Retail Outlet (http://www.unclesamsretailoutlet.com/). Basically they are extra long -10 degree Fahrenheit sleeping bags and should be a nice addition to our camping kit.

More as the parts start arriving.

Thanks for reading, and Happy Rovering.

Fuel Pump Replacement (Post #326) 4/5/2013

196,000 miles out of one fuel pump. That’s pretty good. But as you have read in previous posts it was time for a new pump. Let’s first sort out the process for testing the fuel pump.
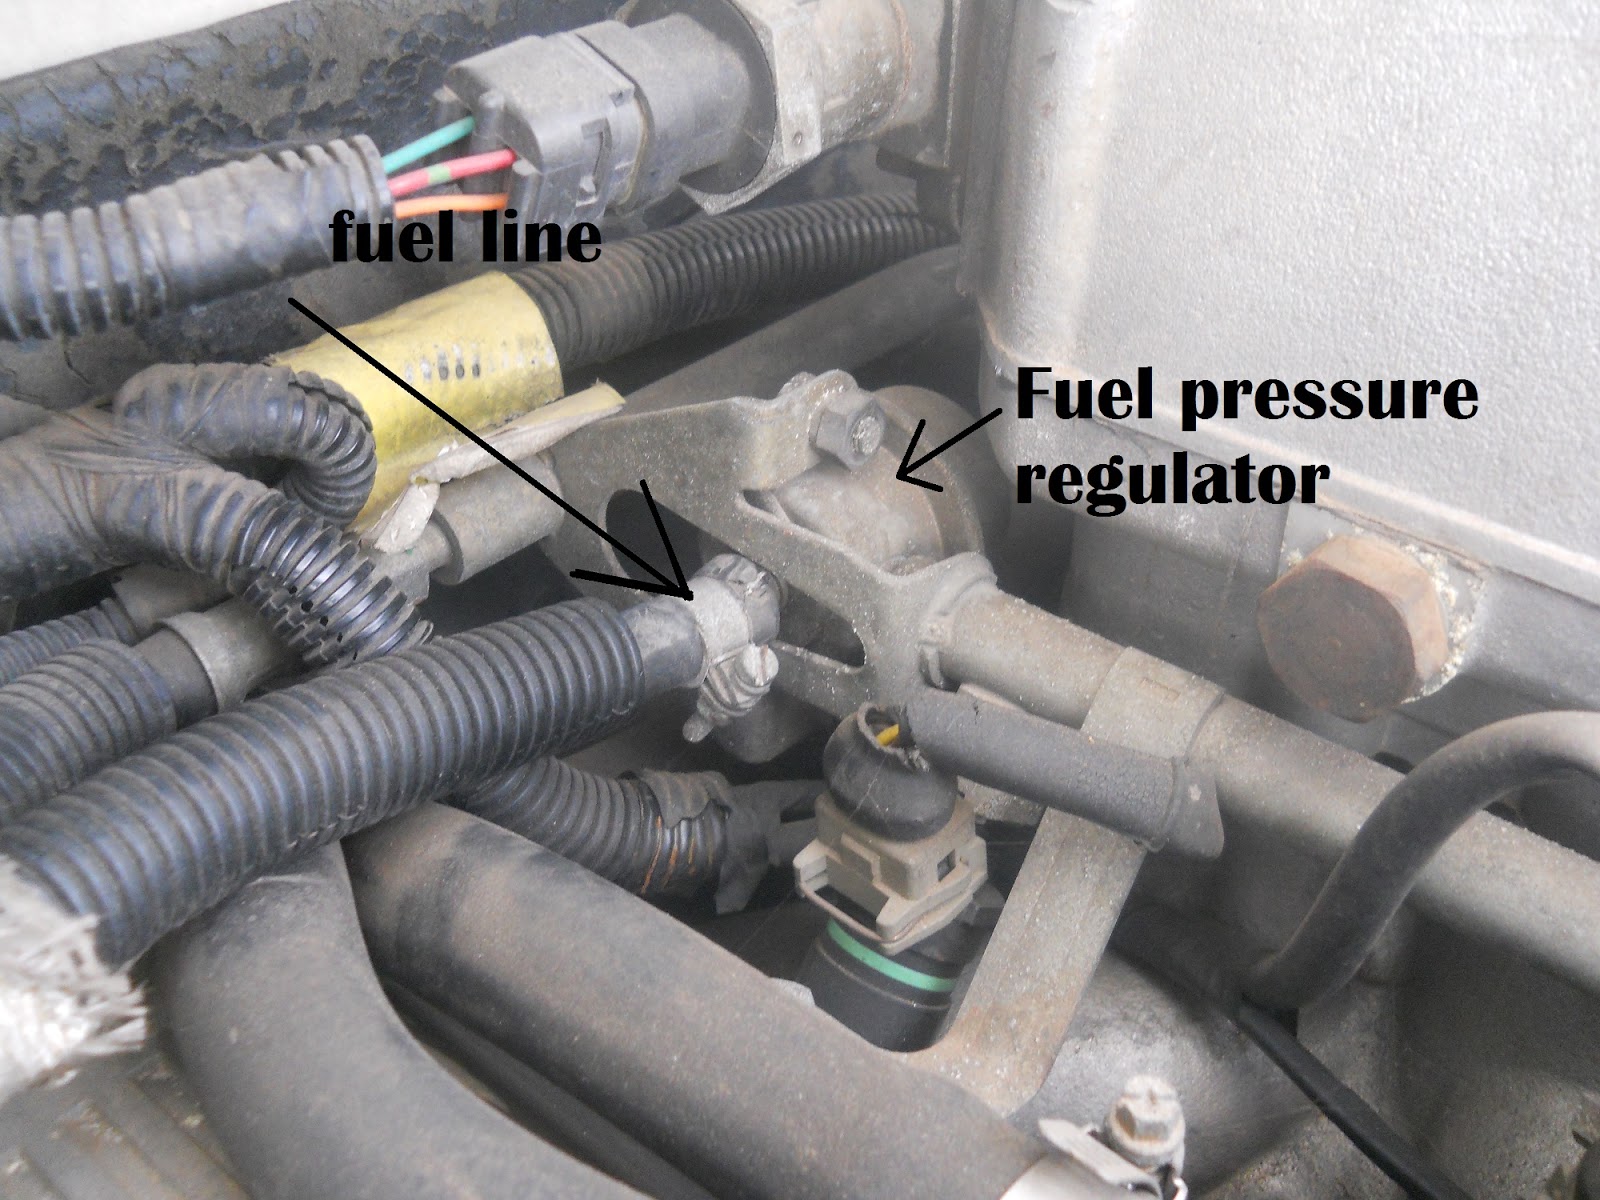
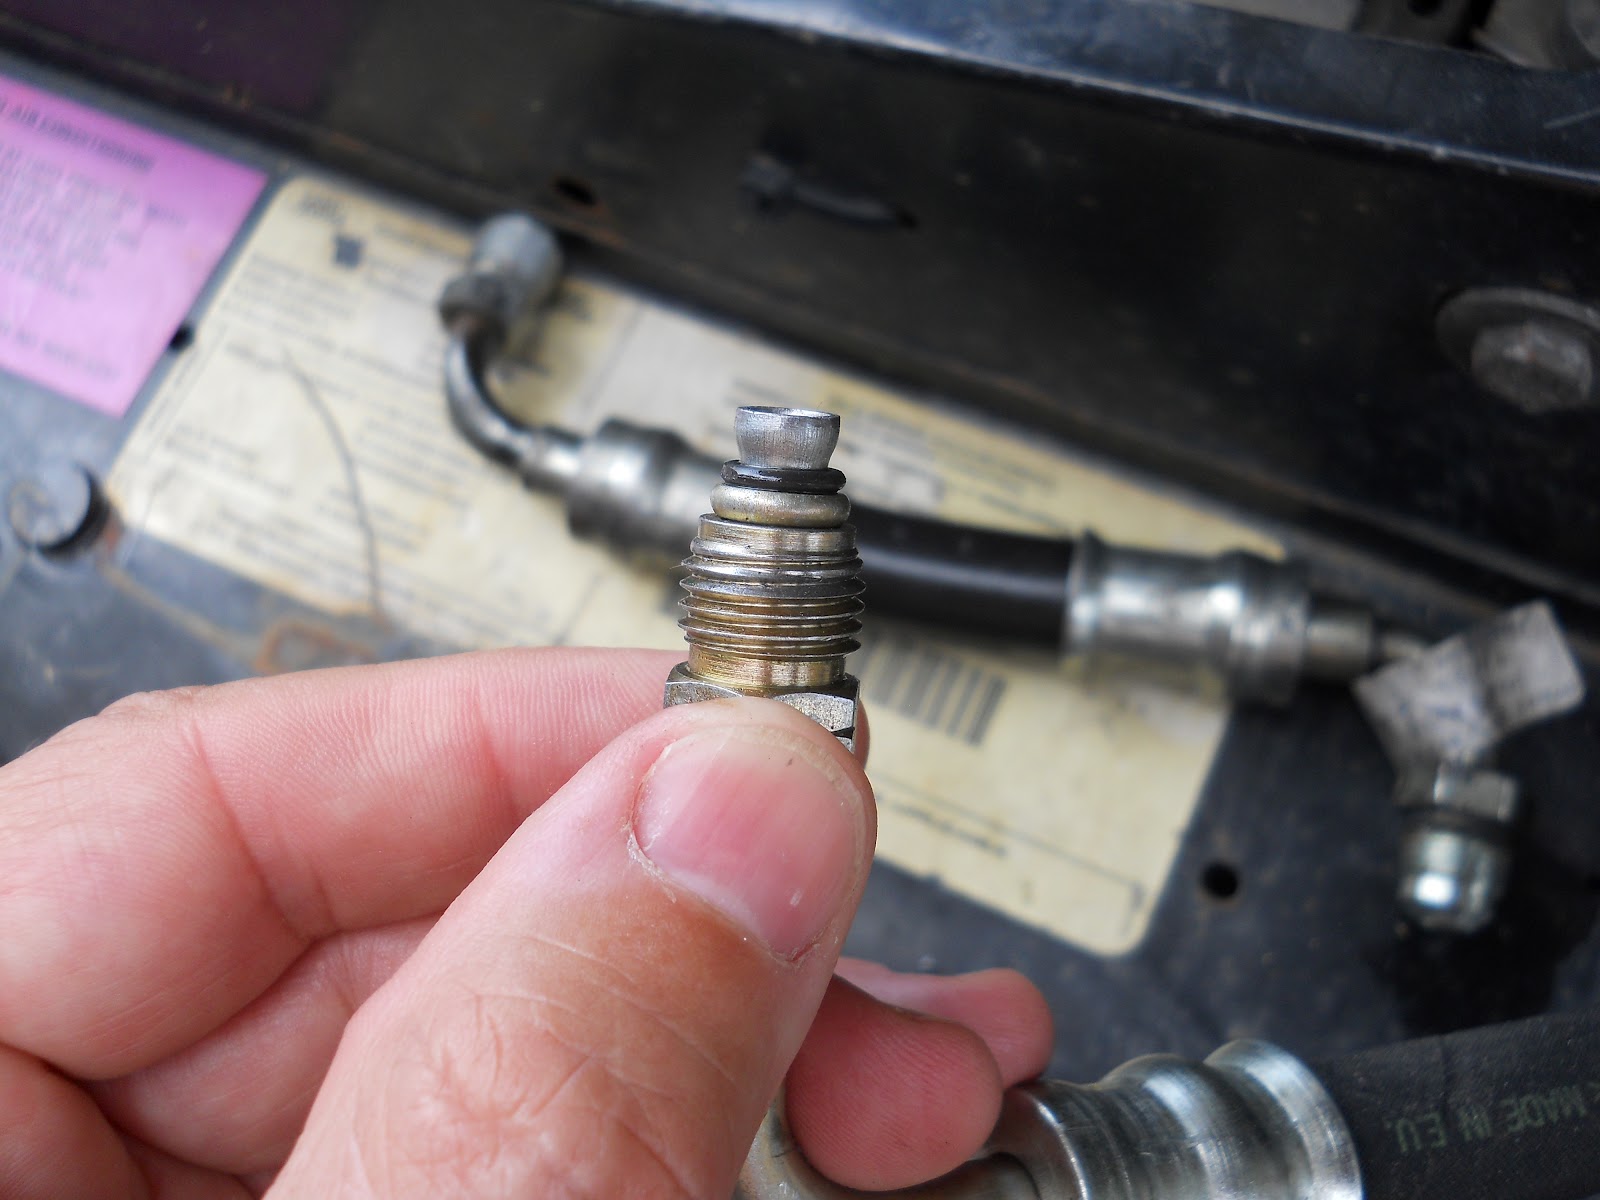
Checking for fuel at the fuel rail was first. I disconnected the fuel line from the fuel rail.
Remove the hose clamp. Place a rag, preferably a large one like a t-shirt under it. You are checking for fuel coming out. WARNING. When you turn the key to the on position it activates the fuel pump. The fuel pump will run for a short burst to pressurize the rail. It will then shut off. A lot of fuel will come out when you turn on the key. It may even shoot out on to the engine. DO NOT DO THIS WITH A HOT ENGINE.
When I disconnected mine, no fuel came out. So that told me the pump did not run. So I climbed in the back and disassembled the back to get to the fuel pump access panel. Some time in the late 1990 models they started manufacturing an access panel to repair the frequently failing pumps.
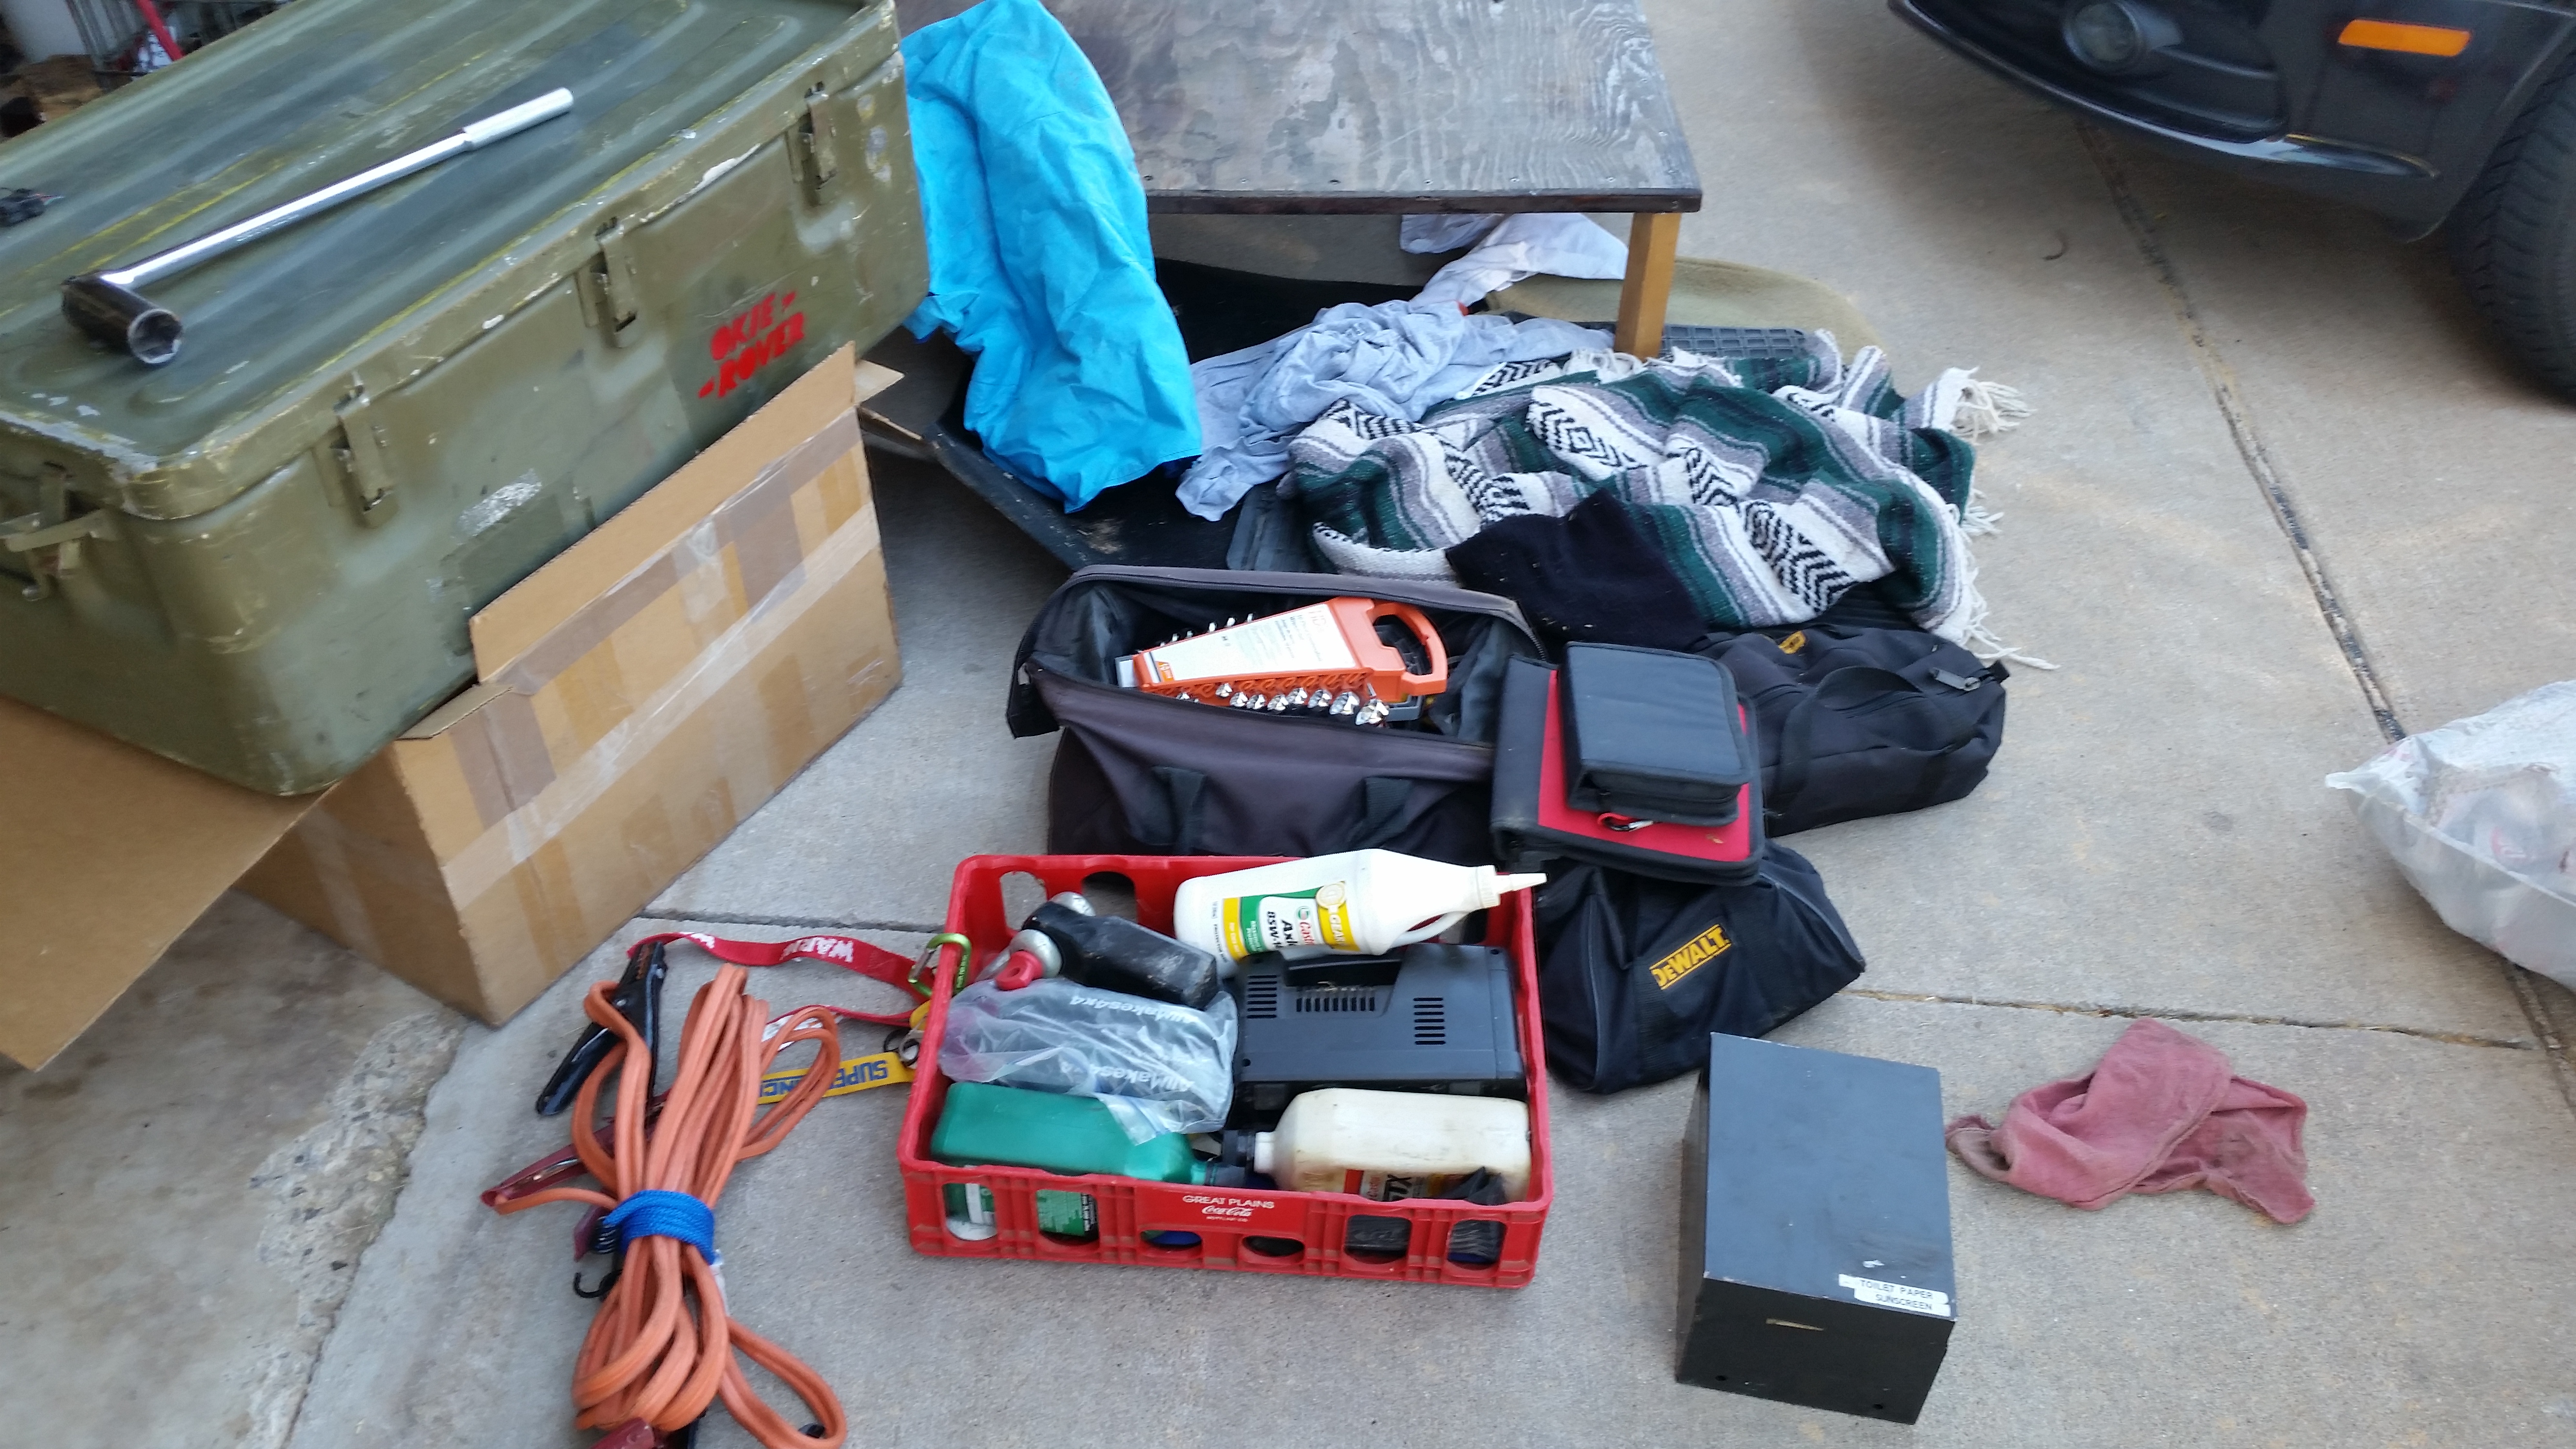
I wanted to first check to make sure I didn’t have a blown fuse. I couldn’t remember which fuse was the one for the pump. So I pulled all of these and checked for a blown one. I also reseated the fuel pump relay (silver one) located between the green and brown items. All the fuses were good. On to the pump.
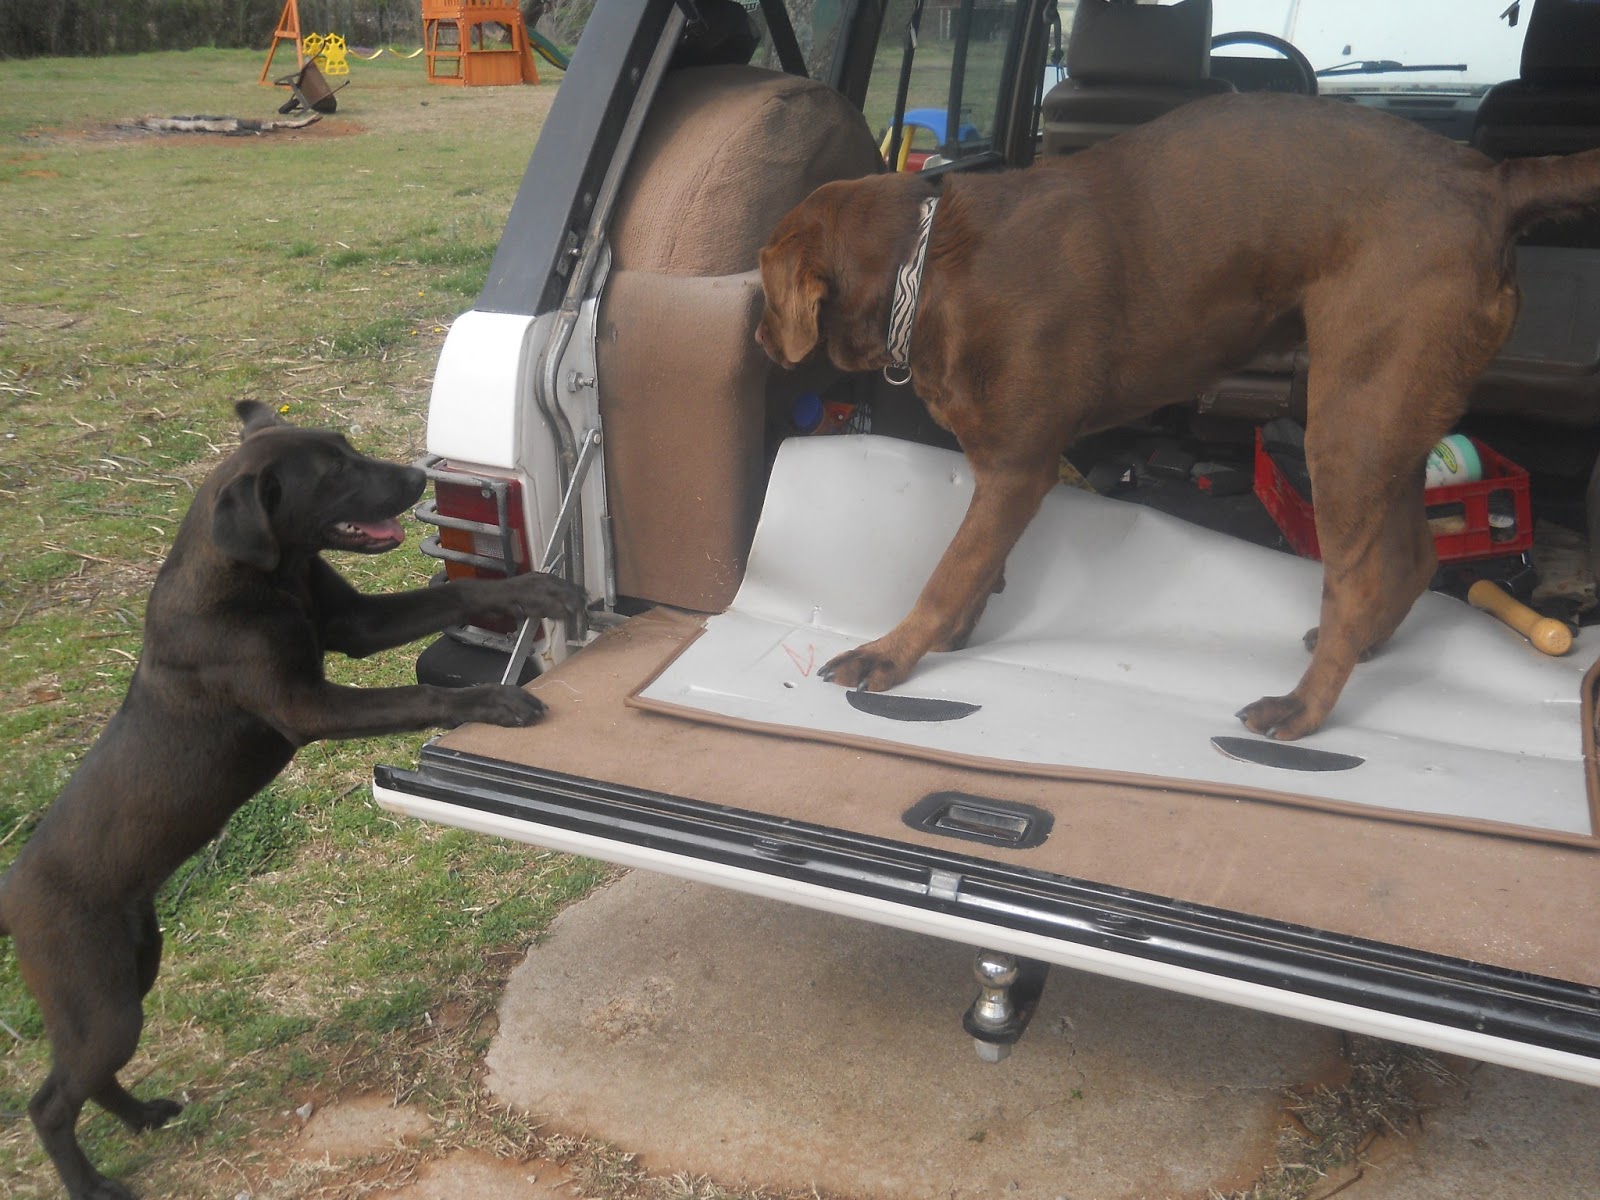
Remove the carpet and the dogs from the rear of the vehicle and access the panel.

I don’t know why they think it is okay to get in the back of the Range Rover.
Luna and Paisley
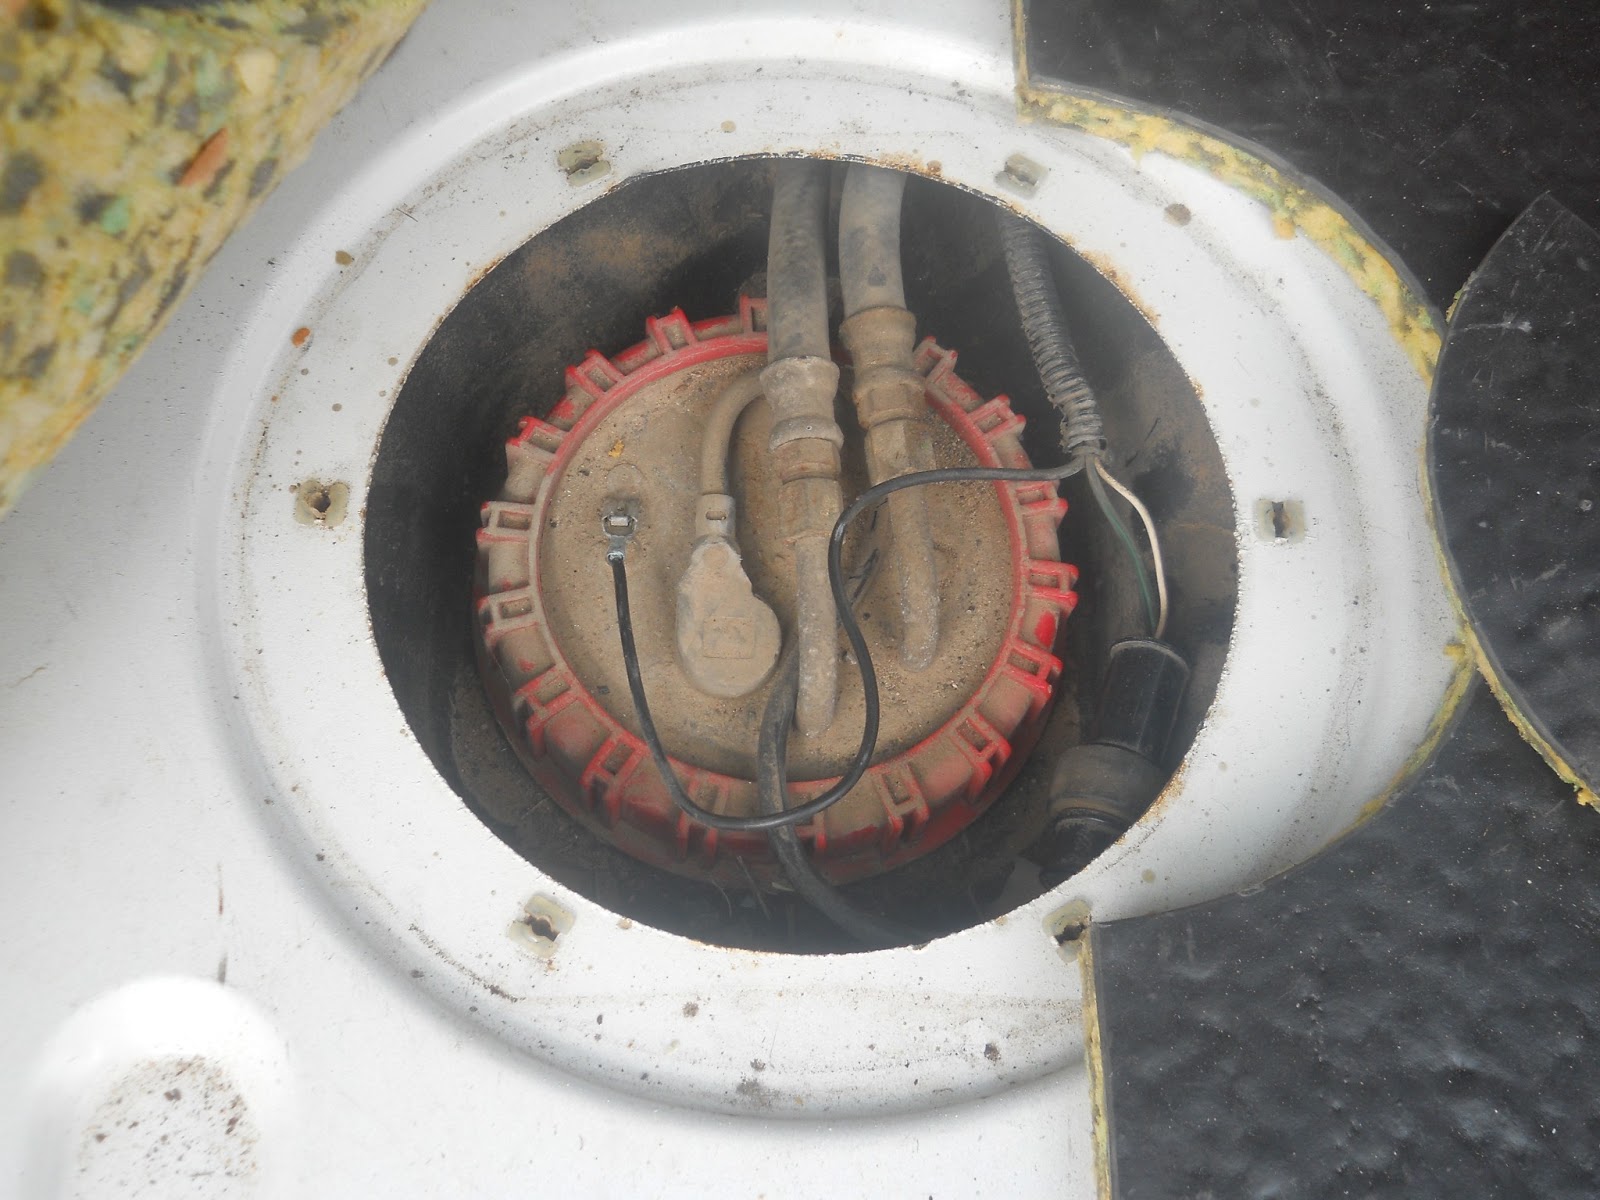
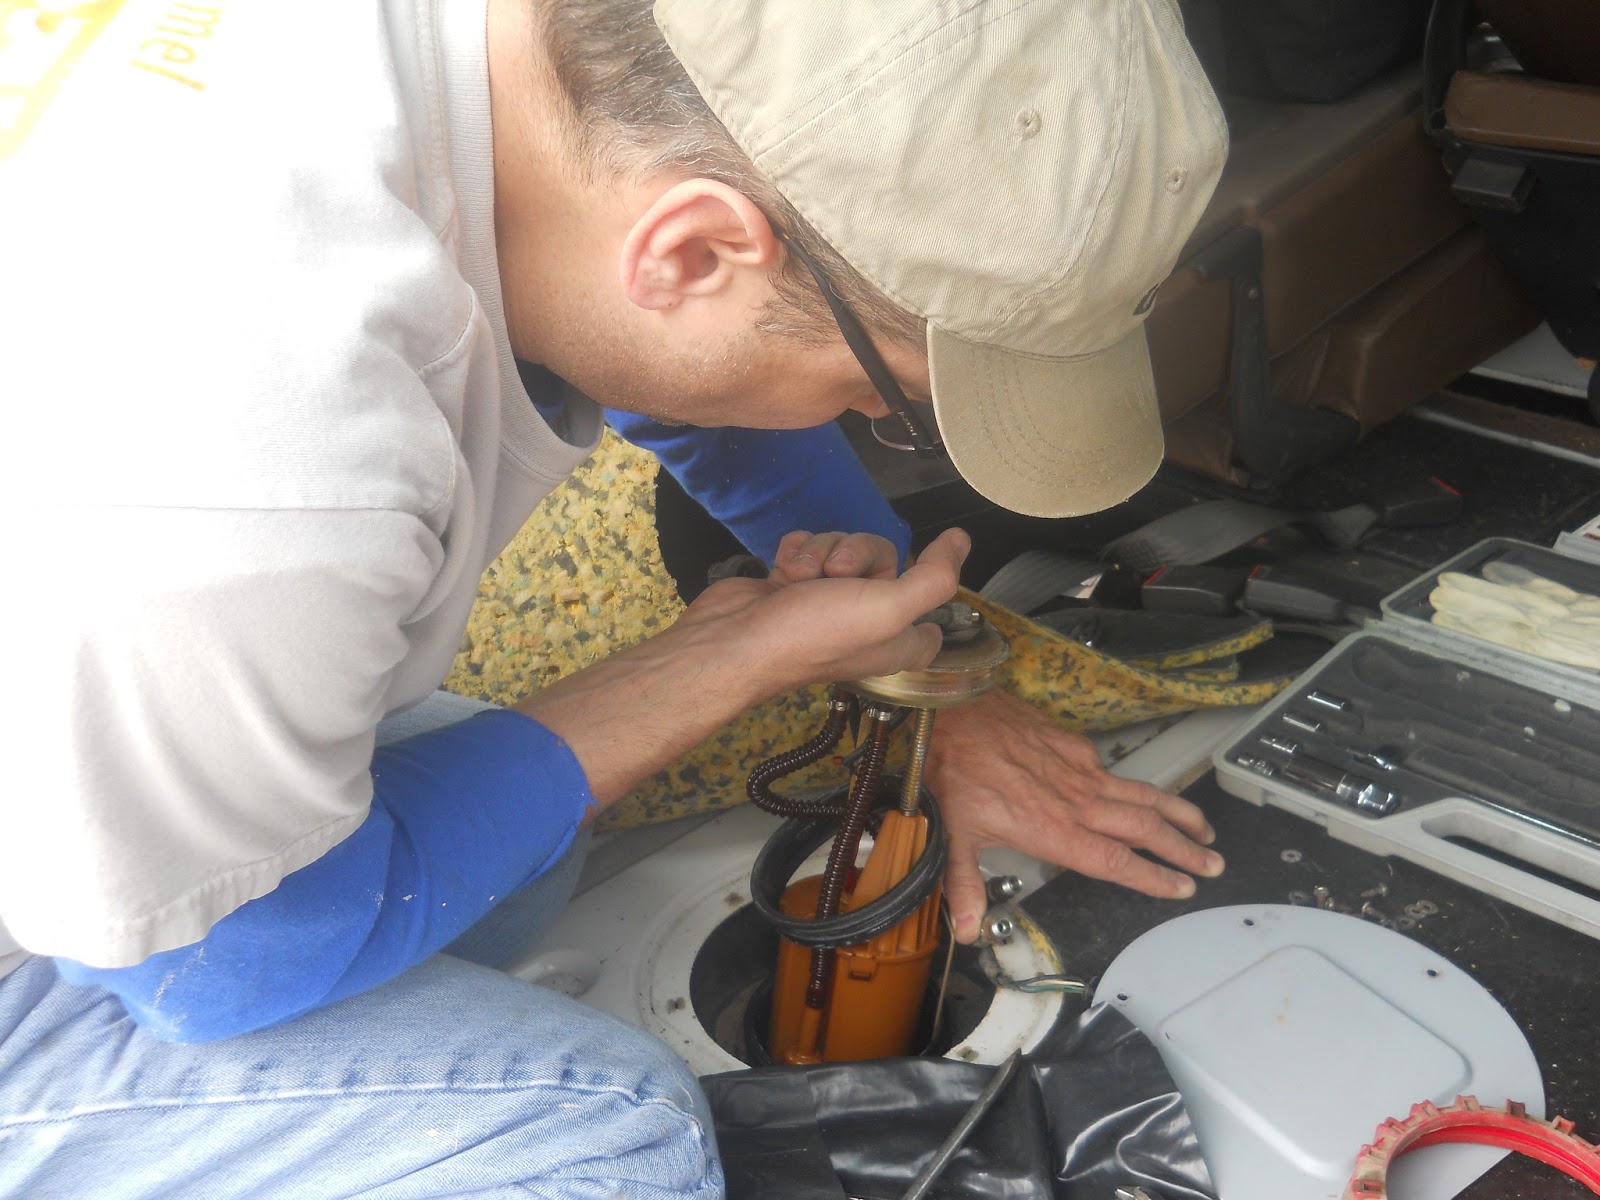
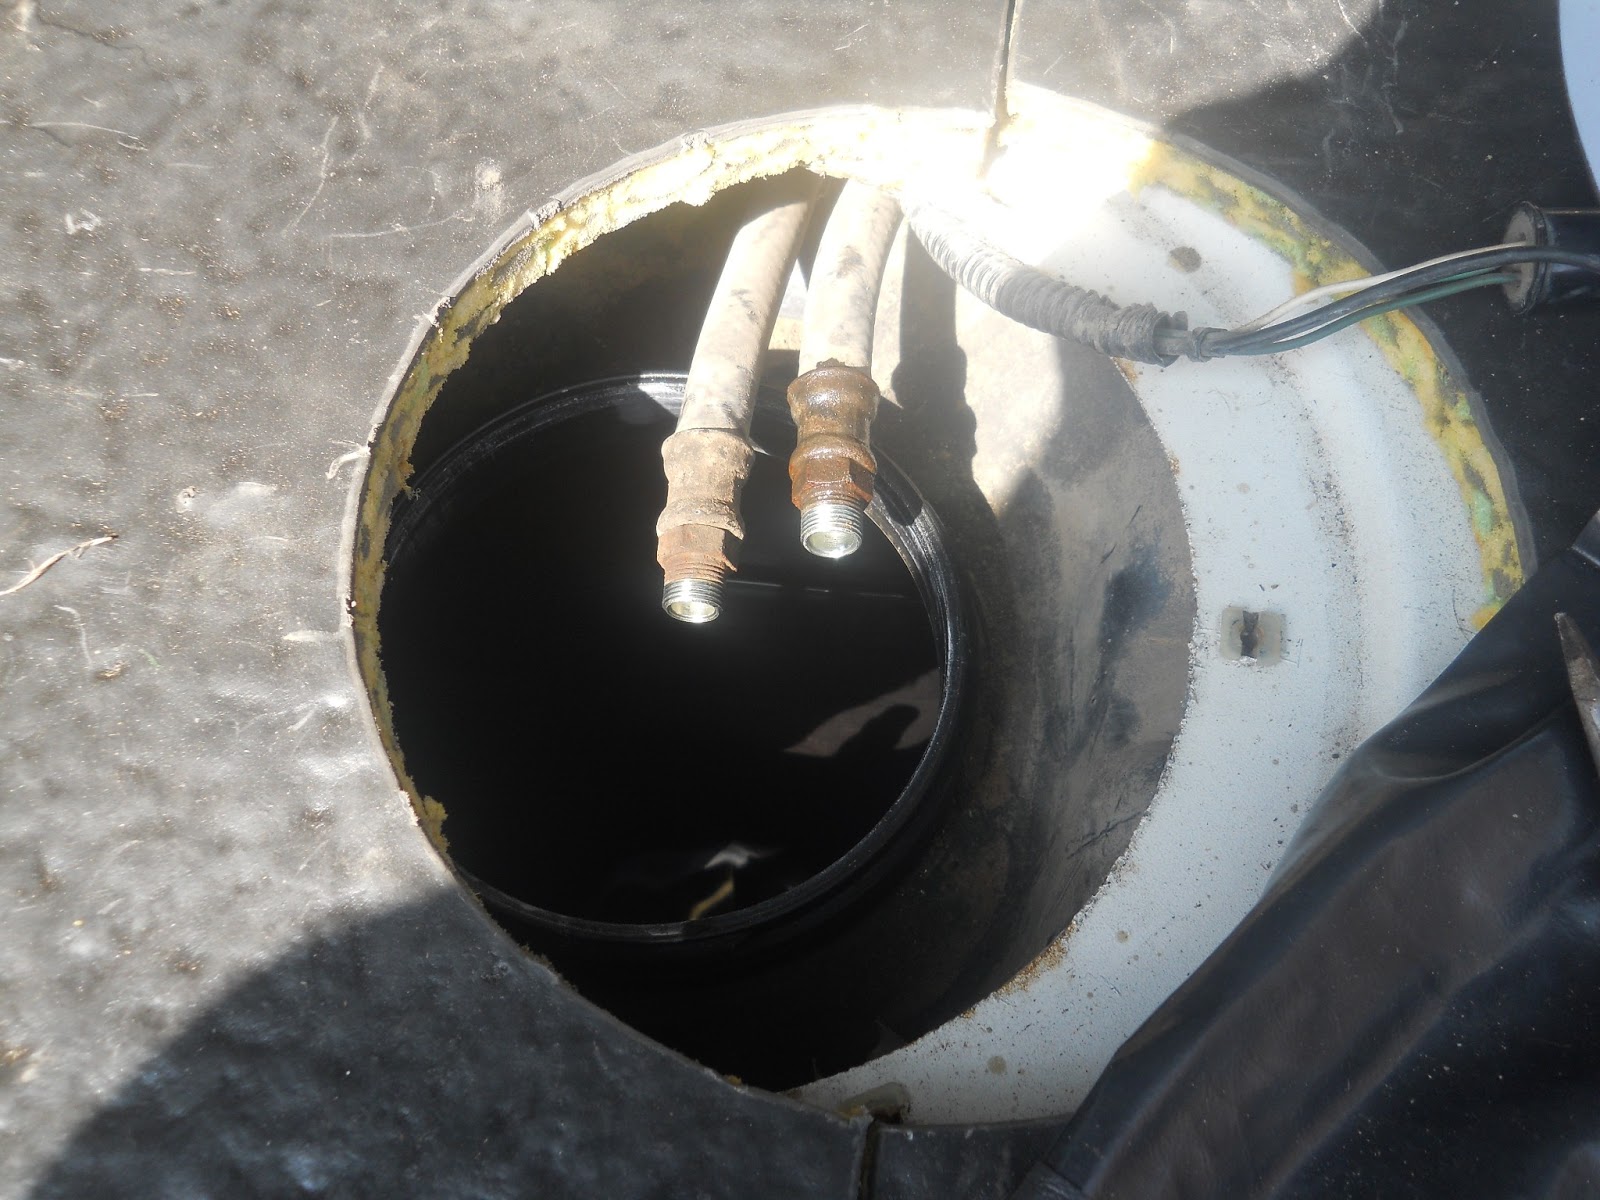
Remove the six screws. Move them to a safe place. Remember you are about to open the fuel tank. If you have something that might fall in the tank…it will fall in the tank. Secure all loose items NOW.
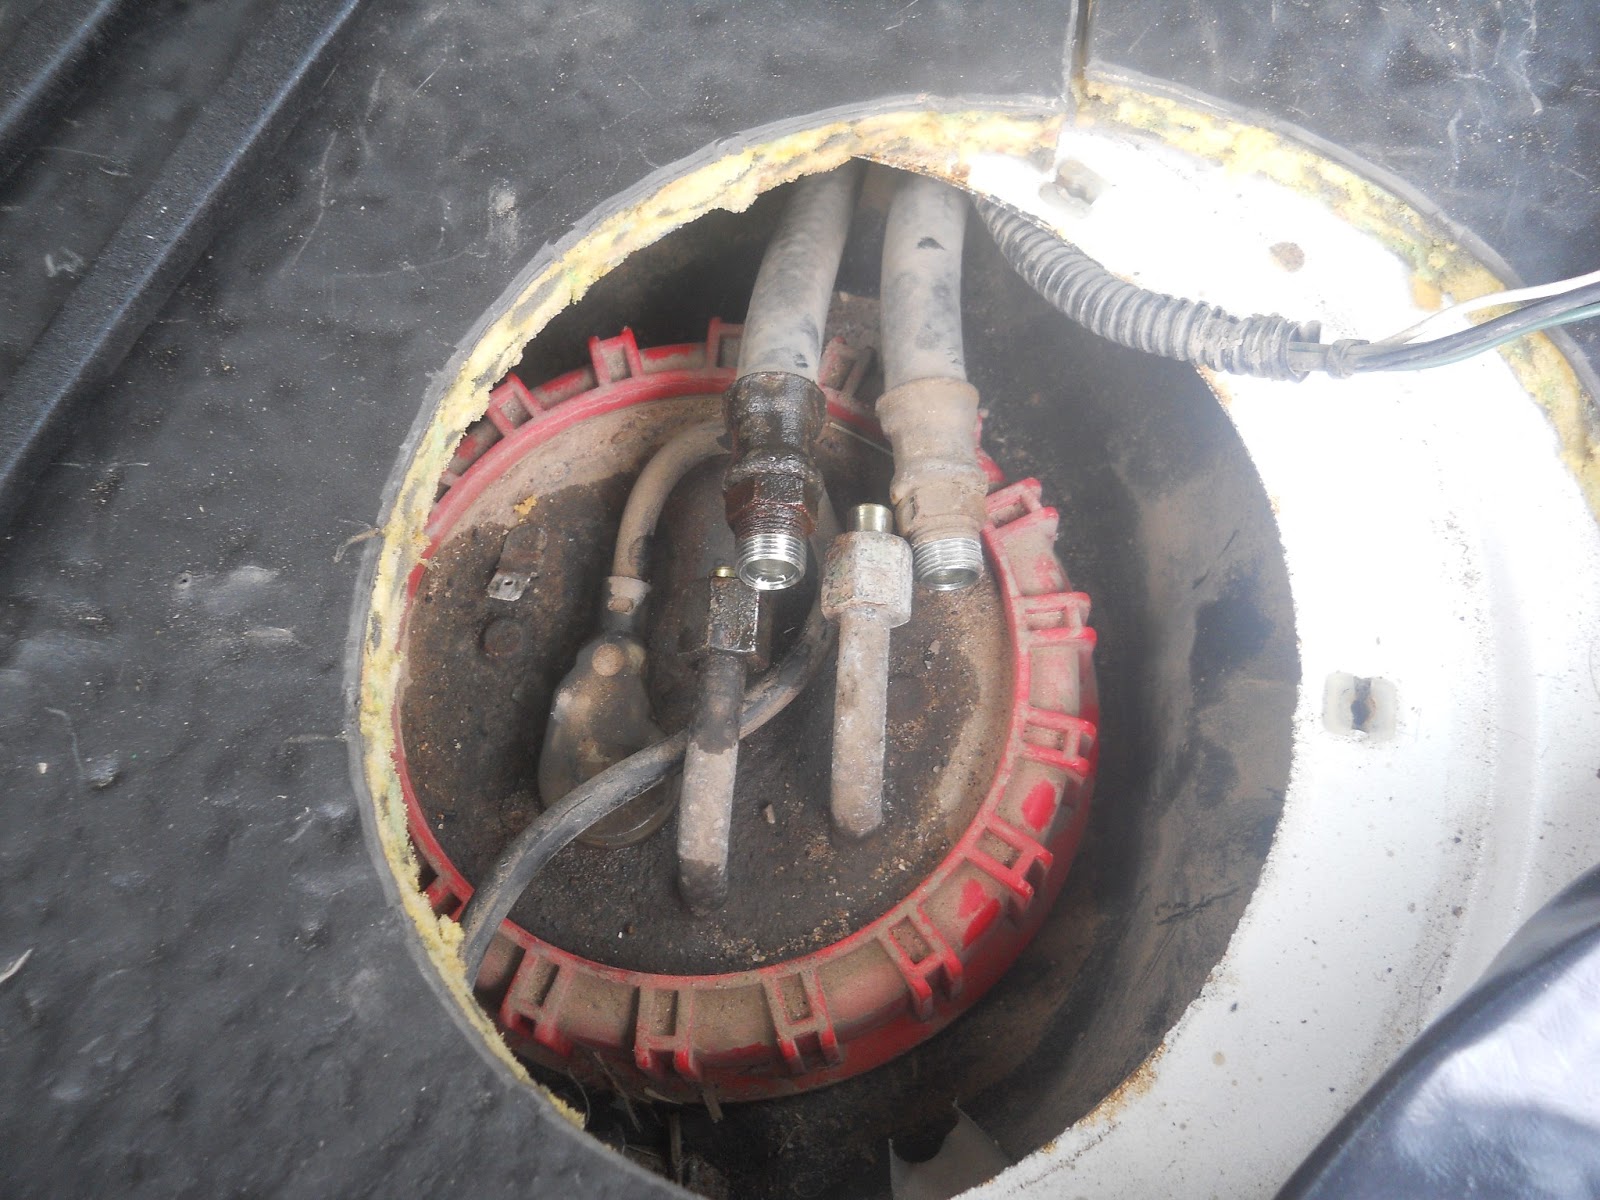
After you are open you are dealing with two fuel lines, a ground wire, and the power connector.
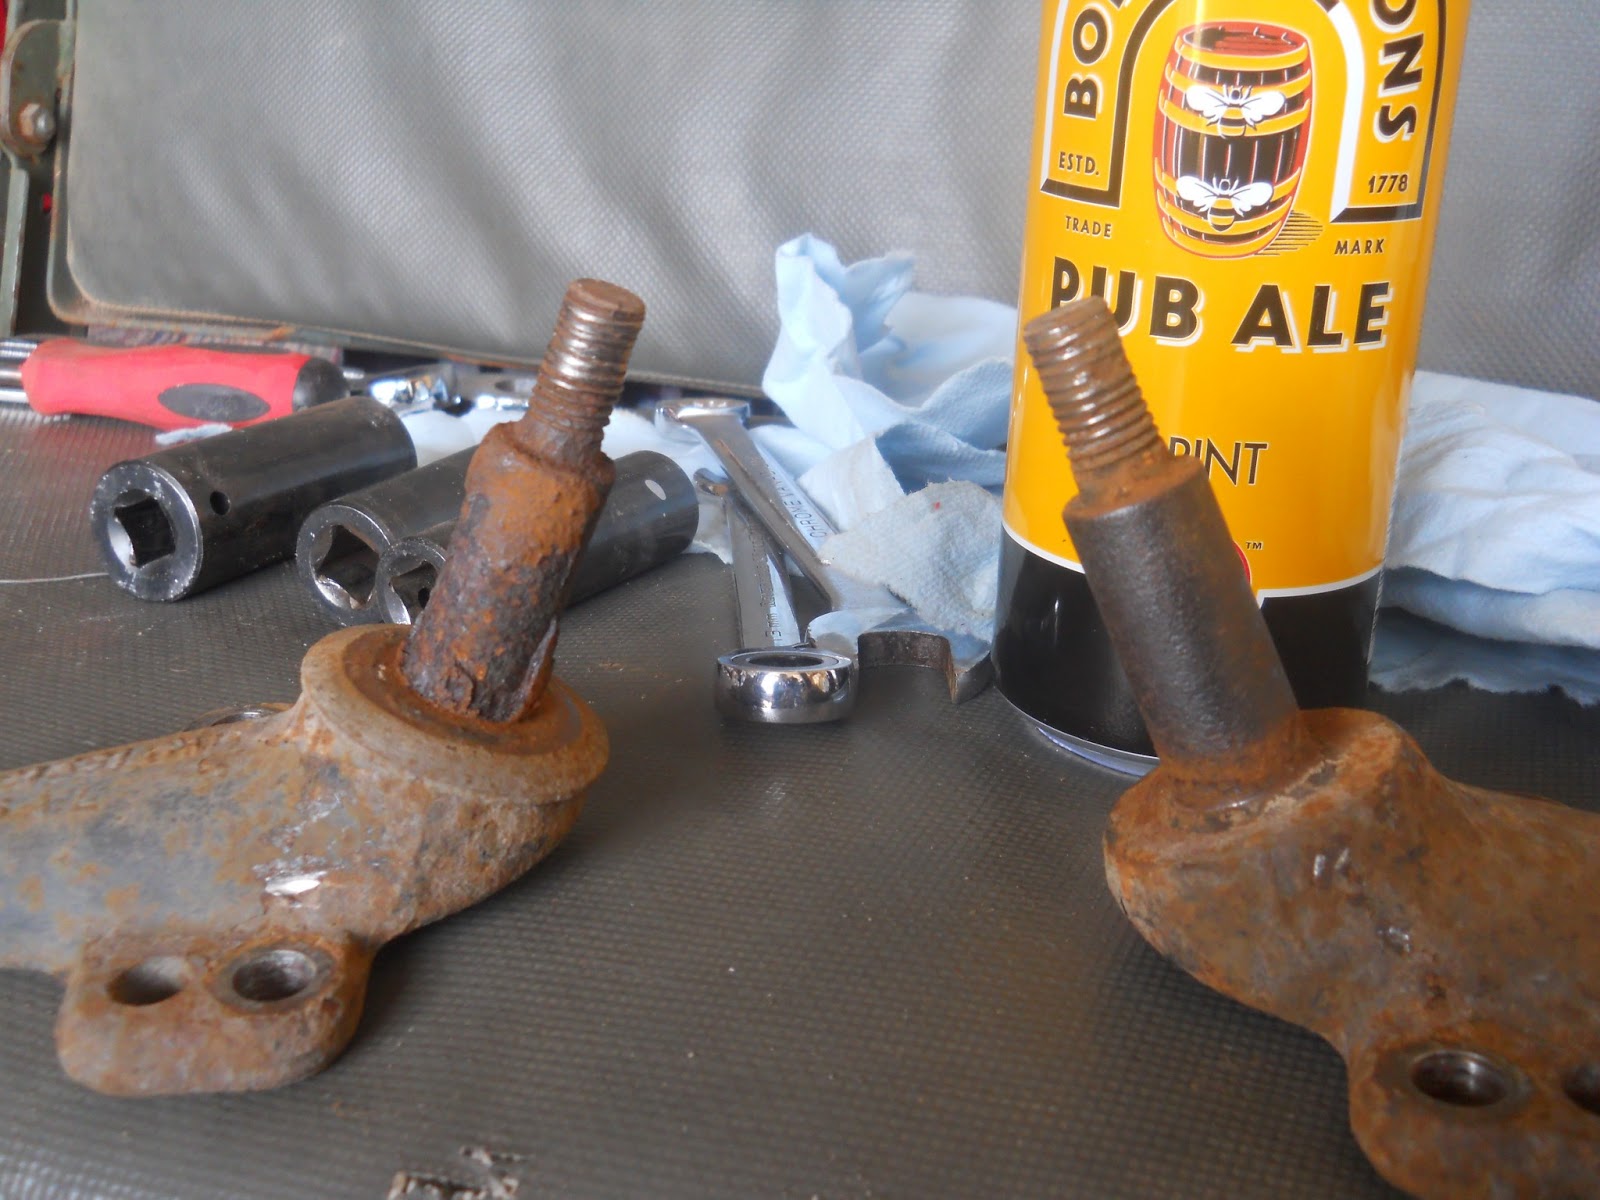
There is also a fair amount of dirt under there. I used a shop vac to get as much as I could to eliminate debris from getting in the tank. Vacuum before you start to remove any bits. Vacuum again after you have knock the wrenches against stuff.
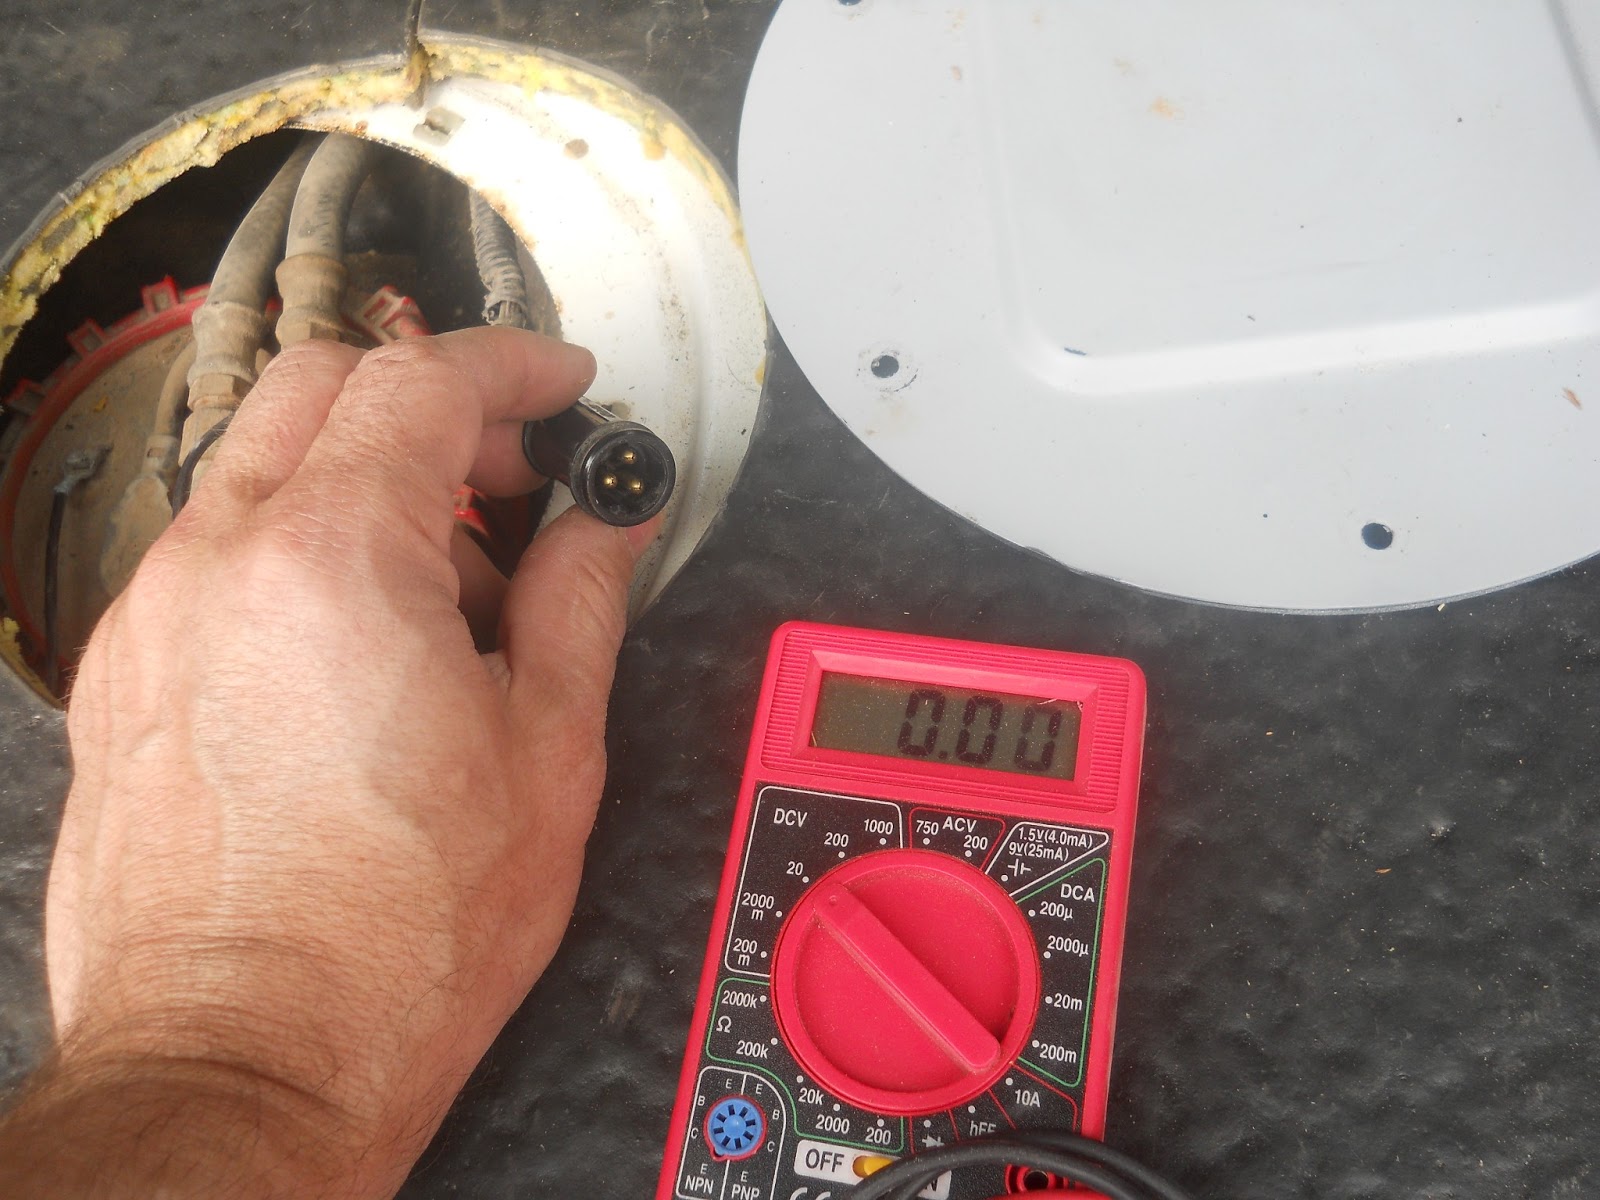
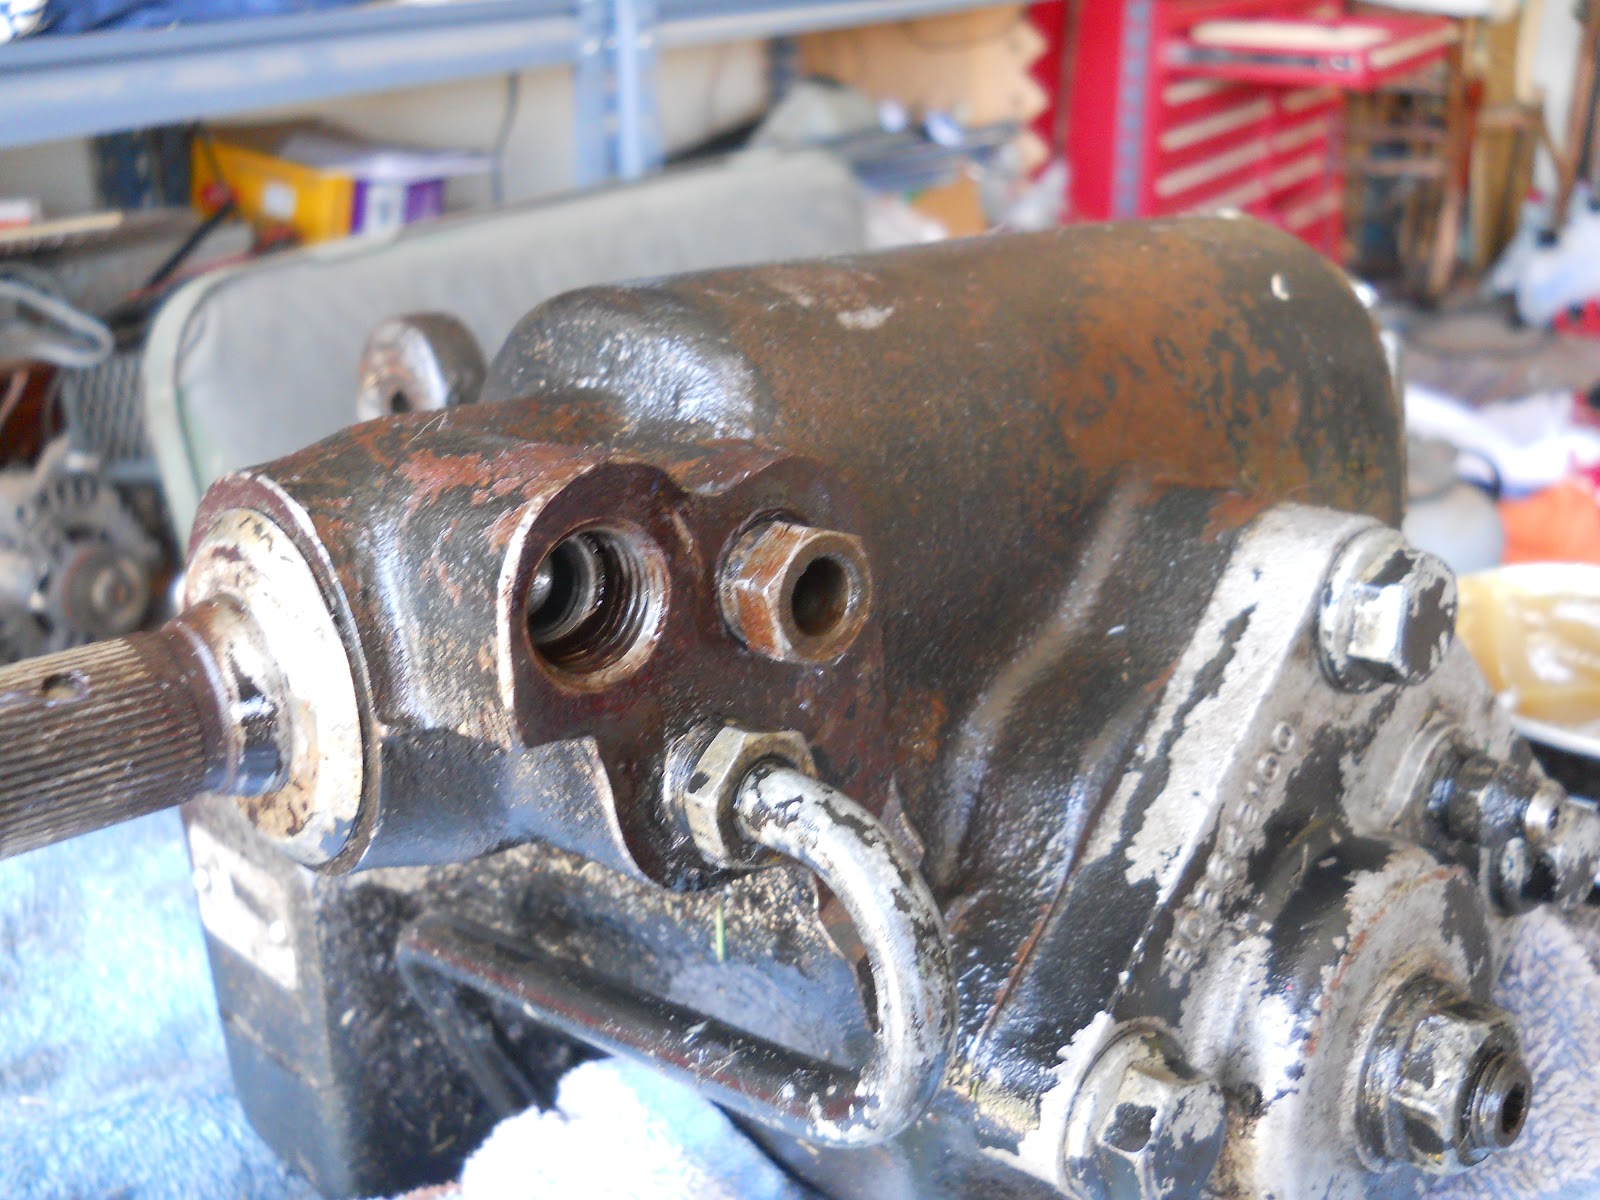
Pull the connector and set your volt-ohm meter to volts. Have someone turn on the ignition. You will see a voltage spike for a few seconds. Remember the pump only runs for a few seconds. I checked across all the combinations of wires. I had power to the plug so….it had to be the pump.
Disconnect the fuel lines and the ground wire.
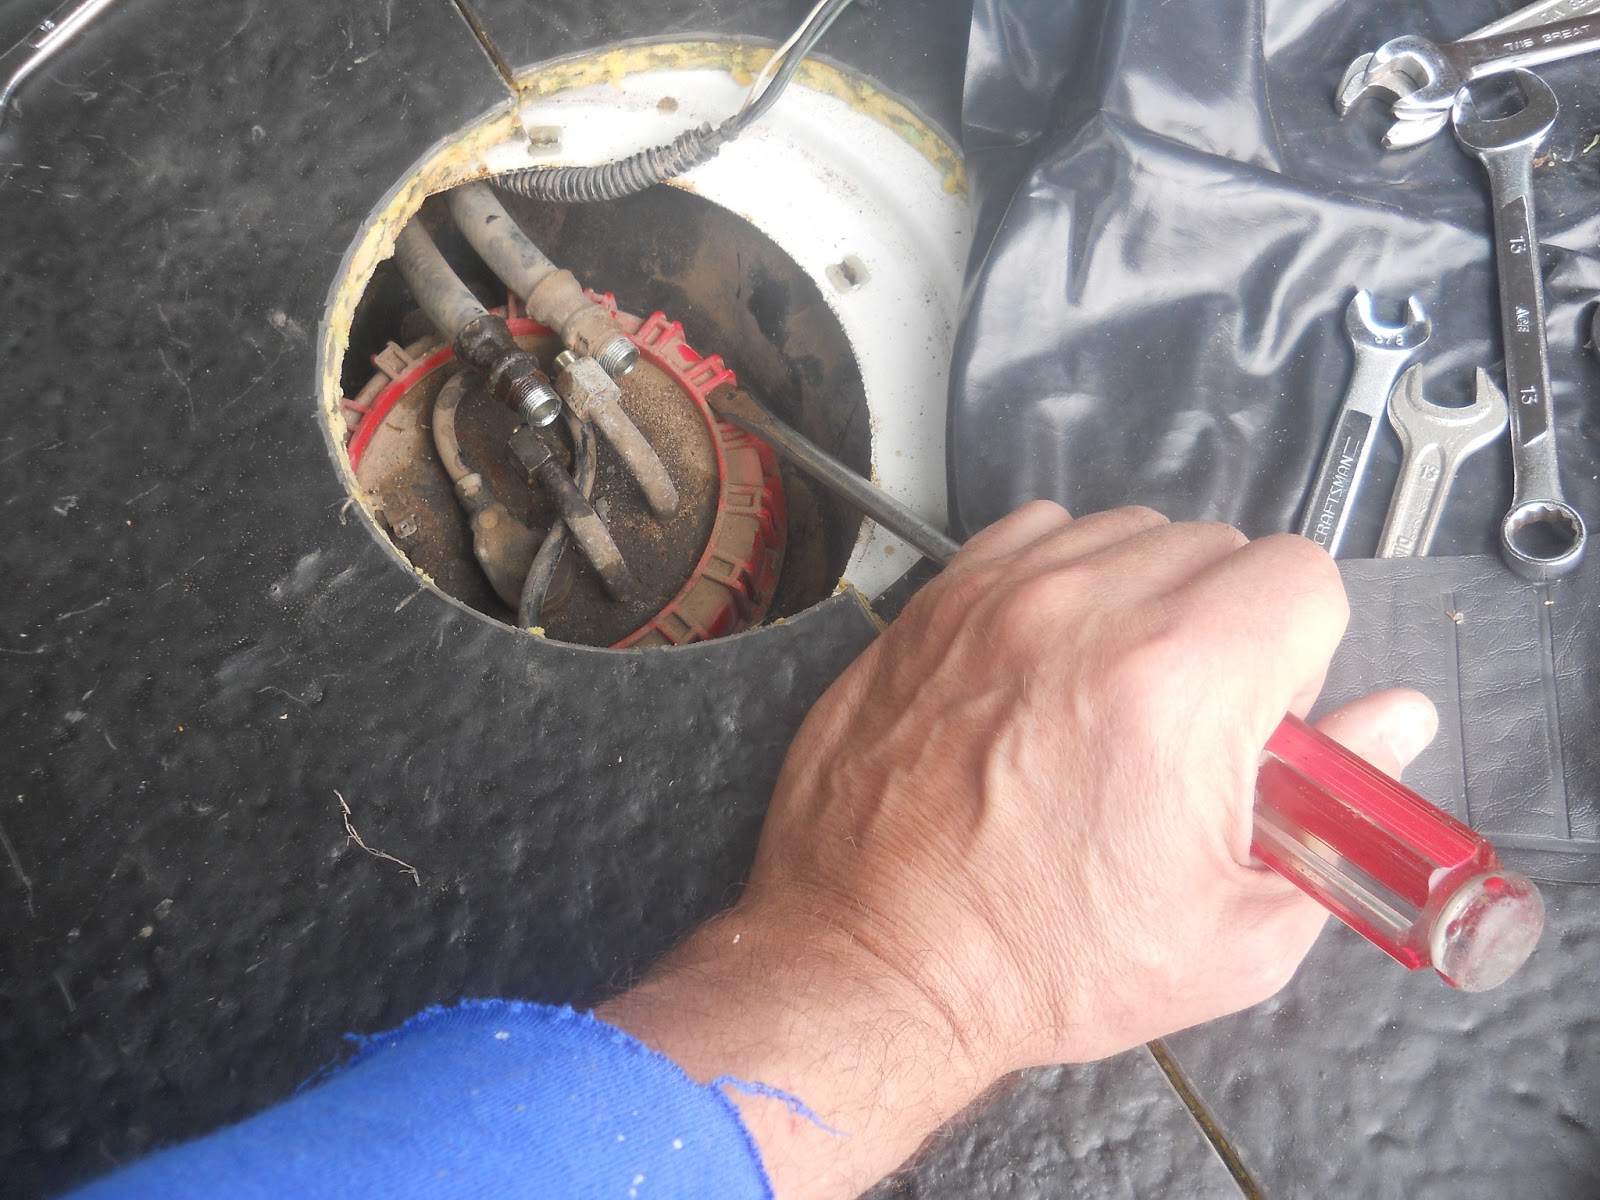
You are going to use a mallet (I used a rubber one) to hit a large flat-head screwdriver to turn the ring. They make a special tool for this…I didn’t buy it. Take your time and lightly tap this ring until it spins enough times to remove it.
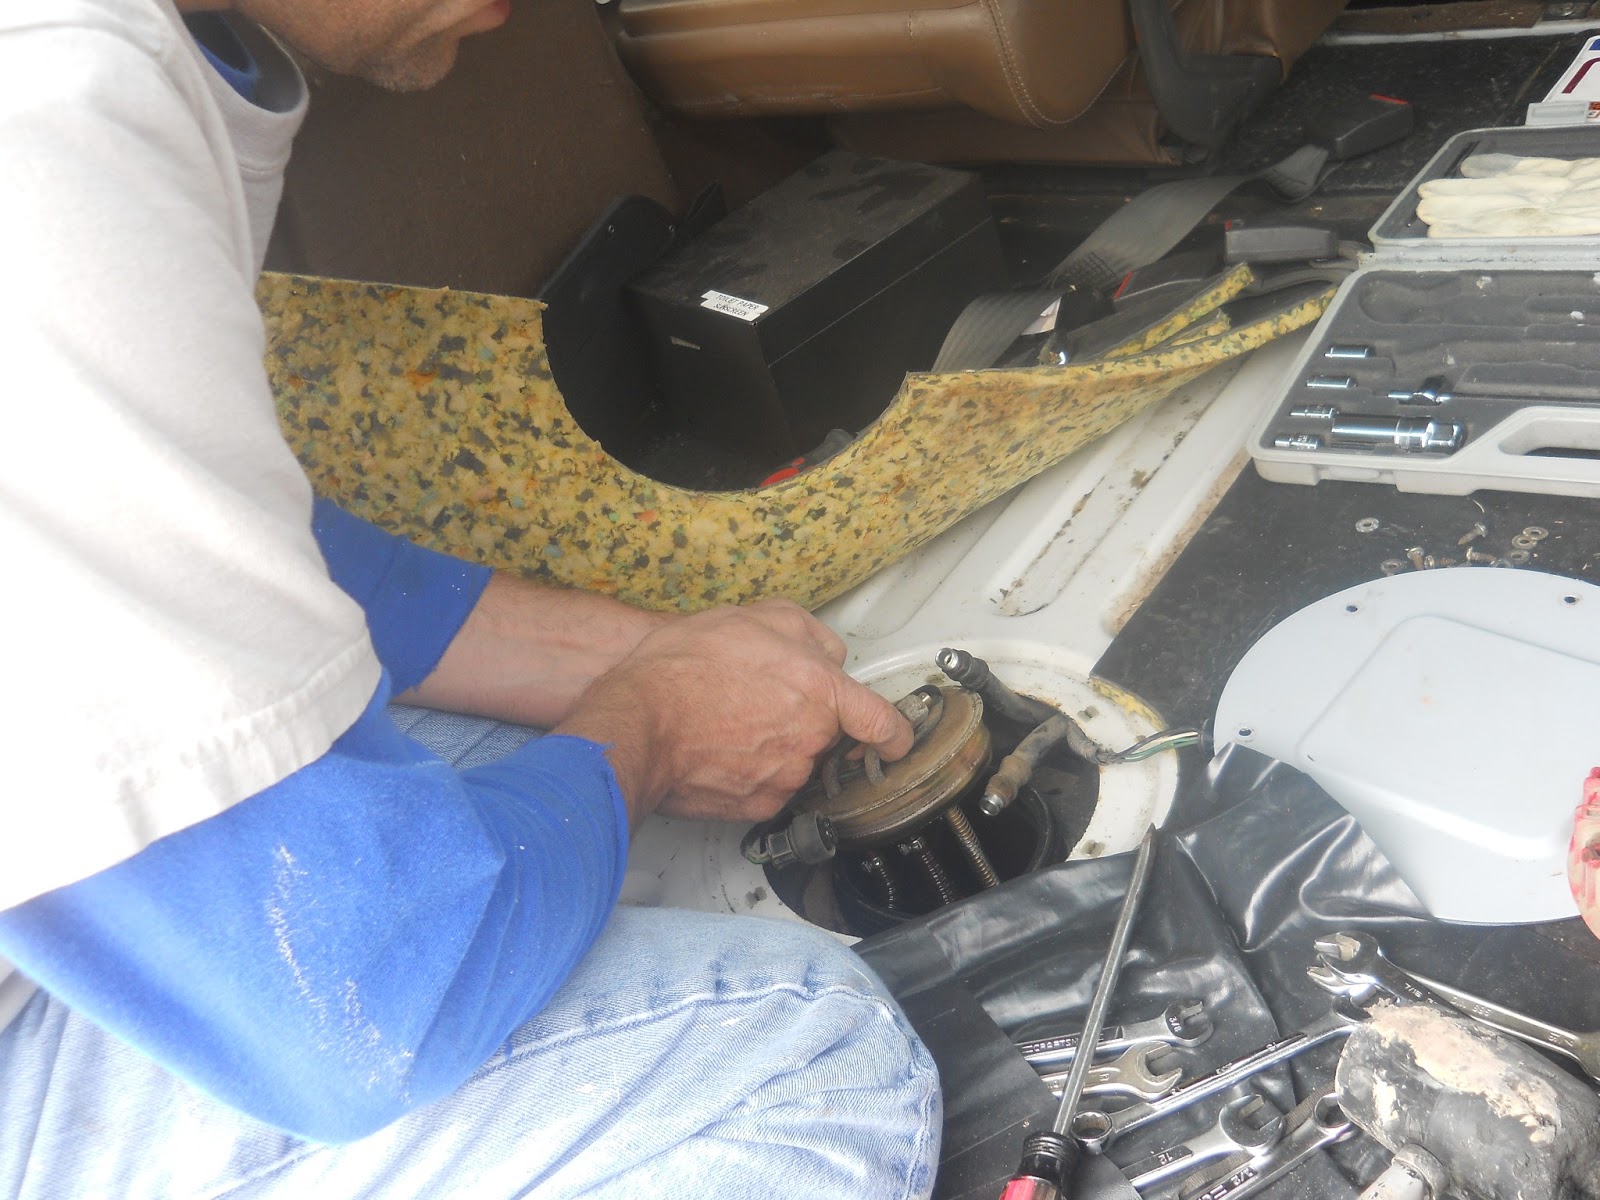
The next series of pictures is me pulling the pump from the tank. 

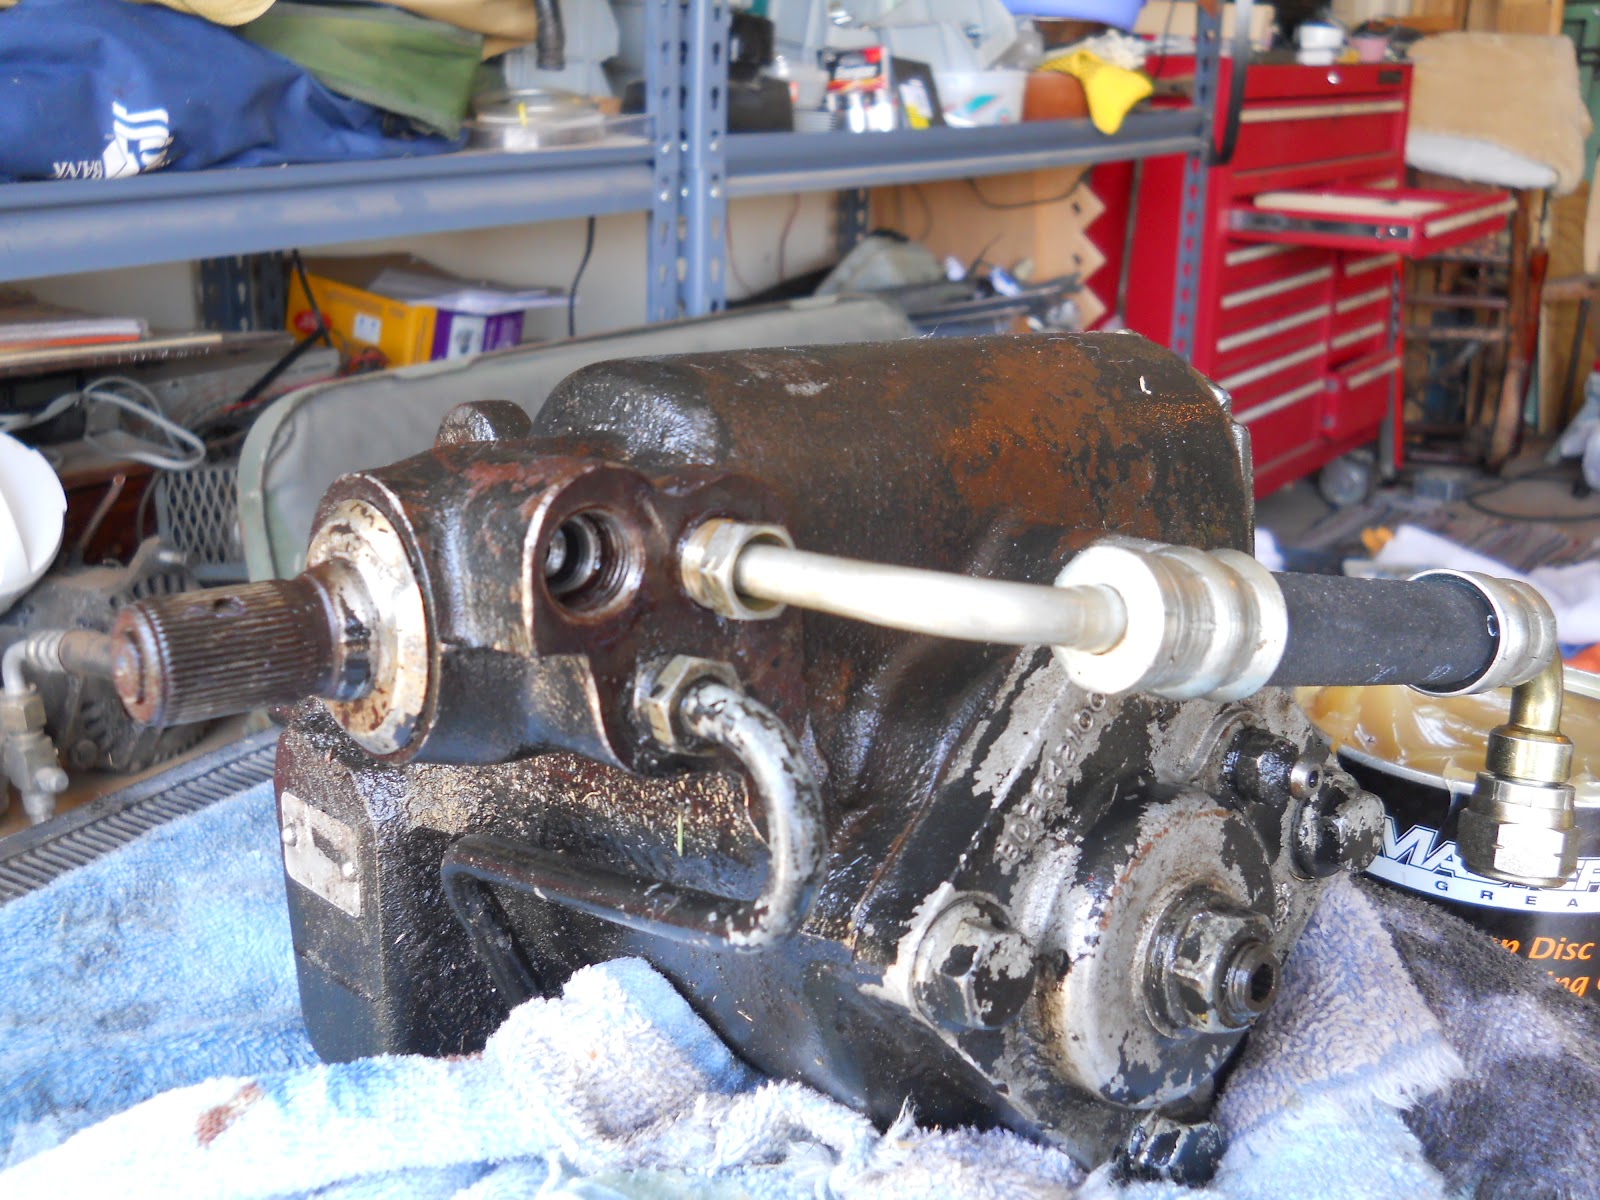
Holding the fuel supply lines out of the way.

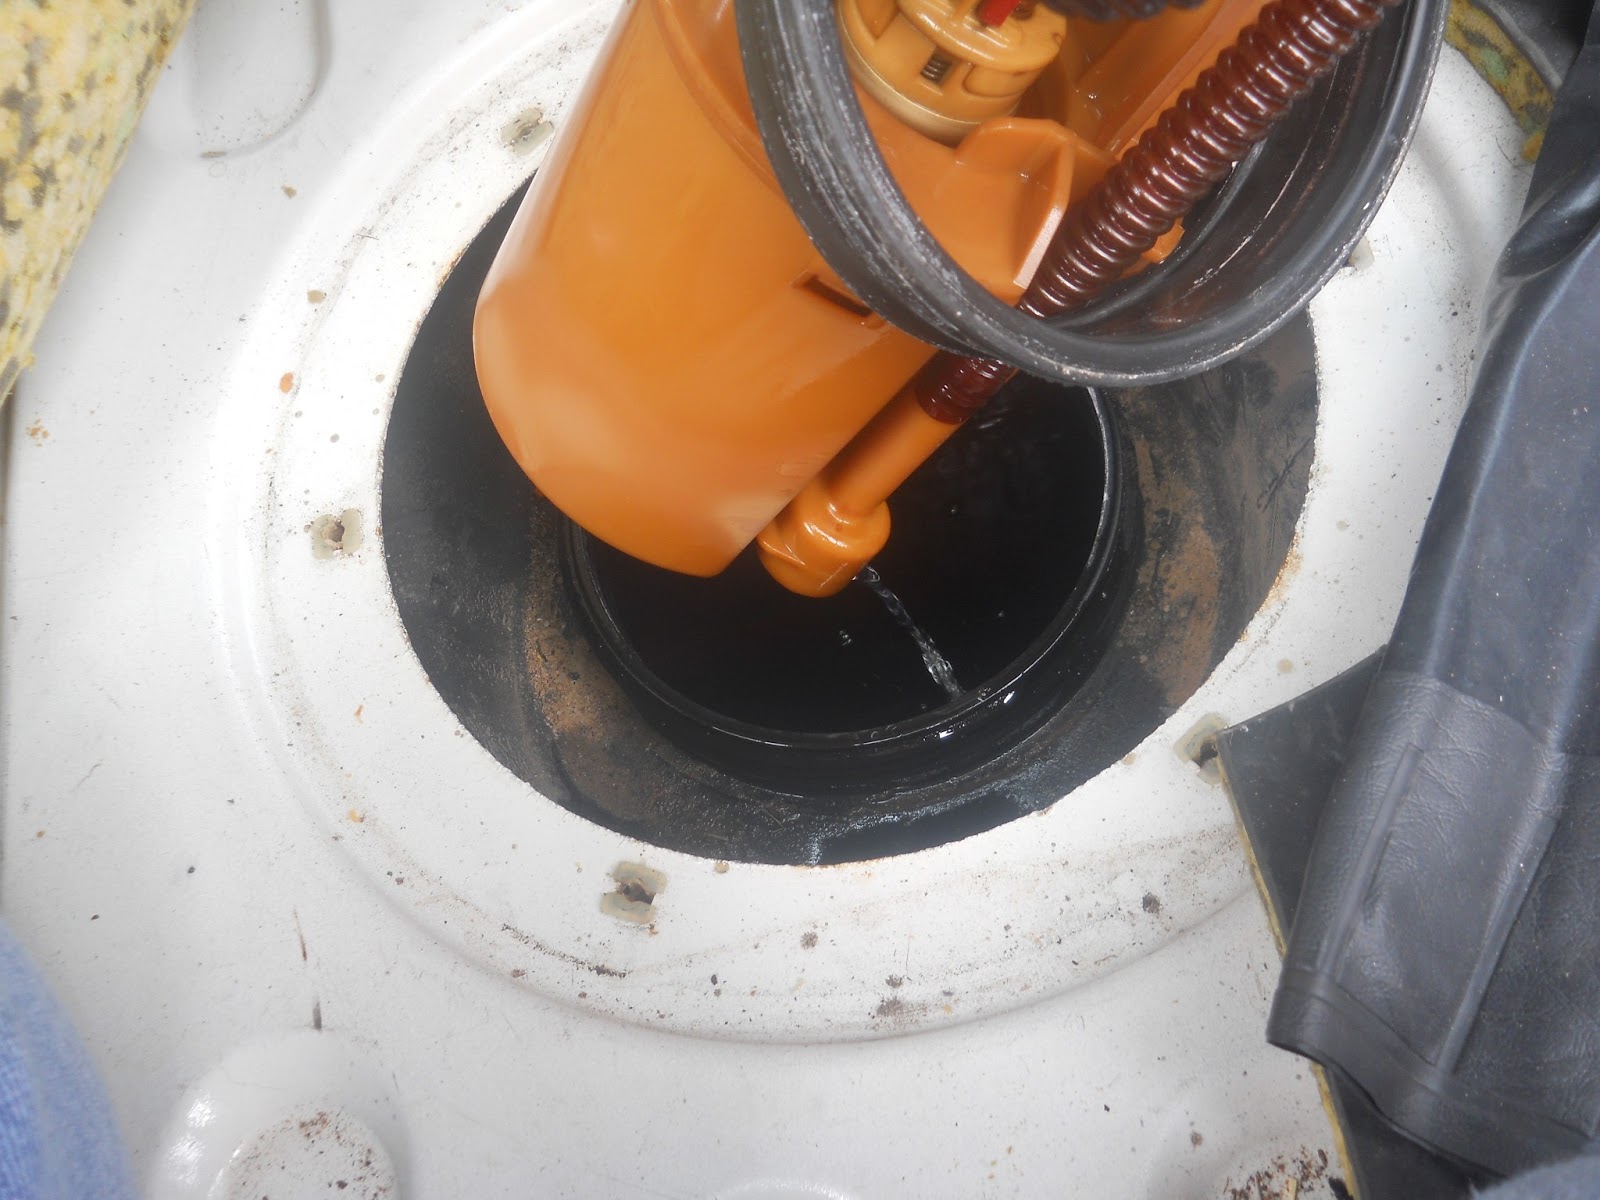
Remember the fuel level indicator is connected to the float. So as you are pulling it out you will angle the pump to slide it out. The lower part of the pump is a sump that keeps fuel around the base of the pump. This way the vehicle is not starved for fuel when the tank is low and you turn a corner and slosh the fuel to one side.

So as you are pulling the pump assembly out. Let the fuel run out of the pump. This will prevent fuel being spilled in the cab.

Fuel draining out.

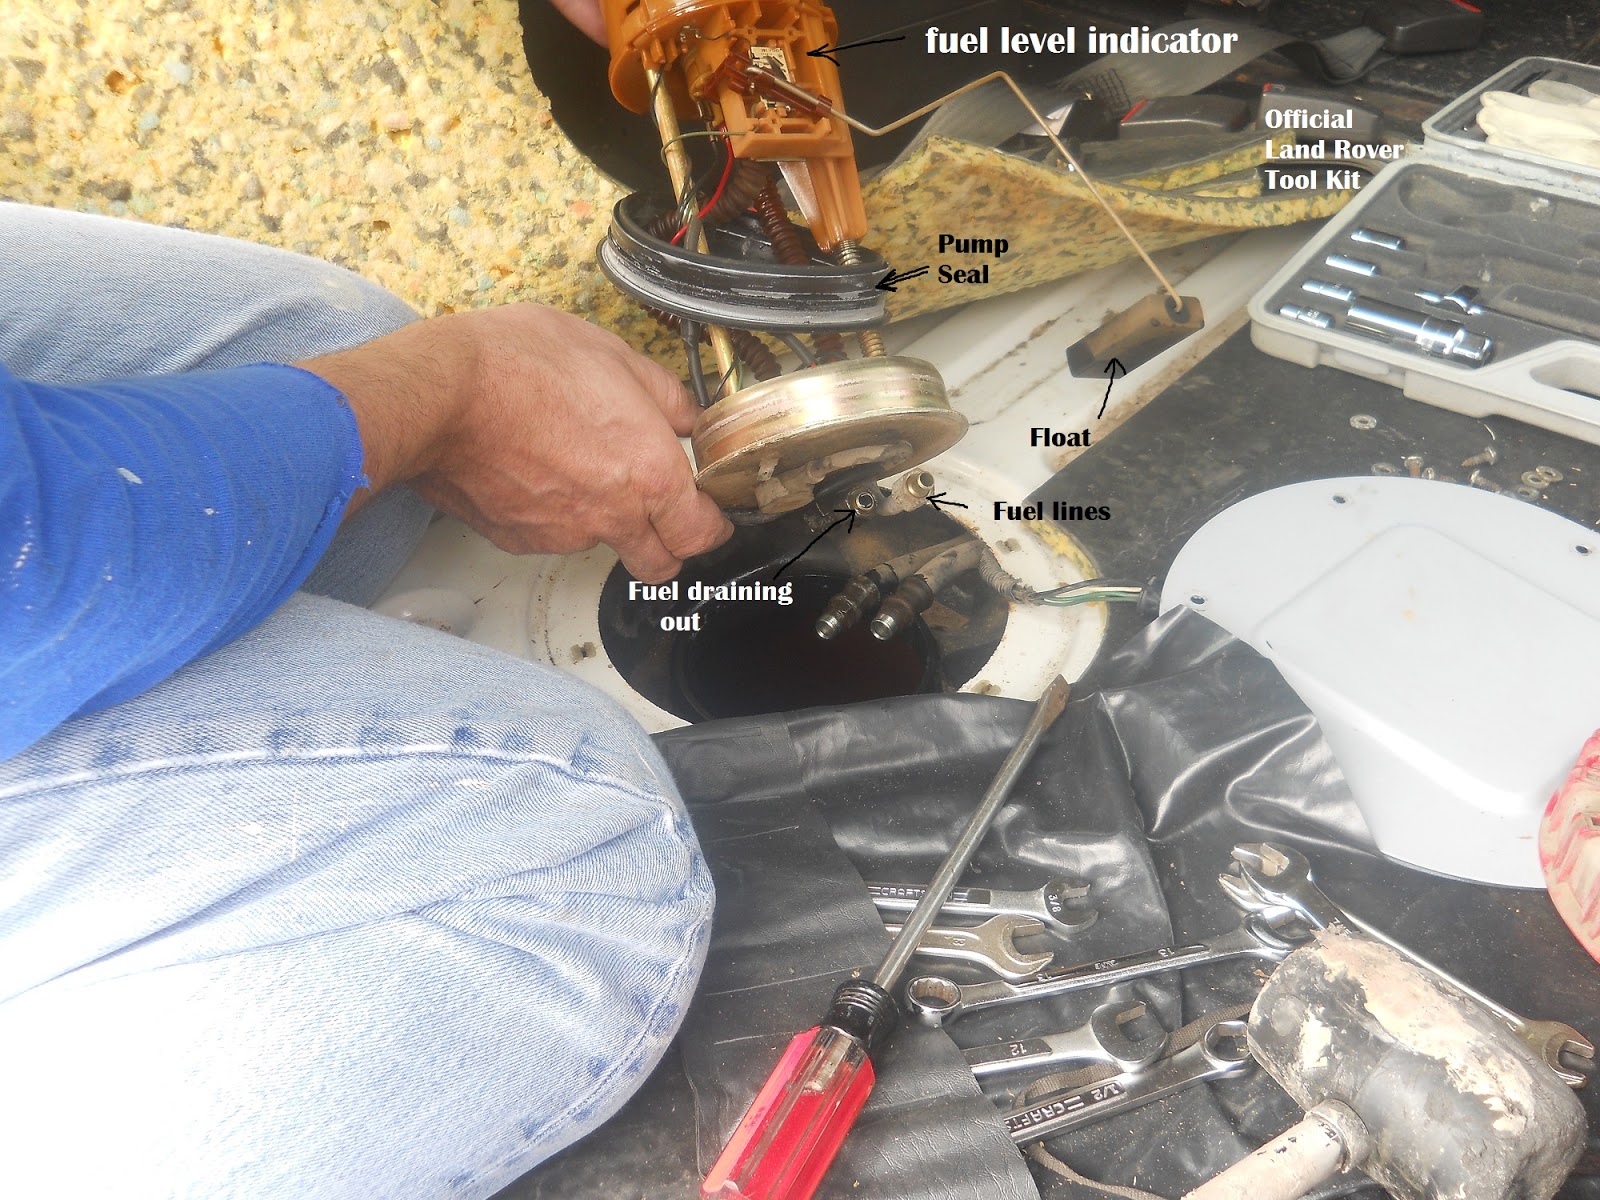
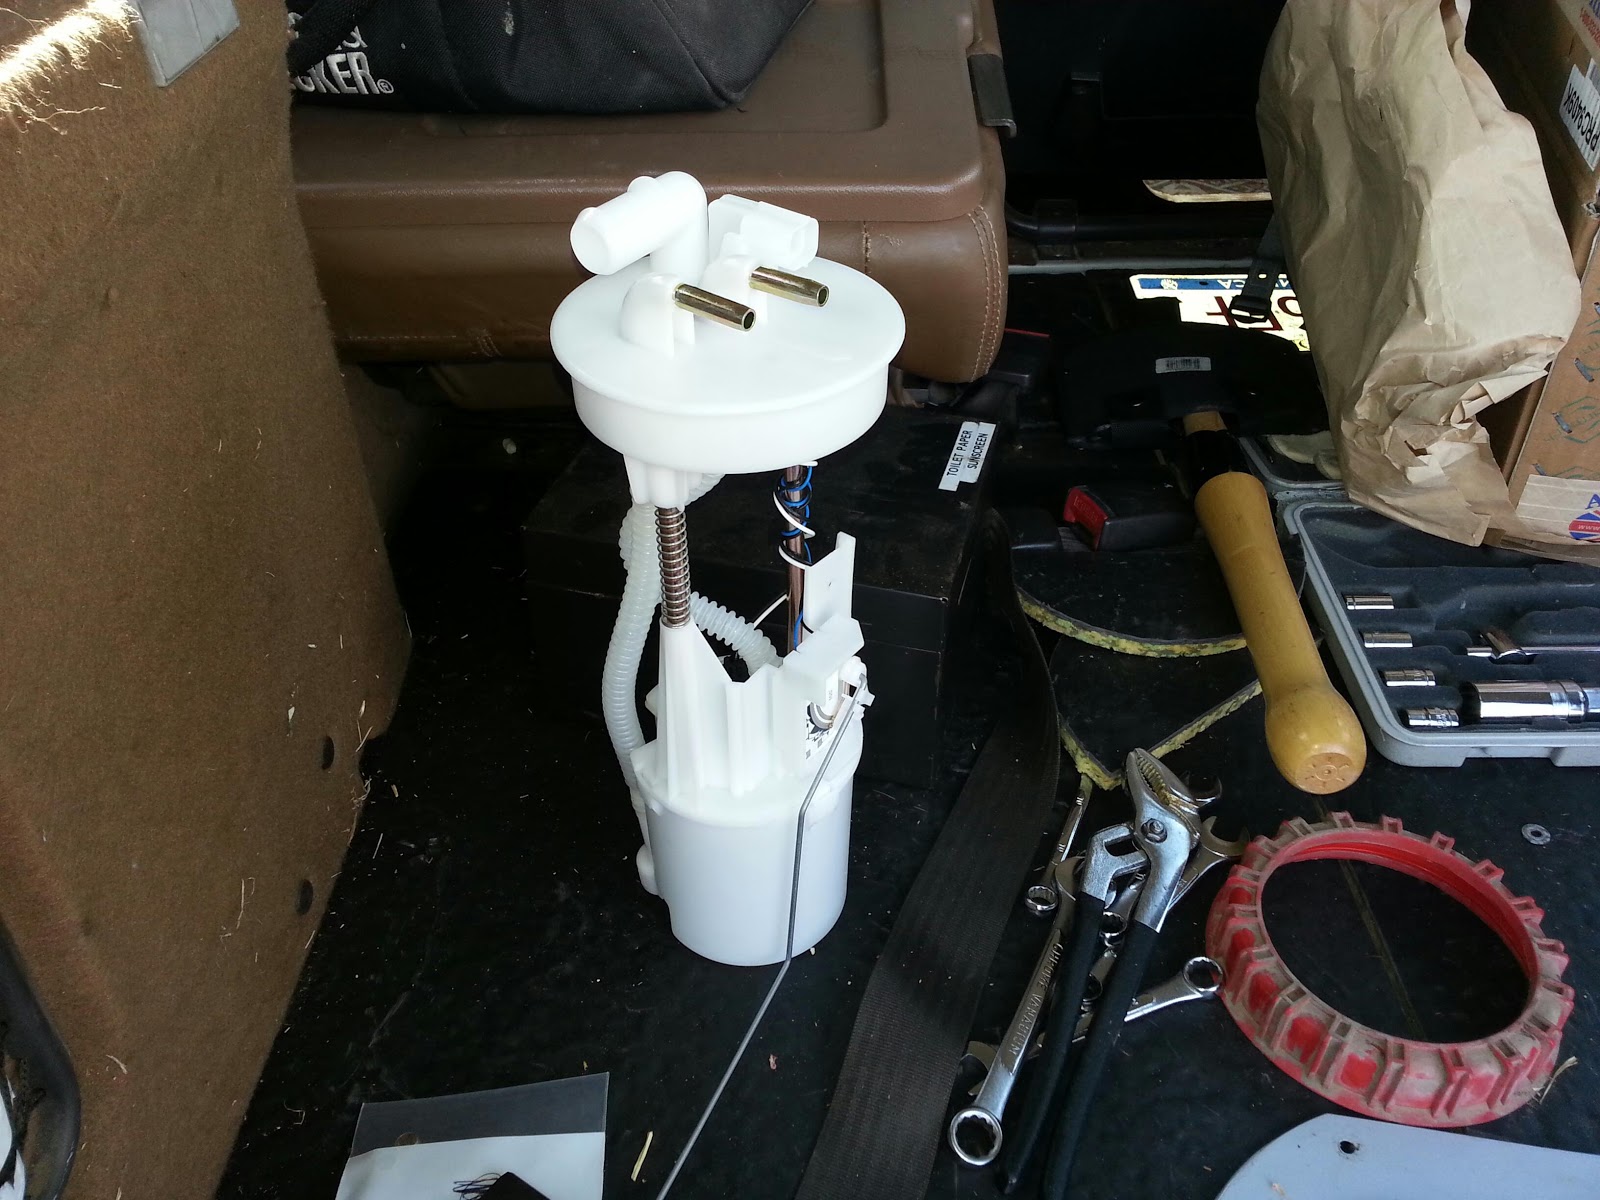
I inverted the pump and drained more fuel out. You can see the official Land Rover Tool Kit in this picture. I needed to use it due to having an insufficient collection of tools in my tool bag. I remedied this by purchasing a socket set for the on-board tool bag.

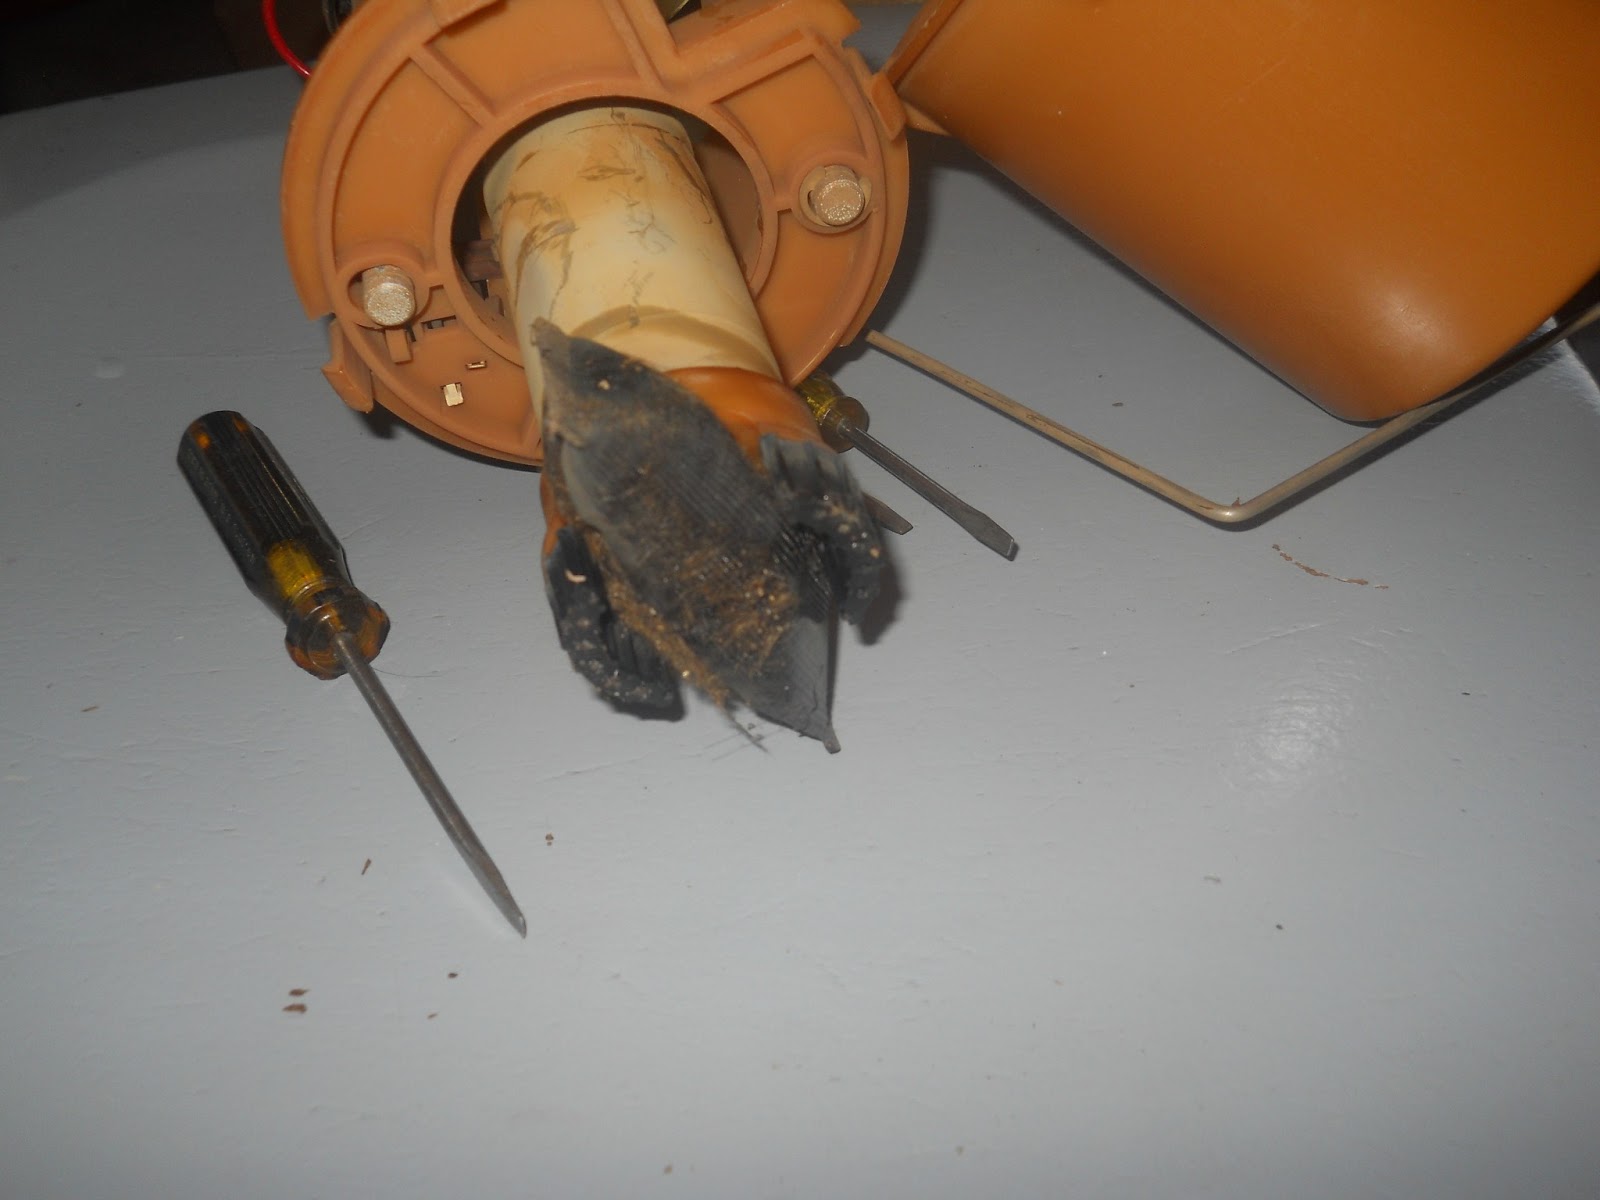
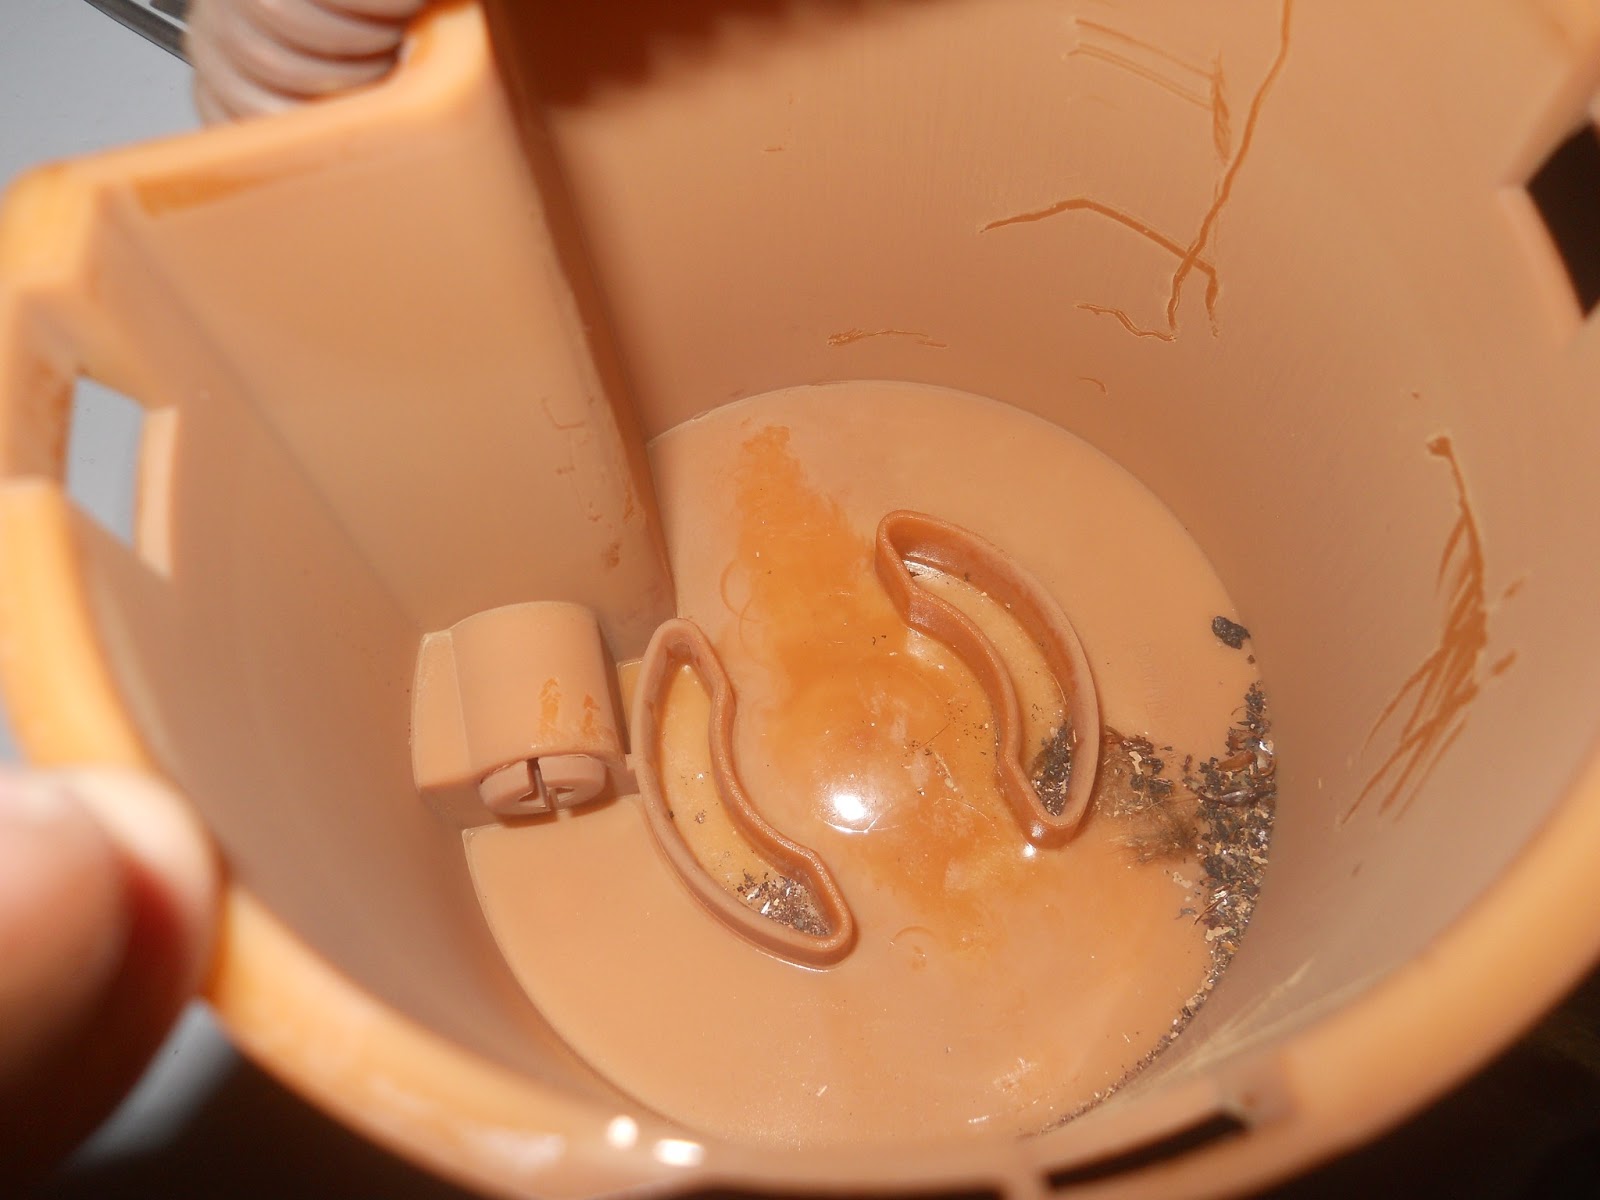
Once I was back in my garage I took the old pump apart. Look at the debris attached to the filter. NASTY!

Look at the debris in the bottom of the “starvation tank”. 

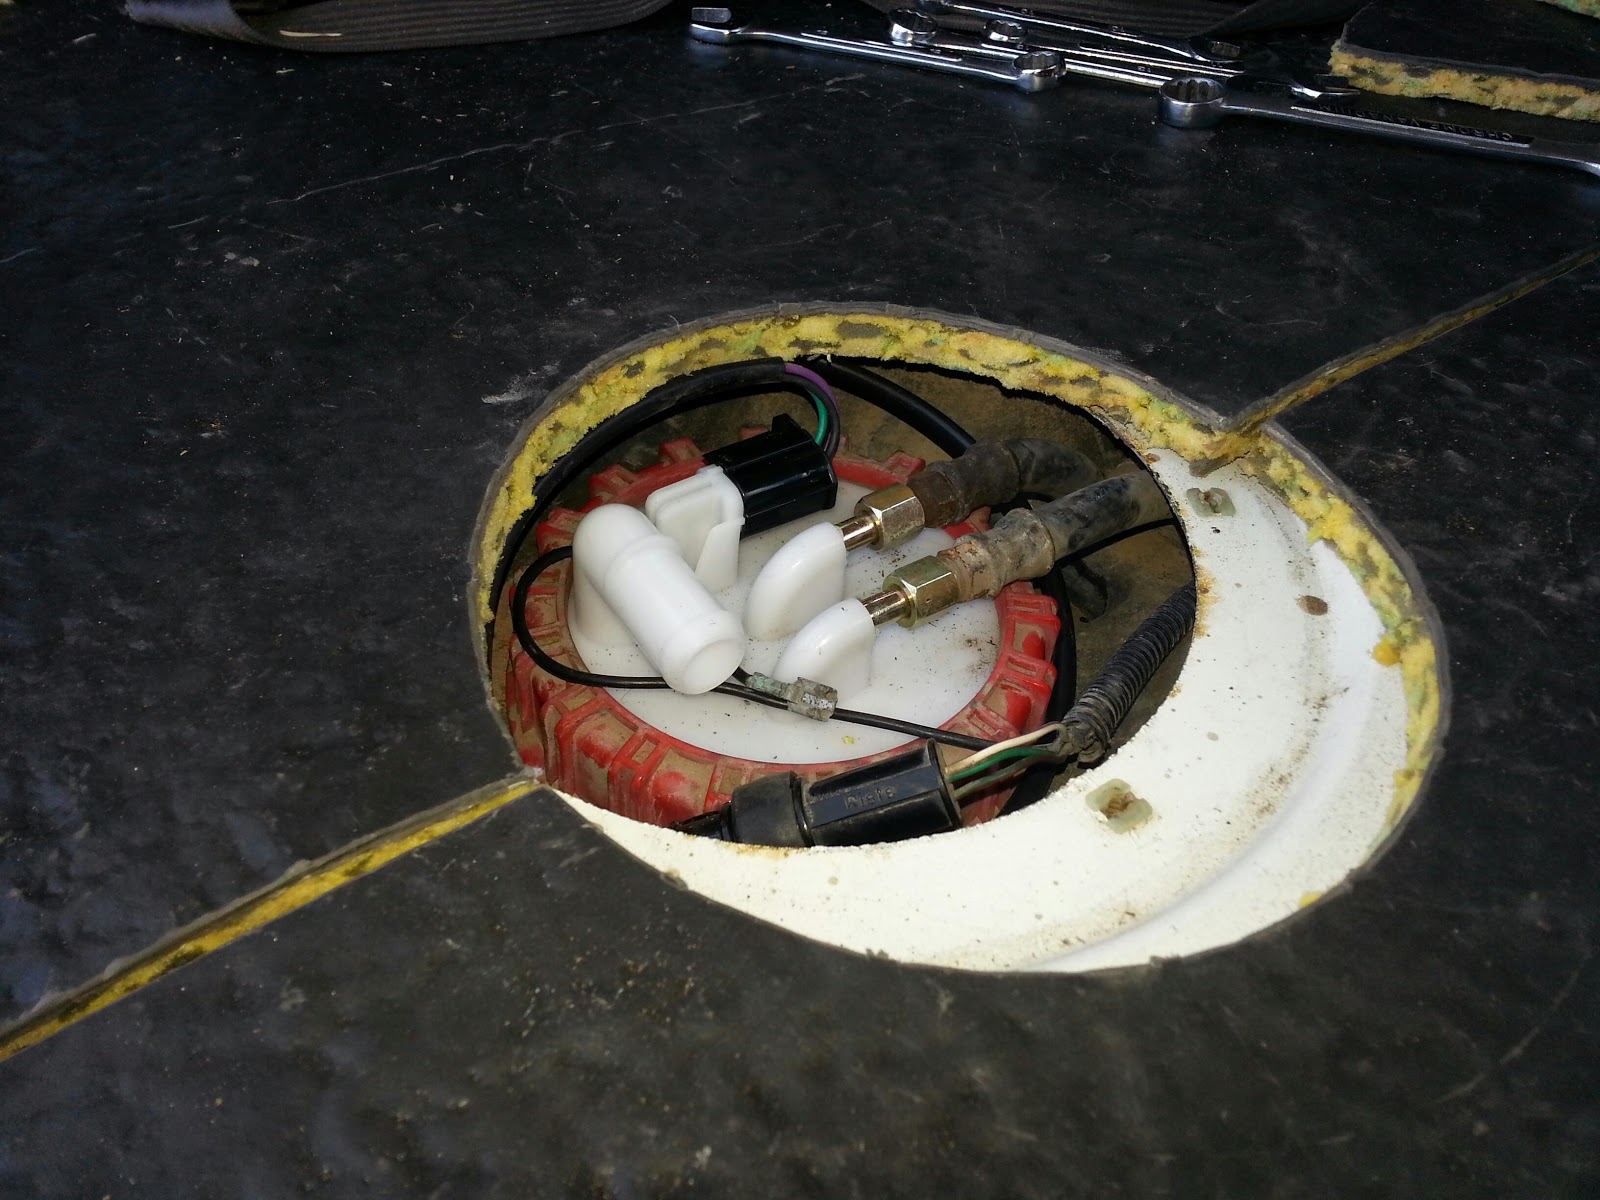
While I was sourcing a new part I just placed the access panel over the hole and replaced the carpet.

I ordered a new pump from Atlantic British and paid the up charge for it to be delivered in 3 days. 300$ for the kit. I originally intended to repair the old one. I talked myself out of that due to my schedule this week. Two assignments, a test, and the weather (four inches of rain in four days, thank you God.) made this an easy decision. I will rebuild the old pump with a replacement pump. I expect it will cost less than a hundred dollars to replace the pump portion.

With the new pump in hand, I went about installing it.

I placed the rubber seal in the tank and then fitted the pump through the seal. It was a tight fit. You then screw down with the red securing ring. Use the screwdriver and rubber mallet. Take it easy and take your time. No need to use the mallet like Thor uses Mjölnir (Wikipedia).
Connect the power connector pig tail thing they send in the kit. Reconnect the fuel lines. 
With the access panel still open, I started her up. I watched for fuel leaks. NONE. So I buttoned everything back up.
I drove the Range Rover over to Braum’s in Tri-City to have ice cream with my grand kids (and my daughter and son-in-law). I had a single dip of chocolate chip on a sugar cone. Yummo.
The Range Rover ran great. I noticed the fuel gauge had me at a quarter of a tank. With a new pump and new indicator I thought it prudent to fill the tank and make sure the gauge was working correctly. It was all good and showed a full tank.
I pulled over in the parking lot of the Chickasaw Nation Training facility. This is the old T.G.&Y. building. I really loved that job. I called JagGuy and chatted about lots of stuff and he looked up replacement pumps will we gabbed. I’m lucky to have him, both as an automotive resource and friend.
As I was chatting I saw the state bird of Oklahoma, a Scissor-tailed flycatcher fly by. Spring has officially come to Oklahoma.
On the Difficulty Scale I’d rate this a 2. It is not difficult, just a tad fiddly.
Thank you to Justin and Lecia for letting me maroon the Range Rover in their driveway. Thank you to Lecia for helping me check for electrical continuity by turning the key while I was in the back.
I am heading to Fort Washita for the annual rendezvous this weekend. Get out and support your local historical society this spring.
Thanks for reading and Happy Rovering.

Steering Issues Solved…For the Most Part (Post #297) 8/19/2012

 If you recall, I left off with the last post with a cross-threaded power steering hose. Sorting it out would take a few phone calls and a lot of hope.

First thing I needed to do was find a tap to correct the threads I managed to mangle. There are LOTS of types of taps. And there are lots of names for those taps. It seems everyone has their own name for each type of tap. I’m sure it varies by region too. I did not know that before this project. I also did not know the name of the tap I needed. JagGuy told me I might need a bottoming tap.

Bottoming tap: 1-2 lead threads ground. Used for continuing to thread a blind hole close to the bottom of the hole. It’s difficult to start threading a hole with this tap.

Looking at the taps its easy to see the bottoming plug was best. Why? Well that is a good question. There are only 5 or 6 threads in the hole. If you use a taper tap you might not have enough threads make contact. Same issue with a plug tap. I needed the bottoming tap.

As it turns out, that was pretty easy. I just visited the amazing J&E Supply and Fasteners. I have sung their praises before. Finding the bolts and nuts for this project required me to visit them twice. Twice because I didn’t have a list of all the nuts the first time. The tap had to be a blunt or

In any event I took the “test fitting” with me and we matched it up to a tap. I was shocked they had it, but they did. I was so stoked or chuffed or happy, maybe all three at once. This tool saved me several hundred dollars American in replacing the steering box.

Having NEVER successfully tapped anything in my life…I chose to call JagGuy and ask for some sage advice. he was full of all kinds of advice for this. First bit of advice, pull the steering box. It turns out I probably would have been able to tap it in place. But, pulling it made it easier and I was able to clean it up while it was out. Second bit of advice, keep the shavings out of the unit.

To do this he suggested dipping the tap in grease. The grease captures the shavings and you just have to wipe it off to eliminate the shavings. This was easy enough.

With the advice in mind, I lined up the tap, and started it and gave it a turn. I backed it out and turned it again, like I had seen on countless TV shows. I turned it all the way to the stop and backed it out. I took the sample fitting and screwed it in. My awesome neighbor Mr. Fisher had walked over and was witness to the successful tapping. I have never been so excited. This was really awesome.

I took the new hose and threaded that as well. I was convinced now that it would not leak and I was ready to clean it up and give it a coat of paint.

Following my habit of painting everything I pull off the Range Rover and replace I gave the steering bits a couple of coats of primer gray.

I managed to get her all together. I filled her with power steering fluid. I turned the steering wheel to the bump stops in each direction three or four times to clear out all the bubbles. I saw that on the TV as well, in fact Mr. Edd China from television show “Wheeler Dealer showed me that.

Okay, now that the steering box is all back together. Where am I on all this? As it turns out the steering box probably has some damage from running with low fluid. There are “spots” when I turn the wheel where I get some negative feedback from the steering. It is either this or an in accurately aligned steering shaft. The shaft has two universal joints and if you don’t have it “just right” it binds a bit. I might be having this. To sort this out I will have to get back under the hood and see if I can adjust the bind out.

On the OkieRover Difficulty Scale, this job is a three. I say three because the job is actually removing the steering box. So if you are going to swap your steering box this is a difficult job and there are lots of things to get back in place correctly.

Thanks for reading and Happy Rovering.