I started a little slow out of the gate Saturday. My good friend, the Evil German Dude (EGD) agreed to help me weld in patches for my rusted passenger side floor. So the plan was to get up on Saturday and drive to the lovely town of Jones, Oklahoma where EGD has his evil lair. It didn’t help that I had what would be considered a bad dream the night before. In the dream I forgot to get up and go to EGD’s house for the project and I couldn’t get him on the phone to tell him why. Weird.
My slow start was mostly due to me failing to move all the crap that was piled on and around my Range Rover. I had to move two cars and it simply took longer than I planned. It turned out not to be a big deal, but when you are dealing with Evil German Dudes you want to be punctual. The drive was unremarkable except for the big hole in the floor letting in the morning chill. The heater kept it comfortable so it turned out not to be the issue I expected. I did see one thing on the way in that disturbed me though. A sign at the city limits of Jones read,
It is illegal to dump animals in Jones.
Is this a big problem? I guess it would make sense to drop an unwanted animal off in “the country” instead of feeding it and loving it. Jones is definitely in “the country”. But Jones is having none of that. It must be a big enough problem that the City of Jones sprung for a sign to declare its intention to fine you if you are caught.
I arrived at EGD’s evil lair and with some pleasantries we got the Range Rover into the garage. “Back it in.” was my first instruction. I asked why, to whit he responded, “it will be easier to push it out of the garage if it catches on fire.” DULY NOTED! That had not even crossed my mind.
The project at hand was to weld in replacement floor panels to cover the rusted holes that I cut out of the floor. EGD’s evil mistress is EGB, the Evil German Broad. She had a project as well and so we all assembled in the secret lair and got started. I’m substituting broad for bitch. I like her, so I tend to think of her in a better light than the later word would denote.
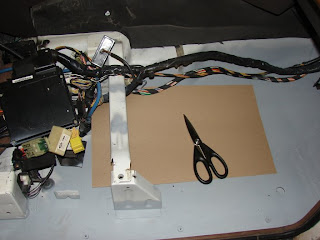
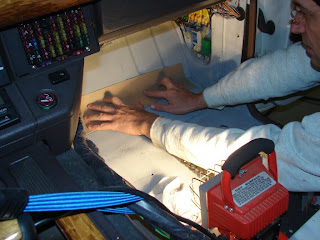
I failed to do my homework so we were set back while I made my templates for the holes. Templates are a good idea. With the price of sheet steel and the distance required to retrieve more if you screw up makes mistakes like poor cutting a show stopper. I got the card board and cut the template.
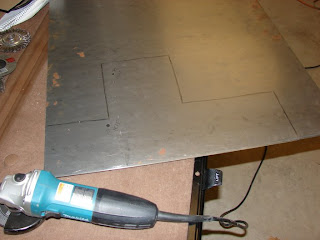
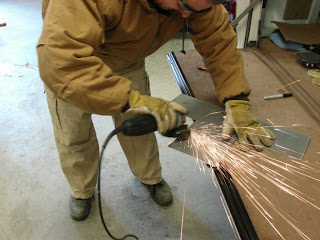
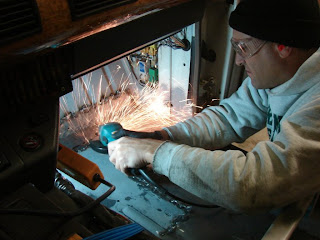
My next task was to cut the steel to match the template. All this would be duplicated for the second set of holes in the front of the floor pan. I transferred the template on to the steel by tracing the outline and got to cutting. I positioned our old friend, the angle grinder, now fitted with a cutting wheel, and got to cutting.
This is the part where a quote from a movie is necessary.
“Stupid is as stupid does.” – Forest Gump
I can just hear you all out there, “But OkieRover, I always thought of you as a pretty sharp guy.” Well that is a nice thought my dear readers, but let me tell you the facts. As my cousin Victoria will assure you, “Marines are NOT the sharpest knives in the drawer.” She would also be the first Army dog to tell you, “Marines may well be the biggest and scariest knives in the drawer, but not the sharpest.”
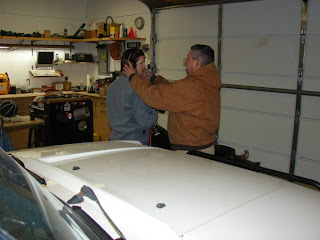
You can see from the picture that something funny is about to happen is about to go horribly wrong. On my third cut the sparks flying at my thigh were hot enough to ignite my Levi’s 501 jeans.
On the first and second cuts I had noticed that the spot where the sparks landed on my leg got warm. But I’m a Marine and I am not phased by such annoyances for my pain threshold is high and my discipline is unwavering. Sadly that level of pride proved too much when the warm spot on my leg got A LOT WARMER, you might even say damn hot.
I looked down just as the Evil German Dude said, “You are on fire.” Before the last syllable of –ire was said I was already slapping the fire out. I did not feel “stop, drop and roll” was appropriate so I just slapped my thigh until the flames were gone.
We all had a big laugh. EGD said, “If you would have left it burning for another minute I would have had a picture of it.” I’m not sure that would have been worth the photo. As it turned out I only received a small blister and a bruised ego.
Growing impatient with my pathetic attempts to cut the steel EGD leaped into action. He took over the cutting. Perhaps he was wanting to have all the fun. I know he has had extensive training in metal working, shop procedures, welding, and nuclear reactor construction techniques from the Stadtweke Bremen AG Academy of Evil Villains. We often tease him that he could build a fully functioning nuclear reactor from two paper clips, a nine volt battery and a piece of cork. We also know he minored in earthquake manipulation while at the Academy. It should then come as no surprise that Jones Oklahoma experiences an extraordinary number of earthquakes. We have not yet gathered the evidence that he is guilty of the earthquakes, it’s only a hunch at this point. Update: The evidence is getting stronger.
=”>
The next step was to cut holes in the steel plate to make tack welds. Unfortunately I had only two thicknesses of steel to choose from at Lowe’s, 16 gauge and 22 gauge. Sixteen gauge being the thicker steel. EGD’s pneumatic punch tool was no match for this thickness and it was determined to edge weld the larger patch.
With that in mind we had to remove the paint I sprayed to protect the naked steel from rusting. I marked the outline of the panel and EGD ground the paint away with his air tool.
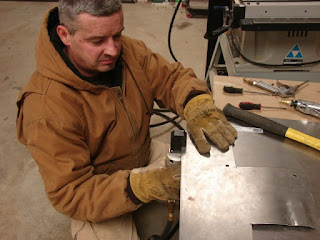
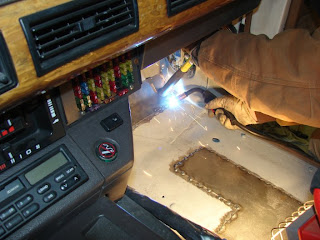
Then it was on to the welding. Originally I had intended to learn this task and do it myself. I was pretty sure I wasn’t ready for this today. EGD was the accomplished welder and I just stepped aside and assisted when necessary holding the plate down as he made the tack welds.
Pretty soon he was done and I was back in there to make the template for the last two holes. I’m now an expert at making templates. I also cut this panel out and managed to not catch myself on fire for a second time. 22 gauge is pretty thin so I cut this one out with the metal shears.
To get the flex and bend necessary for this section we went with the 22 gauge. The punch was easily able to penetrate this thickness and EGD went to work. He also gave the piece a nice bend in his vise and it was back in to weld it down.
I got in and used the air grinder to get the paint off to insure good welds. This time I ground the paint back inside the template marks due to the punch method being deployed.
EGD fired up the welder and got the last panel welded in place. He used the hammer to assist in holding the plate in place with the proper bend. It was necessary to have the air compressor fitted with a blowing tool and at the ready. As the welds were made, several times the rubberized undercoating Land Rover saw fit to install caught fire. It was easy enough to keep under control with a few hundred PSI of forced air to blow out the flame and cool the steel after the weld.
The final step was to knock the high spots of the welds down with the angle grinder. I got that task knocked out in no time.
All that was left was cleaning up. I grabbed the shop vacuum and cleaned up the floor pans the best I could. The grinder wheel and slag from the welding can leave a pretty good pile of debris.
We finished up the day with a lovely meal. EGB had prepared chili and cornbread. It was delicious. I bid them a good day and I was on my way home.
On the way home the alarm went off inside the cab. This is the same alarm that sounds when the transfer case is in neutral. I thought I had eliminated all possibility that it would sound again.
I pulled over in Nicoma Park, Oklahoma and shifted the transmission to PARK. I grabbed the shifter and fully expecting the damn thing to sound, I shifted back to DRIVE. Nothing, no alarm, WHY.THE.HELL did it do that?
I proceeded on home and one more time the alarm sounded. Just a short beep and then no more trouble. The road noise was reduced by the new panels, so I thought I’d listen to the radio. I punched in my CODE and the radio did not spring to life. Maybe it’s the wrong code. So I’ll have to pull the radio again and get the code. My good friend and former roommate Master Guns has a radio from one of his cars for me. I have to get it from him to see if it will fit in the limited space of the Range Rover’s dash. Maybe we’ll just go with a whole different system, I don’t know.
I got home and jumped out of Range Rover. As I passed the front of the Rover I heard a high pitched sound from the engine compartment. I went back and popped the bonnet and listened. My guess is I am loosing the bearings in my alternator. I have a lifetime warranty on the alternator so I guess I’ll pull it and take it down for a replacement. I didn’t expect a new project but I am not surprised by it either.
On Monday evening, Oklahoma was blessed with some unseasonably warm weather. We topped 73 degrees (F). That is very unusual for this time of year. Consider last year at this time. The weathermen were predicting a snow storm for Christmas Eve. What we got was a blizzard with five foot snow drifts that crippled the metro area for 7 days. We named the event Snowpocalypse 2009 mocking the news coverage of the event.
So, with seventy degree weather I was determined to paint the new bare naked panels before surface rust sets in. After Mrs. OkieRover and I got dinner (Chick-Fil-A), mom’s grocery shopping (Homeland), we had to take a roll of tape over to our friend who owns Rusty’s Frozen Custard. When we were neighbors he would always come over on December 23rd or 24th and ask if we had any tape for he had exhausted his tape supply wrapping presents. So after the second year of his late season visits, we started buying extra rolls and giving them to him as a present. Eventually we moved away, and now we take the tape to his store and leave it for him. On and off for fifteen years we have been doing this, a very long running joke.
With all our duties done, we still had time to go to O’Reilly’s for paint and bed liner material. If I hurried I still had time to get some of that paint on the metal before bed time.
We went into O’Reilly’s. Mrs. OkieRover said she “always” goes in with me. I told her she NEVER goes with me to the parts store. I can’t honestly remember the last time we were even at the parts store together. So once again her ALWAYS and my NEVER come up short on reality.
Castrol Edge Synthetic was on sale, buy five quarts get a Mobil One oil filter free. The Scion and the Civic both need oil changes so I grabbed 10 quarts. I don’t know anything about Mobil One oil filters. So that’s something I’m going to have to look up today.
So I look at the receipt,
-
2 cans of bedliner, =”>
-
2 cans of MarHyde acid etching primer, =”>
-
10 quarts of synthetic oil.=”>
130$(US)! WTH? Wow that was a lot. I have to get it out of my head that a quart of oil costs a dollar. So you can imagine I was not expecting 70$(US) for two oil changes. I guess I know what I’ll be doing during the day on Christmas Eve. I’ll probably take advantage of the situation and extend it to a learning situation to the boys. Diet Mountain Drew graduates this year and needs to know about this stuff.
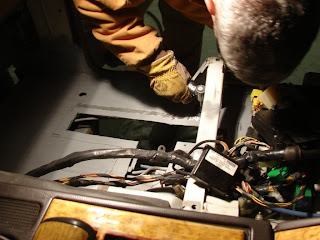
The next steps are to see about sealing up the floor and getting the bedliner sprayed on the new panels. There are some unavoidable problems already popping up. The best way to have done this job was to take the body off the frame and weld in a new floor for this section. With that in mind, it is going to be a challenge to seal out the water. I’ll have pictures of the underneath in another blog post this week. It will become clear why this task is going to be such a challenge when you see the pictures.
One more time, I’d like to send a big thanks out to my friend EGD for his help and to EGB for the great meal.
And to everyone else thanks for reading and Happy Rovering.
=”>


