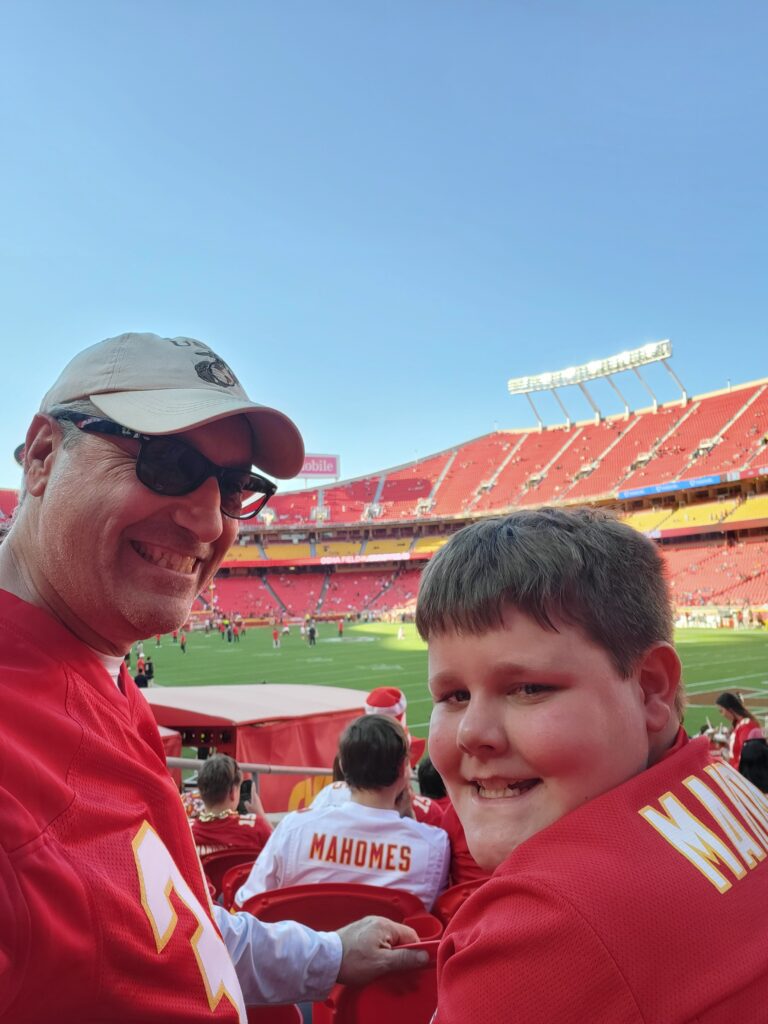
Hotter Welds for the Floor Panel on my Range Rover Classic Overland Rig (Post #695) 3/16/2024

Yeah, these welds go to SEVEN. As Nigel Tufnel of the legendary band, Spinal Tap, says, “…but these go to eleven.” I turned up the voltage on my welder to get better welds.

I started with setting 4 wire speed and C voltage on my Lincoln Pro Mig 180 welder. Those welds did not hold. Drilling them out ate two drill bits and caused me to sharpen one of them twice during this ordeal.

So I turned it up to 7 D. Why the wire speed needed to be so much faster at this level of voltage is till a mystery to me, but hey, whatever works.

Hopefully these work. I am going to reinforce the welding with some bolts just to make sure any “flexing” of the body doesn’t sound like I just cracked the Big White Bus in half, when those weld break free. It will give me some piece of mind too that the floor bed will not go anywhere with all my gear strapped to it.

I also sorted out that I had my braces on wrong. This was why the bed was bulging in the middle. I don’t know how many times I went through how those needed to be installed and I still got them wrong. They are on correctly now and the bed panel fits SO much better.

That’s about all. I really appreciate two of my viewers who pointed out that the welds were not penetrating.

Wallace, who just recently acquired a Range Rover Classic and will be starting on his restoration at some point in 2025. And…

Trevor from Tumbleweed Garage [YouTube channel] who is restoring a Willys Pickup. He is doing a great job and I love watching how his mind works. He does a lot without any fancy tools, proving once again you don’t need to spend a king’s ransom to play with cars in your garage.

Thanks for reading and Happy Rovering.

https://youtu.be/17mumd38By8

Welds Failed AGAIN on my Floor Panel for my Range Rover Classic (Post #694) 3/9/2024

Well that was a waste of a weekend. In a misguided attempt to correct bad welding, I propose it is my ground. Turns out that was wrong too.

So we filmed a lot of wasteful effort to get the floor bed installed.

I received a lot of help from people emailing me and messaging me. The consensus, the welder is not hot enough. I need to turn up the voltage.

This is an exercise in frustration. My next video will be with hotter settings on the welder and hopefully some welds that stick.

I’m pretty sure the bracing is in the wrong place on the frame supports too. There is a bow in the bed that can only be explained by these braces being in the wrong place.

More on that in the next video too.

Thanks for reading and Happy Rovering.

https://youtu.be/F5bEObYQ_Do

Welds Failed on my Floor Panel for my Range Rover Classic (Post #693) 3/2/2024

Today was a punch in the gut. My welds will.not.stick. I have no idea what is going on. I’ve tried several thing and I can’t get these welds to stick.

My goal this weekend was to get the bed installed and to move on to something else. Unfortunately this is a big set back.

I will have to investigate what is going on. Sort out what I’m doing wrong and hopefully get some welds to work.

Thanks for reading and Happy Rovering.

Fitting the Floor Pan on my Range Rover Classic (Post #692) 2/23/2024

In this post I fit my floor panel in the Range Rover. Yes, I know, it’s about time!

I finished up bolting on the support beams and got the panel test fitted in the Big White Bus. This required me to go to the hardware store and buy a bunch of stainless steel hardware. Fortunately for me I bought a box of 100 bolts. Unfortunately for me the bolts had a 37.5% failure rate when fastening them with nyloc nuts.

Why? I have no idea. It’s not like I was torquing the hell out of them. I hadn’t even bottomed the nuts out and the bolts were binding up. Pretty disappointing. I’ll be sourcing a different brand of hardware in the future. These really let me down. I’ve had problems before but thought it was me being rambunctious with the impact driver. Turns out it wasn’t that after all. You might be quick to say “made in China” I’m not surprised. But these were made in Taiwan. Normally an acceptable substitute, and if that helps them stick it to the CCP I’m all for it. Not sure where I’ll find another brand but I’ll be looking.

The panel fit was “tight” to say the least. It required a bit of persuasion (with a hammer) but it fits. The next step is to get the damn thing welded into place. I probably have 100+ plug welds to do. This is going to be a challenge.

I can see the end of this part of the project in sight so I’m excited to get after it. That’s all for this week. Like and subscribe if you enjoy the content and appreciate all the free content.

Thanks for reading and Happy Rovering.

https://youtu.be/2Svh-SdwGOE

Floor Support Beams on my Range Rover Classic (Post #691) 2/17/2024

In this post I pose a question, “Why not bolt those supports on?!?”

I have the holes for bolts. I either have to weld those holes up or use them to mount the supports. It’s only a few bolts to get the beams attached. Bolted or welded I have the same result.

So I decided to bolt them on. I went through my stash of stainless bolts. You KNOW those bolts would have to stainless as do the nyloc nuts and the fender washers. So I needed a run to the hardware store. I had a coupon for 20% off on $50(US) so…let’s go nuts…I mean nuts and bolts.

I am now ready to mount those beams. I managed to get the shop up to 57 degrees Fahrenheit so I sprayed some primer on the bare metal. I then decided I needed to move the beams and the floor pan into the sunroom in the house. It is climate controlled and the paint will cure more effectively if the temp is above 60F.

I also sprayed bedliner on the floor pan too. This rubberized material will help form a water tight water resistant mount once I get this all bolted up. I’m feeling pretty pump about it actually.

The next episode will have the beams installed and mounted in the Range Rover to assure the fit is right and then to weld the pan in place.

Thanks for reading and Happy Rovering. Like and subscribe. I really appreciate it.

https://youtu.be/8bUl7TqlNJk

Welding up the Floor Supports on my Range Rover Classic (Post #690) 2/9/2024

In this update I begin attaching the supports to the floor pan. Also in this update I tried to get carbon monoxide poison and avoided getting bit by a fiddleback spider.

I started on the supports and the first one was the strap across the back portion of the floor bed. When I removed the strap during my tear down I drilled out the welds. I did a decent job and only punched through on one weld. This allowed me to plug weld the strap back into place.

This was fortuitous. The other support beams are drilled through. That’s gonna make reattaching …difficult.

Since it was a bit chilly in the shoppe, I fired up the kerosene heater. I done this several times in the past. Before I closed the overhead door a little exhaust from the Big White Bus managed to get in. The heater must have added to a substantial amount of carbon monoxide. This set off the sensor. So I opened up the door to let the monoxides out.

I also moved the alarm, under the alarm was a damn fiddleback spider. The cold didn’t allow for the damn thing to scurry away. I ended it right there with a tap. When it twitched, I gave it a SMASH. One less brown recluse spider is a good thing.

I now have one of the three supports into place. The other two will not be as fun.

Like and subscribe if you are enjoying the content. It is appreciated.

Thanks for reading and Happy Rovering.

https://youtu.be/n2oFRhvDRRs