Axle Halves and Hub Rebuild (Post #201) 9/7/2010

Busy, busy weekend.
Lets start by saying this was a three day weekend. Meaning in America we had a federal holiday that gave us an extra day off. Labor Day. With that in mind labor was indeed what I did this weekend.

This weekend also kicked off the 2010 College Football season. For those of you in lands other than America this is like the World Cup opening weekend and your team is favored to win the whole thing. Favored right up until the team’s first snap of the ball, then you realize your team doesn’t have a chance, but you are excited anyway.

This year found us actually attending the game. A friend of my wife gave us his seats and we got to watch a football game in person. We normally watch from home as nearly every game the University of Oklahoma plays in, is televised. We had great seats, six rows up from the field on the 50 yard line. You can’t ask for better seats. (we won, defeating the Utah State University)

So, as you can imagine Saturday was all football and a little bit of house cleaning. Sunday was scheduled to be my designated work on mom’s house day. But with Mrs. OkieRover on call at the hospital I swapped it to work on the Range Rover day.

I skipped church and dragged myself out of bed at 0800. I broke out my Rovers North Coveted Mug (1 each), made some tea (with honey) and went out to the garage to tackle the hubs and axle half shafts.
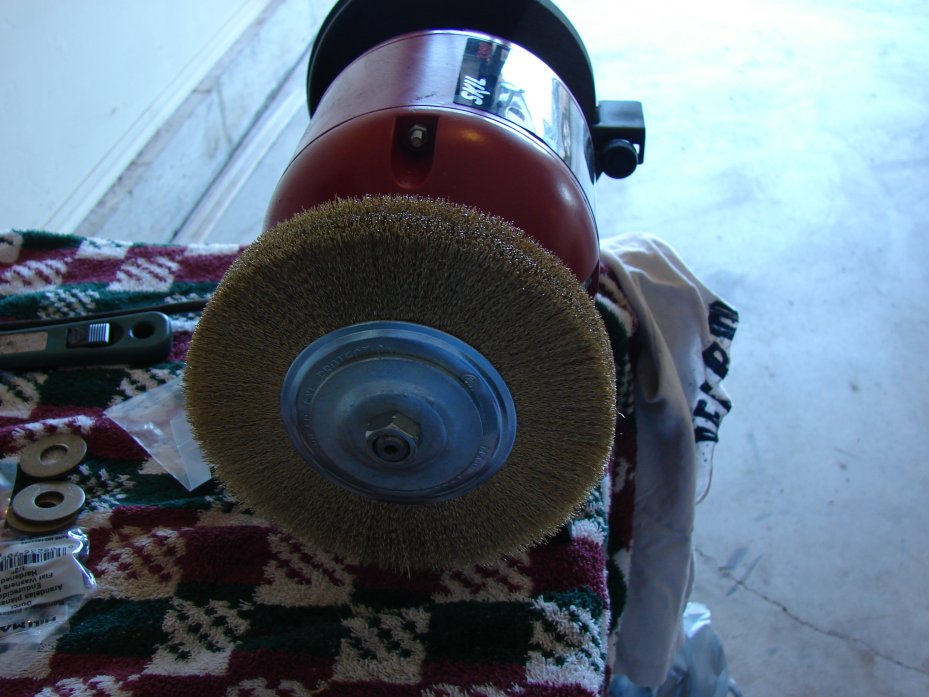
My first task was to put the wire wheels on my new bench grinder. I wanted to buy the big 8 inch model but settled for the 6 inch because it’s not something I’ll use EVERY weekend. I mounted the two fine wire wheels on the shaft. I had purchased some washers and shafts but as it turned out, they were not necessary. I’ll keep them around for the course wire wheel I bought with the grinder.
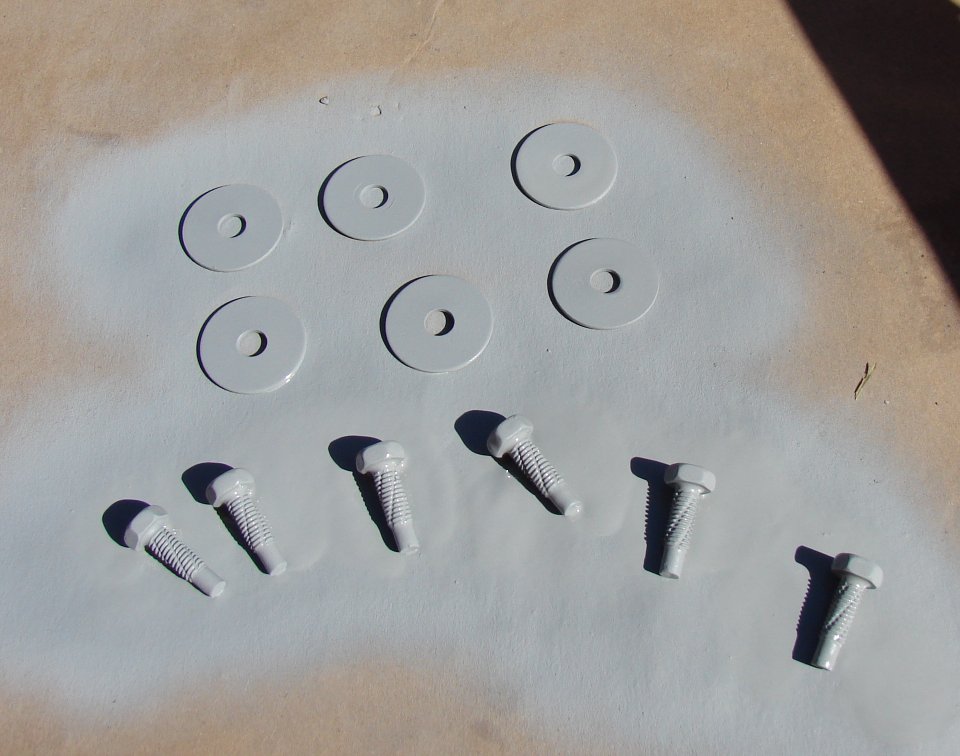
The first part of the job was to get the splash shields mounted. The bolts and washers were corroded from years of use. I polished them with the wire wheel and then gave them a nice coat of Rustoleum primer.
I got the splash guards finished and then looked at the hubs. As I mentioned in a post some time ago I have a set of new bearings for the axle. I was a little wary about installing the new races but with some reassurance from JagGuy that it was easy I went about getting the new races installed.

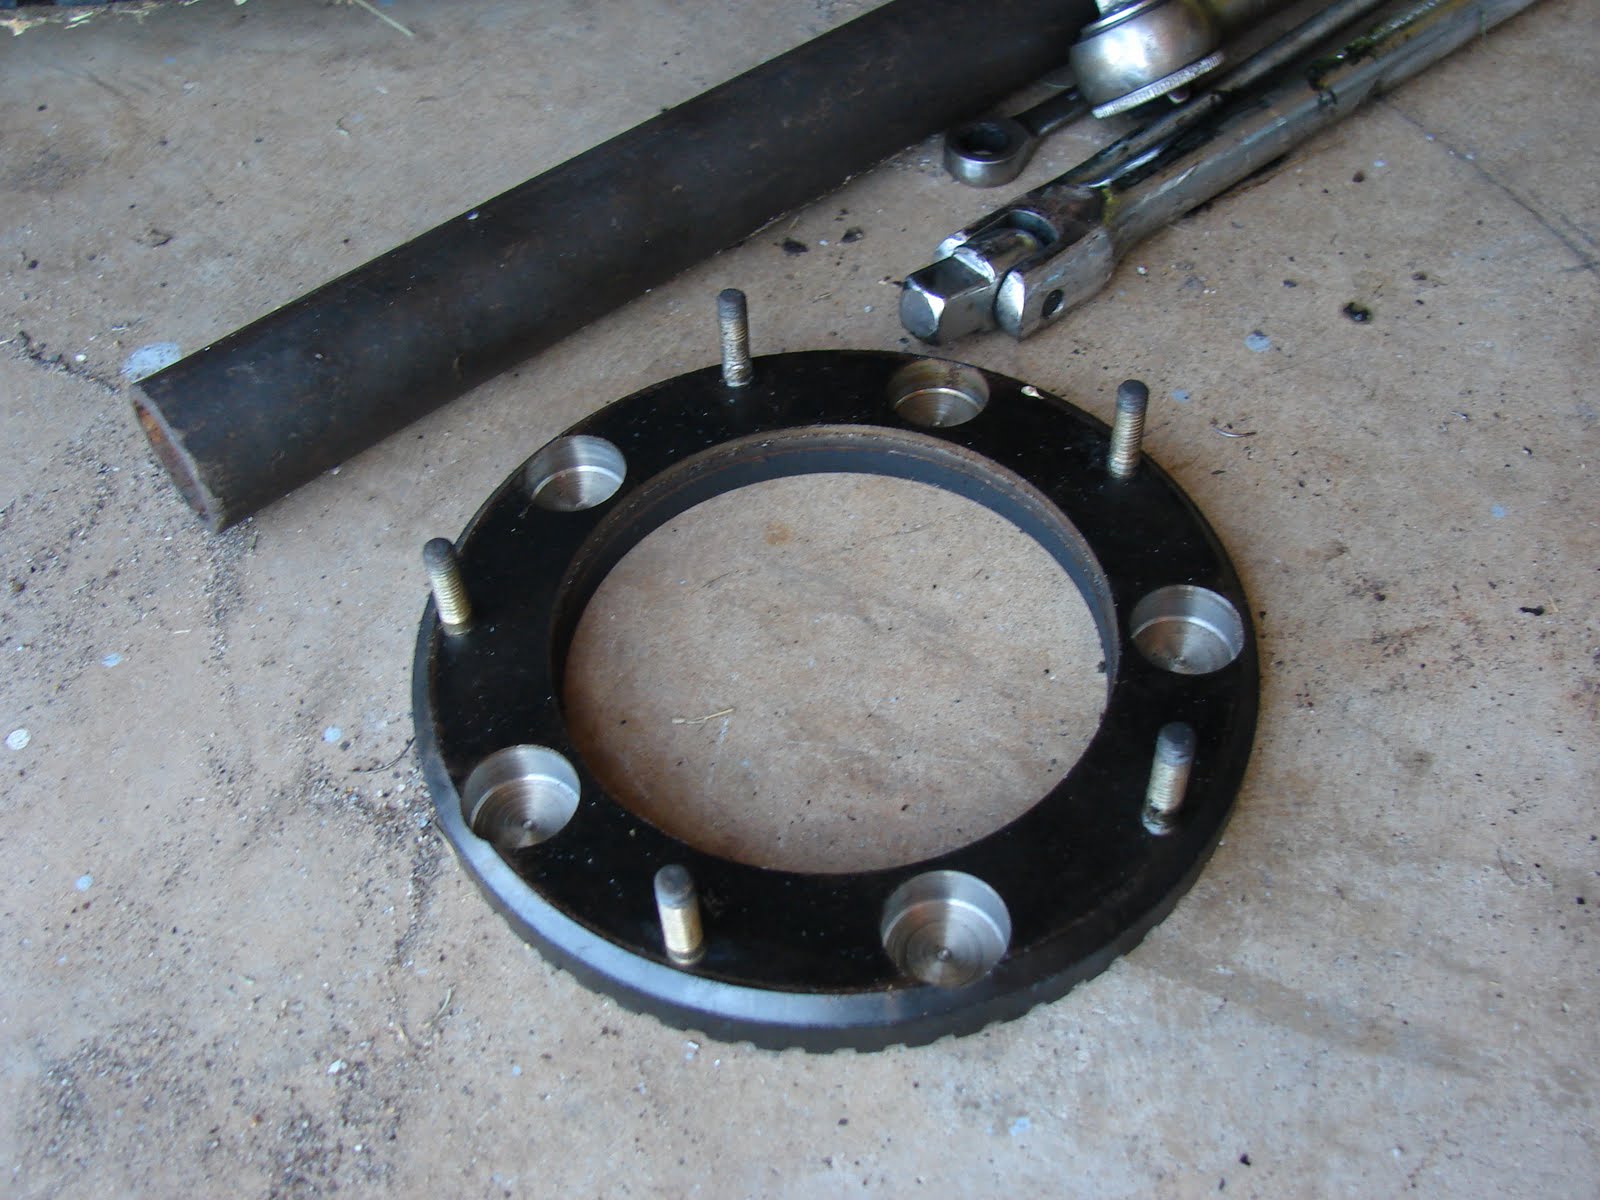
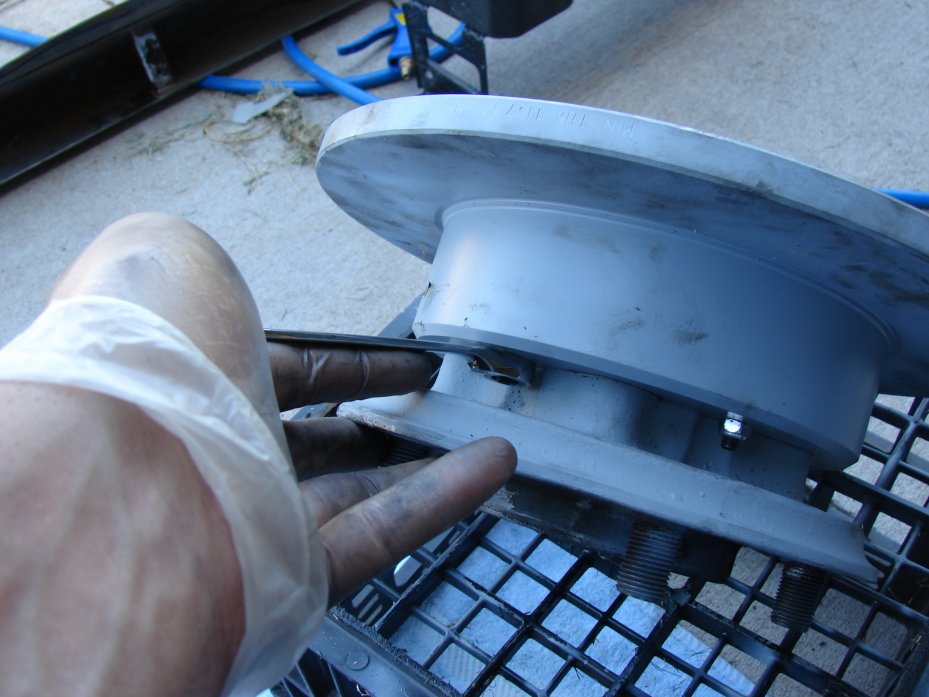
I reassembled the hubs. This is mounting the brake disc to the hub and bolting them together. Then you need to install the ABS sensor ring. I prepurchased the nyloc crown locking nuts just for this occasion. You slide the ABS ring into the holes and punt the nuts and tighten. Not hard by any stretch. The next photo has me positioning the ring. You cannot do this without tightening the bolts you see in the picture as not run down to tight.

Getting the old race out requires using a punch and a hammer. The theory goes that you tap on alternate sides until the race falls out. As you may or may not know the race fits VERY tightly in the hub. I’m sure in an ideal world you would have these pressed out and the new ones pressed back in by a machine shop or the like.
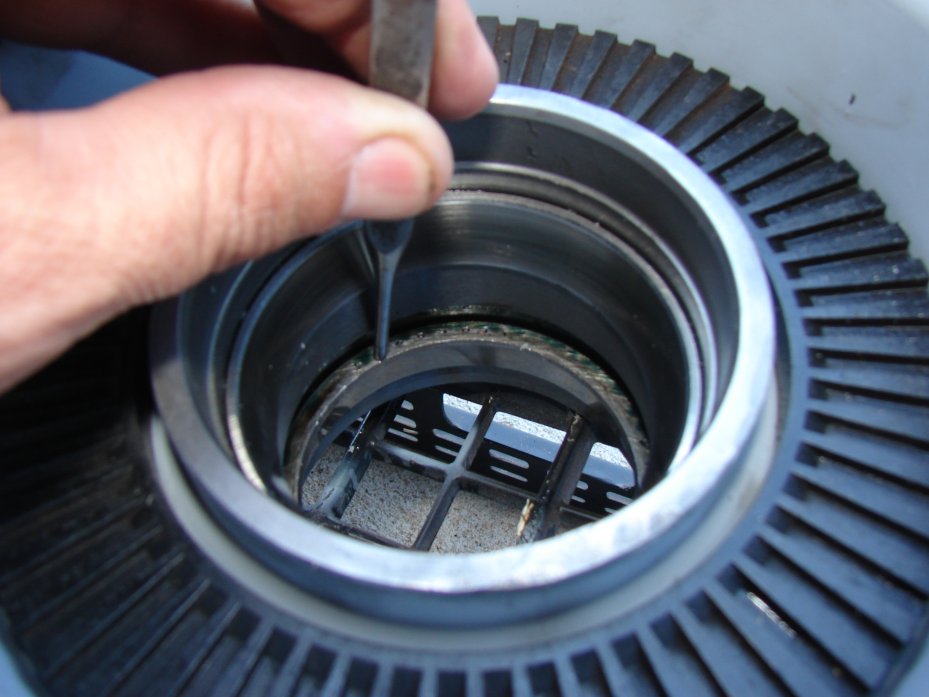
My garage is not the ideal world. So I set about with the punch and a hammer to knocking them out. There are two races, an inner and an outer, per hub. As JagGuy said, its no big deal getting them out. Avoid hitting your hand with the hammer is the only advice I can offer.

You put the new races in just like you take the old ones out. The advice I offer here is striking the race about every 45 degrees as you move around the ring, slowly inching the race into place. Something to note here is having quality tools. Cheap punches will fail you on this project. Think about hitting a wooden stake with a hammer. The softer the wood the quicker the top of the stake with flare out and then splinter.

The same thing happens with cheap punches. I had the two punches my dad had in his tool chest. They are both Craftsman by Sears. Craftsman tools are replaced no questions asked. They will both be warranty replacements on my next trip to Sears along with a screw driver that no longer has a tip. The first punch was terrible and quit me about half way through the second race install. The second punch managed to finish the first hub and the second. The tool casualties are starting to mount.

The only real tip to race installation is making sure they are full seated. When you are fully seated you get a different feel from the hammer striking the punch. That is the first clue you are seated the second is by visual inspection.

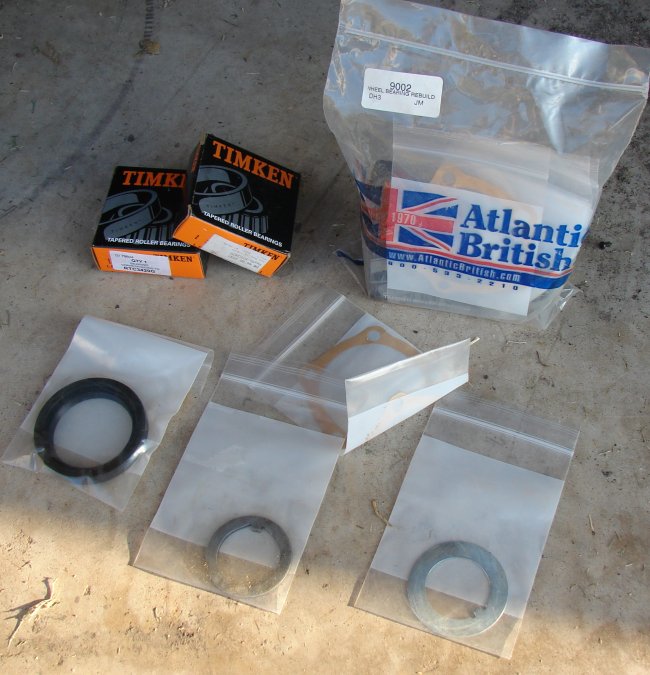
So with the races installed I packed the bearing with grease and inserted it into the hub. The back side is held in place with a ring. I mounted mine with a plastic hammer very carefully. The bearings fit VERY tightly on the shaft. I know they are the same part number but in both cases only one of the two bearings fit on the inner portion of the hub shaft.

I packed the bearing spaces with more grease. I then slipped the bearing and hub into place. This took some doing but I finally got them on. You then mount the bearing washer in place and put one of the hub nuts on and tighten. I used a large set of channel lock pliers. These don’t have to be screwed down real tight. Its best you put them back the way you found them.

You then put the crush washer on and bend a flap over to hold the inner hub nut in place. You then put on the outer hub nut and tighten. I remember the tightness from the tear down. I did my best to match that.
I then packed the hub with wheel axle grease. I can comfortably say it would not take any more grease when I was done.

I applied the gasket material. There is a paper gasket included in the kit. I did not install it. Instead I just used the gray gasket material. This will probably come back to bite me in the ass. I wiped the surface as clean as I could and applied the gasket goo.

I wiped away the excess and made sure it was uniform in its application.

I installed the brake caliper and bolted it down good and tight. I then attached the brake line. I inserted the new brake shoes and got them clipped in. I will have to find a brake wear sensor plug or wire them directly. I’m not sure when the plug went missing but I remember seeing an extra somewhere.

I then slid in the half shaft. This takes a little bit of finesse but is no big deal. Get them seated as close as you can. Then take the bolts and using the same pattern you would to put on lug nuts alternate around the axle tightening until you get to the “I’m gonna need some help” point. Using a 1/2 inch break over bar, which should be standard kit in your Land Rover, use the break over bar to brace against as you tighten the bolts down.

If you remember you needed the cheater pipe to get the damn bolts off. So you can probably guess you’ll need something to get them back on there just as tight. I was running out of steam at this point and our friends were expecting us so I called it quits for the day with only the driver’s side hub bolts left to tighten and the brake caliper left to be installed.

I’m only a few more steps from having the Range Rover mobile again. On my next work day I will finish the axle. I will then install the new brake reservoir. While I have the system nearly dry I will install the new brake discs on the front axle. I understand this is not the task the rear turned out to be.

With the brake system restored, I will then remove the dead viscous coupling. I will then pray that the one I sourced used is good and install it. If everything goes well here I am on to painting the rear door by the end of the month of September. I will have to put all the electrics back together under the passenger seat. At that point I can drive the Range Rover over to the Evil German Dude’s shop and have him assist me in welding in the new floor pieces.

After those are in I need to seal them from the bottom and from the inside just like the driver’s side. I will then make a call on the sound deadening material, buy it and get it installed.

While the dash is out I’m going to remove the malfunctioning piston that prevents me from dropping the transaxle into low. I can then reassemble the carpet and interior.

I have a camping trip scheduled for the third week of October and I hope to drive the Range Rover down there.

It may be an ambitious and optimistic goal much like my hopes for a National Championship in football for my alma mater, but it’s a goal for now.

Thanks for reading, Go Sooners and Happy Rovering.
Shhhh! (Post #199) 9/1/2010

What to do? What to do?
We are at one of those awesome spots in a project where you have a decision branch. Do we go direction A or direction B. Each direction has pros and cons. Neither direction is “the right way” as opposed to the other direction which could also be “the right way”. It is truly subjective.

The dilemma is just this, what do I line the floor boards with after I have repaired the rust holes and get the floor painted?

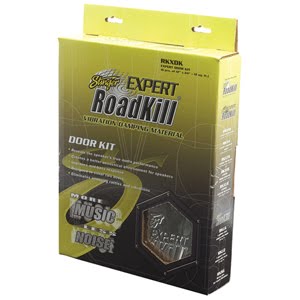
I have done a little research. My friends here at work say the auto audio places have the stuff you want. I looked into Dynamat (endorsed by none other than Chip Foose) and Stinger Road Kill endorsed by Carl at AutoImage USA in Norman Oklahoma. Carl was very helpful and showed me the product and said it was superior to Dynamat due to its greater thickness and cheaper price. One of my mates here at work also said, “there were cheaper and better products out there.” This must be it. Unfortunately for Carl his price for the Stinger Road Kill kits were about double that of the sellers on Google Shopping. Carl did say I could get my entire under body sealed for 300$(US). This gave me an idea that perhaps I might give him a shot at the undercoating once the repairs were done. This is going to be a nasty dirty job and I don’t relish it especially lying on my back in the garage.

The first decision has already been made. I will not put it back the same way it came out in regards to the carpet the sound pads underneath. As you read in an earlier blog post the factory sound pad is a giant water retaining sponge. You already know the Range Rover and apparently every other Land Rover automobile is a basically a petri dish for rust. Add water and watch the rust grow! In my opinion I think this is the biggest disappointment in Land Rover history. Purpose built vehicles that have absolutely not been protected from rust.

I just finished reading a post on the Lucky 8 blog that describes the restoration of a 1997 Defender. If you flip through the 166 photos you will see rust on that vehicle that is totally inexcusable. This was a New York vehicle that was about to succumb to the rust monster. The D90 was rescued from Billy Joel by an owner who intended, as the post goes on to say, to become his beach cruiser at his North Carolina residence.

Look at that transformation! That is a totally new vehicle. Everything that could rust has been refurbished or replaced or coated to never be a problem again. WHY WASN’T THIS DONE AT THE FACTORY? It boggles the mind.

I wish I had the resources to do this to my beloved 1993 Range Rover LWB. A total body off restoration. How awesome would that be? It would only cost 15 or 20 thousand, why not!? Well, man cannot live with out dreams, so I will continue to dream about that.

So back to the decision…
Course A – might be something like this.
Install a Dynamat or Stinger Road Kill like product to the floor pans of the Range Rover. This would be to protect them from water and further rust. On top one might also add a new carpet pad from one of these manufacturers.

Course B – might be something like this.
Install a Dynamat or Stinger Road Kill like product to the floor pans of the Range Rover. Dry the existing OEM carpet pad and reinstall.

Course A would be more expensive but all new products would be water resistant or water proof thusly eliminating the rust problem.

Course B would be a bit cheaper. The floor and windshield in both scenarios will be sealed to prevent the water that was the problem in the first place. So using the old pad would not present EXACTLY the same problems as before.

Course A is perhaps the best choice. If only for this one reason, if the OEM pad were to get wet again, it would be setting there WET, breeding rust. That pad took forever to dry out (if if ever did) and is in my mind inferior. The trick would be to replace it with a superior product that didn’t break the bank.


So the real decision tree is Dynamat or Stinger Road Kill or some other unnamed product. The prices are comparable on Google Shopping. Finally we come to the final and last real question,
Which product do I use?

Plato would be proud of us if he were here to jury this thought experiment. We eliminated the questions that gave us undesirable results and boiled it down (to mix a metaphor) to a win-win scenario. The guys restoring the D90 used Dynamat. Auto Image USA uses Stinger Road Kill. I think either will work exceedingly well.

Have any of you ever used any of these products? drop me a line and let me know what you think.

Thanks for reading and Happy Rovering.

The Good, The Bad, and The Ugly (Post #193) 8/12/2010

[Queue the theme song]
The Good, I started on the rear brakes last night.
The Bad, I can’t finish the project.
The Ugly, I found a broken axle half shaft.

As you can see in this picture the rear brakes on the Range Rover are looking pretty knackered. I love that word “knackered”. In this context I’m using the British and Irish slang form. But it works as well for me on the British/Australasian level too. For when I saw the broken half shaft I translated it into American English and that was one of the words I used do describe my disappointment. RovErica, while driving her UN-air conditioned Taurus, is famous for her saying, “Dad it is hot as balls in my car.” It was definitely “hot as balls” in the garage while I was working on this project. The temperature was still above 95F when the sun started going down. Considering all this, knackered works on many levels.

 
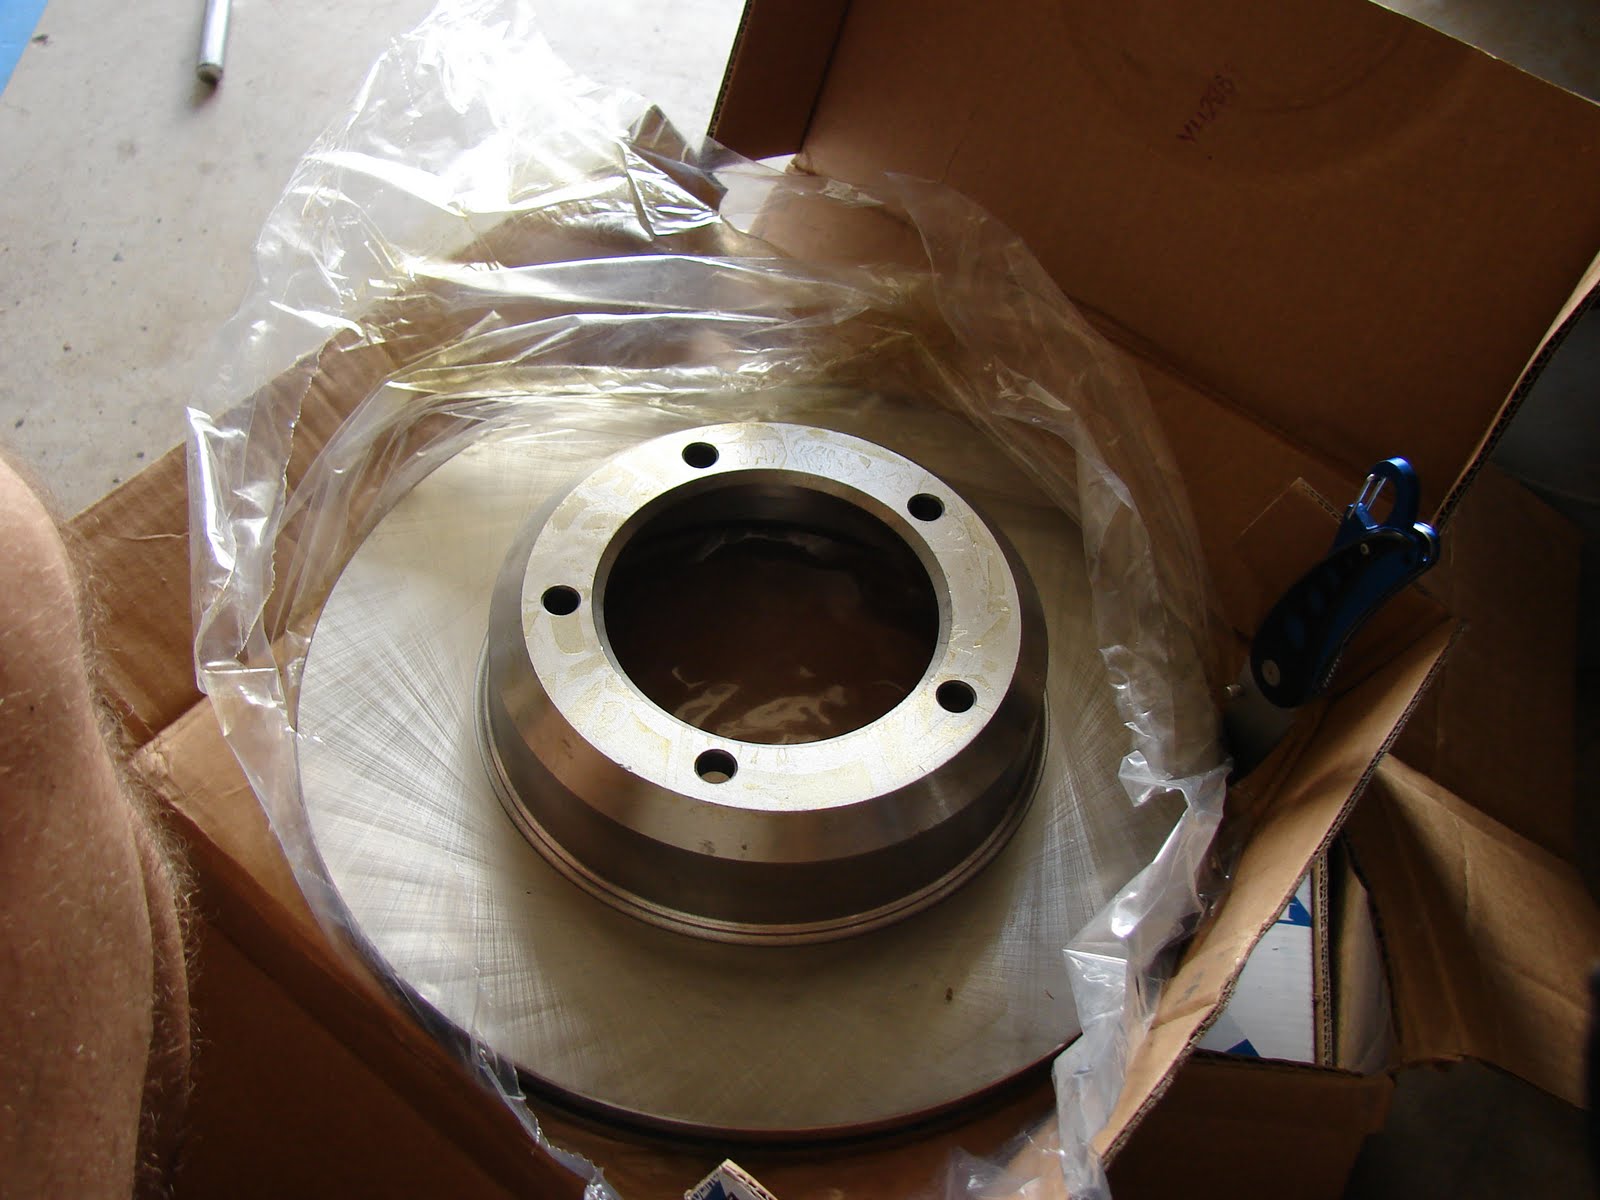
On the final few drives in the Rover, the brakes seemed to be seized at least on the left rear side. And the rust is simply annoying. I normally don’t swap the brake discs when I do a brake job, and as you can see they have probably NEVER been replaced in this Rover’s life. The groove or lip on the edge of the disc was getting pretty deep so it was time for some new discs.

I bought a full set of discs and decided, like all the new items I put on the Rover, to limit the rust the best I can. I decided that a coat of acid etching primer would be just the thing. You might ask, “Will it work?” Who knows, but I feel better about them being painted.

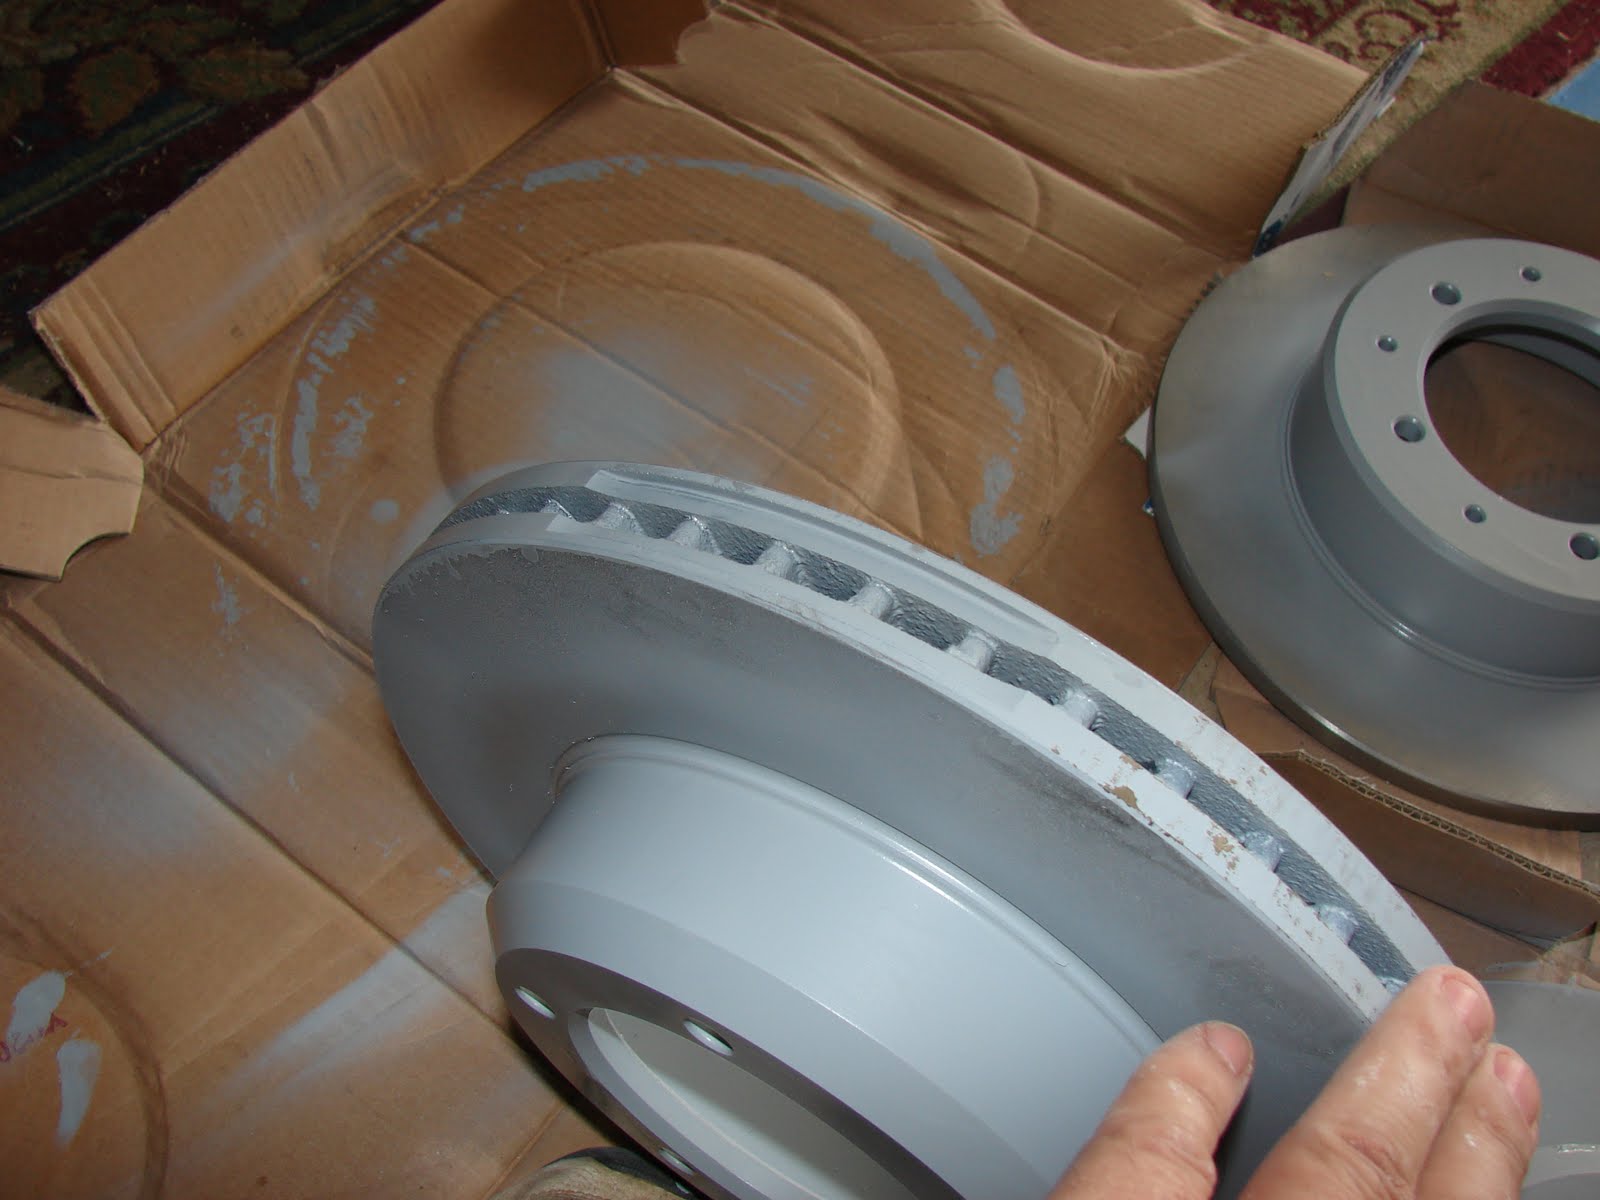
So I took the new brake discs and painted them with the primer. It was not my intention to paint the actual braking surface but through my laziness efforts and impatience some healthy overspray, I got paint on the braking surface. I don’t think it matters for when the brake pads start making contact there won’t be much paint there after a few stops.

After I had put the first coat of paint on the discs I noticed an irregularity on one of the front discs.

After checking with several sources (JagGuy and The Evil German Dude) it was determined this was done to balance that disc. I had seen this before, but wanted to make sure.

Swapping the discs is a pretty straight forward job. You remove the caliper, or as EGD says the “ka-LIPer” (I wish I had an audio file of him saying that for you). This requires the brake lines on the rear brakes to be removed. So have a catch pan available or you will have a huge mess. The brake lines are “hard piped” as in not flexible at the caliper. The flexible part of the brake line on the rear axle is in the center above the axle.

After you have the caliper off, it is time to remove the axle half shaft. That can be seen in this picture.

Five bolts and you are done.

Pro Tip: I used a breaker bar to hold the wheel in place as I broke the bolts lose. I also had to use a cheater pipe to extend the leverage of the socket and ratchet. I’m getting wimpier in my advanced age.

I used a large screw driver to slip between the axle half shaft cap and the hub. Once you break the seal it comes out easily. You then flatten out the keeper ring and remove the bearing nuts. These nuts are very large and I used the biggest channel locking pliers to get them started. They were not very tight in the first place but the grease made them very hard to work with.

Here is another “good” for this project. It is a good idea to replace stuff as you go through the vehicle you are working on. In this example the wheel bearings are in these hubs. I remember I had bought a wheel bearing replacement kit some time ago when RovErica reported some odd behavior and noise. From what she described I thought the bearings were going out. It turned out not to be the case and I had the kits still sitting on the shelf. My axles have 185,000 miles on them. So basically if you break something down this far, go ahead and replace the serviceable parts while your there, if your budget can afford it. I will store the old bearings “for good measure” as I believe they were not bad in the first place and will work in a pinch if necessary.

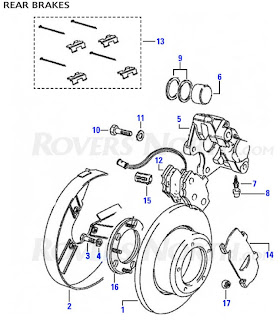
After you have the hub off it is time to remove the disc from the rest of the hub. This is done by removing the crown nuts that hold the anti-lock brake sensor ring.

And those thread shafts pass through the disc holding the hub to the disc. They are dual threaded. Both ends are threaded and this may cause you trouble when you attempt to take the crown nuts off. Be creative. Extra points are awarded to you for removing the ring if you have to deploy additional tools or techniques. Rovers North has a good picture of the ring and assembly and how it all fits together. Click on the picture to open their site for a complete parts list.

With a little persuasion gentle tap of a hammer the hub and the disc will separate. Reassemble in reverse order. If you have a bearing kit to install you will need to do that as well. If no, definitely renew the grease on the old bearings. I will post another entry when I put the new bearings back in.

Right now I’m debating if I’m going to bother sand blasting and painting the hub unit. I really want it all to be pretty and new so maybe perhaps.

Now on to the broken axle half shaft.

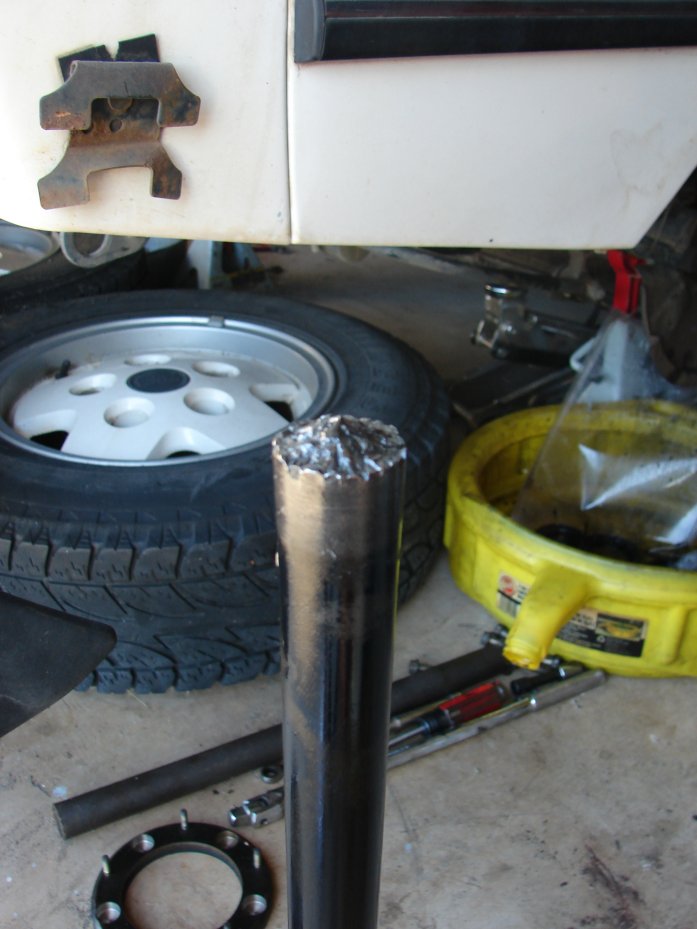
This crappy photo shows the sheared off end of my right rear axle shaft. After seeing this and an expletive laden rant a little disappointed cursing, it hit me, I will have to tear the differential apart. KNACKERS!

If we refer to the rule above, now would be a good time to put in a locking differential. But sadly the budget does not support it. What? You’ve never had the axles out of your Rover? Click here to see what a proper shaft should look like. In short, it depends on who you ask and what you are doing with your Rover.

IF we, that is you and I, were sitting in my garage having a Bodington’s the conversation might turn to 10 spline versus 24 spline axles at this point. Basically in mid-1993 Land Rover started using 24 spline axles instead of 10 spline. Are 24’s better than 10’s? There is a thread on RangeRovers.net in their forum. Check it out for wisdom on the subject.

So another phase of the project will be to assess the damage done and get the axle half shaft piece (or pieces) out of the differential. Gag.

As I posted in an earlier post, everything I touch generates two (2) more projects. At this pace I may never finish the restoration. I am trying to keep a positive outlook on everything, but Mrs. OkieRover is wondering how much this will all cost and when will it be done. As I told her, this is my “mid-life crisis motorcycle”.

I am respecting her wishes that I not buy a motorcycle. I’m hoping she realizes that this is my hobby and in her mind, is a lot safer than a motorcycle. Well, it’s a lot safer than ME BEING ON A MOTORCYCLE.

Thanks for reading and Happy Rovering.

New Links and Plasma Cutting (Post #192) 8/10/2010

I found a couple of new links for you to check out. The first and the one I am most excited about is The Last Great Road Trip. This site is great. I believe it is a model that I will be looking into for my future website redesign. It combines the posts for repairs with the trips and adventures in just the very way I would like my site to do. More on this later.

Ryan Mishler’s Regional eXploration is another great site. I haven’t spent much quality time on it yet but the pictures and content so far are great. Check it out.

Well that should suffice you until I can get the next post from my restoration formed and up on the site. Painted floor boards  FTW (for the win). I have the driver’s side done and have once again consulted the amazing JagGuy for his opinion on the floor boards on the passenger side. PLASMA CUTTER, he says. I asked if the plasma cutter would be too much for some of the sections and his classic response, “It won’t penetrate all that much. What’s under there?” My reply of, “Frame and perhaps fuel lines.” Gave him a few seconds to retort, “Ahhh it’ll be alright.”

And so with that, perhaps we’ll be cutting these at his shop as soon as I can get the rear done and make the Range Rover drivable again.

Thanks for reading and Happy Rovering.
Garage preparation complete (Post #187) 7/14/2010

I set out on Saturday to get started on the now infamous Range Rover Restoration Part Duex. Hopefully it will be slightly more popular at the box office than the first restoration. Sometimes sequels don’t have near the success of the first episode.

I can site a few examples…

  • Breakin’ 2: Electric Boogaloo
  • Caddyshack 2
  • Highlander 2: The Quickening
  • Grease 2

So with those stinkers out of the way, I’m hoping this sequel will be very successful, much like these sequels, that were better than their respective originals.

  • Christmas Vacation
  • Mad Max 2: The Road Warrior
  • Star Trek II: The Wrath of Khan
  • Star Wars: The Empire Strikes Back
  • The Godfather: Part II
  • Aliens

So to get a production like this off the ground and guarantee success we have to hire great actors, we have to have a really great script, we have to prepare the garage for the beloved Range Rover.

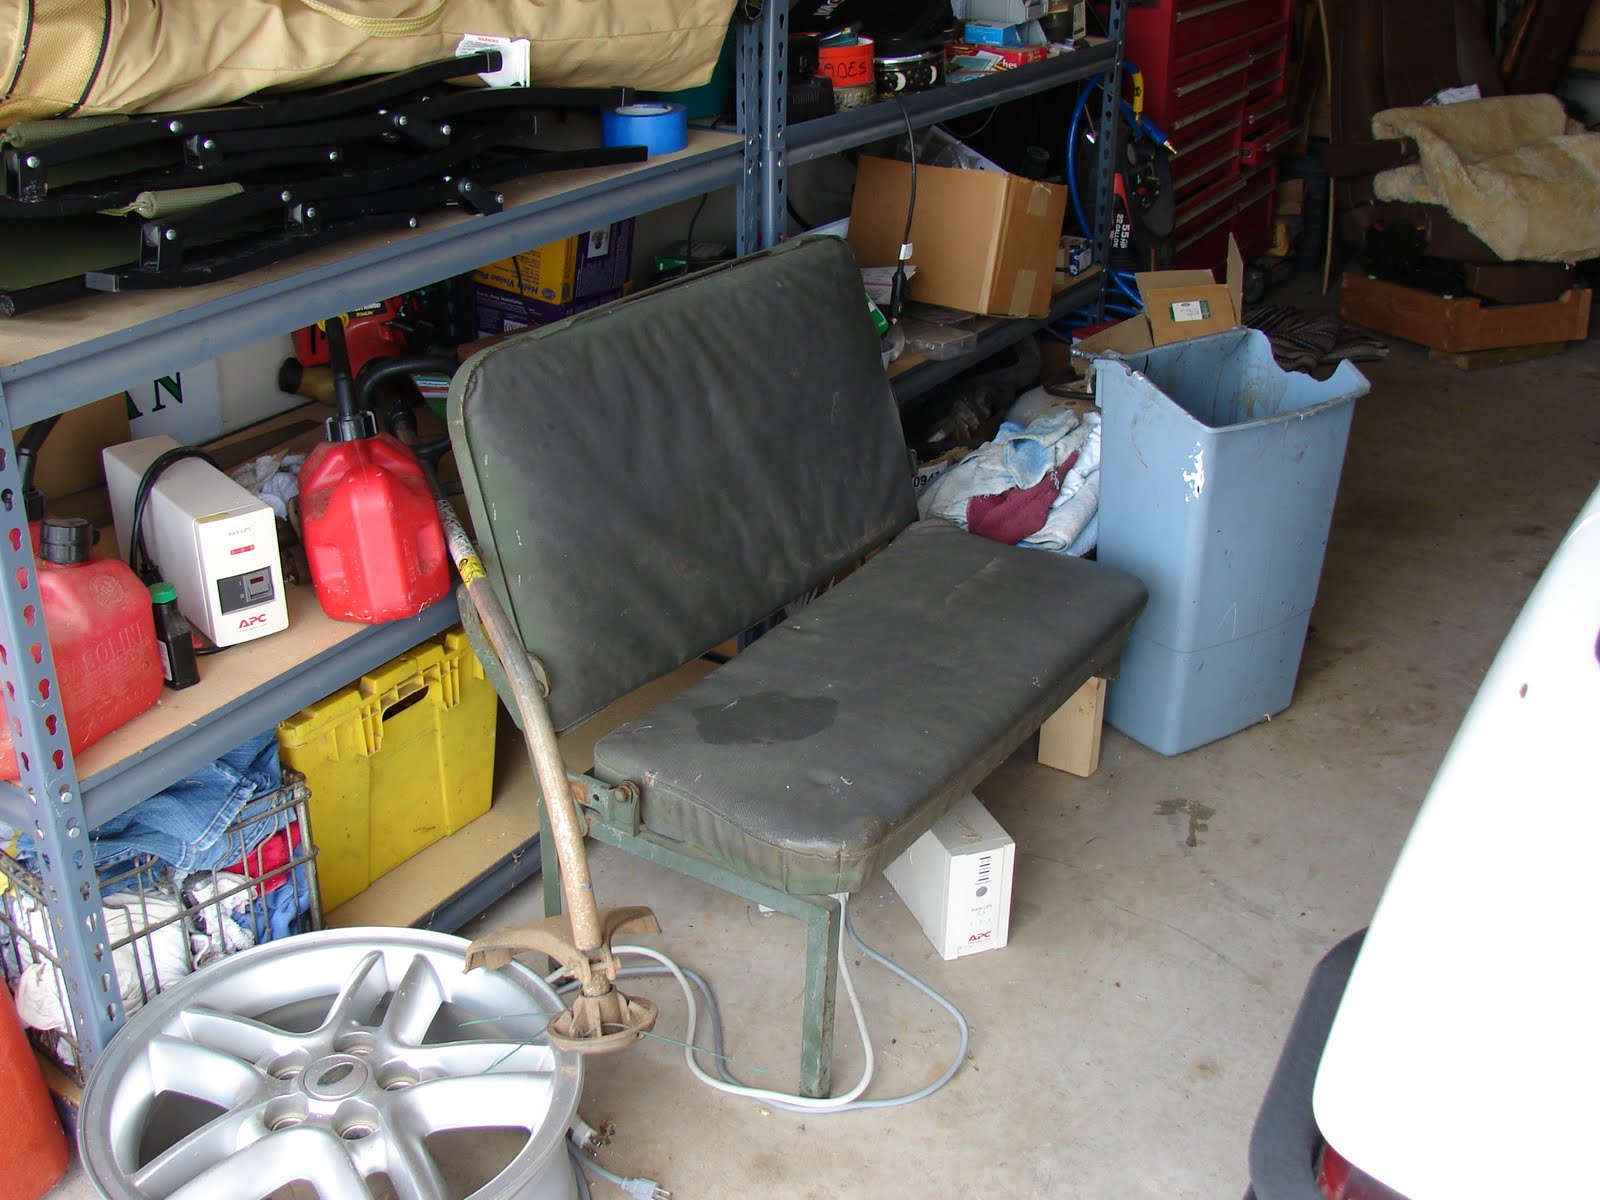
I needed to move a lot of items to make room. I took the giant rocking chair back to mom’s house. I moved the historical reenacting stuff back up to the attic. And I basically just organized all the rest.

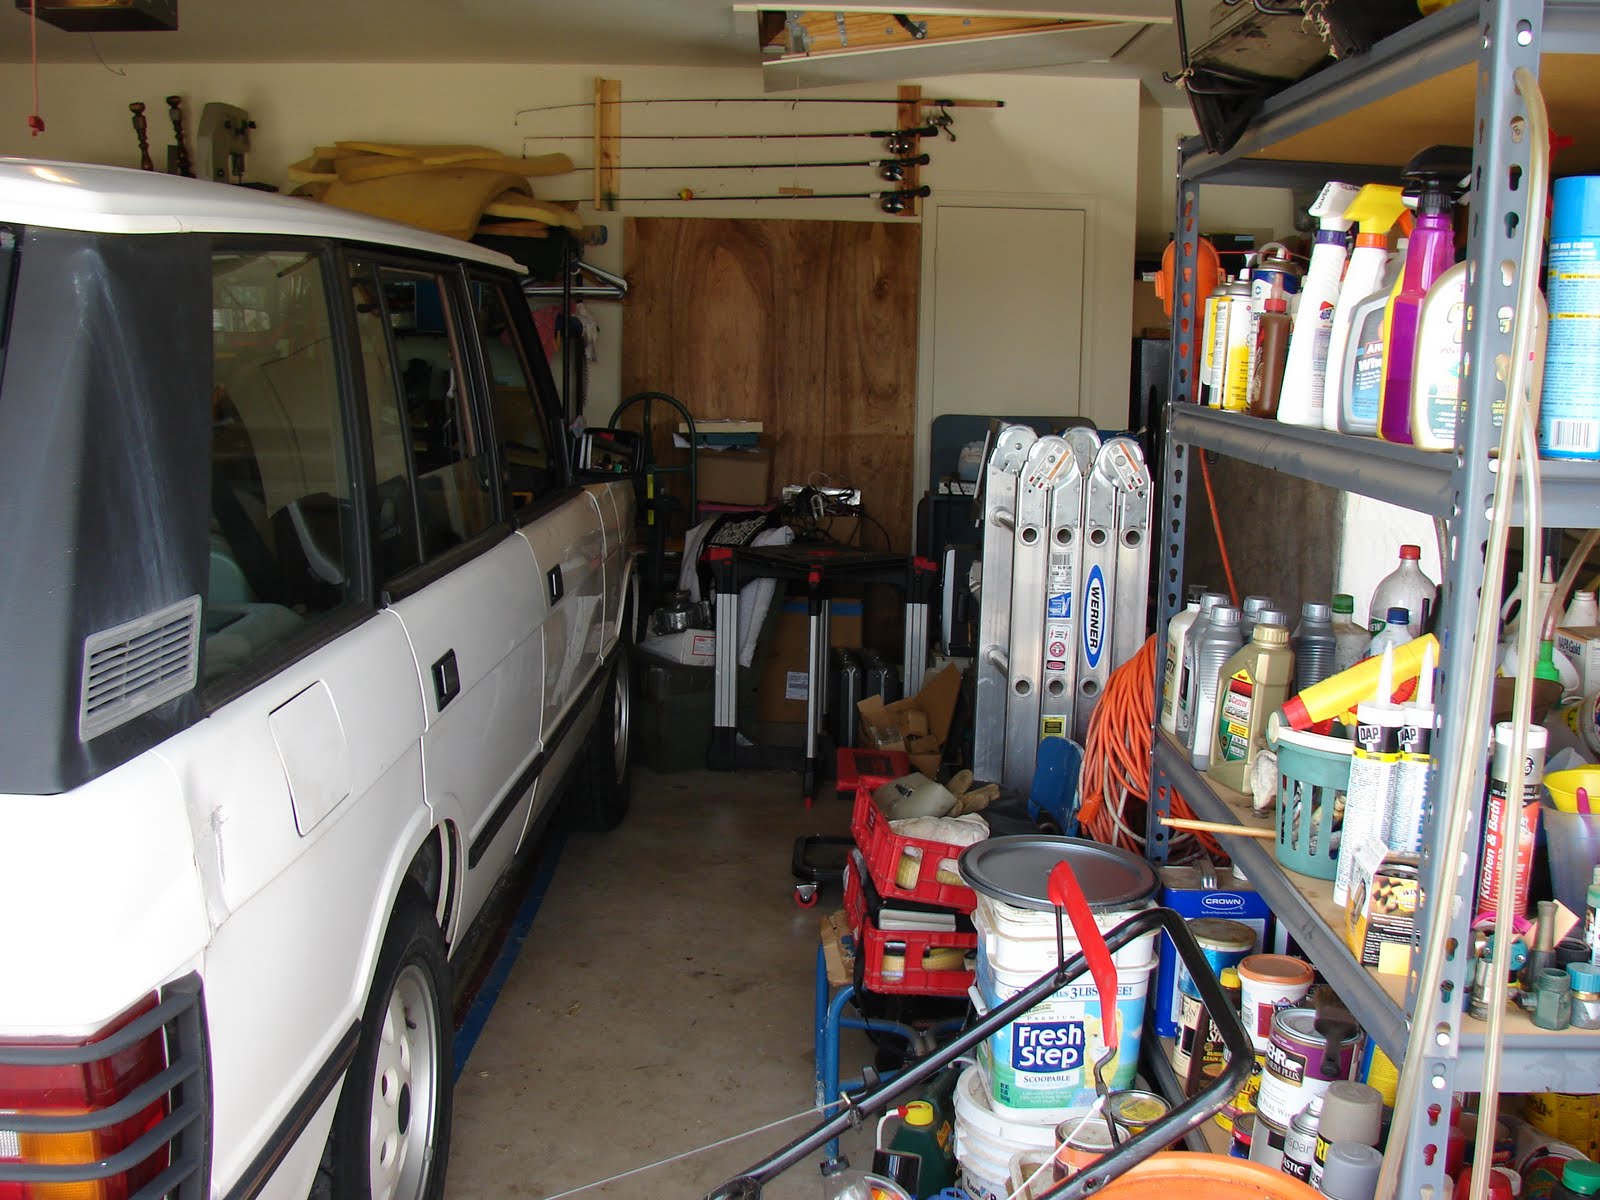
Now I know you are looking at that picture and saying, “You call that organized?” Here’s the deal, I couldn’t afford a “garage system” when we moved in. I wasn’t even sure what I needed and wasn’t about to drop a few grand for the fancy cabinet systems and have them under utilized. So I got some shelves and made due. I don’t even have a work bench. That is definitely one thing I miss. So with that said, there is a method to the madness, lets just hope I don’t have a stroke and forget where I put stuff.

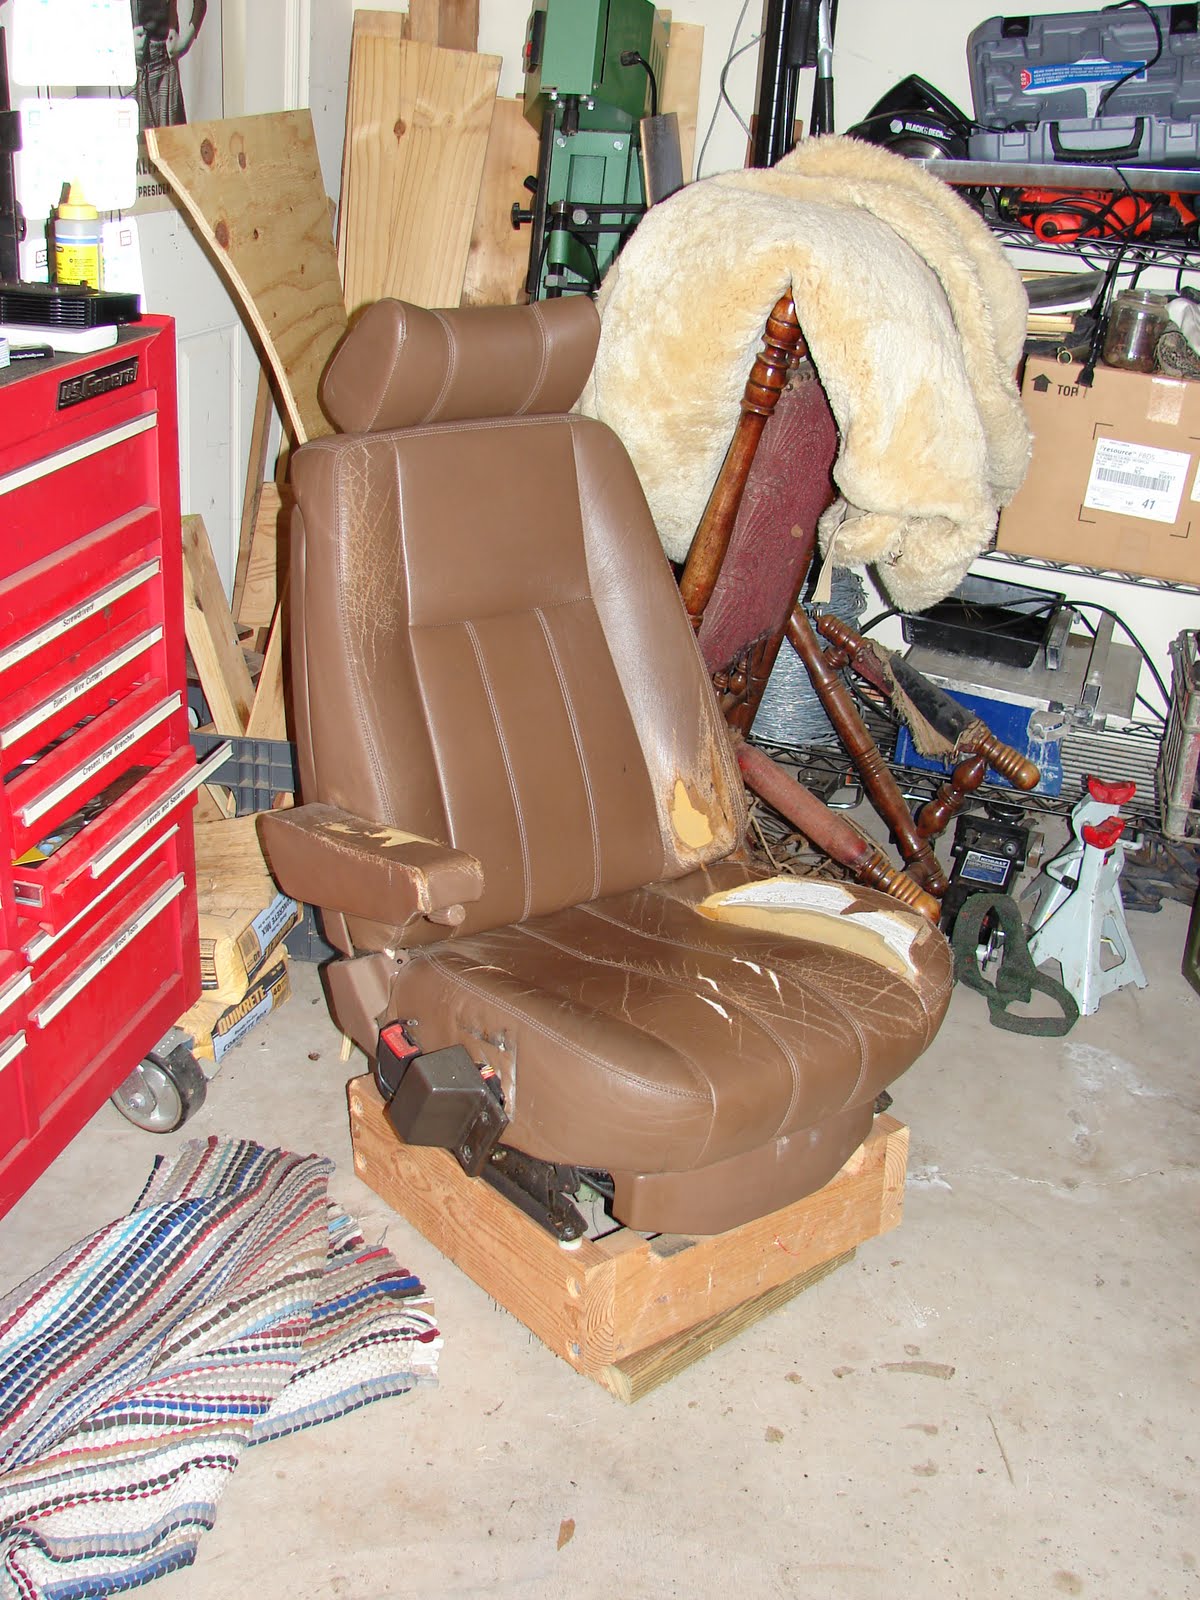
In my neighborhood people use their garages as second living rooms, especially during the football season. I started to add some furniture so I could “entertain”. But me, being me, I just couldn’t have any furniture. So I made a chair out of an old Range Rover seat.
I also added the bench and driver’s chair from an M35. I have many fond memories of driving trucks in the Marine Corps and therefore I snagged these from one of my buddy’s M35 projects.

I couldn’t just toss these or bury them when the project started so I moved them to strategic places so they would still serve some function in the garage.

After I got the major items sorted and moved, I checked my supplies to make sure I have enough to get started on a project like this.

Beer? check. Soft drinks? check. Mustard? check. Giant jar of pickles? check. Music?

What kind of music do you listen to when you restore / work on your Rover? I prefer the classics. So I broke out a couple of my favorite greatest hits albums (she how I went old school there with the terminology?). The Essential Clash and The Cars Complete Greatest Hits.

How can anyone work on a British auto and not have some Clash on hand?

London’s burning! London’s burning!
All across the town, all across the night
Everybody’s driving with full headlights

Great stuff, good times, good times.

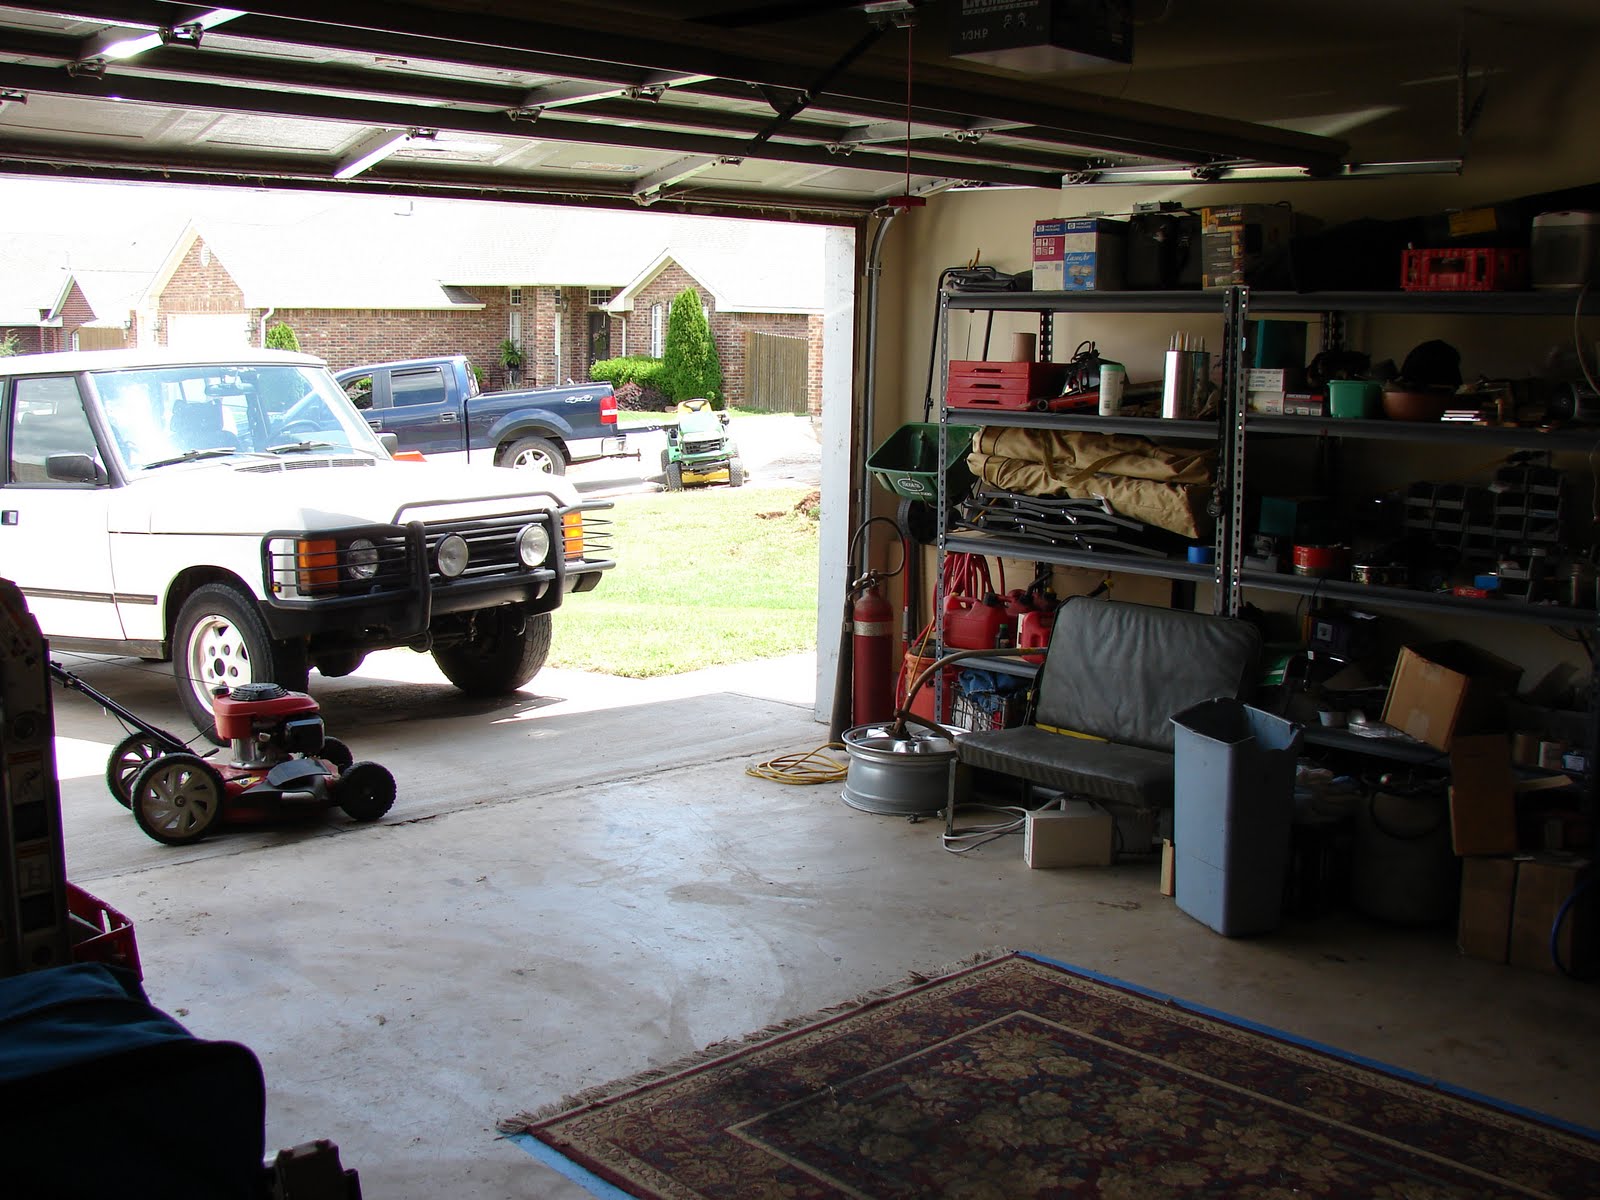
Okay back to the project at hand, getting the Range Rover into the garage. I moved the parking lot of cars from the driveway and lined the Range Rover up and moved her into her new birth for the next few months. Just like the last time, she fits.

She’s snug. I’ll have to work around the mower location and many items will need to be stored on top when I start stripping the interior out. But she’s in there.

I’m still considering a storage shed for some of the items I store in the garage. All the camping gear, the table saw, the furniture items, the wood scraps, the mower and trimmer, the fuels, the weight bench my son never used but we had to have (rolls eyes), all that could go into a storage shed and free up a “shit ton” of space.

Immediately I know I need to rethink how I am lighting the garage. More light is almost always a good idea. I need to look into some lighting options.

Well that’s it for now. I have already begun work and assessed the problems and have a couple of new ones to add to the list.

  • Sound deadening in the rear and under the bonnet (hood)
  • Rust removal and rust proofing

I’ve already discovered those two problems that I hadn’t thought of previously. I’ve always wondered why it takes people 2 or 3 years of work to restore a classic car. When you start on one you quickly learn about the huge amounts of time that “the little things” take up. Every little thing has to be addressed. And you can never estimate all the rust you will find. All of it has to be removed with extreme prejudice or you will just be back in there again removing what you probably should have taken care of the first time.

I will probably be a Waxoyl and Rustoleum expert when all this is done. There are a great many other new skills I’m going to have to master as well. Welding, body work and painting being three that immediately come to mind.

Thanks for reading and Happy Rovering.

Real close to starting Range Rover Restoration Part Duex (Post #186) 7/9/2010

I’m getting real close to (or as we Okies say, I’m fixin’ to) moving the Range Rover into the garage for her latest restoration project. The infamous Range Rover Restoration, Part Duex: RovErica’s Revenge. I say I’m “fixin’ to” start the project because I am determined not to use my wife’s side of the garage to store the crap valuable items on my side of the garage. Currently I have a full size box spring for a bed, a giant rocking chair, a box or two of miscellaneous glassware, a book shelf, all my reenacting gear (in stackable tubs), and several other loose items on my side of the garage. There is no room for a restoration project.

Should I have a garage sale? Probably. Do I hate to have garage sales? Definitely. I am waiting for the garage sale because I know when we start working on my mom’s house there will be tons of stuff to sell at a garage sale. Why have a little garage sale when a bigger one will be better?

So I will get the kids to help move the reenacting stuff up to the attic where it was before I used it back in April. I will reorganize the other items and reduce their floor space foot print. Once that is done, I can move the Range Rover in and get started.

That's a true fact dad.

Get started? What are you going to do OkieRover? That is a great question oh gracious and loyal reader. Let us begin by describing first why anything has to be done at all. Maintenance, that’s why. When you allow a sixteen year old to drive a 15 year old vehicle of British manufacture, things magically stop working. I know that is hard to believe with kids as great as mine but it is “a true fact” as Diet Mountain Drew would say.

When you can’t get to the vehicle because:

  • it is busy being a taxi for a dozen children who’s parents were smarter than to give their kids cars,
  • it is sitting in front of some kids house while your daughter is putting around in that kid’s car because, “Oh, I forgot to tell you, the air condition isn’t cold any more.”,
  • it arrives home each day on average about 25 minutes after you have gone to bed,
  • and lastly, because you are only allowed two sentences each time you see your daughter exit the house on her way to work or somewhere else she is late to, and you are sure as hell not going to let her forget to clean her room and do that random chore you asked her to do yesterday before the door shuts and she is gone again. You don’t waste those precious moments on, “how’s your car running?” Which almost always elicits a response like, “Good! That weird noise it was making for the last 3 weeks finally stopped yesterday.”

See, kids don’t equate noises with problems like mechanics do. Just listen to one hour of Car Talk on your local public radion station Saturday. I dare you. Hell, I double dog dare you. I swear I hear the brothers ask the caller, “How long has it been making that noise?” at least 10 times per show. And almost every caller responds with the same answer, “oh, I’d say aboot six munts or so.” [end New Englander accent]

These clueless callers think their mechanic or in my kid’s case, daddy, can sense any automotive problem with his amazing super powers 30 miles away, at work, talking to callers who’ve locked out their accounts on the system for the fourth time that day or can’t remember the password you gave them ten minutes ago, while listening to The Beat Farmers Radio station on Pandora or my Those Darlins CD, while thinking about the roast beef and provolone sandwich he is going to enjoy at VZDs when lunch time rolls around. All the while dreaming up things to blog to you about. (I know what you’re thinking, yeah, I’m a busy guy.)

So after a couple of years of this behavior things get beyond fixing pretty fast. Let’s us now compile a list of just the things I can remember right off the top of my head. In no particular order:

Viscous Coupling
Sun Roof
Brake Discs
Brake Reservoir
Air Conditioning System
Bushings
Sound System
Cosmetic items inside, outside, and under the hood
Cruise Control
Door Locks
Head Liner
Complete Fluid Service
Drive Shaft Seals
Power Steering Hoses
Possible CV Joints
Possible Failed Transmission

That’s about it. If I were to take this bad boy down to a mechanic I’m pretty sure the labor alone for all this could buy a pretty nice used late model LR3 or Range Rover. That leads us to the obvious question, why fix it? Well, you didn’t read this far down this blog post to ask that question, you know why. Because I, like you, love your Range Rover and can’t imagine not having it sitting in the driveway waiting for me to jump in and tear off down the road.

I hope to have all this fixed in time for the inevitable Snowpocalypses of 2010 and 2011. And with my new utility trailer I hope to make a few camping trips with my wife next year.

The good news for my readers is the fourteen new entries to the Tech Tips Section of www.OkieRover.com these projects will create.

RovErica aka RovErica

All this and I’ve been thinking about reviving the local Land Rover Owners club for the OKC metro area. So look for more info on that in the coming months. I have a photographer and former Land Rover driver (RovErica), anyone know a good web programmer that works cheap?

Thanks for reading and Happy Rovering.