Broken Bits (Post #431) 1/6/2014

During my recent repairs of radiator cooling fans and power steering hoses I came across a couple of broken bits. While discussing the electric cooling fan project with the Evil German Dude we noticed the belt that drives the air conditioning compressor was very loose. So while I was under the bonnet for the hoses I thought I’d just sort that out. I didn’t have the replacement hose and it was New Year’s Day so there was no way to get the hose.

I got the pulley in place and began tightening the bolt on the belt tensioner. It never got tight. At some point I decided something was not right at all. At first I figured the bolt was stripped. That has been my experience in the past so my brain naturally went to that first.

I removed the bolt and the bracket and found…
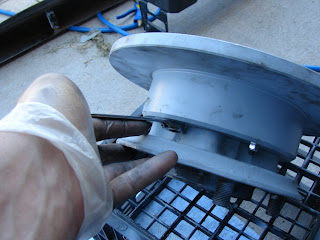
it was broken. Wow. That is disappointing. As you can see in the picture above there are two of these on a Range Rover Classic 1987-1994. The 1995 model has a spring driven unit. This spring driven unit is common to most “modern” cars. This friction method is serious old school. I didn’t say better, I said old school.

I knew finding this part was going to be a nightmare. I immediately called Paul Grant. He is a master of parts and he told me he thought he had one in inventory. I ordered it. It should be sitting in my mail box when I get home today. According to Paul, these are threaded on opposite sides so the one that works for the AC belt will not work for the water pump belt. I’m guessing this is going to added to the list of parts I pull from Range Rovers I find in the breaker’s yards. If you are looking for parts I highly recommend Paul. Stop by his eBay Store and buy something.

The second wasn’t really visible until I had the belts out of the way. Some how the Oil Pressure Switch lost its spade connector. I had noticed a couple of wires loose but was unsure where they went. The spade end doesn’t look like any thing I’ve ever seen before.

The oil pressure switch is found on the side of the engine right where the oil filter is screwed on. I know I’ve changed my oil at least once recently and I should have noticed this but didn’t.

I did find an interesting thing when researching parts sites. Rover’s North lists this part with a really great diagram of it’s identification and location. It also lists for 54.95$(US). However on the Atlantic British site it lists for 7.95$(US). On the Rovers North site similar ones for Discovery II’s also list for 8.95$(US).

I find that a helluva difference in price. I’m almost afraid to ask why. I think I’ll order the 7.95$(US) one from Atlantic British. I’m running out of funds for this round of repairs and I still need to purchase some oxygen sensors.

In my quest for improving the gas mileage by swapping to electric fans I will need to only change one variable at a time. There are potentially four things I believe I can do to improve gas mileage:

  • Remove roof rack (this one is obvious)
  • Replace oxygen sensors (when they begin to fail you will notice fuel use go up)
  • Replace my mechanical fan to electric fans (increased torque and horsepower)
  • Reinstall the air dam (another obvious one)

For the sake of the scientific process I think I’ll change only one variable at a time. I can run a couple of tanks of fuel and get a few MPG readings. I’ll report them all back as soon as I get the data.

Thanks for reading,
You are driving a brick what do you expect your gas mileage to be?
and Happy Rovering.

Brake Bleeding Procedure (Post #427) 12/30/2013

I’ve been conversing via Private Message on Rangerovers.net’s message board with Yungblud04 (I don’t have his “real” name) about the ABS system on Classics. He is going to bleed his brakes and needed a procedure.

Rover’s North has a lovely Tech Tip section and they offer this procedure (Rovers North) for bleeding your ABS brakes. I used it the last time I bled my brakes and it worked very well. It was even confirmed by Mickey of Mickey’s Garage (Mickey’s Garage) that I had done it correctly. This was quite different from another process I read online somewhere. It only required fluid to be bled from #1,#2,#7,#8 in the diagram starting at the farthest (right rear) caliper and working forward to the left rear, then the right front, and lastly the left front. That procedure has worked for me a few times but was not the proper procedure.

I am still having the buzzing ABS relay or whatever problem. I will need to investigate that further when the weather get warmer in a couple of months.

Thanks for reading, Happy stopping, and Happy Rovering.

Brake Caliper Failure (Post #364) 7/2/2013

I’m pretty sure that should be dry.

Look what I found. No, not the rust on the splash guard, I expected to see that. The left front brake caliper is leaking. I’ve been hearing a pop on that side ever since I replaced the left rear brake caliper. I was just about ready to send the old gal to the shop for some fresh springs and air conditioning and then this.

I rebuilt all the calipers about three years ago, or was it four? I had trouble with the right rear staying together so I replaced that caliper with a “professionally” restored unit. I’m pretty happy with having 197,000 miles and one rebuild before a replacement for this part.

This may explain the ABS problem I’ve been having of late. When the brake is depressed (pushed down, not emotionally upset) it is hard (as expected) and is stopping but as the brake continues to be pressed it the braking really picks up and decreases the speed very quickly. That tells me something is not quite right time for a replacement.
More after the jump….

Upside down, stamped on the front axle.

When ordering a brake caliper you will need to know your axle number. My 1993 Range Rover LWB is axle number 57L03581A. This will tell the parts man which caliper to send you. The differences are also noted by the type of bolt used to mount the caliper to the axle. Either a 7/16th bolt or a 12mm 12 point head. I’m sure if you pull yours off and inspect the bolts you’ll know which one to order.

I’m looking all over the internet for the part. Rovers North has a unit for 149$(US). Atlantic British has one listed for 199$(US). I’m hoping for a price match. There are some other units available under a hundred dollars. One was “out of stock” and the others did not give me any confidence in who I was ordering from. These are brakes (read that as mostly important) so I’ll stick with companies I’m familiar with.

My grand kids came over while I was researching parts. While their dad and mom ran errands and I was awaiting a response on a price match request from Atlantic British we ate Jell-O and made funny faces. You might say I was encouraging them.

At this point I’m wondering when the caliper will arrive, what with the Independence Day holiday being mid-week. I’m too cheap to have it over-nighted. And when I’ve asked for “priority shipping” it always seems to arrive on the day it would have if I just order the “whenever you get around to it” shipping. If it arrived on Friday I could work on it that day. Saturday is out, Sunday would work but I’m not sure it will arrive by then. So I’m looking at a weekday evening.

Phone rings….
Bully for me, it looks like Atlantic British is going to price match for me. So I got that ordered and I’ll be ready to swap it when it finally arrives. I always enjoy talking to Eric at Atlantic British. After we briefly kibitz and share a joke about my new credit card number and being on a budget, he says it will be here Monday or Tuesday. Indeed the Independence Day holiday has things mucked up a bit.
Thanks Eric (and AB) for the price match.

I told Mrs. OkieRover that I thought I was getting close with the repairs. I’m guessing that was probably in vain. The circumnavigation of Oklahoma is still in the works, with every repair I grow more confident. The Big White Bus is a twenty year old British automobile and I’ll probably have something to work on every week until the rust wins the battle.

Thanks for reading and Happy Rovering.

Moving Okierover.com (Post #246) 2/6/2011

Me with my Coveted Mug

My hosting service is kicking me out. He said of our break up, that it was him and not me that was the problem. I am going to miss having such a trusted location to park my website.

In actuality my site has been hosted on my best friend’s servers for free for all of these years. He has been really awesome in that. He has decided to drop the account that allows him to host sites and go back to residential service which is twice as fast and half the cost. How can I blame him?

In any event OkieRover.com will be transferring to a GoDaddy.com hosted site in the next week. So if you are looking for us and for some bizarre reason you don’t find us well… 

I AM WORKING ON IT DAMMIT! 
WEBSITES ARE HARD!
Just kidding be patient with me, and if you have any questions you can always email me.

Once again THANK YOU to my friend JagGuy for hosting my site for so long.
And as always, thank you so much for coming to my site and hopefully we will be back to full functionality soon.

Post Allergy Repairs (Post #206) 10/3/2010

The last of summer has finally left the building. Here in Oklahoma that means the temperatures drop, from 100s to 80s and it means allergies. Pollen this time of year consists of the big three: grass, ragweed, chenopods. It is hard on all those affected. The pollen count numbers we saw were ridiculous. On a twelve point scale, we had weeks where the number stayed in the eleven range. At one point, we had three 11.8 days in a row. I spend that weekend, inside as much as I could. As you can imagine this year was very hard on me. I did avoid getting pneumonia this year from the pending lung infections, so I had that going for me.

One of my dogs, Sophia, is allergic to grass. This time of year, she is a scratching insane ball of irritated canine. She is grumpy and needy of our attentions at the same time. She has finally turned the corner and will soon be scratching less. I too have turned the corner and was able to return to the garage to continue the death march of restoration.

I call it a death march because it seems like it will never end. You can imagine trudging on and on, day after day, with no end in sight. This Range Rover is trying my patience for sure. As I mentioned in other posts, every thing I touch produces two new projects. With that type of progress you can almost see yourself walking backward toward your goal.

I have finally finished the installation of the brake rotors. I have repacked the bearings all the way around which is on a tick chart somewhere of maintenance NO ONE likes to do. When I fill the brake system with fresh fluid it will also allow us to check off another item on a “Not fun” tick chart somewhere.

I took the failed Craftsman tools back to my local Sears store for replacement. I had damaged or broken a screw driver, a punch, and a 1/2 inch 14mm twelve point socket. The socket as you may remember had traveled half way around the world with us to Guam and back. After the clerk had handed me the tools, I mentioned that fact to her. I told her the socket was at least 40 years old and had been half way around the world, twice. I also told her that as far as antique tools goes this one qualified and there was someone out there that collected them. As I left the store she was eyeing the socket with a little more interest.

Over the years I have noticed the brake reservoir has some minor cracking on it. It resembles how a porcelain plate cracks. I knew there would be a day in the future when that broke and left me in a lurch. I bought a replacement reservoir and endeavored to replace it.

You can see the cracking in this picture. What I learned from this exercise is the reservoir is a lot sturdier than I believed it to be. The old reservoir would probably have lasted the life of the Range Rover. Instead I have a spare on the shelf now in the form of my old tank.

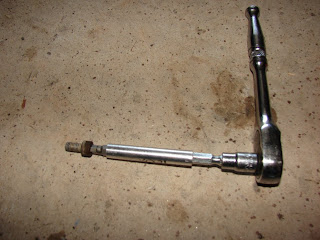
The removal is pretty easy. There is a single bolt holding the tank in place. The hardest part was getting the correct tools to remove the bolt. The head is a hex size 5. I put an extension on the end of a 1/4 inch socket and the hex head bit size 5 on the end of that. You have to remove a low pressure hose from the bottom held in place by a hose clamp. Most hose clamps in America have a 1/4 inch socket head on the drive nut. I have run into clamps with larger heads. Diet Mountain Drew’s friend SeaDawg’s BMW 325is has a hose clamp that was larger, but this one was a 1/4 incher.

I managed to get it under there and on the bolt. It came out with not too much effort.

I had not at this point learned that my new tank came with a replacement so I put the rusted screw on the wire wheel to clean the rust off. I installed the new reservoir and went to put the old reservoir in the box and up on the shelf when I learned there was a new screw and a new set of rubber seals for the new tank to rest in. So I got to install the tank twice.

The install is pretty easy. Remove the old tank. I used a large screwdriver as a lever to lift the tank as I pulled up. I popped out the old rubber seats and replaced them with the new ones. Now, having done this twice I can tell you the secret to an easier time getting the bolt back in. The part I bought had a metal bracket held in place by a channel molded into the bottom of the tank. The metal bracket moves freely. Slide it out a bit and check the alignment BEFORE you push the new tank into the seals.

Before you put the tank back in place connect the low pressure brake fluid hose. You can see it much better in your hand than buried behind all the hoses and wires. Line the tank up and gently press the tank into the new seals. Reconnected the low pressure brake fluid hose and screw it all down with the new bolt.

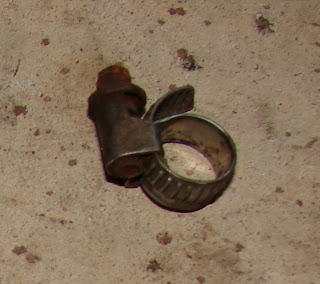
This is a really crappy picture of the old rusted hose clamp. It was so badly rusted the drive nut was basically welded in place. I replaced it with a new clamp.

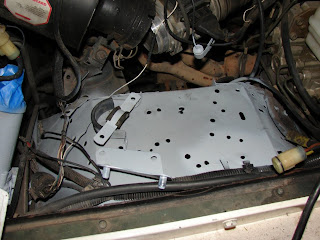
It is easier to replace all this if you remove the ABS pump and the vacuum accumulator and the coil. This fender is full of stuff. And from looking at this picture of swiss cheese the top of the fender, things have been moved around a bit. And those relocations required new holes be drilled.

I’m the kinda guy who uses the existing holes when ever possible. I know I drilled a few of these holes. But no where near all of them. And as you may guess…that’s right it was badly rusted. Big surprise, NOT!

The more I encounter the rust on this Rover the more I’m guessing its days are numbered. If I had the money, a donor Rover and the time, a frame off restoration would be required. I have just resolved I will just protect the metal I can and see what happens in the future. I got the angle grinder out and knocked off all the rust I could and covered it with acid etching primer and Rust-oleum automotive primer. I covered the top and the bottom of the fender with several coats of paint.

In the process of removing all the parts from the fender I found the broken rubber mounts for the ABS pump. The good news was I only needed to cut two of the four off because they were so badly rusted wrenching them off was impossible. It seemed like every bolt and nut on this fender was badly rusted. Several of them broke instead of coming apart traditionally.

I will have to get an assortment of stainless steel bolts and nuts to put everything back together. I’m debating on designing my own ABS pump mounts. I think I could do something with a set of rubber stoppers cut down and drilled with some stainless bolts. I’m pretty sure it will work as well as the factory designed ones.

These mounts are available from several suppliers. Atlantic British has them listed at 7.95$(US) each. The stoppers, stainless bolts, washers, and nuts will probably be about the same cost, WITH NO RUST. I’ll post up my results when I decide.

I also don’t like the GIANT gap in the fender near the shock tower. I’m going to be looking into some rubber sheets to cover these spaces. This is the awkward segue to discuss the mud flaps.

To be have mud flaps, or not to be to have mud flaps: that is the question:
Whether ’tis nobler in the mind to suffer the slings and arrows of outrageous fortune have ground clearance, or to take arms against a sea of troubles not have as much ground clearance, blah, blah, etc…
William Shakespeare – Hamlet

Few people know that Bill was a huge fan of “green laning” and wrote those prophetic words while sitting in a carriage that was hung up on its mud flaps in a field near Guildford. He changed the words slightly to highlight Hamlet’s dilemma over life and its many torments.

I have long ago lost the mud flaps. The brackets for the flaps are attached in the front to the wheel well and provide three more holes for water to get under the carpet. Great idea guys, have another Guinness or twelve on me. I can only guess these holes did not contribute to the water in the floors but it’s anyone’s guess.

I have painted the brackets and cut off the rivets that held the old flaps. I have stainless steel hardware ready to attach new mud flaps. The question now is…do I want mud flaps?

I read a debate about this on a forum many years ago. I have removed my running boards and the mud flaps failed and fell off or were ripped off long ago. The debate was basically that of “ground clearance”. I’m not a fan of mudding. I know there will be places I go that will be muddy. But I can tell you I’m pretty sure I will NOT be driving the Range Rover into mud pits, AKA mud bogging.

The question of cost is also hanging over us. A mud flap costs about 10$(US) for my Range Rover at Atlantic British. All of the suppliers are about the same on the cost. At that cost there isn’t much point in finding a source for a sheet of rubber that might reduce the cost. So for around 40$(US) plus shipping I can put mud flaps back on my Range Rover.

Finally, well for this post anyway, I sprayed some of the rubberized coating material. I sprayed the floor on the driver’s side where the holes for the mud flaps are located. I sprayed the bottom of the footwell too. I got the angle grinder under there and cleaned the holes of any rust.

I will install the stainless steel hardware and then spray the spots again for good measure. I think any holes I can get too will get a stainless steel bolt and nut with washers to close the hole. I can then spray those with the rubberized spray inside and outside.

I was warned about using this product. Mainly if you cover up rust with it, the rust will eat the metal under the coating and you will never know it. I have used it only where I think there is no longer any rust.

I also coated the rain gutter at the tailgate end of the back. As you recall this is where I found the first rust on this restoration project. I have at least three coats of paint on the metal here. I figured any water I can encourage to go out of the Rover on a nice rubberized gutter the better. As a disclaimer I will state at this time, “I have no fantasy what-so-ever that this product will help me with the rust problems on this Range Rover.”

I mostly disavow any hopes here because from what I’ve seen this Land Rover’s days are numbered. How many you might ask? I have no idea. Hopefully it’s a decade or more.

So it’s off to the hardware store Lowe’s to buy stainless steel hardware. And once everything is bolted back down, bleed the brake system. And then the project I’ve dreaded most, the viscous coupling, will begin.

Wish me luck…as I post this the allergies are acting up and I’m packing a snot rag every where I go.
Thanks for reading and Happy Rovering.

Axle Halves and Hub Rebuild (Post #201) 9/7/2010

Busy, busy weekend.
Lets start by saying this was a three day weekend. Meaning in America we had a federal holiday that gave us an extra day off. Labor Day. With that in mind labor was indeed what I did this weekend.

This weekend also kicked off the 2010 College Football season. For those of you in lands other than America this is like the World Cup opening weekend and your team is favored to win the whole thing. Favored right up until the team’s first snap of the ball, then you realize your team doesn’t have a chance, but you are excited anyway.

This year found us actually attending the game. A friend of my wife gave us his seats and we got to watch a football game in person. We normally watch from home as nearly every game the University of Oklahoma plays in, is televised. We had great seats, six rows up from the field on the 50 yard line. You can’t ask for better seats. (we won, defeating the Utah State University)

So, as you can imagine Saturday was all football and a little bit of house cleaning. Sunday was scheduled to be my designated work on mom’s house day. But with Mrs. OkieRover on call at the hospital I swapped it to work on the Range Rover day.

I skipped church and dragged myself out of bed at 0800. I broke out my Rovers North Coveted Mug (1 each), made some tea (with honey) and went out to the garage to tackle the hubs and axle half shafts.

My first task was to put the wire wheels on my new bench grinder. I wanted to buy the big 8 inch model but settled for the 6 inch because it’s not something I’ll use EVERY weekend. I mounted the two fine wire wheels on the shaft. I had purchased some washers and shafts but as it turned out, they were not necessary. I’ll keep them around for the course wire wheel I bought with the grinder.
The first part of the job was to get the splash shields mounted. The bolts and washers were corroded from years of use. I polished them with the wire wheel and then gave them a nice coat of Rustoleum primer.

I got the splash guards finished and then looked at the hubs. As I mentioned in a post some time ago I have a set of new bearings for the axle. I was a little wary about installing the new races but with some reassurance from JagGuy that it was easy I went about getting the new races installed.

I reassembled the hubs. This is mounting the brake disc to the hub and bolting them together. Then you need to install the ABS sensor ring. I prepurchased the nyloc crown locking nuts just for this occasion. You slide the ABS ring into the holes and punt the nuts and tighten. Not hard by any stretch. The next photo has me positioning the ring. You cannot do this without tightening the bolts you see in the picture as not run down to tight.

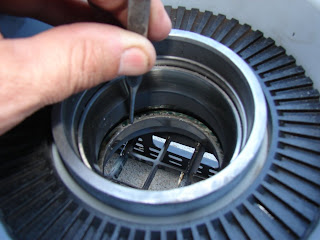
Getting the old race out requires using a punch and a hammer. The theory goes that you tap on alternate sides until the race falls out. As you may or may not know the race fits VERY tightly in the hub. I’m sure in an ideal world you would have these pressed out and the new ones pressed back in by a machine shop or the like.

My garage is not the ideal world. So I set about with the punch and a hammer to knocking them out. There are two races, an inner and an outer, per hub. As JagGuy said, its no big deal getting them out. Avoid hitting your hand with the hammer is the only advice I can offer.

You put the new races in just like you take the old ones out. The advice I offer here is striking the race about every 45 degrees as you move around the ring, slowly inching the race into place. Something to note here is having quality tools. Cheap punches will fail you on this project. Think about hitting a wooden stake with a hammer. The softer the wood the quicker the top of the stake with flare out and then splinter.

The same thing happens with cheap punches. I had the two punches my dad had in his tool chest. They are both Craftsman by Sears. Craftsman tools are replaced no questions asked. They will both be warranty replacements on my next trip to Sears along with a screw driver that no longer has a tip. The first punch was terrible and quit me about half way through the second race install. The second punch managed to finish the first hub and the second. The tool casualties are starting to mount.

The only real tip to race installation is making sure they are full seated. When you are fully seated you get a different feel from the hammer striking the punch. That is the first clue you are seated the second is by visual inspection.

So with the races installed I packed the bearing with grease and inserted it into the hub. The back side is held in place with a ring. I mounted mine with a plastic hammer very carefully. The bearings fit VERY tightly on the shaft. I know they are the same part number but in both cases only one of the two bearings fit on the inner portion of the hub shaft.

I packed the bearing spaces with more grease. I then slipped the bearing and hub into place. This took some doing but I finally got them on. You then mount the bearing washer in place and put one of the hub nuts on and tighten. I used a large set of channel lock pliers. These don’t have to be screwed down real tight. Its best you put them back the way you found them.

You then put the crush washer on and bend a flap over to hold the inner hub nut in place. You then put on the outer hub nut and tighten. I remember the tightness from the tear down. I did my best to match that.
I then packed the hub with wheel axle grease. I can comfortably say it would not take any more grease when I was done.

I applied the gasket material. There is a paper gasket included in the kit. I did not install it. Instead I just used the gray gasket material. This will probably come back to bite me in the ass. I wiped the surface as clean as I could and applied the gasket goo.

I wiped away the excess and made sure it was uniform in its application.

I installed the brake caliper and bolted it down good and tight. I then attached the brake line. I inserted the new brake shoes and got them clipped in. I will have to find a brake wear sensor plug or wire them directly. I’m not sure when the plug went missing but I remember seeing an extra somewhere.

I then slid in the half shaft. This takes a little bit of finesse but is no big deal. Get them seated as close as you can. Then take the bolts and using the same pattern you would to put on lug nuts alternate around the axle tightening until you get to the “I’m gonna need some help” point. Using a 1/2 inch break over bar, which should be standard kit in your Land Rover, use the break over bar to brace against as you tighten the bolts down.

If you remember you needed the cheater pipe to get the damn bolts off. So you can probably guess you’ll need something to get them back on there just as tight. I was running out of steam at this point and our friends were expecting us so I called it quits for the day with only the driver’s side hub bolts left to tighten and the brake caliper left to be installed.

I’m only a few more steps from having the Range Rover mobile again. On my next work day I will finish the axle. I will then install the new brake reservoir. While I have the system nearly dry I will install the new brake discs on the front axle. I understand this is not the task the rear turned out to be.

With the brake system restored, I will then remove the dead viscous coupling. I will then pray that the one I sourced used is good and install it. If everything goes well here I am on to painting the rear door by the end of the month of September. I will have to put all the electrics back together under the passenger seat. At that point I can drive the Range Rover over to the Evil German Dude’s shop and have him assist me in welding in the new floor pieces.

After those are in I need to seal them from the bottom and from the inside just like the driver’s side. I will then make a call on the sound deadening material, buy it and get it installed.

While the dash is out I’m going to remove the malfunctioning piston that prevents me from dropping the transaxle into low. I can then reassemble the carpet and interior.

I have a camping trip scheduled for the third week of October and I hope to drive the Range Rover down there.

It may be an ambitious and optimistic goal much like my hopes for a National Championship in football for my alma mater, but it’s a goal for now.

Thanks for reading, Go Sooners and Happy Rovering.