The one where I catch myself on fire in the furtherance of Land Rovering (post 234) 12/21/2010

I started a little slow out of the gate Saturday. My good friend, the Evil German Dude (EGD) agreed to help me weld in patches for my rusted passenger side floor. So the plan was to get up on Saturday and drive to the lovely town of Jones, Oklahoma where EGD has his evil lair. It didn’t help that I had what would be considered a bad dream the night before. In the dream I forgot to get up and go to EGD’s house for the project and I couldn’t get him on the phone to tell him why. Weird.

My slow start was mostly due to me failing to move all the crap that was piled on and around my Range Rover. I had to move two cars and it simply took longer than I planned. It turned out not to be a big deal, but when you are dealing with Evil German Dudes you want to be punctual. The drive was unremarkable except for the big hole in the floor letting in the morning chill. The heater kept it comfortable so it turned out not to be the issue I expected. I did see one thing on the way in that disturbed me though. A sign at the city limits of Jones read,

It is illegal to dump animals in Jones.

Is this a big problem? I guess it would make sense to drop an unwanted animal off in “the country” instead of feeding it and loving it. Jones is definitely in “the country”. But Jones is having none of that. It must be a big enough problem that the City of Jones sprung for a sign to declare its intention to fine you if you are caught.

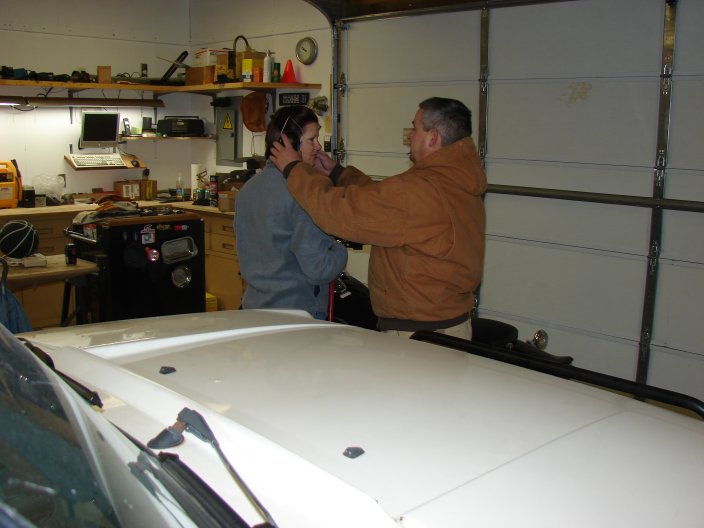
I arrived at EGD’s evil lair and with some pleasantries we got the Range Rover into the garage. “Back it in.” was my first instruction. I asked why, to whit he responded, “it will be easier to push it out of the garage if it catches on fire.” DULY NOTED! That had not even crossed my mind.

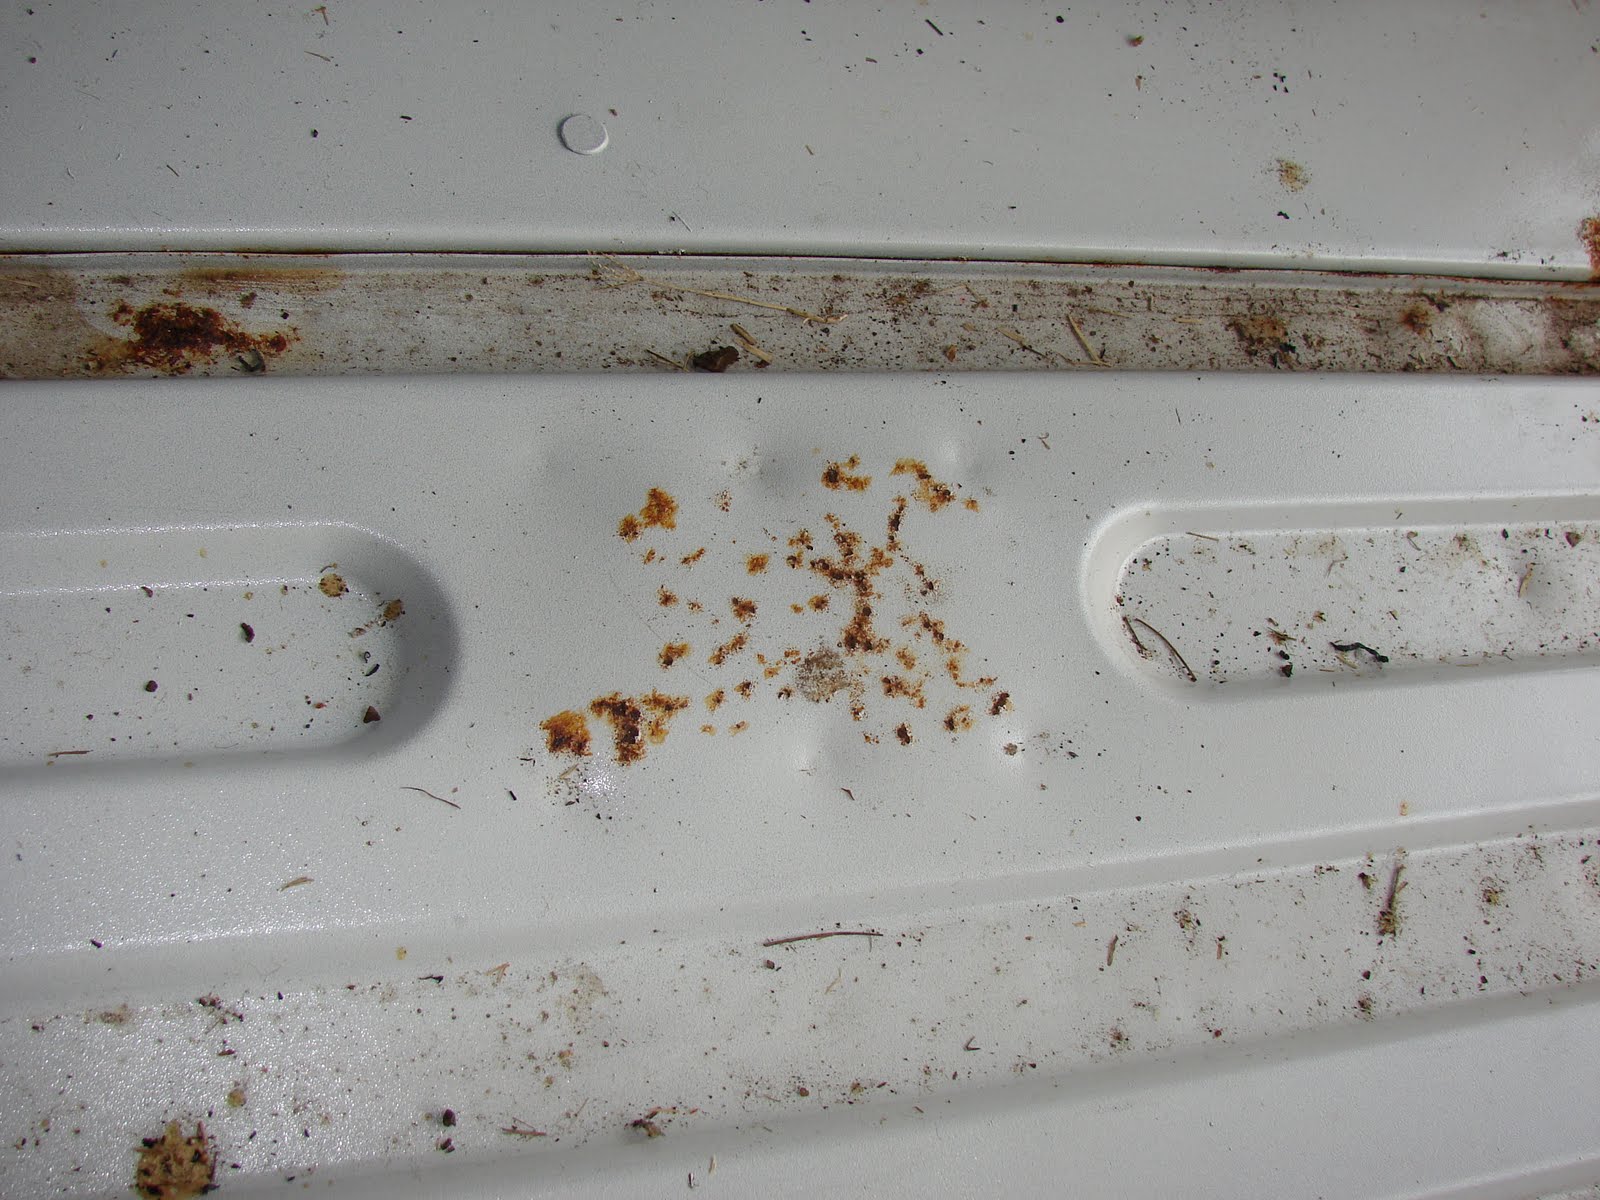
The project at hand was to weld in replacement floor panels to cover the rusted holes that I cut out of the floor. EGD’s evil mistress is EGB, the Evil German Broad. She had a project as well and so we all assembled in the secret lair and got started. I’m substituting broad for bitch. I like her, so I tend to think of her in a better light than the later word would denote.

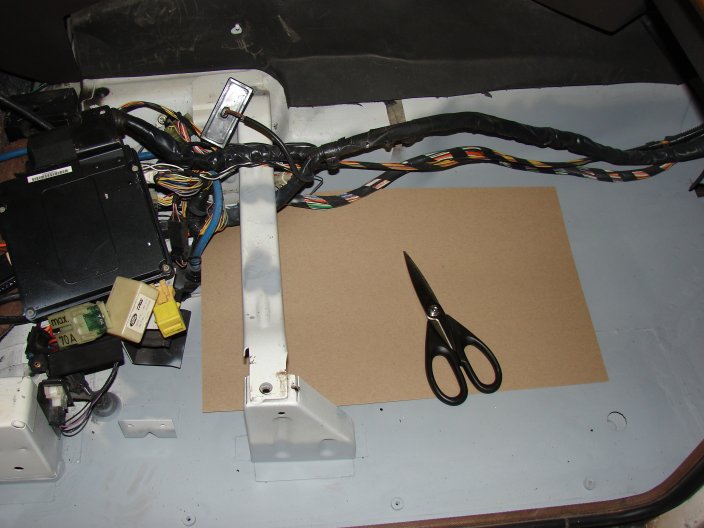
I failed to do my homework so we were set back while I made my templates for the holes. Templates are a good idea. With the price of sheet steel and the distance required to retrieve more if you screw up makes mistakes like poor cutting a show stopper. I got the card board and cut the template.

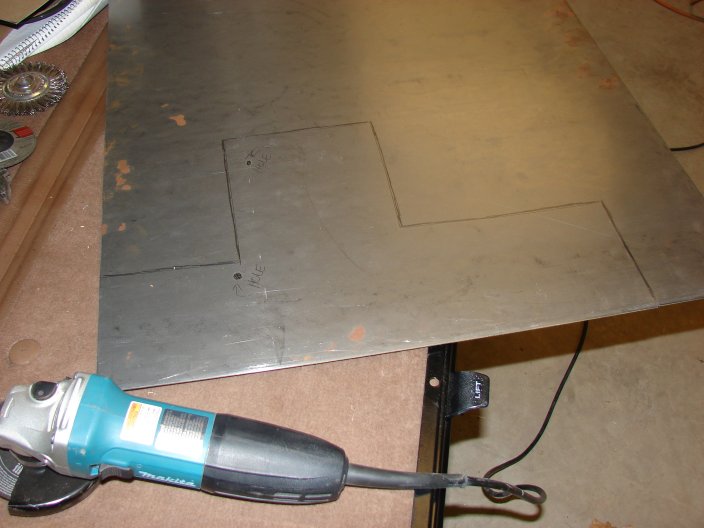
My next task was to cut the steel to match the template. All this would be duplicated for the second set of holes in the front of the floor pan. I transferred the template on to the steel by tracing the outline and got to cutting. I positioned our old friend, the angle grinder, now fitted with a cutting wheel, and got to cutting.

This is the part where a quote from a movie is necessary.

“Stupid is as stupid does.” – Forest Gump

I can just hear you all out there, “But OkieRover, I always thought of you as a pretty sharp guy.” Well that is a nice thought my dear readers, but let me tell you the facts. As my cousin Victoria will assure you, “Marines are NOT the sharpest knives in the drawer.” She would also be the first Army dog to tell you, “Marines may well be the biggest and scariest knives in the drawer, but not the sharpest.”

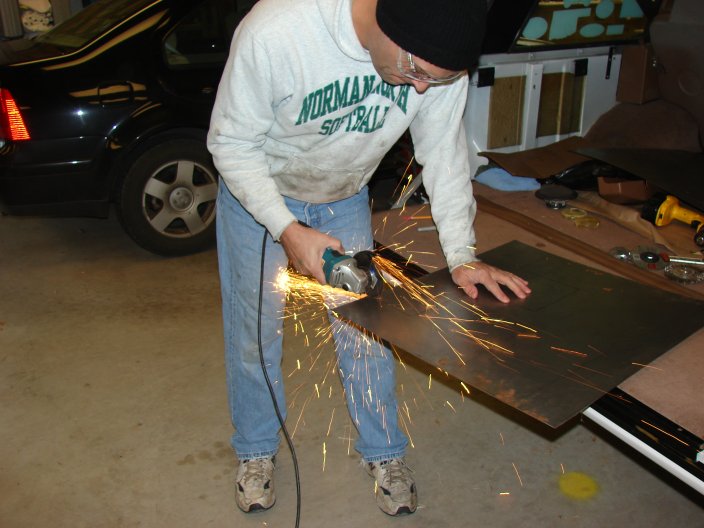
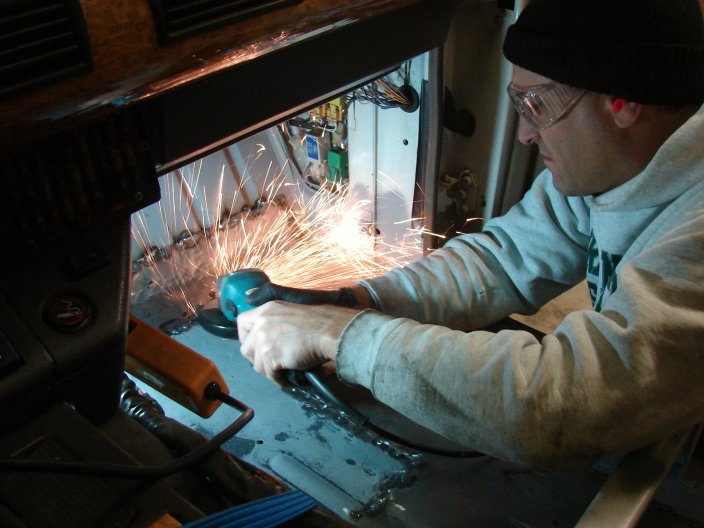
You can see from the picture that something funny is about to happen is about to go horribly wrong. On my third cut the sparks flying at my thigh were hot enough to ignite my Levi’s 501 jeans.

On the first and second cuts I had noticed that the spot where the sparks landed on my leg got warm. But I’m a Marine and I am not phased by such annoyances for my pain threshold is high and my discipline is unwavering. Sadly that level of pride proved too much when the warm spot on my leg got A LOT WARMER, you might even say damn hot.

I looked down just as the Evil German Dude said, “You are on fire.” Before the last syllable of –ire was said I was already slapping the fire out. I did not feel “stop, drop and roll” was appropriate so I just slapped my thigh until the flames were gone.

We all had a big laugh. EGD said, “If you would have left it burning for another minute I would have had a picture of it.” I’m not sure that would have been worth the photo. As it turned out I only received a small blister and a bruised ego.

Growing impatient with my pathetic attempts to cut the steel EGD leaped into action. He took over the cutting. Perhaps he was wanting to have all the fun. I know he has had extensive training in metal working, shop procedures, welding, and nuclear reactor construction techniques from the Stadtweke Bremen AG Academy of Evil Villains. We often tease him that he could build a fully functioning nuclear reactor from two paper clips, a nine volt battery and a piece of cork. We also know he minored in earthquake manipulation while at the Academy. It should then come as no surprise that Jones Oklahoma experiences an extraordinary number of earthquakes. We have not yet gathered the evidence that he is guilty of the earthquakes, it’s only a hunch at this point. Update: The evidence is getting stronger.

=”>

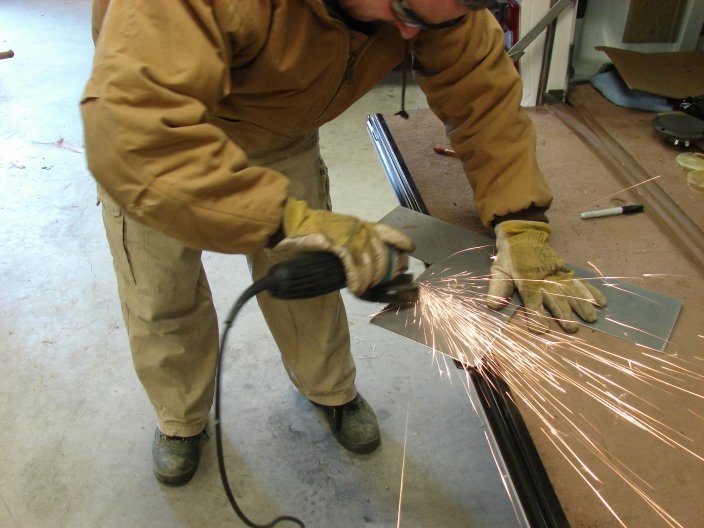
The next step was to cut holes in the steel plate to make tack welds. Unfortunately I had only two thicknesses of steel to choose from at Lowe’s, 16 gauge and 22 gauge. Sixteen gauge being the thicker steel. EGD’s pneumatic punch tool was no match for this thickness and it was determined to edge weld the larger patch.

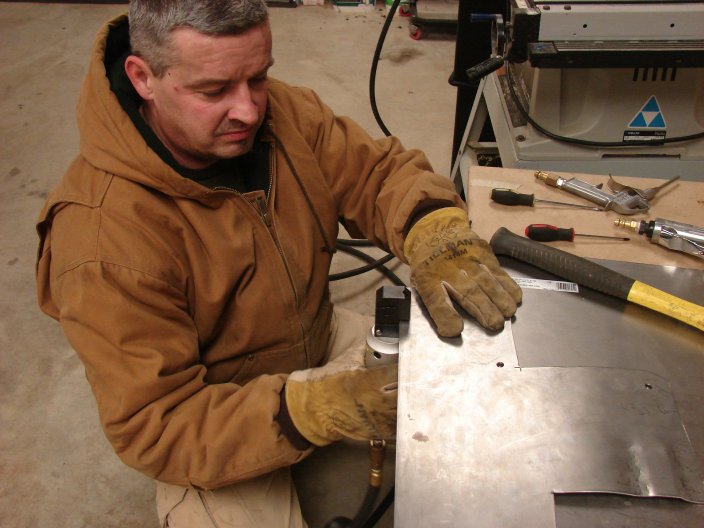
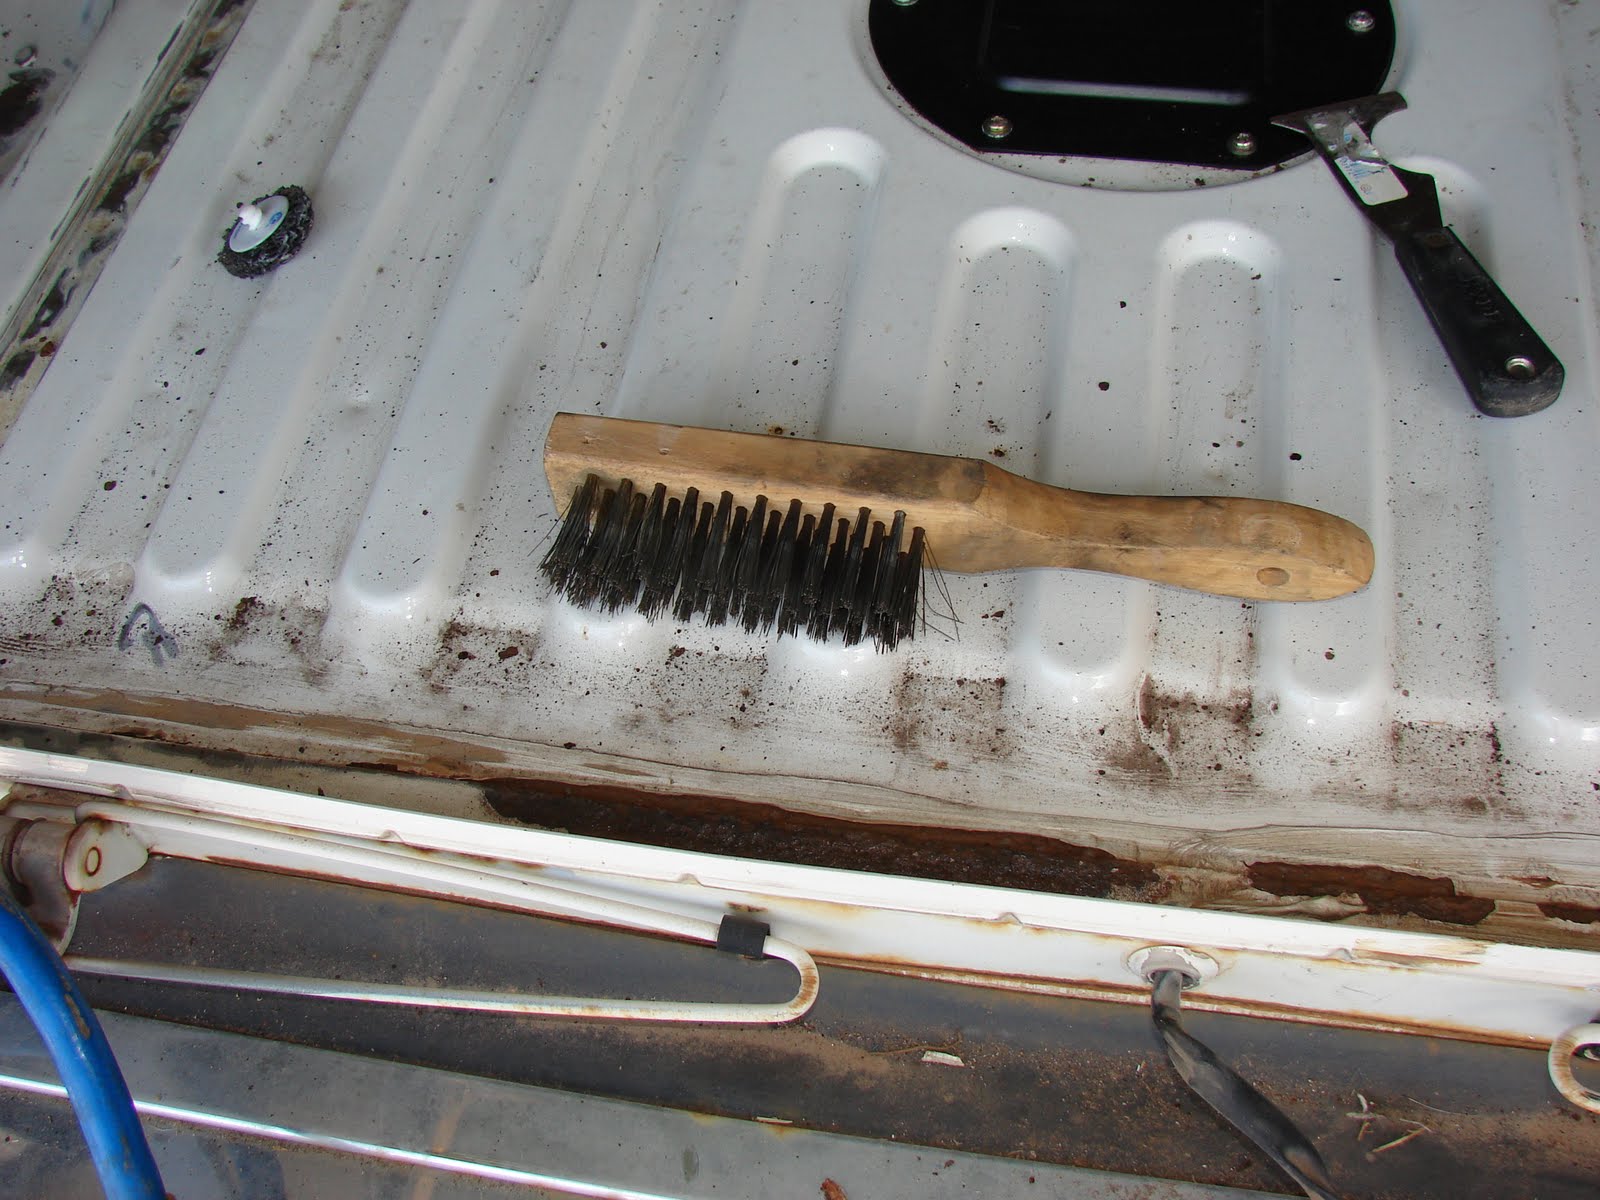
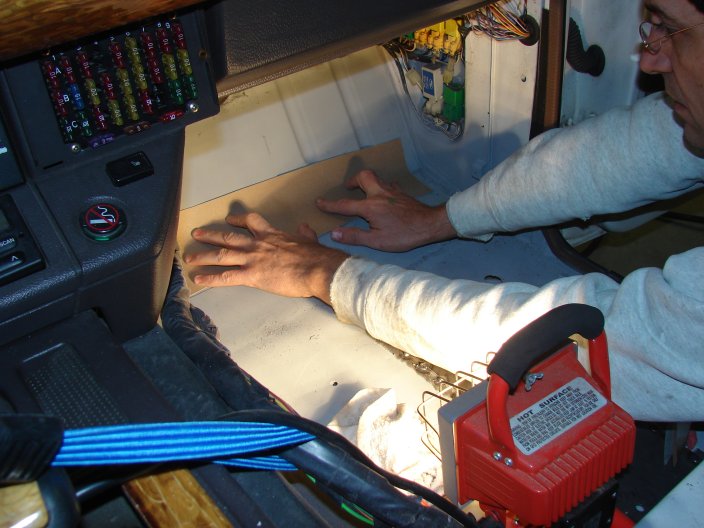
With that in mind we had to remove the paint I sprayed to protect the naked steel from rusting. I marked the outline of the panel and EGD ground the paint away with his air tool.

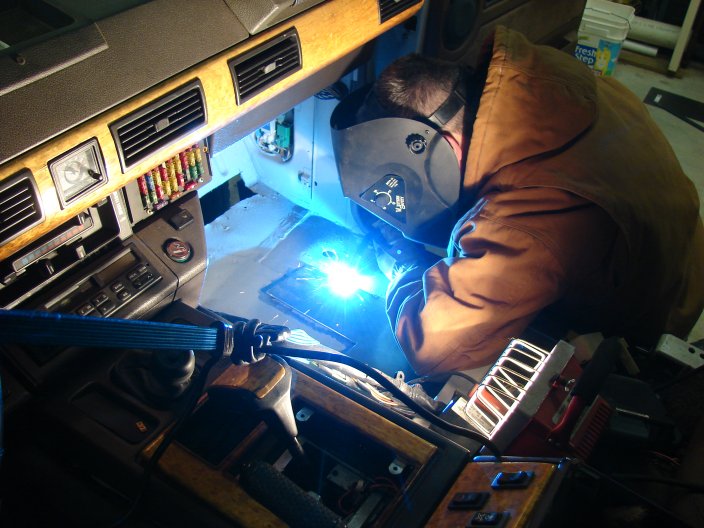
Then it was on to the welding. Originally I had intended to learn this task and do it myself. I was pretty sure I wasn’t ready for this today. EGD was the accomplished welder and I just stepped aside and assisted when necessary holding the plate down as he made the tack welds.

Pretty soon he was done and I was back in there to make the template for the last two holes. I’m now an expert at making templates. I also cut this panel out and managed to not catch myself on fire for a second time. 22 gauge is pretty thin so I cut this one out with the metal shears.

To get the flex and bend necessary for this section we went with the 22 gauge. The punch was easily able to penetrate this thickness and EGD went to work. He also gave the piece a nice bend in his vise and it was back in to weld it down.

I got in and used the air grinder to get the paint off to insure good welds. This time I ground the paint back inside the template marks due to the punch method being deployed.

EGD fired up the welder and got the last panel welded in place. He used the hammer to assist in holding the plate in place with the proper bend. It was necessary to have the air compressor fitted with a blowing tool and at the ready. As the welds were made, several times the rubberized undercoating Land Rover saw fit to install caught fire. It was easy enough to keep under control with a few hundred PSI of forced air to blow out the flame and cool the steel after the weld.

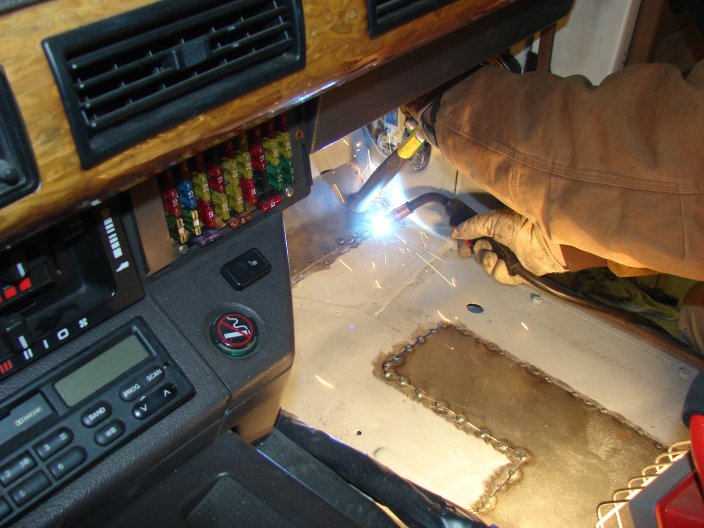
The final step was to knock the high spots of the welds down with the angle grinder. I got that task knocked out in no time.

All that was left was cleaning up. I grabbed the shop vacuum and cleaned up the floor pans the best I could. The grinder wheel and slag from the welding can leave a pretty good pile of debris.

We finished up the day with a lovely meal. EGB had prepared chili and cornbread. It was delicious. I bid them a good day and I was on my way home.

On the way home the alarm went off inside the cab. This is the same alarm that sounds when the transfer case is in neutral. I thought I had eliminated all possibility that it would sound again.

I pulled over in Nicoma Park, Oklahoma and shifted the transmission to PARK. I grabbed the shifter and fully expecting the damn thing to sound, I shifted back to DRIVE. Nothing, no alarm, WHY.THE.HELL did it do that?

I proceeded on home and one more time the alarm sounded. Just a short beep and then no more trouble. The road noise was reduced by the new panels, so I thought I’d listen to the radio. I punched in my CODE and the radio did not spring to life. Maybe it’s the wrong code. So I’ll have to pull the radio again and get the code. My good friend and former roommate Master Guns has a radio from one of his cars for me. I have to get it from him to see if it will fit in the limited space of the Range Rover’s dash. Maybe we’ll just go with a whole different system, I don’t know.

I got home and jumped out of Range Rover. As I passed the front of the Rover I heard a high pitched sound from the engine compartment. I went back and popped the bonnet and listened. My guess is I am loosing the bearings in my alternator. I have a lifetime warranty on the alternator so I guess I’ll pull it and take it down for a replacement. I didn’t expect a new project but I am not surprised by it either.

On Monday evening, Oklahoma was blessed with some unseasonably warm weather. We topped 73 degrees (F). That is very unusual for this time of year. Consider last year at this time. The weathermen were predicting a snow storm for Christmas Eve. What we got was a blizzard with five foot snow drifts that crippled the metro area for 7 days. We named the event Snowpocalypse 2009 mocking the news coverage of the event.

So, with seventy degree weather I was determined to paint the new bare naked panels before surface rust sets in. After Mrs. OkieRover and I got dinner (Chick-Fil-A), mom’s grocery shopping (Homeland), we had to take a roll of tape over to our friend who owns Rusty’s Frozen Custard. When we were neighbors he would always come over on December 23rd or 24th and ask if we had any tape for he had exhausted his tape supply wrapping presents. So after the second year of his late season visits, we started buying extra rolls and giving them to him as a present. Eventually we moved away, and now we take the tape to his store and leave it for him. On and off for fifteen years we have been doing this, a very long running joke.

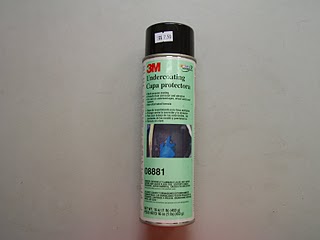
With all our duties done, we still had time to go to O’Reilly’s for paint and bed liner material. If I hurried I still had time to get some of that paint on the metal before bed time.

We went into O’Reilly’s. Mrs. OkieRover said she “always” goes in with me. I told her she NEVER goes with me to the parts store. I can’t honestly remember the last time we were even at the parts store together. So once again her ALWAYS and my NEVER come up short on reality.

Castrol Edge Synthetic was on sale, buy five quarts get a Mobil One oil filter free. The Scion and the Civic both need oil changes so I grabbed 10 quarts. I don’t know anything about Mobil One oil filters. So that’s something I’m going to have to look up today.

So I look at the receipt,

  • 2 cans of bedliner, =”>
  • 2 cans of MarHyde acid etching primer, =”>
  • 10 quarts of synthetic oil.=”>

130$(US)! WTH? Wow that was a lot. I have to get it out of my head that a quart of oil costs a dollar. So you can imagine I was not expecting 70$(US) for two oil changes. I guess I know what I’ll be doing during the day on Christmas Eve. I’ll probably take advantage of the situation and extend it to a learning situation to the boys. Diet Mountain Drew graduates this year and needs to know about this stuff.

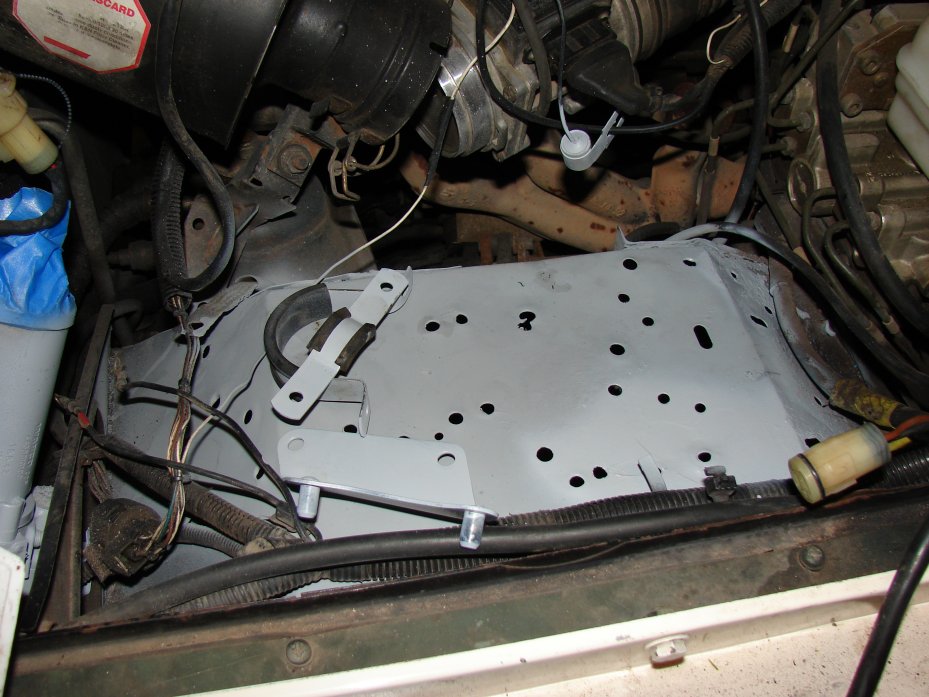
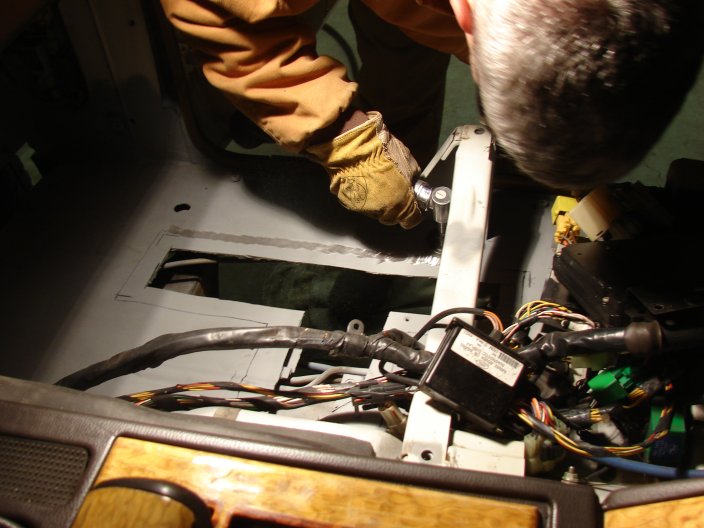
The next steps are to see about sealing up the floor and getting the bedliner sprayed on the new panels. There are some unavoidable problems already popping up. The best way to have done this job was to take the body off the frame and weld in a new floor for this section. With that in mind, it is going to be a challenge to seal out the water. I’ll have pictures of the underneath in another blog post this week. It will become clear why this task is going to be such a challenge when you see the pictures.

One more time, I’d like to send a big thanks out to my friend EGD for his help and to EGB for the great meal.

And to everyone else thanks for reading and Happy Rovering.
=”>

Running out of crap to fix (Post #221) 11/23/2010

Yeah, I know! YOU SHOULD NEVER SAY THOSE WORDS ABOUT A LAND ROVER!

So let me clarify. My to-do list is dwindling.
On Sunday I was able to pull the headliner. This job is no challenge. It is a 1 on the Difficulty Scale I will buy a couple of yards of fabric and some spray glue at Gibson’s and get it all put back together maybe this weekend.

I also found out why the sunroof would not retract. Some of the structure was bumping the glass panel as it retracted. I pulled and tugged on the metal that was causing the friction. I’m not sure how RovErica managed to bend this, probably rough housing or climbing from the front seat to the back seat. I also had a scenario in my head with her sitting on the roof with her feet dangling through the sunroof. Either way it is more or less fixed with a little coaxing of the metal back where it belongs.

The Park Neutral Switch problem was a bit more complicated. After researching and reading about the switch I crawled under the middle of the Range Rover. I found out the switch is virtually unreachable from the bottom and impossible to reach from the top. So I made what I will call a simplification of systems repair.

Yes, I simplified the system by cutting the wires and disabling the switch. It has always been one of my complaints that the Range Rover of the 1990s was WAY TOO COMPLICATED with electrical this-and-that’s. This system is basically a way to idiot proof the changing of the transaxle from low to high. The system works as such, if the transaxle is in neutral a tone sounds warning you that is the case.

I don’t need that level of safety system. I’m a pretty sharp guy. Well, I like to think I am, most of the time anyway. So a system so ripe with failure as this one was is probably not necessary for a guy “like me”. If low range is necessary, by God, I can promise you, I’ll make sure it is in LOW before I go. There are no safety circuits like this on a Defender or Series model, and now, there isn’t on my Range Rover.

So I cut the microswitch’s wires and applied a little bit of heat shrink to their ends so they would not short out anywhere. I also labeled them with my handy-dandy label maker. That way if I ever open this area up again I won’t look at those wires and wonder, “why the hell are those cut?”

And lastly I ground the surface rust off the floor pan on the passenger side, AGAIN. I have a picture of me using the angle grinder to remove rust from this floor pan in an earlier post. For some reason it must not have been enough grinding to remove the rust. It needed another round. This time I used the grinding disk and tore it back to metal. At this point you have to imagine that the floor pan is badly rusted. Pitting of the metal had set in and it looks pretty bad. I was careful not to grind it so much that I made the metal too thin.

I’m not 100% confident this will stay fixed over the life of this Range Rover. By the time we weld the replacement panels down this section will be pretty badly Frankensteened.

And rust, as much as I’d like to think I got rid of it, will appear again. I have decided to get a heat shield sound deadening material. There are too many options to choose from.

SecondSkin, Dynamat, FatMat, Lizardskin

I did some research and will probably get SecondSkin Damplifier Pro. The only thing that could have swayed me more to this product would have been bikini clad installers. But I’m glad they didn’t sink to that level to sell the product. At least I don’t think they haven’t sunk, there are only a hundred videos I haven’t quite looked at when you search second skin and bikini on YouTube.

That LuxuryLiner Pro product looks great too. Closed foam so you can count on water not sitting there promoting rust. I looked at the OEM foam liner and it is NOT closed foam. I could probably get away with just putting it back in. Consider that the metal floor will have the Damplifier Pro as a barrier so if the foam gets wet it will not be touching the floor pan. This will probably be a game time decision based on how much the players cost.

I’ve already talked to SecondSkin and will probably buy the materials next week and get them down as soon as I can get the welding, and painting and sealing done.

The layers will be as follows…
Carpet
Either OEM foam pad or LuxuryLiner Pro
Damplifier Pro
Spray on bedliner product
Rustoleum Paint
Metal
(Now we are outside the Rover)
Rustoleum Paint
Lots of spray on bedliner product

All of this preparation will probably fail so the more crap I pile on there the happier I’ll feel when I put the carpet down and attempt to forget about it. Its going to rust, I just need to slow it down until I’m too old to fix it or rich enough to buy something else to play with. Either way as long as Mrs. OkieRover’s legs don’t go poking out the floor it’s all good. My best friend used an aluminum speed limit sign he liberated from its duties managing the speed limit on some back county road as a floor pan in his 1962 Ford Falcon. I wish I had a picture of that. Maybe I’ll dig one up.

Thanks for reading and Happy Rovering.

Post Allergy Repairs (Post #206) 10/3/2010

The last of summer has finally left the building. Here in Oklahoma that means the temperatures drop, from 100s to 80s and it means allergies. Pollen this time of year consists of the big three: grass, ragweed, chenopods. It is hard on all those affected. The pollen count numbers we saw were ridiculous. On a twelve point scale, we had weeks where the number stayed in the eleven range. At one point, we had three 11.8 days in a row. I spend that weekend, inside as much as I could. As you can imagine this year was very hard on me. I did avoid getting pneumonia this year from the pending lung infections, so I had that going for me.

One of my dogs, Sophia, is allergic to grass. This time of year, she is a scratching insane ball of irritated canine. She is grumpy and needy of our attentions at the same time. She has finally turned the corner and will soon be scratching less. I too have turned the corner and was able to return to the garage to continue the death march of restoration.

I call it a death march because it seems like it will never end. You can imagine trudging on and on, day after day, with no end in sight. This Range Rover is trying my patience for sure. As I mentioned in other posts, every thing I touch produces two new projects. With that type of progress you can almost see yourself walking backward toward your goal.

I have finally finished the installation of the brake rotors. I have repacked the bearings all the way around which is on a tick chart somewhere of maintenance NO ONE likes to do. When I fill the brake system with fresh fluid it will also allow us to check off another item on a “Not fun” tick chart somewhere.

I took the failed Craftsman tools back to my local Sears store for replacement. I had damaged or broken a screw driver, a punch, and a 1/2 inch 14mm twelve point socket. The socket as you may remember had traveled half way around the world with us to Guam and back. After the clerk had handed me the tools, I mentioned that fact to her. I told her the socket was at least 40 years old and had been half way around the world, twice. I also told her that as far as antique tools goes this one qualified and there was someone out there that collected them. As I left the store she was eyeing the socket with a little more interest.

Over the years I have noticed the brake reservoir has some minor cracking on it. It resembles how a porcelain plate cracks. I knew there would be a day in the future when that broke and left me in a lurch. I bought a replacement reservoir and endeavored to replace it.

You can see the cracking in this picture. What I learned from this exercise is the reservoir is a lot sturdier than I believed it to be. The old reservoir would probably have lasted the life of the Range Rover. Instead I have a spare on the shelf now in the form of my old tank.

The removal is pretty easy. There is a single bolt holding the tank in place. The hardest part was getting the correct tools to remove the bolt. The head is a hex size 5. I put an extension on the end of a 1/4 inch socket and the hex head bit size 5 on the end of that. You have to remove a low pressure hose from the bottom held in place by a hose clamp. Most hose clamps in America have a 1/4 inch socket head on the drive nut. I have run into clamps with larger heads. Diet Mountain Drew’s friend SeaDawg’s BMW 325is has a hose clamp that was larger, but this one was a 1/4 incher.

I managed to get it under there and on the bolt. It came out with not too much effort.

I had not at this point learned that my new tank came with a replacement so I put the rusted screw on the wire wheel to clean the rust off. I installed the new reservoir and went to put the old reservoir in the box and up on the shelf when I learned there was a new screw and a new set of rubber seals for the new tank to rest in. So I got to install the tank twice.

The install is pretty easy. Remove the old tank. I used a large screwdriver as a lever to lift the tank as I pulled up. I popped out the old rubber seats and replaced them with the new ones. Now, having done this twice I can tell you the secret to an easier time getting the bolt back in. The part I bought had a metal bracket held in place by a channel molded into the bottom of the tank. The metal bracket moves freely. Slide it out a bit and check the alignment BEFORE you push the new tank into the seals.

Before you put the tank back in place connect the low pressure brake fluid hose. You can see it much better in your hand than buried behind all the hoses and wires. Line the tank up and gently press the tank into the new seals. Reconnected the low pressure brake fluid hose and screw it all down with the new bolt.

This is a really crappy picture of the old rusted hose clamp. It was so badly rusted the drive nut was basically welded in place. I replaced it with a new clamp.

It is easier to replace all this if you remove the ABS pump and the vacuum accumulator and the coil. This fender is full of stuff. And from looking at this picture of swiss cheese the top of the fender, things have been moved around a bit. And those relocations required new holes be drilled.

I’m the kinda guy who uses the existing holes when ever possible. I know I drilled a few of these holes. But no where near all of them. And as you may guess…that’s right it was badly rusted. Big surprise, NOT!

The more I encounter the rust on this Rover the more I’m guessing its days are numbered. If I had the money, a donor Rover and the time, a frame off restoration would be required. I have just resolved I will just protect the metal I can and see what happens in the future. I got the angle grinder out and knocked off all the rust I could and covered it with acid etching primer and Rust-oleum automotive primer. I covered the top and the bottom of the fender with several coats of paint.

In the process of removing all the parts from the fender I found the broken rubber mounts for the ABS pump. The good news was I only needed to cut two of the four off because they were so badly rusted wrenching them off was impossible. It seemed like every bolt and nut on this fender was badly rusted. Several of them broke instead of coming apart traditionally.

I will have to get an assortment of stainless steel bolts and nuts to put everything back together. I’m debating on designing my own ABS pump mounts. I think I could do something with a set of rubber stoppers cut down and drilled with some stainless bolts. I’m pretty sure it will work as well as the factory designed ones.

These mounts are available from several suppliers. Atlantic British has them listed at 7.95$(US) each. The stoppers, stainless bolts, washers, and nuts will probably be about the same cost, WITH NO RUST. I’ll post up my results when I decide.

I also don’t like the GIANT gap in the fender near the shock tower. I’m going to be looking into some rubber sheets to cover these spaces. This is the awkward segue to discuss the mud flaps.

To be have mud flaps, or not to be to have mud flaps: that is the question:
Whether ’tis nobler in the mind to suffer the slings and arrows of outrageous fortune have ground clearance, or to take arms against a sea of troubles not have as much ground clearance, blah, blah, etc…
William Shakespeare – Hamlet

Few people know that Bill was a huge fan of “green laning” and wrote those prophetic words while sitting in a carriage that was hung up on its mud flaps in a field near Guildford. He changed the words slightly to highlight Hamlet’s dilemma over life and its many torments.

I have long ago lost the mud flaps. The brackets for the flaps are attached in the front to the wheel well and provide three more holes for water to get under the carpet. Great idea guys, have another Guinness or twelve on me. I can only guess these holes did not contribute to the water in the floors but it’s anyone’s guess.

I have painted the brackets and cut off the rivets that held the old flaps. I have stainless steel hardware ready to attach new mud flaps. The question now is…do I want mud flaps?

I read a debate about this on a forum many years ago. I have removed my running boards and the mud flaps failed and fell off or were ripped off long ago. The debate was basically that of “ground clearance”. I’m not a fan of mudding. I know there will be places I go that will be muddy. But I can tell you I’m pretty sure I will NOT be driving the Range Rover into mud pits, AKA mud bogging.

The question of cost is also hanging over us. A mud flap costs about 10$(US) for my Range Rover at Atlantic British. All of the suppliers are about the same on the cost. At that cost there isn’t much point in finding a source for a sheet of rubber that might reduce the cost. So for around 40$(US) plus shipping I can put mud flaps back on my Range Rover.

Finally, well for this post anyway, I sprayed some of the rubberized coating material. I sprayed the floor on the driver’s side where the holes for the mud flaps are located. I sprayed the bottom of the footwell too. I got the angle grinder under there and cleaned the holes of any rust.

I will install the stainless steel hardware and then spray the spots again for good measure. I think any holes I can get too will get a stainless steel bolt and nut with washers to close the hole. I can then spray those with the rubberized spray inside and outside.

I was warned about using this product. Mainly if you cover up rust with it, the rust will eat the metal under the coating and you will never know it. I have used it only where I think there is no longer any rust.

I also coated the rain gutter at the tailgate end of the back. As you recall this is where I found the first rust on this restoration project. I have at least three coats of paint on the metal here. I figured any water I can encourage to go out of the Rover on a nice rubberized gutter the better. As a disclaimer I will state at this time, “I have no fantasy what-so-ever that this product will help me with the rust problems on this Range Rover.”

I mostly disavow any hopes here because from what I’ve seen this Land Rover’s days are numbered. How many you might ask? I have no idea. Hopefully it’s a decade or more.

So it’s off to the hardware store Lowe’s to buy stainless steel hardware. And once everything is bolted back down, bleed the brake system. And then the project I’ve dreaded most, the viscous coupling, will begin.

Wish me luck…as I post this the allergies are acting up and I’m packing a snot rag every where I go.
Thanks for reading and Happy Rovering.

Shhhh! (Post #199) 9/1/2010

What to do? What to do?
We are at one of those awesome spots in a project where you have a decision branch. Do we go direction A or direction B. Each direction has pros and cons. Neither direction is “the right way” as opposed to the other direction which could also be “the right way”. It is truly subjective.

The dilemma is just this, what do I line the floor boards with after I have repaired the rust holes and get the floor painted?

I have done a little research. My friends here at work say the auto audio places have the stuff you want. I looked into Dynamat (endorsed by none other than Chip Foose) and Stinger Road Kill endorsed by Carl at AutoImage USA in Norman Oklahoma. Carl was very helpful and showed me the product and said it was superior to Dynamat due to its greater thickness and cheaper price. One of my mates here at work also said, “there were cheaper and better products out there.” This must be it. Unfortunately for Carl his price for the Stinger Road Kill kits were about double that of the sellers on Google Shopping. Carl did say I could get my entire under body sealed for 300$(US). This gave me an idea that perhaps I might give him a shot at the undercoating once the repairs were done. This is going to be a nasty dirty job and I don’t relish it especially lying on my back in the garage.

The first decision has already been made. I will not put it back the same way it came out in regards to the carpet the sound pads underneath. As you read in an earlier blog post the factory sound pad is a giant water retaining sponge. You already know the Range Rover and apparently every other Land Rover automobile is a basically a petri dish for rust. Add water and watch the rust grow! In my opinion I think this is the biggest disappointment in Land Rover history. Purpose built vehicles that have absolutely not been protected from rust.

I just finished reading a post on the Lucky 8 blog that describes the restoration of a 1997 Defender. If you flip through the 166 photos you will see rust on that vehicle that is totally inexcusable. This was a New York vehicle that was about to succumb to the rust monster. The D90 was rescued from Billy Joel by an owner who intended, as the post goes on to say, to become his beach cruiser at his North Carolina residence.

Look at that transformation! That is a totally new vehicle. Everything that could rust has been refurbished or replaced or coated to never be a problem again. WHY WASN’T THIS DONE AT THE FACTORY? It boggles the mind.

I wish I had the resources to do this to my beloved 1993 Range Rover LWB. A total body off restoration. How awesome would that be? It would only cost 15 or 20 thousand, why not!? Well, man cannot live with out dreams, so I will continue to dream about that.

So back to the decision…
Course A – might be something like this.
Install a Dynamat or Stinger Road Kill like product to the floor pans of the Range Rover. This would be to protect them from water and further rust. On top one might also add a new carpet pad from one of these manufacturers.

Course B – might be something like this.
Install a Dynamat or Stinger Road Kill like product to the floor pans of the Range Rover. Dry the existing OEM carpet pad and reinstall.

Course A would be more expensive but all new products would be water resistant or water proof thusly eliminating the rust problem.

Course B would be a bit cheaper. The floor and windshield in both scenarios will be sealed to prevent the water that was the problem in the first place. So using the old pad would not present EXACTLY the same problems as before.

Course A is perhaps the best choice. If only for this one reason, if the OEM pad were to get wet again, it would be setting there WET, breeding rust. That pad took forever to dry out (if if ever did) and is in my mind inferior. The trick would be to replace it with a superior product that didn’t break the bank.


So the real decision tree is Dynamat or Stinger Road Kill or some other unnamed product. The prices are comparable on Google Shopping. Finally we come to the final and last real question,
Which product do I use?

Plato would be proud of us if he were here to jury this thought experiment. We eliminated the questions that gave us undesirable results and boiled it down (to mix a metaphor) to a win-win scenario. The guys restoring the D90 used Dynamat. Auto Image USA uses Stinger Road Kill. I think either will work exceedingly well.

Have any of you ever used any of these products? drop me a line and let me know what you think.

Thanks for reading and Happy Rovering.

Rust and Relaxation (Post #190) 7/28/2010

I’m almost ready to start on the repairs of the holes in the floor pan. I have read some websites that gave some direction for this kind of repair. I have also consulted with the Evil German Dude about the repairs. The general concepts have all been thoroughly hashed out.

I general idea is to cut out the holes. Then you make the patches to fit into the holes. The idea is to cut away the rust and to replace it with a patch that extends at least an inch over the edge. At this point you weld it and seal it.

It sounds very simple in concept. But the details and techniques are the devil, and thankfully, I have a legitimate evil source of assistance and believe this will go with little trouble.

We worked all this out recently by making a model of the project out of paper. Not a full sized 1993 Range Rover LWB, just a small concept model of the floor pan. I’m obsessed, not crazy.

The Evil German dude has a nifty tool that does the crimping and bending. It called an air punch flange tool.

It bends the metal and has a punch to pop holes in the metal for welds. EGD assures me this is “no big deal”.

The absolute hardest part will be getting the metal cut out. There are some vital systems below the floor in the areas that need to be cut out. This will require careful cutting. EGD says you can use the cutting wheel on an angle grinder to “score” the metal weakening it and then using a screwdriver or chisel complete the cut.

At the cost of an 16 Gauge Air Nibbler 25$(US) or a pair of Inline Air Shears 30$(US) perhaps we might consider another tool. I haven’t even asked JagGuy if he already owns either of these tools and would he be willing to lend them to me.

I took the passenger seat and electrics out of the Rover over the weekend in order to investigate the rust on the long seam. It was a birds nest of wires under there. With the Electronic Fuel Control computer removed it is easy to see how it could be move to the under side of the dash. The thought here is to get it even further away from water in case of a river fording. There were some plugs unplugged and I’m not sure what they were. The rust is bad but no holes yet. I will grind off the protective undercoat and clean as much rust off as possible and paint everything with Rustoleum and or acid etching primer.

I know at this stage I should not have visited the HarborFreight.com website as I see right there that a 90 amp Flux Wire Welder is on sale 149.99$(US) to an affordable 99.99$(US). That’s a hell of a deal. Too bad I don’t have any money right now.
90ampfluxwirewelder.jpg
Oh well. It’s not like this is the first tool I’ve wanted that I would only use once or twice (a year). If I had a “real shop” I’d be all over this deal.

Before all this lovely work is to begin though, I am going to take some R and R and visit a beach. If I had known the oil had not fowled the beaches in Mississippi I would have made for that coast post haste. First because I’ve never been there but the brochure looks nice. Secondly, I think it would be nice to help with the economy down there. Not that BP won’t be kicking in, but its not the same.

I heard an NPR report that said tourism was way down in the region, yet nothing was wrong with the flour white beaches. I also heard from an online poker buddy that the cost of shrimp and seafood was not bad and was only up just a bit in cost. Not that it matters to me, as I eat the seafood no matter what they charge for it.

Well, here’s to some rum and relaxation. More as it develops.

Thanks for reading and Happy Rovering. One more for the road…

Panel rust and rust in the cargo area (Post #189) 7/20/2010

Welcome back dear readers. Multiple post in one week? What is wrong with me?
As promised in yesterday’s post I said I’d come back with the pictures and descriptions of the rust in the rear of the Range Rover. So here it is.

I have always seen the rust bubbling up on the rear of the Range Rover. I vowed I’d get to it eventually. Eventually is here. If you see rust in one place, its a good idea to look for it in other places. That couldn’t be more true on a Range Rover Classic.

A note here about quality. I find it entirely unacceptable to produce an automobile that is as capable of off-road adventure like this…

…and then to fail to use materials that protect it from the elements. The rubber pads and bits and pieces that cause water to be trapped against metal and allow rust to take hold is unforgivable. If you intend to use your Land Rover for these kinds of activities, take it apart and coat the entire thing in some sort of water proof bed liner, like Line-X or Rhinoling. You’ll save yourself hours and hours of frustration later.

Back to the tailgate rusting. I decided, if there was rust on those parts, what on earth would I find if I pulled the carpets off. Well I’ll tell ya, more rust. Rust on a scale I did not expect to be quite honest. The rear tailgates of the Range Rover are not noted for their water tight seals.

What I found under the carpets disappointed me greatly. The good news is that as I posted yesterday, my best friend JagGuy said, “…that ain’t rust.” His observation was a comparison to the rust he finds on his Jaguars and M35 trucks. Compared to them I was mostly rust free! We know that is not the case.

The treatment for rust is to remove it with extreme prejudice by all means in your power. For that I bought an angle grinder and some aggressive wire wheels. On advice of the Evil German Dude I got a Makita from Home Depot. You can see the ear plugs in the lower portion of the picture and wearing more or less protective clothing is a must. As always, wearing goggles is key to not wearing an eye patch pirate style for the rest of your life. Patches used to cover your empty eye socket are albeit very cool and interesting conversation pieces do not help you gauge distance while driving.

The angle grinder has more than paid for itself in time already. After getting the discs for cutting and the wire wheel, I’m out about 75$(US) for this time saving device. The honest truth about it is, I don’t have the patience to use a wire brush vigorously enough to bare metal.

JagGuy suggested I get a brillo pad like wheel and just use that. I have a new air grinder and attempted to use the brillo pads. They worked pretty good but they were not getting me down to BARE METAL. Besides that I could only use the air tool for about 5 minutes and then I had to wait for my compressor to catch up. My Campbell Hausfeld air compressor is louder than its small size would indicate. When it is running you can’t hear The Clash belting out their motivating sounds. In defense of the other rust removal methods, you can’t hear the music with any of the power tools in operation. My air compressor was hot enough to melt the plastic covers when I retired it at the end of the first day.

As before there is a pre-picture and a post-picture of each area. Keep in mind I will hit everything one more time with the grinder for good measure before painting with acid etching primer. The flash lights up rust nicely and you can see the parts I missed in some of the pictures.

The question remains, which product to use for the rusted through parts? Waxoyl or copious amounts of Rustoleum? This is where you have to apply serious amounts of patience. The Rustoleum approach is using ridiculous amounts of paint, to the point it drips off the parts and then waiting at least a week for it to dry. Waxoyl is not a product I’ve used before so further research is required.

My plan is to remove as much as possible with tools and use acid etching primer. On those parts I can’t get tools on or paint directly on, are the parts that require the products listed above. There is a healthy amount of “how much of this is seriously necessary?” going on as well. It is a 17 year old Range Rover. As all cars do, it will rust. Eventually you have to get to the “this is silliness” level of labor and move on to “thats good enough”.

So from that you can conclude that I’m probably not going to do this job again. Anything short of me putting my foot on the floor board and it extending through the floor Flintstone’s style I’m most likely not going to be doing this level of project on the beloved Big White Bus. This vehicles function is to haul stuff. Primarily to haul me, to and from historical events and hopefully my family on a couple of camping trips this coming fall or spring. The mechanicals are far more important than the cosmetics. Momma likes her air conditioning if you know what I mean.

After all the primer is applied I have sourced a company in Norman to buy matching the white paint of my model year and they have a clever method of getting it on to the metal. More on that when I get to that stage.

Lets look at some rust!

Bed rear from the driver’s side to the passenger side.


I cut back the pitted and rusted metal parts on the gutter portion seen above. I will just paint this and clean up the edges a bit when I’m done. None of this is visible after the carpet is put back in.

Inside the cargo area.


Oxidation from the roof and the outer panels

The oxidation will be taken care of with a buffer and some Meguire’s. I also found some mildew under the rear bench on the bed. This is not surprising from the amount of wet gear we packed in the back during the second consecutive Fourth of July rain out at the Norman Day celebration. I have made it a habit to wipe everything down with paint thinner before continuing. So there will be no organisms living back there when I’m ready to paint.

The next post will get me totally caught up with the pictures and work I have done so far. I will show the work I’ve done on the tailgate, which you are all aware is a famously rusty bit of trouble for Range Rovers Classics. When Edd China was restoring the Range Rover for the Wheeler Dealer show he just replaced the entire tailgate in leiu of wasting the time to get the rust out and off.

You can catch the rest of the episode if you are interested by using the links on the right side of the YouTube page. This is from part 2. He (Mike) sources the tailgate and door from a breakers yard (how quaint) at 7:20 and replaces it in the ninth minute.

Well that gives you a ton of material to look at and roll around until the next post.

Thanks for reading and Happy Rovering.