Rust and the Art of Welding: Part Deux, Electric Boogaloo (Post #333) 4/23/2013

Here are the pictures of the install and the damage from the rust. I like the silver gray color. The front shocks went in with very little trouble.

The corrosion and abuse are evident on this shock.

Here’s what’s left of the rear shock mounts. Look closely at the one on the left in this picture. That is terrible. The threads being destroyed are evident in this picture too.

I’ve got lots of stuff coming to the hacienda de OkieRover. My buddy JagGuy is letting me swap him a lunch at Earl’s Bar-B-Que for a sand blasting cabinet. It needs new gloves so I ordered those today as well.

I also ordered two Tennier Industries Intermediate Cold Weather Sleeping Bags from Uncle Sam’s Retail Outlet (http://www.unclesamsretailoutlet.com/). Basically they are extra long -10 degree Fahrenheit sleeping bags and should be a nice addition to our camping kit.

More as the parts start arriving.

Thanks for reading, and Happy Rovering.

Rust and the Art of Welding (Post #332) 4/22/2013

Do you know what this part is?

Nope, it’s an upper shock mount on a Range Rover Classic. Wait, what? You guessed that right? Bully for you. This weekend I climbed under the Range Rover to swap out the old and tired Old Man Emu shocks I bought in 2001. Before it was over, I had ordered two of these.

I sourced a set of Terrafirma shocks from Atlantic British and they had been languishing in their boxes on my garage floor. It was time to replace them.

The front shocks on went without a hitch. However the rear shocks were quite the ordeal to remove. It required me using the electric impact wrench. (Brilliant tool, by the way. If  you don’t have one, get one.) The rust was terrible. I have pictures to share in another post.

The nuts were welded to the shafts with corrosion and after hitting them with the impact wrench they just spun on the shafts. I had always wondered why people buy shock mounts, they are made out of metal right? How pictures have you seen or witnessed in person a person breaking a shock mount on the trail? I used to think these things were from hard use. Apparently they are from “use”. The part is shipped from the factory unpainted and you know what that means. RUST.

This means that after just a few years the rust has begun and the structural integrity of that part is being compromised. After climbing around under the Range Rover this weekend I was really surprised at how much rust was forming on the parts I had painted with Marhyde Self-Etching Primer just a summer ago.

If I had the budget and time I would probably pull the major bits and have them all powder-coated. But that is not really practical nor affordable. If I were doing a FULL RESTORE it would be. But I’m not, so I’ll just chase the rust around, part by part.

Speaking of rust, I noticed the brake calipers on the rear are really nasty. I replaced the right rear brake caliper a year or two ago when I noticed my second caliper rebuild failed. Frustrated I sourced new brake calipers. I did not paint them at the time thinking if I needed to return them under warranty they would not take them back. That left them with what ever they were coated with to rust. Turns out they were coated with Pre-Rust ™. Yes, I just trademarked that product. I will show a picture of the right side rear caliper in a future post.

After pulling the wheel to remove the shock, it turns out, I will need to replace the left side brake caliper as well. It does not seem to be contacting the brake disc. I may or may not have mentioned already that I have a pop when I apply the brakes and I would bet 100$(US) that this caliper is sticking and the culprit.

So what started as a Difficulty Scale 1 shock replacement, is going to be four jobs:

  • Replace Upper Shock Mounts
  • Rust Abatement on Right Rear Brake Caliper
  • Rust Abatement on Left Rear Brake Caliper
  • Replace Left Rear Brake Caliper

I think I will pull the right rear caliper and take it to JagGuy’s shop this coming weekend and sand blast the rust off. Then everything will get two coats of primer and get slapped back on. I wonder if anyone makes a “portable sand blaster”? I’m guessing Google is going to get work out on that search string later today.

I missed SCARR this weekend (http://scarr.texasrovers.org/) I really wanted to go but the time was not available. And as it turned out, my Range Rover wasn’t ready either.

Happy Earth Day. I hope it was awesome for you. In honor, I cut down a tree Sunday which was encroaching on my swimming pool. Up with people! (there will be no singing).
Smoke’m if you’ve got’em.

Thanks for reading, and Happy Rovering.

Fat Mat Installation (Post #295) 6/8/2012

If you’ve been reading along like good little minions dis-interested onlookers followers you know about the rust issues in the front floor pan of the Range Rover. You also may have read that I was looking for sound deadening products in my post back in September 2010, Shhhh!  Last month I decided to do something about it….again. I purchased some Fat Mat sound deadener. I had two thoughts when installing it. It would…

  • Reduce heat and sound
  • Cover the floor pan
The reduction of heat and sound is a simple one. The Range Rover shipped new from the factory has a pad and carpet installed. If you pull that up you will find two small pads to reduce vibration and thus sound. The first thing you learn about the factory pad is IT IS A SPONGE. The second is it smells. And lastly it holds water and increases the rust chances for those metal surfaces.
The second to cover the floor pan, is simple, reduce water coming in contact with at least one side of the metal. I thought if I could coat the floor one more time and then cover it with this material I might minimize the rust. For certain, I won’t ever see rust there again as the Fat Mat material is very difficult to remove.
Once I began to prep the surface with grease and wax remover I noticed…the metal was already beginning to rust. Frustrated, I got the angle grinder out, too the surface down to bare metal. I then wiped the surfaces with the grease and wax remover and sprayed the surface with acid etching primer and after letting it set up. I covered the floor pan with pickup bed liner.
Over this I placed the Fat Mat.
All I can say about the install is follow the instructions. And put it on in small sheets. It would be impossible to cut the sheet correctly, peal the back, and get in place, and rolled down. As I type that I’m sure someone out there has done it or will do it. 
I was careful to cover the floor in such a way as if water DID get in there it would not seep through the Fat Mat and sit on the metal. I know the floor will rust again, I just don’t want to see it.

Over the Fat Mat I placed the OEM floor pad and then reinstalled the carpet AND all the plastic trim! Yes! The floor project is complete.
Once I had completed this I also installed a Fat Mat bonnet kit as well. This was to reduce the sound as well. I got an added bonus light is reflected from its surface down into the engine bay.

The worst part of the bonnet install was leaning over the engine bay to wipe the surfaces and to place the mat.
After everything was done I took her out for a road test. I wish I had taken readings so I could have compared them. Over all I think it is quieter. I can safely say the heat in the leg area has been significantly reduced.
Over all I’d give the Fat Mat project a 1 (one) on the OkieRover Difficulty Scale if you are just putting the stuff in sans rust abatement. I’d say this job was a 2 (two) if you have to grind any rust and spray any paint or surface covers.
Thanks for reading and Happy Rovering.

That’s not supposed to happen (Post #280) 1/4/2012

QUICK! Name three things you didn’t expect to happen when you got home today.
Was one of them “finding a puddle of brake fluid in your driveway?”
No?
Me neither.

This is what I came home to today.

You will remember in my last post that we had a brake rotor we thought was warped. On first inspection of it, I didn’t see anything like that but the evidence (sound and peddle surging) was there.

My son, Diet Mt. Drew, called today and asked to drive the Range Rover to lunch. He first asked, via text, if it was “safe” and “reliable” enough to drive. THE NERVE! He had to ask to drive my Range Rover because his Scion xB was in the shop. It was in the shop because he hit a curb in front of the Cleveland County Fairgrounds while traveling 40 MPH. Yes, a cell phone was involved. Yes he bent the lower “A” Frame, destroyed two rims…etc… but I digress.

In any event…he drove the Classic today. I did not expect the brake caliper to fail with him at the wheel, but apparently it did. He reported all this to his mother, the noted blogging mechanic in the family  “that he had severe braking issues” while driving her today.
Did anyone call me or notify me by text?

I’ve rebuilt that caliper at least once. So today I ordered a couple of re-manufactured brake calipers. They were half the price of new and free shipping, so I bought one for each side on the rear. No core return, so I can rebuild my old and tired ones again and have a spare….just in case Diet Mt. Drew drives to lunch again. (wink, wink)

If you remember the last major brake restore (I keep referring to these previous posts like you all are AVID readers) I swapped brake hoses and ground off all the rust (theoretically) and re-sprayed the brake calipers with some acid-etching primer. It was kind of silly because brake fluid is a paint solvent. But I felt obligated.

When I had them apart I noticed a lot of rust. Especially inside the caliper. I even took a picture of the rusty bleed screw, see below. The picture doesn’t show it very well but it was pitted with rust.

When I did that project, it was determined that I had a bad proportioning valve. I vaguely remember replacing it. But quite honestly if I hadn’t seen the picture labeled “Valve that failed” I wouldn’t have remember it.

It is likely that these old tattered calipers are past their prime. I’m a bit surprised with only 191,000 miles on them. (okay I’m not really all that surprised).

I’ll let you know how the replacements go and whether or not I’d recommend the company as a source for parts for your Range Rover.

Thanks for reading and Happy Rovering.

Ever had one of those a-ha moments? (Post #267) 10/2/2011

Saturday was a beautiful day in America’s heartland. I finished my homework early this week and my wife has a new book and bible study to prepare and the Oklahoma Sooners had a late start. All that meant I got some garage time. I went out to the garage and fired up the TV for some regional college football matchups.

I still have a lot of things in the garage from our last garage sale. So my plan was to get the garage organized. At present I couldn’t reach anything on my shelves and getting to the tool chest was only possible due to my training in the Marine Corps at avoiding booby traps.

I got to what I call the heavy tool shelves and noticed my small chain saw was down. I forgot that I loaned it to my neighbor and he reported that the chain was too dull to use. It turns out that all my chains are dull. They needed to be sharpened and I only know one place locally that does that. Dave’s Small Engine Repair in Noble, Oklahoma. My wife graduated from Noble High School. My best friend Master Guns Jason gets his chains sharpened there so…ROAD TRIP!

I grabbed the keys and was excited to get the Range Rover out on the road. It had been a while since I had driven her. I expected I would drive her or at least fire her up to charge the battery this weekend.

I grabbed the keys and my chains, jumped in and turned the key…rattle, rattle, rattle. I didn’t have enough battery to get her turned over. I pulled the Civic up and jumped her. Varooom.

I still have an air bubble in the cooling system so the low coolant light still comes on in cycles. The excessive heat this summer has cause the glue to fail on the rear view mirror. I also noticed the metallic rattle sound had gotten WORSE. Worse? how on earth could it get worse? I haven’t driven her in a month. I went about two blocks and decided I could drive no further with this sound it had to be found.

I originally thought it was either the trailer I was pulling or something in the exhaust. The pitch of the metal rattling sound is how you know what to look for. I thought for sure it was the muffler. I dropped down under the rear of the truck and looked around. And then I saw it.

I remembered the sound and thought perhaps it could be the mud guard? It sounded a little like the mud guard scraping sound from the front axle. So I looked at the axle hub area and sure enough there was the mud flap for the left rear dangling and dragging on the rim. Each time I hit a bump it would jump up and land on the rim causing a clanking.

I had horrific ideas of what might have gone wrong under there. Everything from I did something wrong on the bushing replacement project, to needing an entire new exhaust, to something I haven’t worked on yet. And in the end it turned out to be something silly simple. A couple of bolts I had improperly tightened on the last brake job project.

I thought I could fix it right there. I looked in the back and low and behold no tool bag. So I had to go back to the house and get the tool bag and exact a repair.

I got it tightened down and examined the scrape wound I got from reacting to a burn on the exhaust. Not too bad. I’ve had worse, much worse. I tossed the tool bag in the rear and as I was getting everything sorted I think I have an inadequate tool kit. More on that in a later entry.

I climbed behind the wheel and took off for Noble. Oh.my.gawd! It was like driving a new Rover! No rattling, no odd noises when I turned, no clangs when I hit the speed humps. It was great!

I got to the shoppe and standing there in the parking lot was the former State Senator Cal Hobson. Cal told me the shoppe was closed on weekends. That figures. I should have known better. He asked me if I knew where another place to get sharpening done was, I replied, “no but if you do I’ll follow you over there.” It turned out we were both out of luck for today.

I figure I’ll drop by there next week. I have a sharpening tool for chainsaws. But I have too many to mess with and thought perhaps I could learn something from them sharpening them. It seems when I sharpen I only get a couple of uses out of the saw before it is in effective and I’m wishing for a good sharp ax.

I’ll leave you with an A-Ha moment and thank you for reading and wish you Happy Rovering.

A Lazy Sunday (Post #258) 5/23/2011

Ah…a lazy Sunday in Oklahoma. Spring is upon us and each day we wonder if we will get some our famous southern plains weather. Saturday night Mrs. OkieRover and I enjoyed a steak, asparagus, and an adult beverage for me and watched as the thunderheads anvil out as they trekked across the state. I tried to capture a panoramic picture of the storm. Eh…I’m obviously not a photographer.

Panoramic due east to SSE

Sunset reflecting on the clouds

Fortunately for us they stayed to the south and east of us. We had 5 inches of rain this week, more on that later. We got more on Sunday tonight but again they are east and south of us.

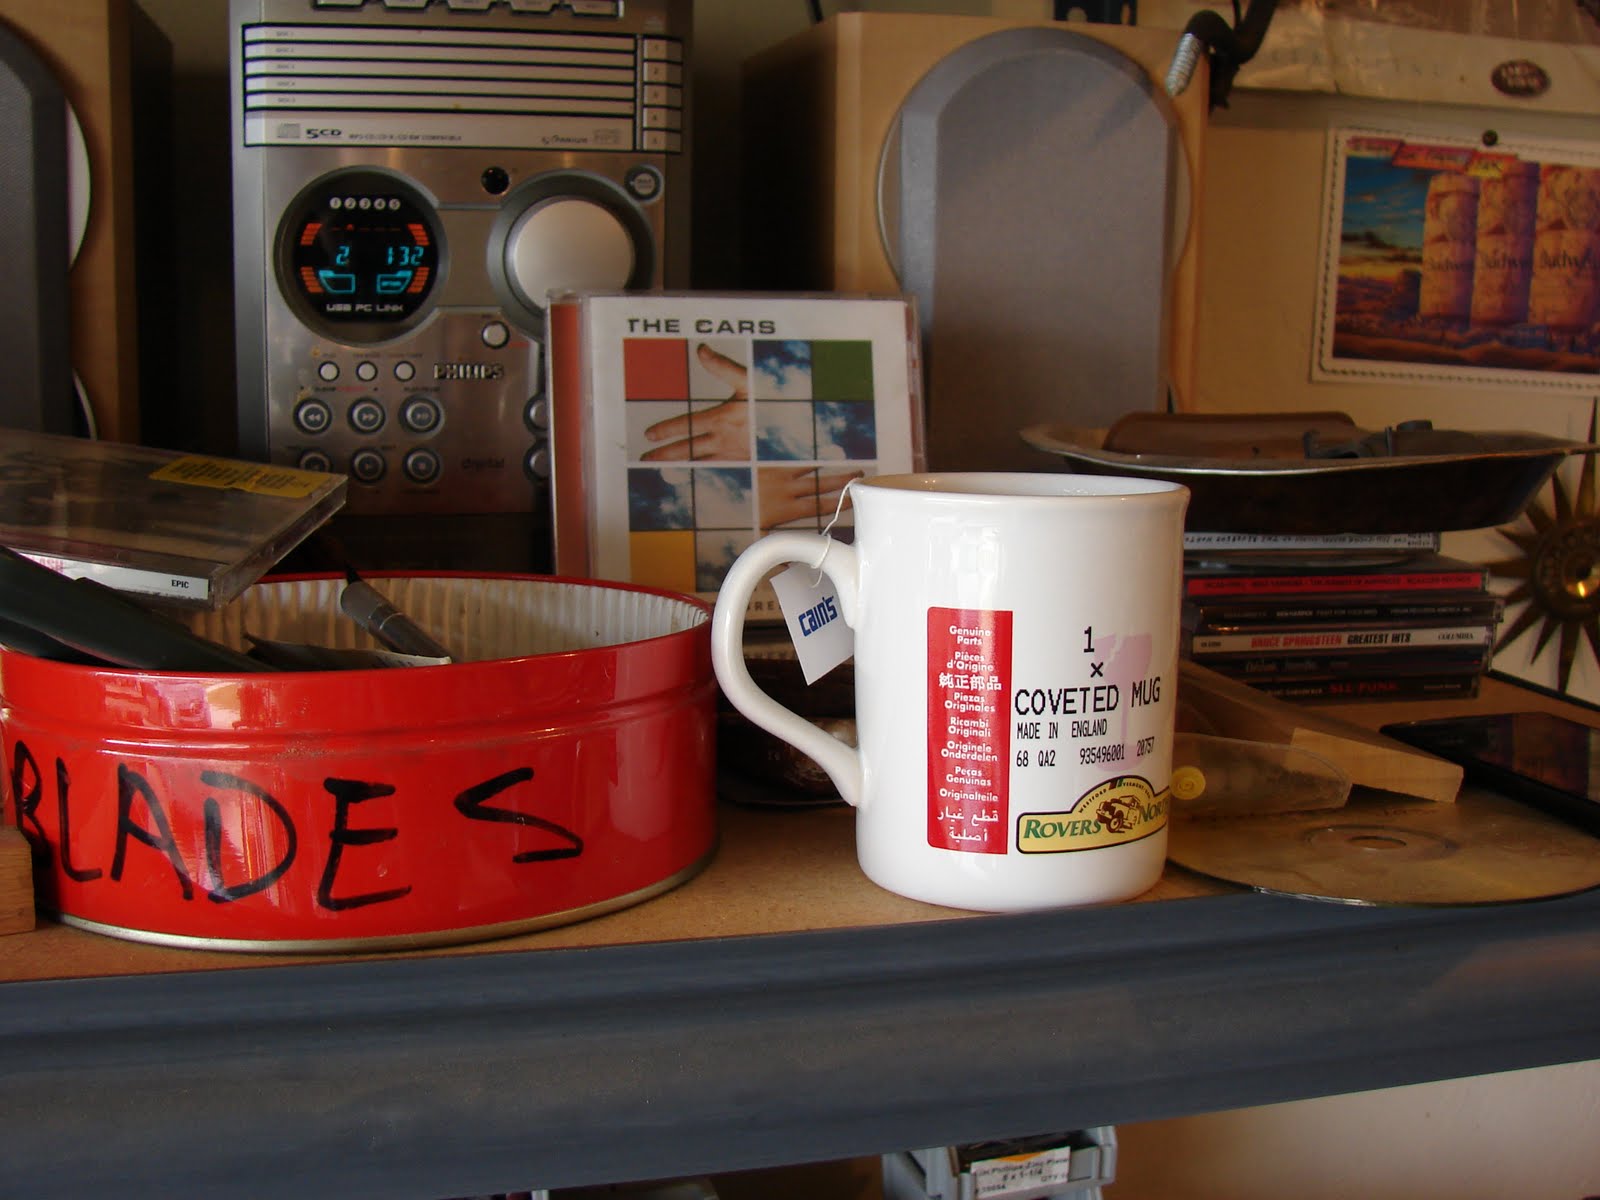
Sunday morning I played hookie from church and wanted to work on my Range Rover. I went out to the garage with a cup of tea in my Rover’s North Coveted Mug, 1 each, and The Cars Greatest Hits.

First, the garage is a WRECK. Several factors have contributed to this fact. We bought a new couch and loveseat and that meant that the old couch went to the garage.

Also the city of Norman gave away rain barrels to the first 90 people to show up at Forest Lumber. Forest Lumber is my new hardware store. I won’t need to go all the way to Lowe’s now. That place was awesome. My pal Larry and I took the Range Rover down there and hauled the barrels back. When we were looking around Forest Lumber we were discussing America’s First Sergeant’s Zombie Apocalypse Preparation Post. We found a wrecking bar that would make a great zombie deterrent weapon. You can see how impressive it is. It has an awesome name too, the FuBar III. FUBAR is a familiar acronym to all Marines. After a few applications of this tool most things it touches will be FUBAR.

Also currently located in the garage is a TV, a dead TV. It previously graced the entertainment center until it unceremoniously fell due to the affects of gravity on a shelf. I’m not happy. The budget took a big hit this week. The rest is the normal condition of the garage…cluttered.

Sunday’s Range Rover project was the sun roof. As you may have read, it was working when I went to Fort Washita. When I came home from Fort Washita, it wasn’t. So I started by taking the headliner out. I’ve taken the headliner out so many times it takes only a few minutes using a powered drill with Phillip’s bit.

Once out I started by unbolting the sunroof. The sunroof system is kinda heavy so if you can get help you should. Again I’ve done this a few times so it’s no biggy. You can use the head rests as supports and leave the front bolts that hold the motor connected to the roof structure as one point and the head rests as the other.

Once I got it lowered I started trying to figure out what was causing the problem. I futzed with it for at least an hour. Once I got it working I bolted it back up only to find it was not working again. When you pressed the button to retract it would stop as if something was blocking it.

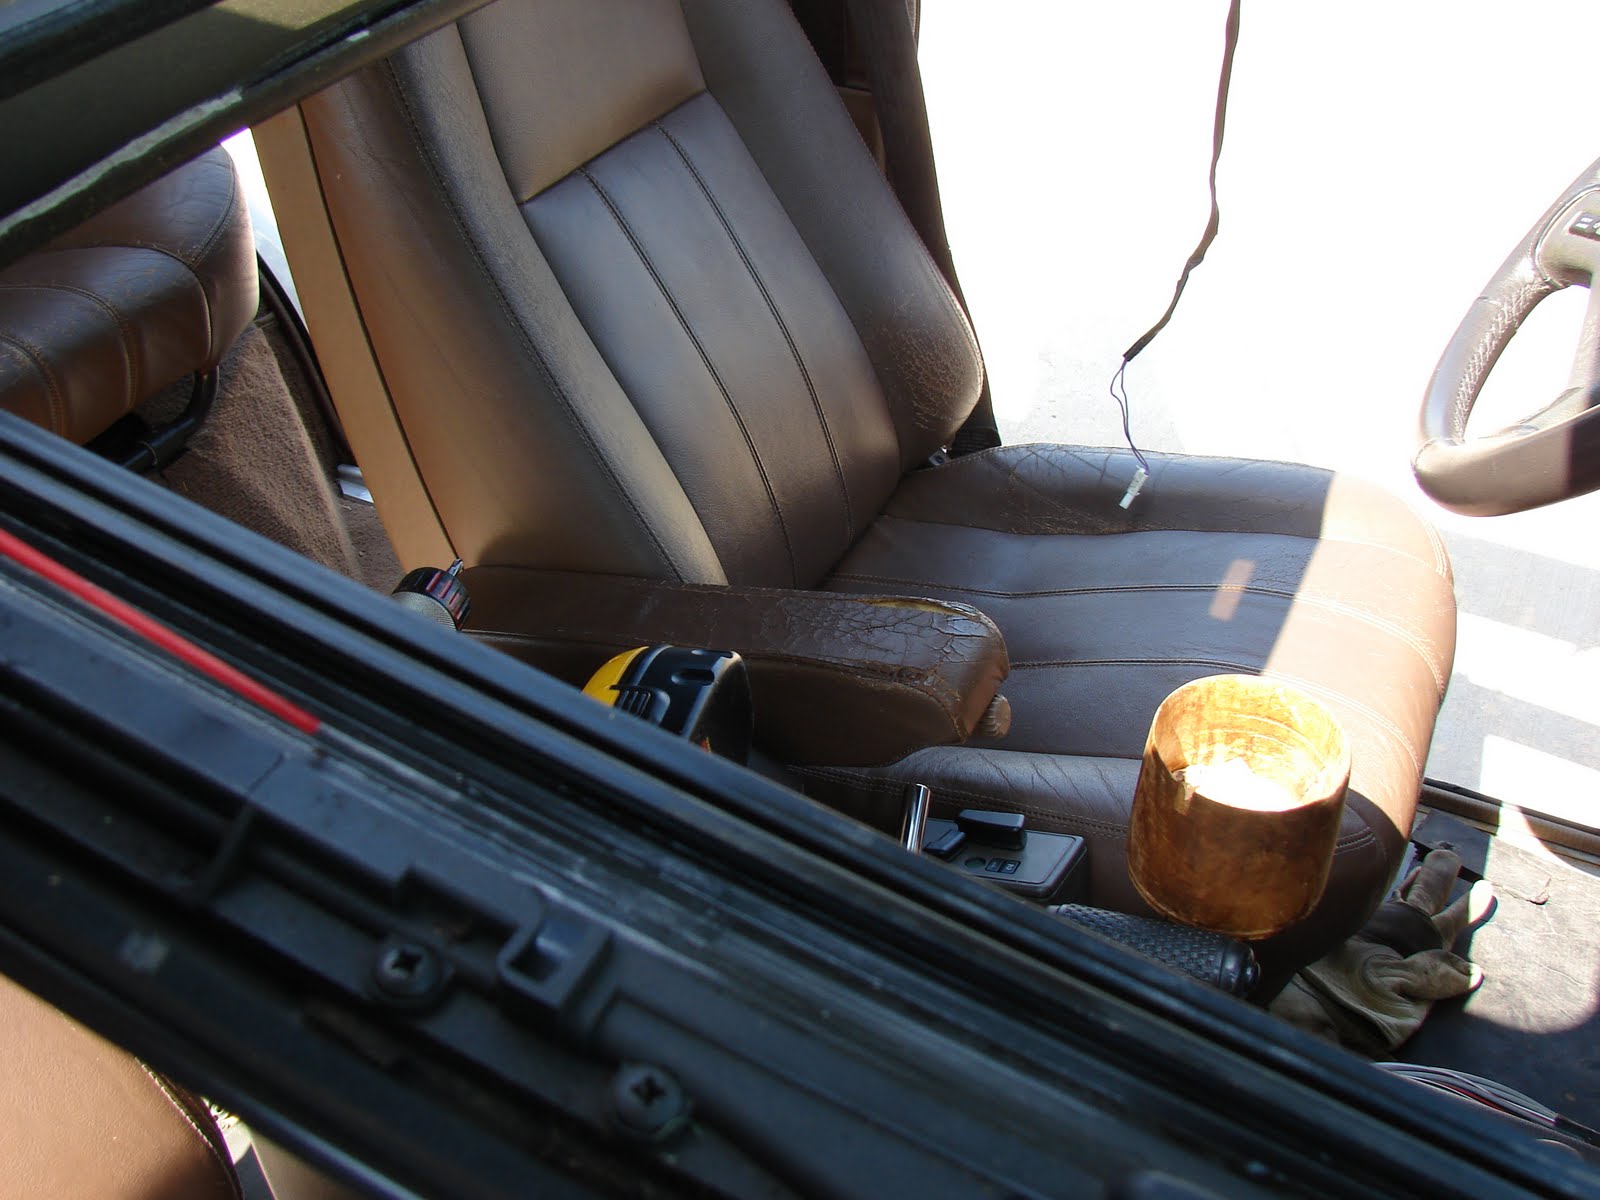
I could not figure it out. Finally I decided I should lube up the tracks. They looked pretty dry. So off to the chemical shelf and out with the silicone spray lube. I hosed it down and the window moved better but not great.

You can see in the above photo the red spray hose, it is important to control the spray as not to hose the interior with silicone lube. After a couple of trial refits and more and more silicone spray the sunroof works. It still has a little catch but it slides back and forth on its own. In the process I ran the battery down and had to jump the Range Rover with the Honda Civic. It was shameful but necessary.

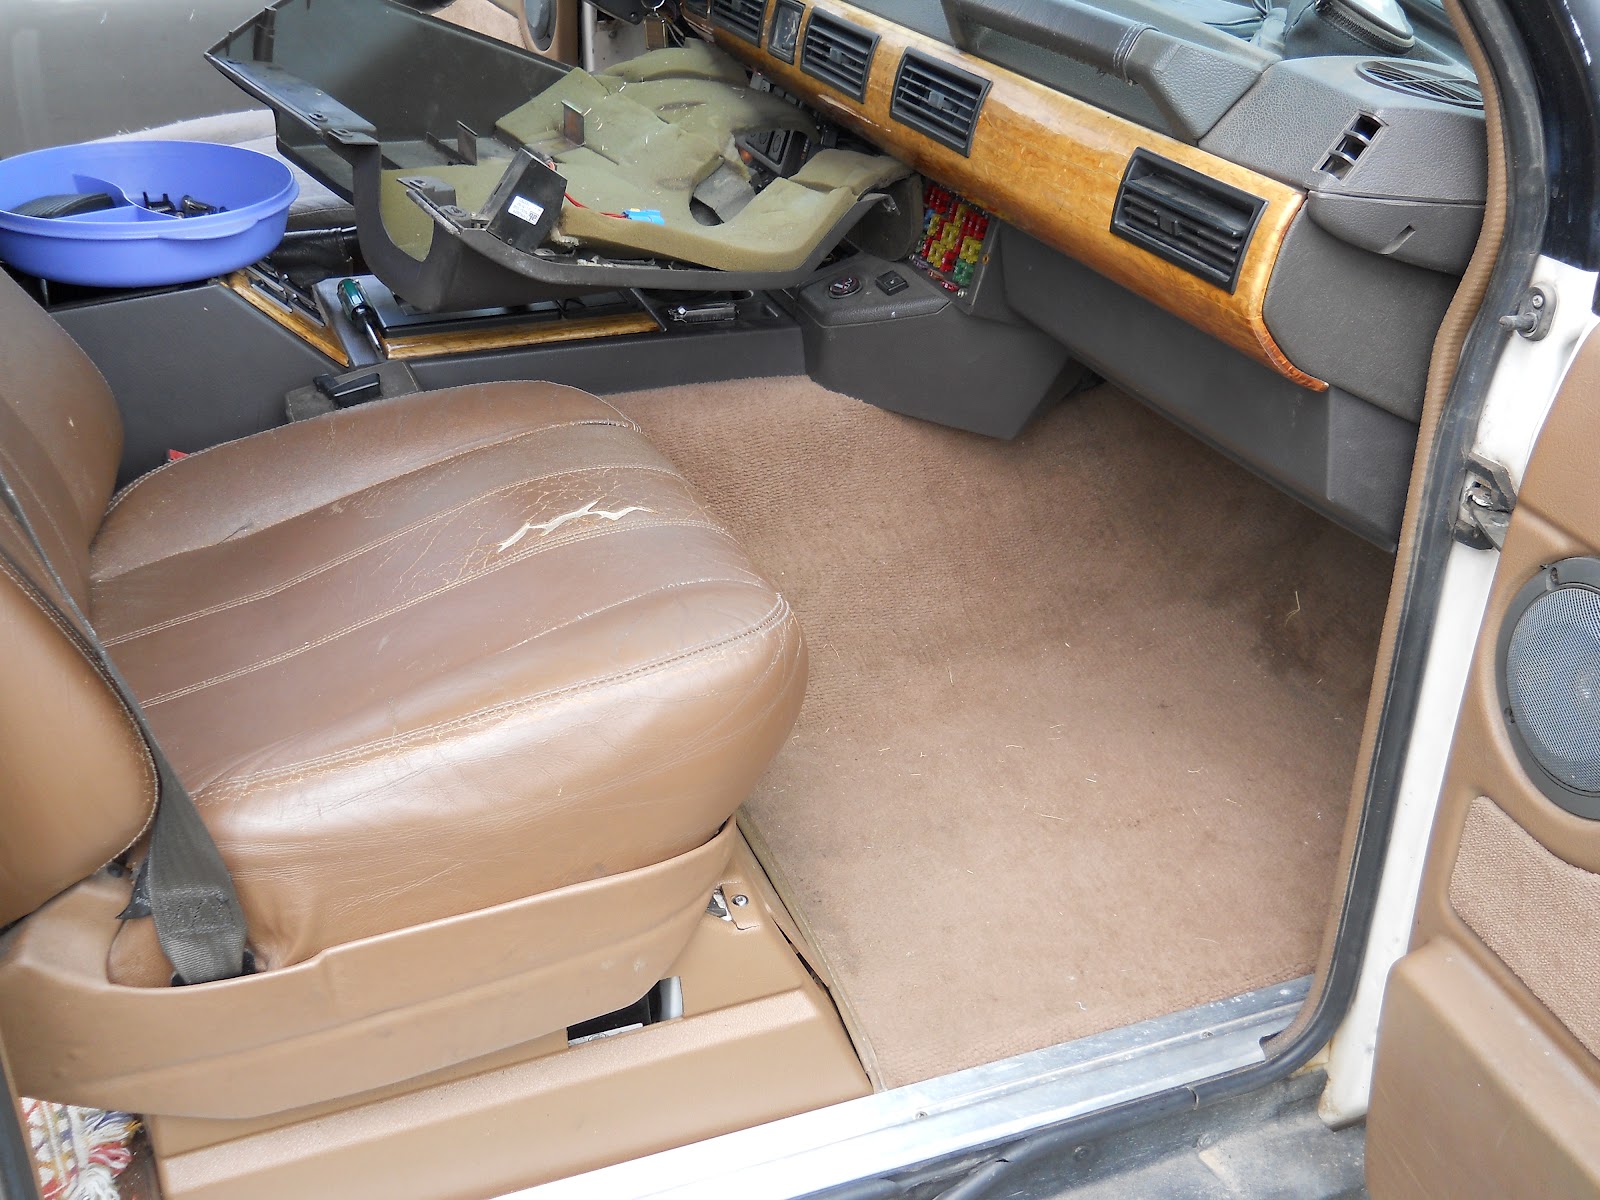
Now, back to the rain. We had five inches of rain over night on Thursday and Friday this week. That is enough rain to tell me if there is a water problem with the windshield. There is. The pads were wet…as usual. I pulled them out to dry. I will probably throw them out. The windshield is obviously the problem. I’m not sure if it is the seal or rust.

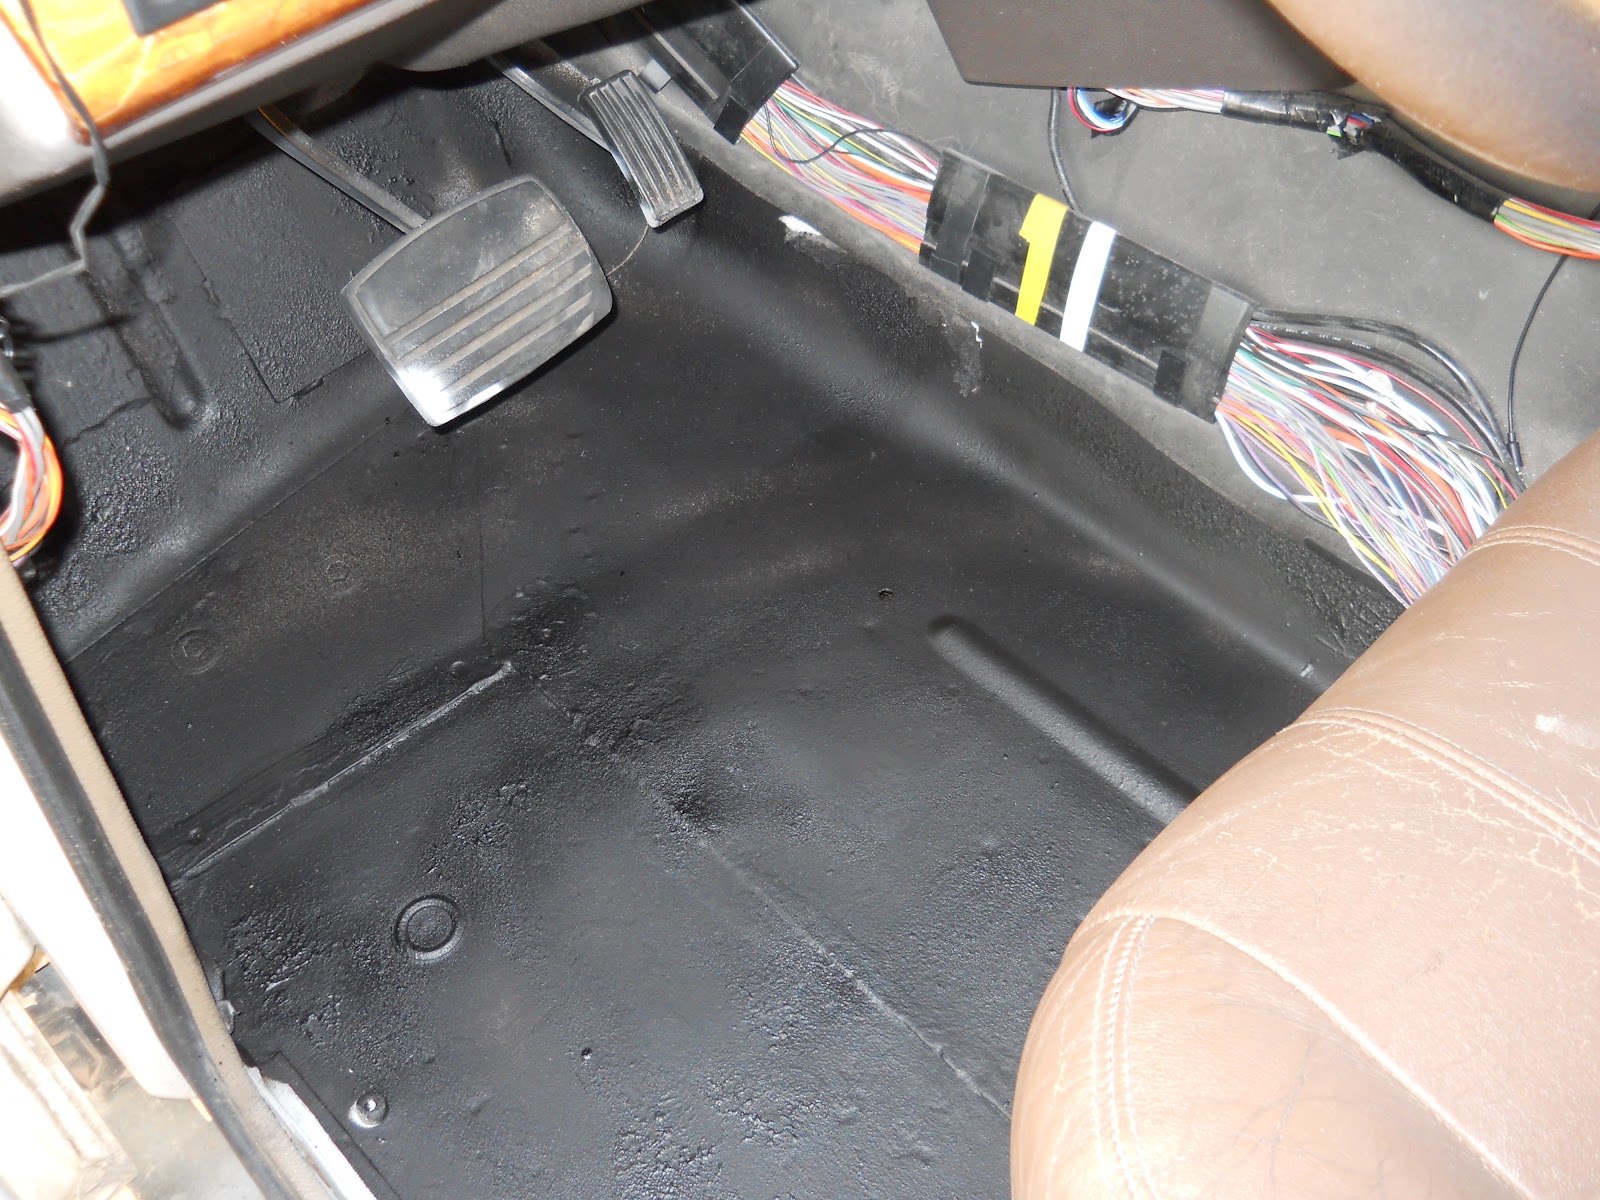
I’m going to start with the windshield seal. The good folks at Binswanger Glass told me I should test it with a garden hose. It wasn’t necessary as I didn’t drive the Range Rover in the rain so it had to be from the seal. With the pads up, the rust is back on the floor pans.

Its probably surface rust or staining from the bottom of the pads. Either way it is annoying. Considering the trouble I went through to remove the rust and cover the panels with layers and layers of paint. I’m now thinking bedlining spray and more sound deadening material like I originally planned.

I buttoned up the Range Rover and went on to the other duties requiring my attention. With that much rain the grass went nuts. With the drought we’ve had this year, I’ve only had the mower out twice. I think we are still behind overall for the year on rainfall, but the grass hasn’t noticed.

I tried to organize the hardware and parts shelves but I ran out of steam. I need a budget infusion to do anything else on the Range Rover this year. The first money I’m going to use will be to sort out the windshield seal issue. I can’t move forward on the interior until that is all sorted out.

Thanks for reading and Happy Rovering.