B Pillar Post Repair Part 1 (Post #646) 3/3/2024

In this video I start the repairs on the B Pillar. As you have seen it rusted out. I was able to find a replacement part from YRM. It cost the equivalent to a really nice bottle of rum to ship it over from England. The shipping was as much as the part. Such is the world of British vehicles and getting parts from the motherland I guess.

This repair involved removing the passenger side rear door. The workshop manual was very helpful. I actually read the instructions. Three C clips and some liquid persuasion (Liquid Wrench).

I got the bottom of the post cut off. I should have scribed a straight line and cut along it. But I’m a moron. I got to use my new air chisel, that was kinda cool. That coupled with my new air compressor worked quite well.

I got the bottom of the B pillar off and made a template for the sill where I had to patch it. The really terrible lines I cut made the repair patch pretty hard to work with. A better way would have been to make a template, place the template on the sill and cut around it. Live and learn I guess.

But I finally got it made. I think it looks pretty good. I mean, I’m not a professional auto body guy. I put primer on everything. The entire sill should probably be sprayed with bedliner/stonechip/whatever. There will be rock sliders built and installed so I’m not worried about the structural quality of my welds. The entire weight of the sill will be distributed across the sill in the end.

Off camera I also cleaned off some of the rubberized underbody and wire wheeled a bunch of rust off. The welds of the floor repair the Evil German and I completed a while back were rusting. I got the rust removed and got primer on it. It’s now ready for some stonechip seal/bedliner stuff.

Also off camera I found that the floor repair we fixed has completely failed. The rust was really bad. I have another repair to sort out now. This one was a gut punch because I was hoping to wrap up all the rust except for the rear floor panel. Heavy sigh…..

As my son said, “Rut row Shaggy.”

If you were wondering why I jumped from Post #642 to #645, I posted two videos without accompanying blog posts. You can check them out here on these two links.

OKC Overland Meetup February 2024 (Post #643) 2/18/2024

More Rust (Short) (Post #644) 2/19/2024 (which you see above)

Thanks for reading and Happy Rovering

https://youtu.be/ElkExlyY-dA

Mmmm templates…..

As always, Like and Subscribe to the blog and the videos.

Refurbishing / Replacing the Subwoofer (Post #633) 11/26/2023

Subwoofer work

Ever wonder what is inside of that gigantic custom-fit subwoofer box in the back of your Range Rover Classic…well wonder no more. I had to pull all the parts of the sound system out of the Big White Bus to investigate my rust issues.

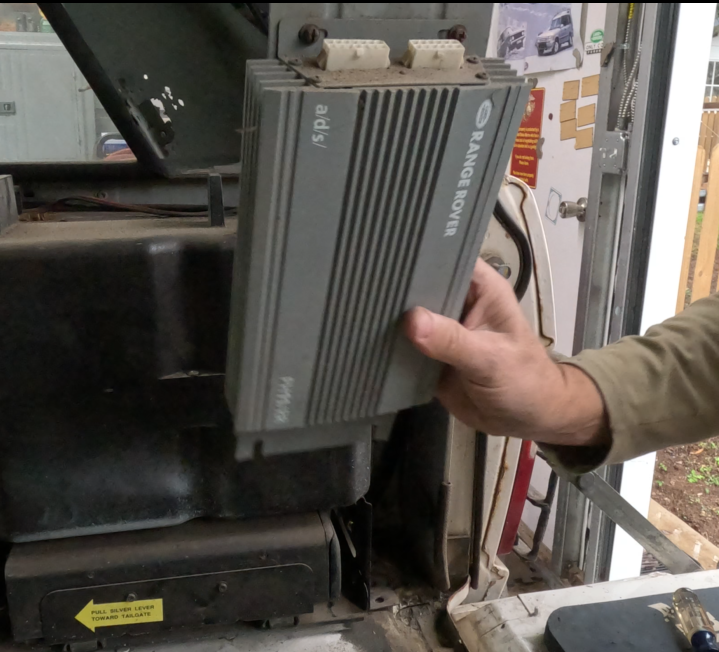
It takes a few bolts to get it out but everything is easy-ish to get to and you don’t need any special tools. Take the amplifier off the subwoofer box. Then tackle all the bolts. Once the subwoofer is out you can get to the antique CD changer. Actually in 1993 a six disc CD changer was straight up gangster. My CD changer worked for a few years. It then got a little buggy. You could get it to work if you slid it out and slammed it back in. Most of the time it started to be available at the head unit after that.

It all has to come out. I have a new head unit. I have new speakers. I don’t know if the amplifier still works. I will have to sit down at some point and try to figure out all the plugs and see if the amplifier will be part of the equation. Having a working subwoofer would be a nice addition.

Once the subwoofer is out it takes 10 screws and a little gentle encouraging and the box will come apart. It’s a relatively simple setup. There is a dual cone speaker inside and that’s it. Mine as you will see in the video is toast. the cone has disintegrated. It is at least 30 years old probably closer to 33 considering assembly line technology of the day.

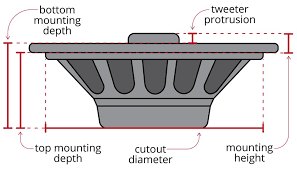
So the speaker will need to be replaced. In the video I speculate about the size but it turns out to be:

  • Cutout Diameter 6.5 inches
  • Top Depth mounting 3 inches
  • Bottom Depth Mounting 3.25
speaker measuring graphic

There are a LOT of speakers to choose from online. I went to Crutchfield.com. They don’t sponsor me, I wish they did, but they don’t. They have great customer service and the spec’s for everything are easy to find on their site.

I found a speaker that looks like it will fit.

That’s not a lot of money and 4 people think it’s pretty awesome. Mounting that is still a question, but I’m not worried. I will figure it out if that is the direction I go.

There is some debate going on in my head about replacing the old one with a NEW subwoofer. I found a Kenwood on Crutchfield that was not all that expensive.

Kenwood Excelon
ribbed polypropylene cone, sounds naughty….

It’s pretty small too. Just a little under 18x12x6 inches. I’m certain I’d have to cover the speaker cause it would almost certainly get damaged if I didn’t. I am confident it would fit in the space. But the real question outside of would it be better is…. am I really saving enough space to matter? I’m not sure I would gain anything. The space would have to be VERY creatively designed to take advantage of a few inches more here or there.

This gives us the cheaper option of just buying the speaker and figuring out how to wire it to the old AMP and the new head unit. Another plus of this operation was the elimination of the CD player gives me 12 volt switched power line back in that corner. That might come in handy, who knows.

I like tunes as much as the next guy. I even have a playlist named, “Can’t Be Too Loud”. It’s got some songs that you turn up until your ears bleed.

  • Van Halen’s Eruption
  • AC/DC Back In Black
  • Living Colour’s Cult of Personality
  • Beastie Boys Sabotage
  • Black Sabbath’s Iron Man
  • Wagner’s Die Walküre (Ride of the Valkyrie)
  • Carl Orff’s O Fortuna from Carmina Burana

There are more, but you get the picture…you probably have a list of your own. Whenever I hear these songs I turn them up to maximum volume.

Mostly today…I listen to audio books. Sooooo many audio books. It’s not uncommon for me to just drive, no music, just the window down and the sound of the engine and the tires on the road. That recharges my batteries almost as just sitting in the woods next to a fire.

There is a lot left to do to get the sound system installed. I’ve got to sort out the plugs and get everything wired up. The dash is still not installed. There is an order to putting the BWB back together…and the windshield needs to be first. I’m almost certain there is water leaking in and the last thing I want is to get his all put back together and still having water coming in.

That’s it for this week. As soon as I make a decision I’ll post it up and when I starting putting the sound system together.

Your sponsorship on Patreon would be appreciated if that is in your budget. Otherwise LIKE and SUBSCRIBE to the YouTube channel. Leave me a comment…I love talking to people about Land Rovers.

Thanks for reading and Happy Rovering.

Passenger Side Rear Wheel Well Rust – Part 1 (Post #631) 11/14/2023

rats

Now that I have the Range Rover flopped in the shoppe I can start on the rust abatement. But first, I thought I should get some oil and some other fluids and do some fluid refreshing. That was a great idea if I had done that BEFORE I started the Big White Bus. But the fact I was doing it AFTER I ran the engine, -2 points.

I loaded up one 5 gallon barrel of oil and headed to my favorite O’Reilly’s. When I got out of the truck my folly was apparent. I had successfully done an Exxon Valdez [Wikipedia] imitation. The metal barrel had rusted through the bottom and dropped 5 gallons of used oil all over the back of my F-150 and on to their Prince William Sound parking lot. I ran in and bought two bags of kitty litter/oil soaker stuff and with the help of one of the guys we spread all that all over their parking lot. I haven’t been that embarrassed in a long time.

I finished up the clean up of the back of my F-150 when I got home and started getting the rear passenger wheel off to start the investigation. The video shows I had a mostly optimistic view when I started scraping the rust. In comparison…the passenger side is no where near as bad as the drivers side wheel well. The rear window is another issue entirely but let me attack these one at a time.

I’ve got two holes SO FAR. I still have to get the wire wheel out and take the rubber back to metal where there are brown spots. The worst looking SO FAR is the bottom of the C Pillar is rusted out. The reason for the rust there is the sunroof drain hose exits there and the crappy plastic grommet did not keep water out. And it is entirely likely that there was nothing inside the C Pillar that would pass for paint. So that was an obvious place for rust.

I’m going to replace the sunroof drain tubing and possibly fit a “Hose Barb Thru-Bulk Head Hex Union 90 Degree L Right Angle Elbow Barbed Brass Fitting with Flat Washer Gasket Water/Fuel/Air” fitting. Something like this….

I’ll add a rubber washer to assist in keeping the water out. I’ve got to measure the tubing and get the right one ordered. They can be found on Amazon.com. Not sure if they are using ID (inside diameter) or OD (outside diameter) to determine if I get 3/8″ or 1/2″.

This may be complete folly but what the hell right? If it works, I’m a genius. If it doesn’t work, I’m still a genius, just a terribly misguided one. Half of me says extend the drain line to behind the mudflap. It would not be that hard to add a little more distance to the hose and NOT put it back in the same poorly designed place. I mean seriously, lots of water and ice and mud and road salt and roadkill chunks (mostly opossums and armadillos and skunks) and all kinds of crap fly off the tires at extreme tangential velocity [Study.com]. The fact that plastic gromet is even able to not be dislodge is a miracle. So…let’s try to make it better!

The headline came out also so I could get the sunroof drain. It had to come out anyway, because it needed to be replaced…again. This will be the third and final. If this is needed again while I own this rig, it will be painted and forgotten.

More next week. Like and subscribe my Youtube channel. Send me a comment too…I love to converse with you.

Thanks for reading and Happy Rovering.

patreon.com/okierover

Bumper Project Part 1 (Post #599) 9/7/2022

Part 1 of the Bumper Project

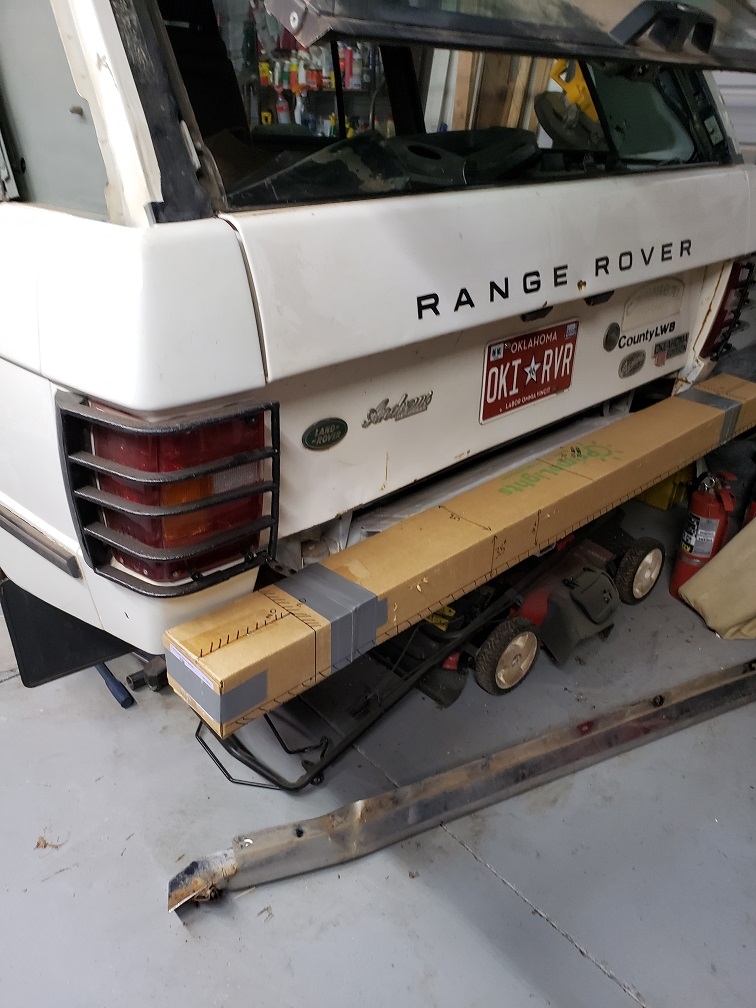
Part 1 of the Bumper Project. I mocked up a new bumper using cardboard. It will likely be 5×3 inch tube with rear fender protection. I got the idea from the PFab Youtube channel. You can check out his video in a link on mine.

If you remember the old bumper was damaged by an inattentive driver of a Hyundai reaching over to pick up a jar of spaghetti that had rolled off her seat [Okierover.com].

I’ll post another video when I get closer to pulling the trigger on this project. List of needs:

  • Welder
  • Plasma Cutter
  • Steel

I don’t have any of those things at the moment. I’ll have at least as much invested in those items as a new bumper from RTE would cost WITHOUT the tire carrier and jerry can holder. But I’ll have a welder at the minimum and maybe even a plasma cutter when I’m done.

If I hit the lottery, I’ll still buy the welder and plasma cutter, but I’d probably consider buy a RTE bumper built to spec.

Thanks for reading/watching and Happy Rovering.

Current Progress (Post #594) 12/14/2021

In the latest installment, I chat about my current progress on getting the Big White Bus back on the road. I had to take a week off for family coming in for the holiday, and Mrs. Okierover and I both got bronchitis that decided to hang on for 3 weeks (you can hear the Stevie Nicks in my voice). That slowed work on the to-do list. This weekend I’ll probably need the new heater in the shop as it should start getting colder here on the Southern Plains.

In the video, I show the closed cell neoprene installed. I talk about a small missed part on the heater box install. Also talk about getting a new seat controller ECU and getting the seats out. A few words about adjusting the door handle for the driver’s side rear door.

Then instead of shutting up, I drone on more about my desire to have a new bumper, a storage box/bed, and installing D-rings.

I know the video work needs improvement and as I torture you as you watch them make more and more they should improve. When I’m a big interwebs video star you can say, “I remember when that bum first got started. Man those early videos sucked.”

Your feedback is always appreciated.

Thanks for reading/watching, click and subscribe, and Happy Rovering.

Video Blog: Panhard Rod Bushings (Post #573) 6/24/2017

Professional driver, do not try this at home.

I discuss panhard rod bushing failure and deathwobble.

I demonstrate how knackered my panhard rod bushings were.

Removing the failed bushing requires you to use a “punch”, I used a socket which is slightly small in diameter than the bushing, to press the failed bushing out. It is similar to the process of pressing them in except when you press in new ones you used a socket that is larger in diameter than the bushing.

I demonstrate how to press in new bushings. Find the beveled side of the panhard rod and the bushings will go in easier than the side that is not beveled. I used a vise to get the bushing started. This helps with getting the bushing “square” in the hole before you apply the press to the bushing.

Getting the tool lined up correctly is 90% of the battle.

Victory is mine. The bushing is pressed in. You do this for both sides.

I had trouble with the width of the bushing sleeve and it require a bit of grinding to get it mounted. I used a bench mounted grinder. Just take off a little of the material and try to fit. If you need more, grind off a little more then refit. I went to the bench grinder four times to get both sides right before mounting with the bolts.

Thanks for watching and Happy Rovering.