Installing an Exhaust Fan in My Shop (Post #745) 8/12/2026

OMG! If you haven’t noticed, it is hot outside. Here in the Southern Plains (never refer to Oklahoma as “the Midwest”, never). Oklahoma City has recorded about 15 to 16 days of 100-degree temperatures so far this summer in 2026, which is above the typical annual average of 12 to 13 days. We have at least 6 more 100-degree days coming. If your country has never landed a man on the moon that temperature is 37.7 Celsius.

With those kinds of temperatures my metal shop building with the lovely radiant heat effect temps often climb above 120°F (48°C). That’s warm. And for a man of my age that is considered “dangerous”. When you start looking at the wet bulb numbers you can easily quantify your chances of a heat related injury.

85-88Working or exercising in direct sunlight will stress your body after 30 minutes.Take at least 30 minutes of breaks each hour if working or exercising in direct sunlight
88-90Working or exercising in direct sunlight will stress your body after 20 minutes.Take at least 40 minutes of breaks each hour if working or exercising in direct sunlight
>90Working or exercising in direct sunlight will stress your body after 15 minutes.Take at least 45 minutes of breaks each hour if working or exercising in direct sunlight

So we have had wet bulb numbers above 85 all of August. Brutal.

So I’m looking at options to adjust the temperature of the shop down to a “reasonable” temp. That will take at least two major items to help.

Exhaust Fan

This weekend I put a 2200 CFM exhaust fan in. Shops my size should have at least a 1500 CFM fan. So I grabbed a Chinese made fan from Vevor. I ordered one with a “control module”. It was broken when it arrived. I had to repair it. Then I tested it. The temp rheostat did not seem to work as I would have expected. Set on 100°F the fan didn’t come on. So I set it to the lowest temp 32°F the fan came on about 60% speed. That is not going to be acceptable.

So I’m going to wire an old fashioned on off switch to a plug. Plug the fan in and when needed I will turn it on the day before. Simple, efficient.

The second thing in the research, planning, I need some money to buy stage is Prodex.

I’m looking at something like $1,000.00(US) to get roughly 1,410 square foot of Prodex Total 5m material and the ancillary materials to mount it to the building frames.

The testimonials and YouTube video promise I will see some significant temp reductions. And in the winter I’ll retain heat.

That’s what were up to. That’s where we are headed.

Thanks for reading, like and subscribe, and support my work by contributing on Patreon.

May the wind take your troubles away….
Shoppe Clean-Up and Mower Repair (Post #617) July 31, 2023

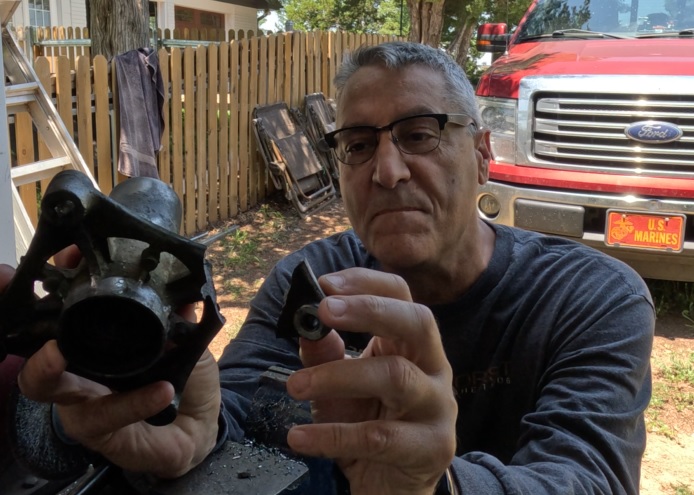
Broken Mower Part

No Land Rover content this week. I started the weekend trying to get the chores done first. Mowing the grass which grows at a ridiculous rate due the the wet July we’ve had. I’m cutting grass every week now.

I got on the mower and got my book on tape going [Extreme Measures by Vince Flynn the eleventh book in the series]. I kept hearing some odd noises, vibrating parts, and the engine was running like crap. Just last week I was evaluating how many more summers I might get from this mower while I was patching the holes in the tires with plugs.

I have been impressed at how trouble free this mower (Husqvarna 1842) had been with this being the sixth summer. I’ve only had one other serious repair. It was also a mandrel. I have also replaced one battery and before the summer is up, I really should replace all the tires.

After an inspection I saw the shaft on the mandrel wiggling like crazy. The upper bearing failed on the mandrel. So it wasn’t going to be grass cutting for the weekend, it would be mower repair. I looked the part up and found it had a John Deere part cross referenced. I went down to P&K Tractor on Highway 9. The parts guy was SUPER helpful. He looked up the part on several sites and found a part number at O’Reilly’s. Turns out in his words this was the most common bearing in the world. I was surprised how many different parts numbers were associated with it. I ran down to O’Reilly’s grabbed two.

The bolts (steel) were really stuck in the mandrel housing (cast aluminum). You don’t have to be a chemist to know this is a recipe for disaster. And that’s exactly what happened.

I wound up having to attempt to drill and easy-out what was left of the bolts. Broke two drill bits and eventually the mandrel. Four hours lost. I’ve ordered a replacement, it comes in this week. So I spent the rest of the day cleaning and organizing the shoppe.

I’m going to visit an old Marine friend of mine this week. Jeff was one of my closest friends in the Marine Corps. We went to boot camp together and artillery school. I haven’t seen or heard from him since perhaps 1988. Gonna be great catching up. RovErica’s kids are coming to stay with us this week too. With all this happening I don’t think there will be any video next week. But we’ll see.

Jeff and Bear
Heavy sigh.

Thanks for reading and Happy Rovering.

Fender Repair Part 1, Welding Patches (Post #616) July 25, 2023

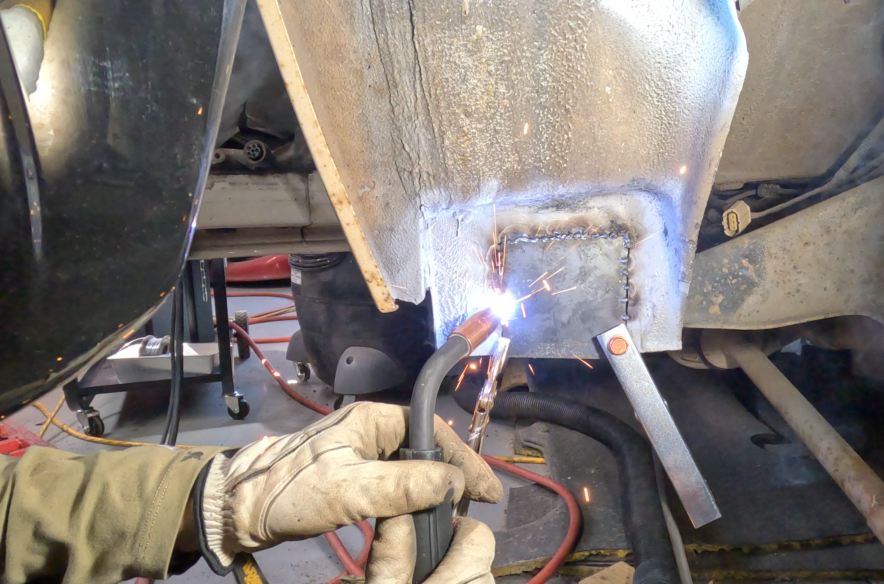
Welding a patch for the body mount

I finally broke down and welded something on my Range Rover. While I will admit freely, I am NOT a welder, but I did enjoy getting the patches welded on. I took a few hours the day before this video was shot to “practice” welding with some scraps I had cut off the Big White Bus.

One of the difficulties is the metal on the Range Rover and the metal I am patching with are different thicknesses. I believe the OEM body panels are 18 gauge whereas my patching material is 16 gauge. I watched a YouTube video where a young man from Weld.com showed how he setup his welder to weld different thicknesses. It’s pretty good stuff and I recommend it if you are still wondering how to setup your welder and what settings you might want to start with. His settings for 18 and 16 weren’t different so I just need to find the same settings he suggested and convert those values to the letter equivalent on my Lincoln MIG Pro 180.

I also watched a fellow from Make It Kustom that has some great tips on welding and patch making. Good stuff there too. This guy is obviously an artist and I imagine has, “done this a time or two.”

In my video there is a lot of grinding and sparks flying and hopefully some good tips to help you weld your patches on your Range Rover Classic. I sped a lot of it up so I’m not consuming a lot of your life watching my low grade videos.

The camera overheated at the end for the second time that day. The temp inside the shoppe was above 110°F (which is 43.3°C for you metric system types). Yeah that’s pretty hot for this old man. I’m seriously going to investigate getting an exhaust fan installed to pull the hot air out.

Overall I’m pretty excited that I can weld stuff. I did fix a yard swing that one of our trees landed on and crushed. I’m looking forward to finishing the welding on the rust and turn my attention to making stuff like a 270 degree awning, a rear bumper, and lots of other stuff.

Thanks for reading and Happy Rovering