The sun is very hard on your plastic parts. Oklahoma City (the nearest metropolis) receives an average of 235 days of sunlight every year. That means about 68% of the time the sun is shining down on our British rust buckets providing something like 3,089 hours of sun in an average year. And all that sun with its ultraviolet rays really does a number of certain kinds of plastics. This is an excerpt from “UV and its effect on plastics: an overview” [www.essentracomponents.com].
But what about plastic – how is it affected by the varying types of UV?
If plastic has been affected by ultraviolet rays, you may notice:a
- a chalky appearance
- the component surface becoming brittle
- a color change on the surface of the material
In terms of the components more likely to be at risk of UV damage, automotive parts are high on the list. The effects will predominantly result in a change of the material’s surface layer – and some plastics, if damaged by UV, will ultimately lead to the component failing altogether – not good news when a project is near completion or has been finalized.
If you need to know more about the sun’s effect on plastic head over there for details.
So what did I do to slow the inevitable? I’ve painted my surfaces and given them a coat of matte finish sealer. Will it work, probably not! But at least I tried something. Only time will tell.
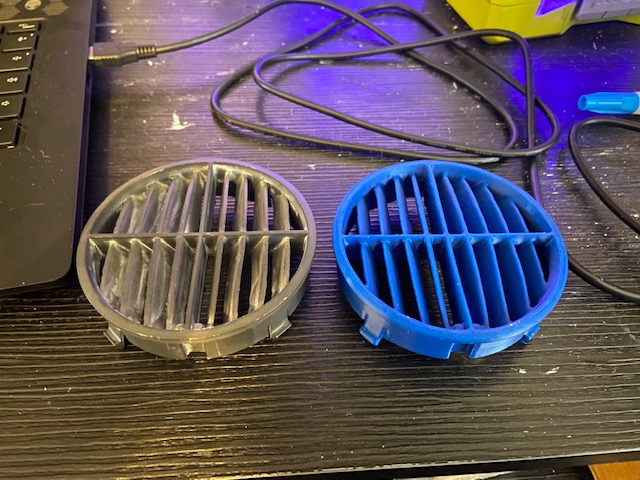
As you will see in the video below, my dash vents are knackered. I reached out to some vehicle-parters and wasn’t happy with the parts they offered. I mean, I’m going to buy 30 year old vents that haven’t had quite as many hours of sun on them than mine? Nah. Then I stumbled on Rocky Mountain Printed Rover Parts [Facebook]. I messaged Jordan and asked if he had the vents. He said he would need to make them and sure enough he did. I ordered 4. I painted two of them to match the new dash color and as you will see in the video got them installed.
Two things need to be adapted, no holes in the sides for the vent hose adapter and the pins for the restrictor plate were not defined enough for the plate to stay in place. So I drilled the holes and glued the plate on. I used 1/8th pop rivets so I drilled a 9/64th hole and popped them in.
Pro Tip: Drill the holes where it will be easiest to use the pop rivet tool to install the rivets. Think about it and lay it out first.
I’m super happy I found him. I mentioned the vents in the D pillar would probably be another great item to 3d print. He agreed.
I bought these, they weren’t given to me for any publicity. I like supporting innovation and small businesses. I hope he does well in this venture. So if you are interested, give Jordan a message or email at RMRPrintedParts@gmail.com.
Thanks for visiting and Happy Rovering.
You can support this content and this website on Patreon.
