Worth Every Penny (Post #393) 9/21/2013

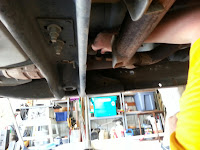
I can’t remember if I had blogged about getting an in the floor tornado shelter. In any event I did. I had ulterior motive. And the picture at left demonstrates it.

It made a perfect oil change pit. I am standing on the floor of the shelter. Every thing was in reach. Once I drained the oil pan, I moved the stairs up to the top and used them as a shelf for the oil filter.

It all worked like a dream. I am really chuffed about it.

I also investigated the oil coming from the left front hub. My dust cap has failed and the spare I got from Rover Cannibal disintegrated when I installed it. I guess my only option now is buying a new set from Atlantic British.

I cleaned the tire up and while I did it occurred to me that the oil coming out was from the differential. That means the seal for the drive shaft is also toast. And that will mean a total hub removal to fix. I’m not terribly excited about that project.

Thanks for reading, and Happy Rovering.

Garage Day: Titanium Hitch and His New to Him Ford (Post #383) 8/27/2013

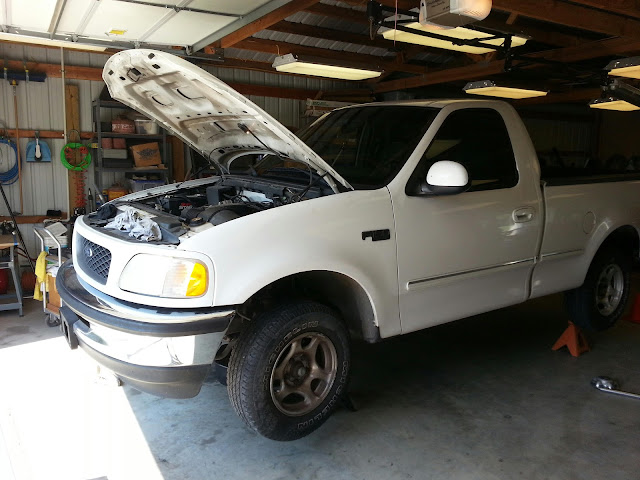
Another Saturday, another Garage Day. Wrenching on a old truck with your best friends in the middle of rural farm country is as American as America gets. This time the patient was Titanium Hitch’s 1998 F-150. According to TH the truck had been running pretty rough. It was in bad need of a tune up.

What started out to be an oil change, a brake job, and to investigate the rough running, became an all day ordeal. When we talk about project creep, this project not only crept, it grew as it did. What finally happened was a plug change, oil change, brake fluid change, two O2 sensors replaced, air filter change, and a final sorting out of the sound system problems from the last garage day.

First, the good news, the truck did not need brakes. The pads were deemed to be in satisfactory condition. So TH is going to shelf the pads he bought for another time. The brake fluid was sucked out with a syringe, fresh oil replaced. Then the nipples all got a turn as the bad fluid was evacuated from the lines.

This went exceedingly well with three pseudo-mechanics working on it. +EGD was at the wheels while I filled the reservoir. TH was relegated to pumping. The instructions were pretty tough to follow. Pump the pedal and say when he was pumping. This took a few tries to get perfected. But as with most things TH finally became an expert peddle pusher.

On to the O2 sensors. A lively debate was had betwixt the three of us regarding how many O2 sensors an F150 had. We quickly found what we later learned were the upstream sensors. Only through a parts search did we find out that it had a set for downstream as well. Well hoity-toity for them! We all were surprised and our theories of why it could only have two, like a Land Rover were dashed on the rocks of our hubris.

The codes that were being thrown were thought to be related to the downstream sensors. I’m still a little fuzzy on this but I went with it. Besides the down stream sensors looked to be the easiest to remove. Yeah right!

The driver’s side came out with out much of a problem.
The passenger side was…welded …frozen …rusted WELDFROZTED in.

A great many attempts were made with a great many tool configurations.

We first cut the lead so we could use a deep socket,

We then attempted to sawz-all the sensor,
Then a propane torch was tried,

Then the sensor was cut into pieces with a large bolt cutter,
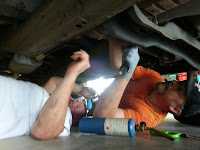
Finally a socket with a large cheater bar was used to tear the threads off. To get the cheater bar in to play the truck had to be lifted up to the maximum height of 5 ton jack stands. I was quite worried about this, as one mistake and the state’s insurance agencies would be writing a bunch of checks to happy sad widows.

I’m surprised I don’t have a picture of the end result of the sensor. But suffice to say brute force won the day. You can well imagine that the threads were trashed. EGD remembered to grab a tap in the correct size when we went to the parts store to spend some more of TH’s beer money hard earned pay on auto parts. EGD managed to get a few threads cut back into the sensor port and the second was installed. The front sensors were looking pretty bad as well. They were probably WELDFROZTED in as well. None of us wanted to find out. Another problem for another day.
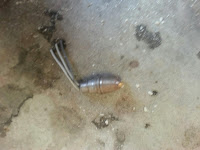
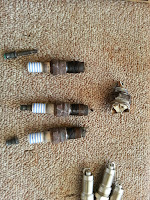
Next was plugs. We should have guessed we’d have problems. The first plug fell apart as the lead was being pulled from it. You can see the center conductor out of its plug in the following picture a long with what was left of the O2 sensor on the right side.
Half the plugs we pulled came apart in one manner or other. After examination of the plugs it was easy to say they were the originals. This was evident by checking what was left of the anodes for spark gap. The plugs were so badly eaten away and the gaps so large I was surprised the truck ran at all. One of the gaps measured .1000. Yes… point 1 thousands. The actual factory plug gap should have been .0560. Two of the plugs measured .0900. I didn’t measure the rest. I hope you can see the ends and how badly eaten away they were in the picture.

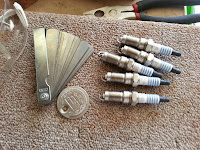
I gapped all the plugs with a feeler gauge and they were installed. At some point here a lively debate broke out about the parts we had just picked up. The replacement O2 sensors did not have the correct key on them. It looked to me what little key was there was half-heartedly cut off/ground down.

We looked at the existing up and down stream plugs for comparison. Then we compared them with the one upstream sensor which we could actually reach with out being a contortionist, the passenger side. Sure enough the replacements didn’t match any of the OEM ends. We installed them anyway, trusting that the AutoZone guy gave us the right parts and they were labeled correctly in the boxes.

The oil change was completed in short order. The truck was two quarts low on oil as well. The black stuff that was serving as oil didn’t even fill the five quart jug of the replacement oil.

I had to bail out before the speakers were addressed. I waited long enough until I got to hear the engine with all the new bits. They gave me the honor of firing her up. She roared into life and idled like she was meant to. I’m going to guess she gets 3-4 miles more per gallon of petrol.

About an hour after I got home I got a panicked call from TH asking if there was something I could think of that might have made her run poorly. Seems when TH tried to drive home although idle was good, any application of throttle caused coughing and choking and a poor running motor. It was probably dropping to “limp mode”.

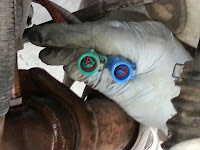
I remembered I had pulled the passenger side O2 lead, but I hadn’t reconnected it. I relayed that and he was off to check it and indeed it was still disconnected. It was reconnected and he made it home.

I talked to TH the following Monday and he told me she was still running rough. During the Garage Day festivities we had had a lively discussion about the Air Idler Valve. If it was half as bad as the other parts, it most likely really needed a good cleaning if not an out right replacement.

It was fun to hang out with my old mates and swap stories and wrench a little in the sub-Saharan African hot Saturday in Oklahoma. I wouldn’t have rather been anywhere else, well perhaps in my pool with Mrs. Okierover, but I got that too so I was a winner all the way around.

Thanks for reading and Happy Rovering.

Garage Day – August 2013 (Post #377) 8/14/2013

My good friend and resident evil scientist the +Evil German Dude (EGD) announced we were having a Garage Day at his house this past Saturday. For once I didn’t have anything Land Rover related for him to assist me with. I’m sure he and the former Titanium Hitch were quite surprised as we normally have something to do on the Range Rover. They both liked the Big White Bus’s new stance on fresh springs. I had to call it to their attention, but they responded with friendly comments after looking her over.

Inadequate alternator

The main goal of the day was to install a new alternator in EGD’s F-250 Super Truck 4×4 Beast. If you have been a frequent reader you know every thing EGD touches must be modified. His Chevy 1500 was highly modified. I could write an entire blog post listing the changes he made to the 1500. His F-250 is well on its way to being heavily modified.

EGD and the Former Titanium Hitch

More after the jump….

Today’s modification was to be a nuclear power reactor. He has the need to power small cities and in case of a disaster provide power to his evil lair. Sadly the Nuclear Regulatory Commission denied his permit for a mobile nuclear power reactor. They said his design was sound and the schematics were first rate. They just did not feel he rated one.

Beefy.

So he picked the next best thing and contacted the Russian’s for one of theirs installed a DC Power Engineering alternator. At maximum revolutions this monster will put out 300 amps. At idle it puts out 190 amps. Compare that to a stock Land Rover alternator and its 100 amps at max output. They will send it to you polished or one of 11 colors. Impressive.

Size comparison. New on the left and old on right.

The task was a simple one if you were content with using the existing wiring. But EGD is an evil mad scientist, so you know there has to be enhancements. First was replacing the cables to 1 aught. Yes, you read that correctly…1 aught. He is fond of his power conduit mechanisms. Three hundred amps is a lot, and to run it through stock wire is just silly.

One aught cable and in-line voltmeter.

He also installed an in-line volt meter. This is cool enough to warrant install on my Big White Bus. I will have to investigate this option further. One of my pet peeves about my Land Rover is the apparently inadequate wiring. Lots of Land Rover owners outfit their rigs with wenches winches, lots of lights, refrigerators,…etc. These are all power hungry devices in which dual batteries and beefy alternators are just the prescription to get the needed amperage to the devices. EGD’s beastly F-250 is no exception.

Installed.

The former Titanium Hitch and I mostly handed EGD tools and offered the “extra hand” every mechanic, at one time in their life, wishes God had given them. Working with EGD on his rigs over the years is truly entertaining. I’ve never seen him come up against something he hasn’t all ready anticipated.

His work is meticulous, precise, and clean. I have learned a lot from him over the last decade. I told the former Titanium Hitch that when I work on my Range Rover I think about what EGD would say if he saw my work. You’ve no doubt seen the W.W.J.D.? (What Would Jesus Do) and the many variations over the years. My own is W.W.E.G.D.D?

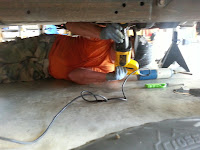
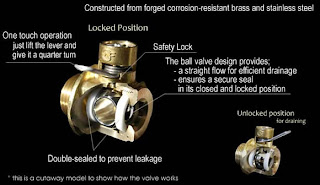
EGD then decided to manipulate the worldwide price of a barrel of crude by doing an oil change in the big diesel. The behemoth uses 13 quarts of oil. Since I have the smallest beer belly of the group, I was elected to ride the creeper under the truck to empty the oil. EGD has made this a simple process by installing a Fumoto valve. No more guessing which wrench you need. No more getting oil on your hands removing the plug. Easy peasy.

Once EGD was done with the alternator installation and oil change was completed, we had a great dinner of roast potatoes, hot dogs, and grilled vegetables prepared by EGB (Evil German Bitch). I know what you’re thinking. But I assure you that’s her own moniker, she picked it out. That’s even how I have them in my phone. She is a superb cook and I always love eating at their house.

After chow time was over, Titanium Hitch told us about the sound system woes in his newly acquired late nineties Ford F-150. The after market sound system had been butchered. EGD was keen to sort out his problems.

I fetched tools while EGD started extracting the radio from the dash. I was also tasked to find a wiring diagram for Ford pickups on the interwebs. That was no real challenge and I was back to handing them tools.

We found the problem, a blown speaker. The others were not in good nick and it was suggested he replace them all. Replacing them was a job for another day.

So we wrapped it all up. I said my goodbyes and headed home with a detour to drop the used oil off at JagGuy’s garage where he will undoubtedly use it in his Bobbed-Duece.

I received an email from an Art of Manliness reader who told me the visited link color on my OkieRover.com website was virtually unreadable in low light. So I swapped it to a red for high contrast.
Thanks Shawn.

Thanks for reading and Happy Rovering

Yep! Brake cylinder was leakin’ (Post #126) 1/19/2009

Not my exact one, but as close a picture as I could find
I changed the oil today on the Range Rover Classic. It was past due. I also gave her a run down the street. I was quickly harkened back to the days of my youth. The growl from the steering pump reminded me of my 1973 Ford Maverick Grabber. It was always leaking steering fluid. And once the pump was ruined it didn’t matter if you had fluid in it or not, it still growled. Why it never occurred to me to swap it out is still a mystery.

So I checked the reservoir and sure enough it was very, very low. I filled it up. I also checked the brake fluid reservoir. I could not believe how low it was. I had only noticed it puddling up on the drive way this week.

So I pulled her into the wife’s side of the garage and got the left (driver’s side) rear tire off. I proceeded to pull the caliper and this is what I found.

As you can see in the picture the seal has slipped out. The ring around the outside should sit flush to the caliper. This seal must have been leaking for quite awhile. The grime was pretty heavy.

I pulled the seal and cleaned the ring and groove for the seal with the wire wheel on the end of the Dremel tool. I also cleaned the outside of the caliper with some brake cleaner. I forgot how good this stuff was at removing paint and soon the acid etching gray I sprayed on there during the restore was coming off. So I blew everything off with the compressor to stop the mess. As I have done this job about a million times it was pretty easy. Actually I have only done this about 6 times. As with the last repair on the calipers I’m hoping the seal holds this time.

I buttoned everything up and gave her a test drive. She stopped when I pressed on the brake. So I have that going for me. I’ll let you know if it doesn’t hold.

Window Regulator Installed (Post #125) 1/18/2009

I got some happy time with my Discovery yesterday. Several things had piled up and she demanded a few hours of quality time. The weather was predicted to cooperate and it did quite well. It was a pleasant 55F outside. Which was nice compared to the 10F we woke up to the day before.


So out to the garage I ventured. I pulled the Discovery in the wife’s side of the garage as mine is now full of electronic devices our house has begun eating and other projects I’ve been too lazy to address. Broken antique chair (not sure how to fix), dead TV (probably going to part out), dead microwave (trash not fixable), dead Chi hair straightener (waiting for part). My side also contains my son’s weight bench which he NEVER uses.

Once I got the Disco in I got started. I had begun to smell oil burning and knew something wasn’t right because I was not loosing oil in the drive way. So I crawled under and sure enough there has been oil leaking at the oil filter. I started the oil change. When I got to the oil filter I really struggled to get the filter off. I’m not sure what I was thinking when I put on that filter last time. It was impossible to get off.

I struggled with it for a while and finally got it off. I am guessing that I must have put the filter on too tight and damaged or got the gasket in a pinch which allowed oil out. The mess underneath was going to be unpleasant to clean up.

While I waited for the oil to drain I got the diesel rags out and cleaned as much dirt and oil off the bits underneath. I was able to clean it off under there without too much trouble. And over all I’m pleased with the effort and it’s results.

I once again put one too many quarts of oil in on the fill. I’m not sure what I’ve been thinking when I’ve been filling the disco. I need to look up once and for all the proper amount and put a label on the inside. That way I won’t do that again.


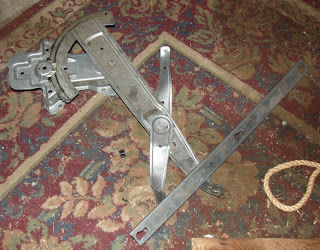
The last project for today was getting the window regulator I bought from Rover Cannibal installed. The children were tired of pulling on the rag I had tied to the door and my wife was tired of the bare panel. She’s gonna hate it when I buy a Series.

The panel went in pretty easy. I only failed to install 2 parts. One bolt and the sound dampening cup for the large speaker. I was not in the mood to take the door panel off once I got the top lined up. You cannot push your luck when you are working with the plastic friction push posts. They have been off and back on this panel 3 times at least. I didn’t want to risk breaking them for those few things.

I also managed to have a couple of beers with one of my neighbors who came down when he saw the garage open. I have great neighbors and we are always in each others garages during the summer months and it’s nice when we get a few minutes during the winter.

I must get started on the laundry today as tomorrow I am going to tackle the left rear brake caliper. It has left a nice puddle of brake fluid on the drive. I had trouble with the front right last year as you frequent readers are aware. With the extreme weather change recently I’m hoping we don’t have any major trouble there.

So I’m off to my laundry duties and to enjoy “Chasing Classic Cars” and “Wheeler Dealers” on HD Theater Channel. Today’s show on Wheeler Dealer they are referbing a Saab 900 turbo. One of the troubles was non-working electric windows. The mechanic Ed called working on the electric windows, “a fiddly little job”. I’d have to agree.


Were you paying attention to the picture of the garage? I forgot to tell you all about the Range Rover Classic furniture I made for the garage. I took the old knackered seat, fitted a frame I made and voila instant cool seat for the garage. Wheels will come later.

Thanks for reading and Happy Rovering.
PSA: Oil Filters (Post #116) 11/25/2008


Every few years I post up the Oil Filter Study. Mostly it is a way to convince you to buy better filters for your Rovers. In looking for a totally unrelated email I found an email where I sent the Oil Filter link to a friend. I thought it had been long enough since the last post that I should probably post it again.

The good news is the study is still online. The better news is I have a new link, due to the study moving to a new page.

I use Wix/Napa filters on all my autos.

Thanks for reading and Happy Rovering.