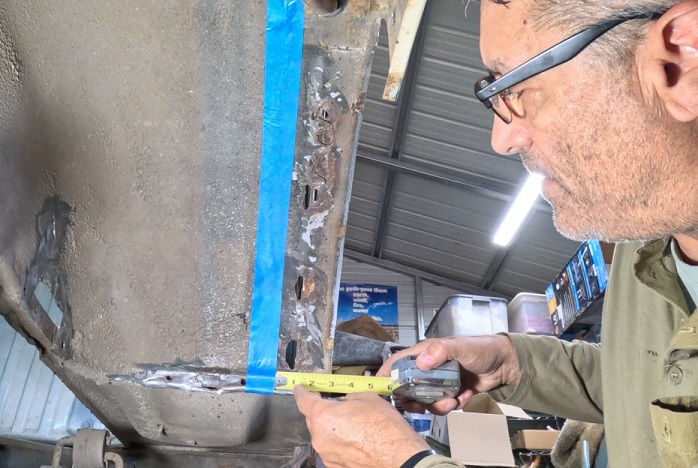
In this installment I spent two days preparing the fender well for welding in the patches. Two days (4 to 5 hours each) of wire-wheeling and grinding and cutting. It was a dirty job with lots of rust dust and rubber flying all over.
My spinal cord didn’t enjoy sitting on the hard shoppe floor for so long. And, it was hot. Deep in the Congo humid Africa hot in the shoppe. It would rain in the morning, then the sun would come out and crank up the air temp along with the humidity. Temps from 95F to 100F plus 90% humidity, AND I’m in the metal hot box of the shoppe where the temp is 105F to 115F. Brutal. I need an exhaust fan for the heat.
My shooting of video was mostly terrible. It also was extremely long. I’m not sure what I should have done differently to make this more consumable. Watching other Youtubers I see they sometimes have longer videos. I would have most likely had to skip some of the work. How much grinding does one need to watch? I sped those parts up to cut time.
I’m prepping the first of the welding videos now and should have it out this week.
In this installment I talk about how I will attack the rust in the driver’s side rear wheel well. I bought some shielding gas for my mig welder and will be welding patches and fixes this week. My GoPro camera decided not to record audio on the underside review so you’ll have to settle for a lovely voice over (which is terrible). You’re welcome.
Hope you enjoy the content. You can contribute to help with the cost of keeping this site on the internet through my Patreon account.
Rust. The ever present issue in every Land Rover. While investigating the rust in the rear floor board I found some really nasty rust on the sills. So much so in some places that additional cutting and repair will need to be planned.
The passenger side B Pillar is rusted out. This will need some major work to rebuild. I have prices for the steel and a welder. I just need to pull the trigger on them both. I also need to source about a case of zinc based primer like Seymour 20-1675 PBE Professional Primer [Amazon.com] More research is needed for this. I’ve seen and read some things that give be some doubt about this process.
For now, I’ve coated the bare metal with some primer. Now on to the video…
I got out into the shop and was working on some peripheral projects over the weekend. Peripheral because they don’t directly get the Big White Bus back on the road for driving. These are the cosmetic fixes, plain and simple. The primary project line is getting the motor back to 100% and making it reliable. I completed the repair of the heater fan blower motor. That disabled the motor due to the coolant hoses being removed.
I did start the motor about a month ago. Surprisingly she fired right up. I was really happy about that. I have not addressed the original issue with the reliability of the motor which is the ignition system. I’m 94.67% sure I’m going to replace the distributor with a Davis Unified Ignition (DUI). Its an all in one unit built in Memphis, Tennessee. Seeing the price today makes me wish I’d have bought it a year ago. The price has gone up about 50$(US). Although waiting has allowed me to start the one year warranty when I’m actually driving her.
All other projects from the list….linked here [Okierover.com Blog] not counting the replacement alternator, which I believe is where my vampire batter drain is coming from, are not keeping me from driving her.
I’ve ordered Knightsbridge seat covers. I finally talked myself out of putting leather back in. The estimates I got from local car upholstery companies were more expensive than ordering new leather…..customized with embroidered family crests on the headrests and my face digitally embroidered on the seat backs. Just kidding, but seriously, super expensive. So I ordered seat covers I’m not afraid to get muddy and dirty.
My new radio and speakers have arrived. I’ll need to watch the install video, call tech support 16 times, and finally give up and have the Evil German Dude or JagGuy help me install it. I’ll post something about that when I get closer to installing.
Still a couple of interior trim pieces that need painting. I am not going to remove them, I’m going to paint them in place, its just not worth the effort to remove them. The door cards came out without much effort and I need to wash them down, tape them off, and paint them. Perhaps next weekend.
I know this post was about the D Pillar so let me close with that. I have the welding repair still yet to do. As mentioned in the video, I used a palm sander and 100grit sandpaper to remove the glue from the beauty cover. It formerly had vinyl wrapped on it.
I’ve cut out some closed cell neoprene foam to replace the rust inducing open cell crap they delivered the Range Rover with from the factory. I’ve decided to start with painting the beauty panels. Rattle can style…can’t get much more redneck than that. I’ll show the finished product when I get it done.
My dash looks like hell. The sun has really taken it’s toll on the plastic. Several places are starting to turn into dust. It also is no longer uniform in color and some pieces aren’t even close to the original color. That color was/is Bokhara Green. Named from the color often found in oriental rugs from the Bokhara district of Turkestan. Traditionally made by the Turkmen tribes, the rugs were made almost entirely from locally obtained materials. Using wool from the herds and vegetable dyes, or other natural dyes from the land to create the Bokhara green color.
In my extensive research (30 minutes of distracted Google searching), I could not find a paint code I could take to a paint store. Nor could I find a can of paint on my side of the big pond (the Atlantic Ocean). You can’t ship paint, believe it or not, its flammable (the more you know…).
Before we get too far into this post…a disclaimer:
I have no idea if painting the plastic parts of my dash is going to work. I did not do any extensive research on best practices or if the products I had available would even bond properly with my very sun damaged dash. Undertake this at your own risk.
With OEM Bokhara Green unavailable, I started looking for colors and stumbled across Rust-Oleum Specialty Flat Earth Brown Camouflage Spray Paint [Ace Hardware]. I originally found the green color but once I saw the brown…I knew that was it.
I painted the dash pieces and have decided that the “flat” and “powdery” nature of this paint is going to be difficult to clean up later. Dust and whatever that will inevitably find its way on to these parts is going to be hard to wipe off. So I decided to experiment with coating the paint with a matte clear. It will also help with keeping the sun off the plastic. UV protection is right there on the label.
I stopped at the store on the way home and picked up the Matte Clear. I tested it on a piece of trim. It dried to a matte finish. This is a second wet coat in the picture.
Un-coated above, Matte finish below
I’ve got a bunch more work to do. I found some more rust on the floorboard in the cargo area. To get this fixed I’m going to need to cut the floorboard out and patch it. The floorboard is supported by a piece of steel that is very rusted and failing in several places. To do this right, I need to replace the steel that is failing. I don’t know what that will entail at this time.
Rusty hole in the floorboard in the cargo area.
I also popped for this ridiculously expensive rust paint.
Hopefully this will magically do what it says it will do.
This paint was insanely expensive. Like 160$(US) for this gallon. I’m not going to lie, I’ve got high hopes for this stuff. Everything I’ve painted on this Range Rover has already begun to have surface rust. I see these types of products used on the YouTubes and TV shows and I’m hoping it works as well as it appears to in the magic of television and the interwebs.
To replace the rusted bits, I’m going to check with Mickey at Mickey’s Garage [Mickey’s Garage] as he indicated on the Facebook that he may have a donor vehicle that I could perhaps get some parts from.
Every one of these “new discoveries” just postpone the day I will get to drive the Big White Bus for pleasure again. It’s frustrating, but it is what it is. I need to fix this rust. The things I want to use this vehicle for will require the flooring to be fixed. No reason to spend a few hundred dollars on building a bed and drawer solution if its just going to get ruined when water gets inside. It’s fun to fix stuff…right? Am I having fun? I’m not sure yet.
My friend the Evil German Dude gave me some excellent advise recently. “You’ve got to leave work at work, and put things behind you so you can go out to the shop and do things you WANT to do.” He’s right, I’ve been very distracted by home repair, nursing our dog back to health again, and I have neglected myself and my wants and needs.
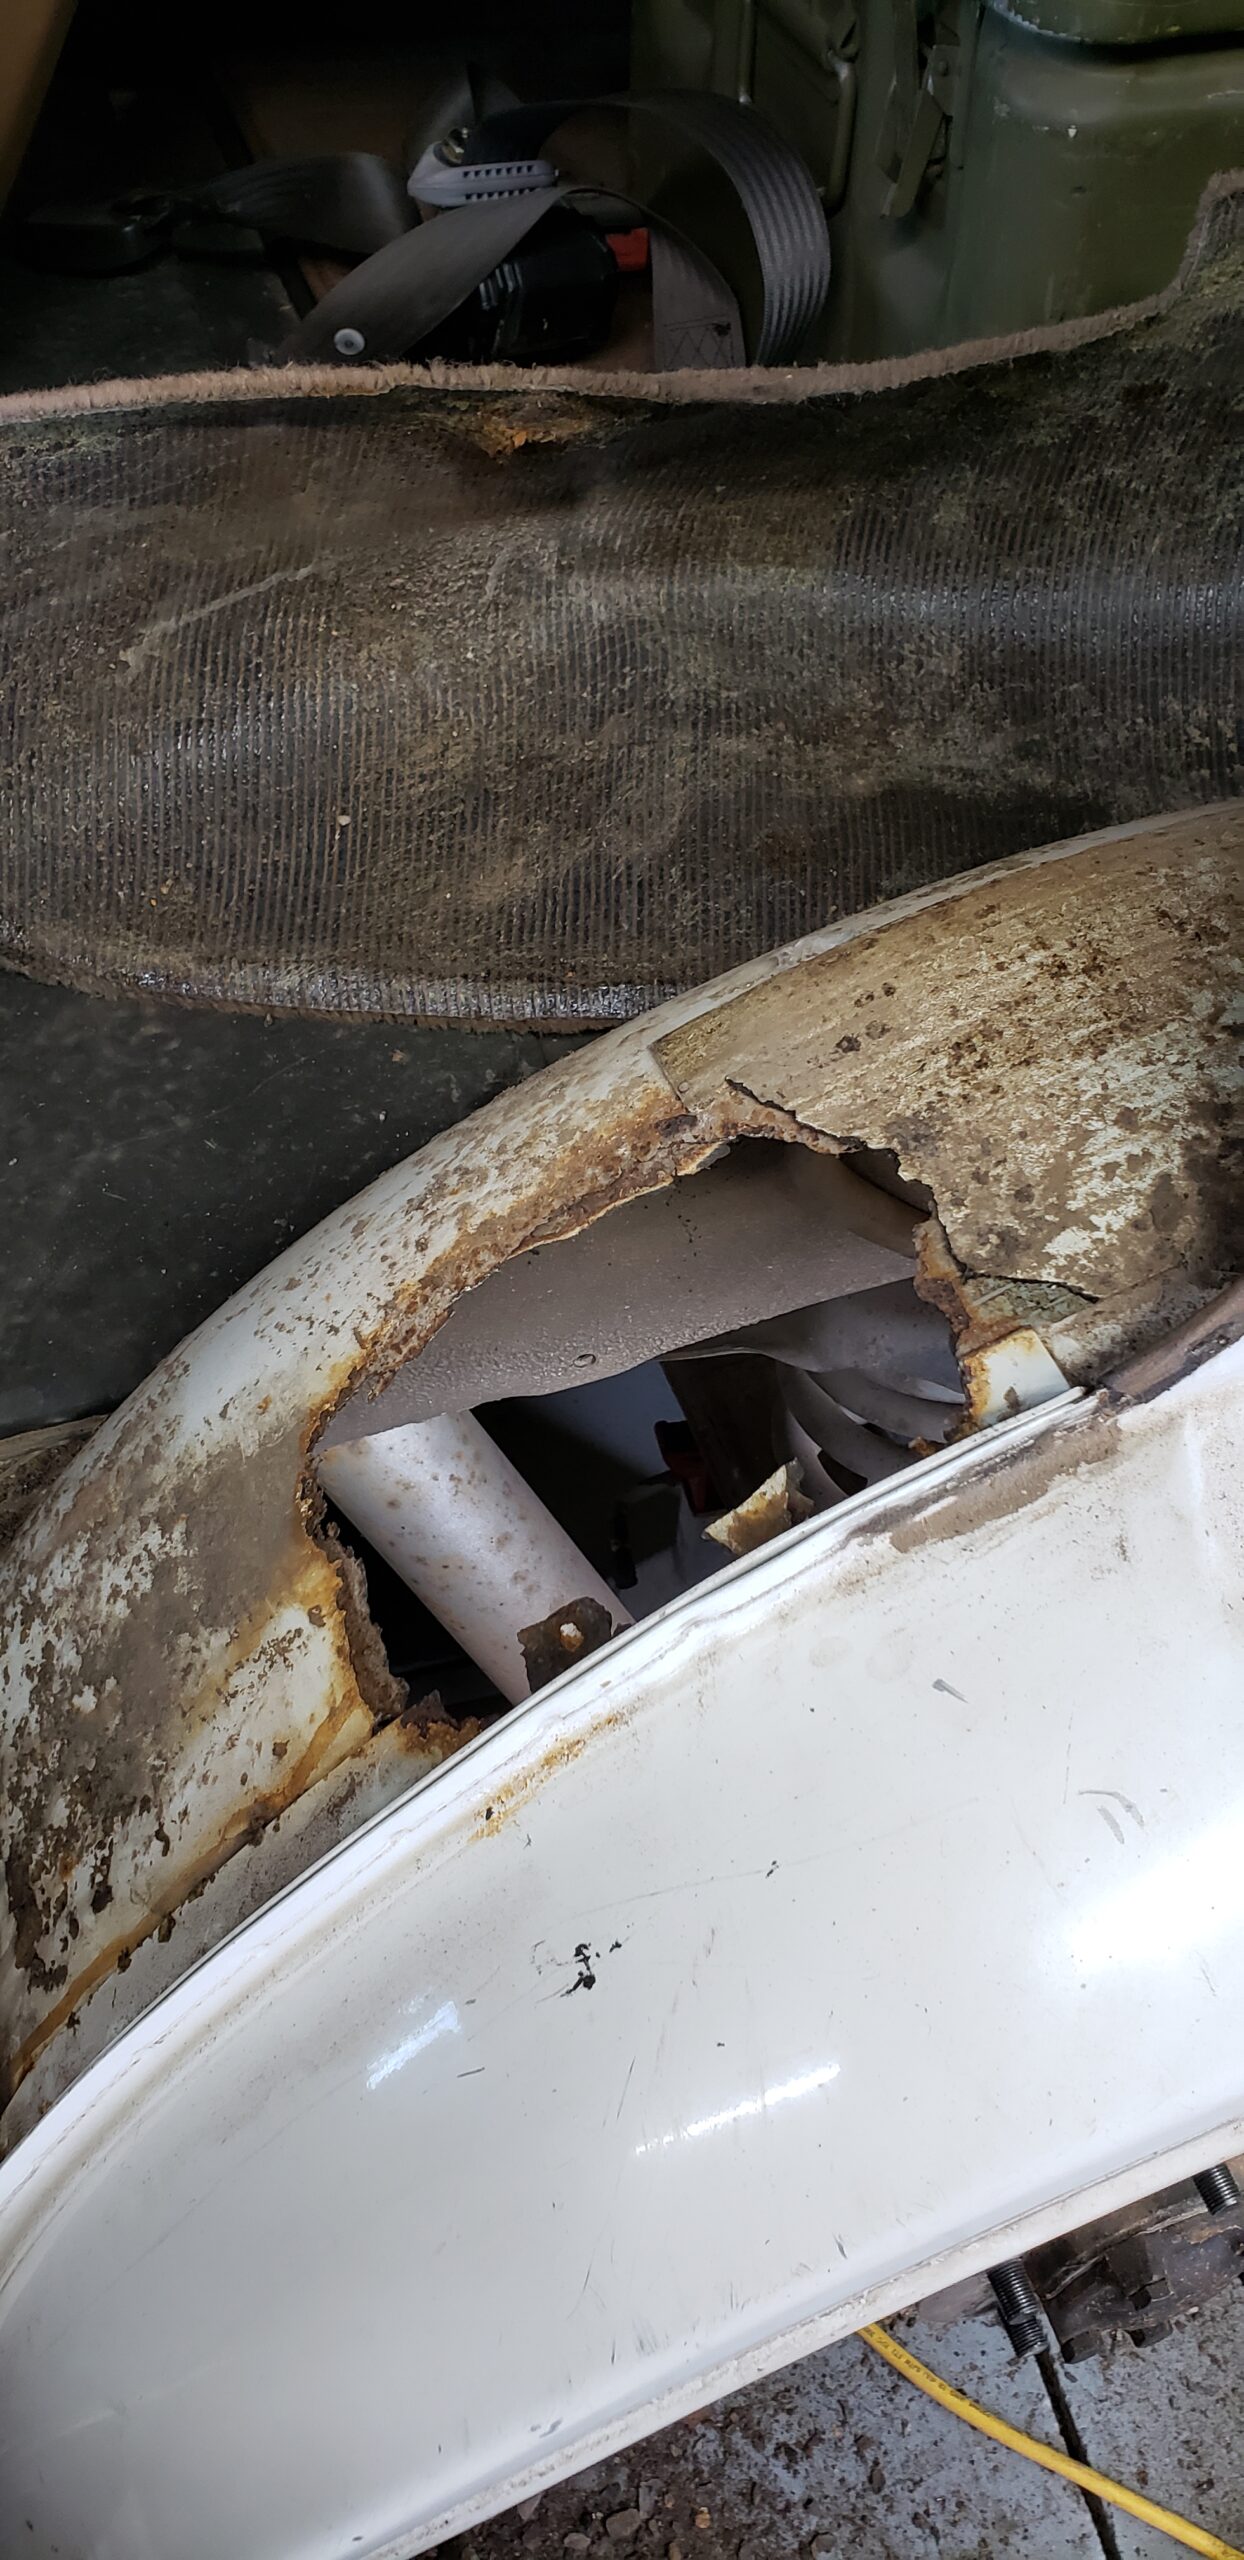
I found some rust under the left rear fender wheel well. I know! you are probably as surprised as I am!! (/sarcasm).
There were some signs of rust under the wheel well. I pointed them out in another video. So I decided to investigate. I found a lot of rust.
I’ve watched a bunch of videos where guys fix the rusted body panels and sub-structures. I guess it is my turn. I took a welding class a few months back and this was exactly why I took the class. However, I don’t have the tools I need to do most of these repairs. Not yet, anyway.
I will need:
A welder ($400 to How much do you want to spend amount of dollars)
Welding hood (already own it)
Welding gloves (already own it)
Fancy pliers (already own it)
Training (already done did it)
Metal break ($50 to I’ll probably borrow JagGuy’s)
A bunch of wire wheels to remove rust ($6 to $15+ for the fancy name brand ones)
I’m going to take a couple week break. I need to do some remodeling on the house’s master bathroom (Mrs. Okierover will be happy when I get this done.) I’m going to the Midwest Overlanding and Off-Road Expo (aka MOORE EXPO).
If you are thinking, “when will you get the Big White Bus back out on the backroads?” Well, I don’t know. At this pace…probably in the Fall. Trust me when I say…I really want to get her fixed and reliable again. Funding does matter, so hopefully that won’t be too big a constraint.
There will be more on this rust issue as I get back in the shoppe and start to sort out this mess.