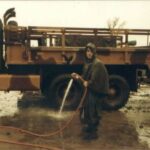
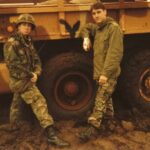
Part 6: Welding Patches in the Rear Wheel Well (Post #642) February 3, 2024

I’m getting real close to finishing the C pillar repairs. I had one final repair to finish. The patch over the rust at the bottom of the C pillar. If you know Range Rover Classics this is where the sunroof drain comes out and runs down the back of the wheel well. This is a popular place for rust to setup shop and eat your precious Range Rover Classic.

So instead of “fixing it” just like it was designed, which was poorly executed. Poorly because they didn’t protect any of the inside surfaces. Poorly because, seriously, holes in a wheel well where water, salt, sand, dirt, animal parts, and just about anything else you can imagine can hide? Super stupid. That sounds harsh, but you shouldn’t design an offroad vehicle that descended from the amazing history of Land Rovers in such a way that you can’t use it in the environments it was designed to live in.

I spent a lot of effort to shape the patch. I also devised a way to hold it in place so I could weld it there. A strategically placed bottle jack and a length of pipe. I called it the trapeze of stupidity in the video. I’ve done dumber things. This one actually worked really well.

After turning up the welder a tad, and increasing the wire speed to compensate the upside downed-ness of this welding. I saw a couple of videos where guys were welding some structural steel and they suggested uping the wire speed and voltage. That seemed to work. My problems were with the primer I painted on the fender and the patch. And at some point I think my ground was not very good. This lead to some very poor welds which I had to grind off…. several times. Eventually I got everything sorted out and the welds started holding.

Once I had the patch in place and covered in primer I took a look at the rest of the rear quarter panel. I cleaned up some surface rust and coated it with primer. I know this is only to slow the rust down but it felt good to do it.

I got all the patches on the quarter panel covered in seam sealer. Everything also got a final coat of primer. Over the primer, under the wheel well, I put on two coats of rattle can bedliner. It is my sincere hope that this will keep some rust at bay for at least a few years.

I have all the wrap up to do now including reassembling the quarter panel and reinstalling the mud flap assembly. That will be the next video. After that, I will be working on the passenger side B pillar.

patreon.com/okierover

Like and subscribe to the blog and the the YouTube channel. I hope you enjoy the content.

https://youtu.be/-LZcSk1cKwo

https://youtu.be/-LZcSk1cKwo

Part 5: Welding Patches in the Rear Wheel Well (Post #641) February 4, 2024

In this installment I continue patching the rust on the passenger rear wheel well. The patches went pretty well, all things considered. I am learning that i should probably use the zinc weld through primer. The basic primer I am attempting to use prevents me from having solid welds.

I wire wheeled off A LOT of paint to get these welds to stick. Not great considering I need paint of some kind on this metal. I have one more patch to weld on this fender. I will use the zinc primer.

I also replace one of the sunroof drains using some tubing I bought from one of the big box stores. I’m going to come right out and say I don’t recommend this stuff. It had too many pinches in the tubing. I thought I could use a heat guy and get the tubing flexible enough to reshape the tube.

This failed miserably. What did work was using some zip ties to eliminate the pinch. How this worked was the zip ties press equally all the way around the tube. This seemed to work amazingly well. Super happy with that clever trick. So if you can’t find high quality tubing, you can use the cheap stuff and you may need to employ this trick.

Getting this tubing into the C pillar was challenging. If you are patient you will succeed. It took longer than I thought it would to get this tubing in the right place.

Think something like this.

As I mention in the video, I needed to cut a hole in the lower part of the C pillar. I decided to direct the tubing down the INSIDE of the fender well. This removes another hole in the wheel well. I will, as I mentioned in an earlier video, drill a hole behind the mud flap and using a pass through pipe thingy I will be able to send that water out while attempting to have a less rust prone way to get the water out of my Classic.

I also learned welding upside down is HARD. I had absolutely no luck getting the final patch to stick. I said in the video I would would watch some videos. Unfortunately I did not find a single video on Youtube where someone was demonstrating welding sheet metal from below or upside down.

I watched a couple of videos of guys welding structural steel joints upside down or from below. The one trick I will try this coming weekend is to increase my wire speed and maybe increase my voltage. Basically being more aggressive. Maybe if I’m lucky it won’t just blow holes in my steel.

That’s all for this week. Like and subscribe to the YouTube channel. Comment as well if you see something I’m doing wrong or could do better. I’m no expert, I’m just winging this like most hobbyists do.

Patreon.com/Okierover

Thanks for reading and Happy Rovering.

https://youtu.be/nEzSJ3lHLV8

https://youtu.be/nEzSJ3lHLV8

Part 4: Welding Patches in the Rear Wheel Well (Post #640) January 28, 2024

This was the first weekend in a while that we were healthy. My son brought home Flu A from a basketball tournament at the school and then Mrs. Okierover brought home Covid. I tried to avoid both of them while still making them food and making sure they were taking their medicines. I also tried sleeping in the living room all weekend to minimize contact. It was all for naught. I got Covid on MLK Jr. Day. I missed a week of work too.

In this episode I tackle some of the rust holes in the passenger side wheel well. Turned out it was too cold to paint so I couldn’t get any primer on them.

I put a patch over the bad spot in the front side of the wheel well. This spot is where three panels come together. It was “protected” from the factory with hope and a lot of seam sealer. My original goal was to just fill the split but the steel was too thin and the MIG welds just blew through.

I got the patch welded in place without too much trouble. I think I did a decent job with this patch. I mean, I don’t have that much experience welding so every time weld I’m trying to get better. If I’m getting better, it would be considered “slowly getting better”.

While cutting out a bad seam I inadvertently sliced the wheel well in two places. These needed filling. They went as I would have expected.

Finally, I fixed the cut I made in the rear support beam. If you remember I cut through this while attempting to remove the rear floor pan. This was dumb. Thankfully it wasn’t damaged too much. I welded the entire cut closed. I think this went well too.

I had some trouble with being able to see through my hood towards the end. I adjusted the settings on my helmet and realize I need to replace my batteries. I need a few more hours under the helmet. I wish I could have tried out several helmets to see how they work. I limited myself to American Made welding helmets so there weren’t a lot of affordable options.

That’s all for this week. If you enjoy the videos Like and Subscribe.

patreon.com/okierover

Thanks for reading and Happy Rovering.

https://youtu.be/dvfHz-CrfTo

https://youtu.be/dvfHz-CrfTo

Too Cold to Work (Post #639) January 14, 2024

Holy crap it’s cold outside.

Most of the country is experiencing extremely cold temperatures. It got down to 1.6ºF last night here at Okierover Base Camp. Thankfully the winds were mild (mild for Oklahoma anyway) and the windchills stayed in the minus teens and single digits. Still VERY dangerous to be outside.

That didn’t stop some of my fellow overlanders from going out in this mess. This is not fun camping weather. Changing a tire in this weather can seriously test your constitution. Frostbite is just 15 minutes away in this weather.

Instead I give a short overview of what I called a short-term To-Do List.

  • Wire for Power in the back for a battery and fridge eventually
  • Install radio and cameras
  • Purchase and install a GMRS radio
  • Fix the Ignition Issues

You’ve heard it all before. My goal is to get back behind the wheel by April. If you don’t set goals, you’ll never achieve them.

That’s all for this week. I’ve got to go take care of Mrs. Okierover who got diagnosed with Covid today. My son is on the downhill slope of Flu A. I’ll be lucky to survive the week without catching SOMETHING!

Wash your hands, thanks for reading and Happy Rovering

patreon.com/okierover

Like and subscribe!

Air Compressor Failed (Post #638) 1/8/2024

Failed piston

Sometimes we have to take time out to repair our tools. Well, that was what I had HOPED I was doing, repairing my Husky (aka Campbell Hausfeld) air compressor. A few weeks ago while the air compressor was running I heard a loud BINK sound. It was actually kinda scary and I’m not gonna lie, I thought twice about exiting the area. Instead, I went over and turned it off. This compressor would not hold air overnight…ever, so something was not so great about the Chinese components used to build it.

The next time I started it up (to nail some baseboards in the pantry) it ran and ran and ran and ran…. The pressure never got above 50psi. I tried the nail gun and it wouldn’t even fire a nail. I googled a bit, and the most obvious issue was likely a failed piston seal.

I took the compressor apart and yep….there was an obvious failure.

That’s not good.

The piston block was pretty rough too. It’s been in use in my garage and shop for 10 years (maybe 15) and who knows how long my neighbor used it before he gave it to me.

I got online and looked for the replacement part, which turned out to be unobtanium. They discontinued that pump and only a few parts were still available for it. I first contemplated trying to find a new compressor to mate to the tank. One of the things I hate most about the stuff that is built today is most of it is throw-away. If it has a failed part, you just toss it and buy another.

Ben at Tractor Supply was telling me about his air compressor which he inherited from his grandfather who bought it when Sears still sold quality stuff. He said it just runs and runs. Its industrial…bullet proof…and probably will out live him too.

They just don’t make stuff like that anymore. The really wasn’t an option to buy a new compressor for that tank. I’d probably have spent what a new compressor costs to upgrade/repair this crappy Chinese air compressor. So a new compressor was the solution.

I was resigned to buying Chinese-made again mostly because quality air compressors you could probably rely on for ever cost more than what my Range Rover is worth today. Don’t get me wrong if money wasn’t an issue my shop would have some seriously nice stuff, but that damn Money Tree will not sprout in my backyard.

I lucked out that this new DeWalt is “Made in America” (from foreign sourced parts). This is a win in the “employ Americans” as much as possible mindset. I also picked up an air chisel while I was there and it was made in Taiwan! That’s a double win cause it was cheap and I get to stick it to the Chinese Industrial Complex by supporting straight up dissidents. WIN WIN!

I’m a little poorer, but I now have reliable compressed air in my shop again. A compressor that can run a wider variety of tools due to its output capacity of 6.2 CFM.

Next week if it isn’t too cold I’ll be welding and the goal is to finish up the rear wheel well. I need to order a B pillar replacement. I found one online and it will be mine for about $65.00(US). Half that cost is shipping from jolly ole’ England.

Remember to Like and Subscribe both the videos AND this blog.

Patreon.com/Okierover

Thanks again for reading and Happy Rovering.

https://youtu.be/S5sFjniTA5Y

Prep for Welding, Part 2(Post #637) 1/1/2024

B pillar rust

Happy New Year everyone!!!

The plan this weekend was to do some welding. Unfortunately the welding supply store was closed. So I was unable to source the shielding gas I needed. That…was frustrating. I instead knocked out a project my wife has asked for “she claims” for 18 months. I’ll admit it was a while…but maybe only a year. In any event, the pantry portion of the former laundry room now has fancy shelves.

So today I did some more investigating of the rust, primarily on the A and B pillars at the sill. The B pillar is mostly rusted out. It is as bad as it looks and I’ll need to source the ready made B pillar lower portion. I’ve seen them online…but don’t remember if they are available in the US of A. I’ve found at least three businesses in the UK. Part is only about $33.00(US) the shipping to the US is the same amount. More research is needed, or I weld up my own version.

YRM B Pillar Replacement Part
YRM B Pillar for Range Rover Classics and Disco 1

The A pillar has a hole next to it in the sill. I think it would be an easy patch to fix.

So this week I’ll get some more shielding gas and I’ll be ready to do some repairing next weekend.

Once again thanks for stopping by and for watching the videos.

Like and subscribe… Patreon if you like this content and want to help me keep this site up.

Thanks for reading and Happy Rovering….

https://youtu.be/WX3yTOSc6zo