Getting Closer (Post #204) 9/17/2010

I’m getting close to finishing the brake disc swap on the front of the Range Rover. I did have two disappointments though. With the brakes.

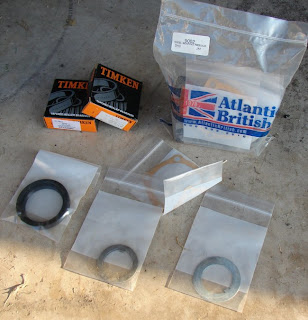
The brake caliper (ka-liper if you are German) on the right front had to be replaced. I attempted to rebuild them in the Restoration Part Uno. No matter how much effort I gave it I could not make the right front stop leaking. I’m guessing the bits were just too worn out. In any event, I replaced it with a new one. I’m pretty sure it came from Atlantic British.

So as I’m pulling the calipers off and the brake pads out, out falls one of the outer retainer rings for one of the pistons. I’m like, “WHAT THE HELL? Where did that come from?” Just then the brake pad in my hand separated. The asbestos bit came loose from the metal backing plate. So again I’m like, “WHAT THE HELL?”

I can’t tell you how disappointed I was. First that I didn’t keep my receipts/invoices. Second that a new part failed like that. Thirdly, I’m wondering if the word QUALITY is even in some people’s dictionaries.

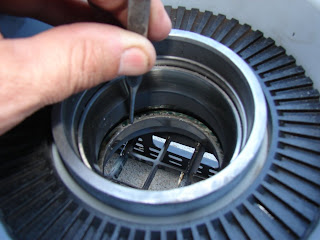
So I take a look at the ring, yep, it was rusted all to hell. I then took it over to the bench grinder and polished off the rust the best I could. I got the Dremel out and put a mini wire wheel on it and got the inside bit rust-free as well. Then I needed to figure out a way to get it pressed back in.

I put the ring in place and using the metal backing plate and a large C and pressed it in. It is the dust seal for that caliper cylinder so I’m confident it will be okay. But seriously, what is going on? I’ve never seen a brake pad fail like that. I’ve heard of it, but never seen it.

With that little side project complete I had totally spent myself and gave up for the day. For the day I got the left front brake disc done and totally re-greased the bearings. I broke yet another tool on this part of the project.

I am not what people would call a “muscle man”. My entire life I’ve been cursed with exceptionally long arms and making those puppies muscular escaped me. I think I can wrench with the best of them but when it gets to stuck I rely on the levers and cheater pipes like anyone would. So I’m breaking the bolts loose on the brake disc and snap, I broke a socket. It’s a Craftsman and if they honor their warranty I’ll be bringing home a sack full of tools from this rebuild.

Sitting in my sister’s lap 1967 Guam, USA  

So far, a standard screwdriver, two punches, and a 16mm 1/2 inch drive socket have sacrificed themselves on the alter of the Range Rover gods. I’ve got to get them all together and take them down to Sears and get replacements. The socket was bought while we were on Guam to work on the Volkswagon type 2. So it’s been to Guam and back to Oklahoma. In its life it has circumnavigated the globe and is likely older than 90% of the people working at our Sears today. But I’m going to make them replace it.

So this weekend is finishing the right front disc brake and replacing the brake fluid reservoir and hopefully bleeding the brakes. Then its on to the viscous coupling! Happy, Happy, Joy, Joy.

Thanks for reading and Happy Rovering.

Axle Halves and Hub Rebuild (Post #201) 9/7/2010

Busy, busy weekend.
Lets start by saying this was a three day weekend. Meaning in America we had a federal holiday that gave us an extra day off. Labor Day. With that in mind labor was indeed what I did this weekend.

This weekend also kicked off the 2010 College Football season. For those of you in lands other than America this is like the World Cup opening weekend and your team is favored to win the whole thing. Favored right up until the team’s first snap of the ball, then you realize your team doesn’t have a chance, but you are excited anyway.

This year found us actually attending the game. A friend of my wife gave us his seats and we got to watch a football game in person. We normally watch from home as nearly every game the University of Oklahoma plays in, is televised. We had great seats, six rows up from the field on the 50 yard line. You can’t ask for better seats. (we won, defeating the Utah State University)

So, as you can imagine Saturday was all football and a little bit of house cleaning. Sunday was scheduled to be my designated work on mom’s house day. But with Mrs. OkieRover on call at the hospital I swapped it to work on the Range Rover day.

I skipped church and dragged myself out of bed at 0800. I broke out my Rovers North Coveted Mug (1 each), made some tea (with honey) and went out to the garage to tackle the hubs and axle half shafts.

My first task was to put the wire wheels on my new bench grinder. I wanted to buy the big 8 inch model but settled for the 6 inch because it’s not something I’ll use EVERY weekend. I mounted the two fine wire wheels on the shaft. I had purchased some washers and shafts but as it turned out, they were not necessary. I’ll keep them around for the course wire wheel I bought with the grinder.
The first part of the job was to get the splash shields mounted. The bolts and washers were corroded from years of use. I polished them with the wire wheel and then gave them a nice coat of Rustoleum primer.

I got the splash guards finished and then looked at the hubs. As I mentioned in a post some time ago I have a set of new bearings for the axle. I was a little wary about installing the new races but with some reassurance from JagGuy that it was easy I went about getting the new races installed.

I reassembled the hubs. This is mounting the brake disc to the hub and bolting them together. Then you need to install the ABS sensor ring. I prepurchased the nyloc crown locking nuts just for this occasion. You slide the ABS ring into the holes and punt the nuts and tighten. Not hard by any stretch. The next photo has me positioning the ring. You cannot do this without tightening the bolts you see in the picture as not run down to tight.

Getting the old race out requires using a punch and a hammer. The theory goes that you tap on alternate sides until the race falls out. As you may or may not know the race fits VERY tightly in the hub. I’m sure in an ideal world you would have these pressed out and the new ones pressed back in by a machine shop or the like.

My garage is not the ideal world. So I set about with the punch and a hammer to knocking them out. There are two races, an inner and an outer, per hub. As JagGuy said, its no big deal getting them out. Avoid hitting your hand with the hammer is the only advice I can offer.

You put the new races in just like you take the old ones out. The advice I offer here is striking the race about every 45 degrees as you move around the ring, slowly inching the race into place. Something to note here is having quality tools. Cheap punches will fail you on this project. Think about hitting a wooden stake with a hammer. The softer the wood the quicker the top of the stake with flare out and then splinter.

The same thing happens with cheap punches. I had the two punches my dad had in his tool chest. They are both Craftsman by Sears. Craftsman tools are replaced no questions asked. They will both be warranty replacements on my next trip to Sears along with a screw driver that no longer has a tip. The first punch was terrible and quit me about half way through the second race install. The second punch managed to finish the first hub and the second. The tool casualties are starting to mount.

The only real tip to race installation is making sure they are full seated. When you are fully seated you get a different feel from the hammer striking the punch. That is the first clue you are seated the second is by visual inspection.

So with the races installed I packed the bearing with grease and inserted it into the hub. The back side is held in place with a ring. I mounted mine with a plastic hammer very carefully. The bearings fit VERY tightly on the shaft. I know they are the same part number but in both cases only one of the two bearings fit on the inner portion of the hub shaft.

I packed the bearing spaces with more grease. I then slipped the bearing and hub into place. This took some doing but I finally got them on. You then mount the bearing washer in place and put one of the hub nuts on and tighten. I used a large set of channel lock pliers. These don’t have to be screwed down real tight. Its best you put them back the way you found them.

You then put the crush washer on and bend a flap over to hold the inner hub nut in place. You then put on the outer hub nut and tighten. I remember the tightness from the tear down. I did my best to match that.
I then packed the hub with wheel axle grease. I can comfortably say it would not take any more grease when I was done.

I applied the gasket material. There is a paper gasket included in the kit. I did not install it. Instead I just used the gray gasket material. This will probably come back to bite me in the ass. I wiped the surface as clean as I could and applied the gasket goo.

I wiped away the excess and made sure it was uniform in its application.

I installed the brake caliper and bolted it down good and tight. I then attached the brake line. I inserted the new brake shoes and got them clipped in. I will have to find a brake wear sensor plug or wire them directly. I’m not sure when the plug went missing but I remember seeing an extra somewhere.

I then slid in the half shaft. This takes a little bit of finesse but is no big deal. Get them seated as close as you can. Then take the bolts and using the same pattern you would to put on lug nuts alternate around the axle tightening until you get to the “I’m gonna need some help” point. Using a 1/2 inch break over bar, which should be standard kit in your Land Rover, use the break over bar to brace against as you tighten the bolts down.

If you remember you needed the cheater pipe to get the damn bolts off. So you can probably guess you’ll need something to get them back on there just as tight. I was running out of steam at this point and our friends were expecting us so I called it quits for the day with only the driver’s side hub bolts left to tighten and the brake caliper left to be installed.

I’m only a few more steps from having the Range Rover mobile again. On my next work day I will finish the axle. I will then install the new brake reservoir. While I have the system nearly dry I will install the new brake discs on the front axle. I understand this is not the task the rear turned out to be.

With the brake system restored, I will then remove the dead viscous coupling. I will then pray that the one I sourced used is good and install it. If everything goes well here I am on to painting the rear door by the end of the month of September. I will have to put all the electrics back together under the passenger seat. At that point I can drive the Range Rover over to the Evil German Dude’s shop and have him assist me in welding in the new floor pieces.

After those are in I need to seal them from the bottom and from the inside just like the driver’s side. I will then make a call on the sound deadening material, buy it and get it installed.

While the dash is out I’m going to remove the malfunctioning piston that prevents me from dropping the transaxle into low. I can then reassemble the carpet and interior.

I have a camping trip scheduled for the third week of October and I hope to drive the Range Rover down there.

It may be an ambitious and optimistic goal much like my hopes for a National Championship in football for my alma mater, but it’s a goal for now.

Thanks for reading, Go Sooners and Happy Rovering.

The Good, The Bad, and The Ugly (Post #193) 8/12/2010

[Queue the theme song]
The Good, I started on the rear brakes last night.
The Bad, I can’t finish the project.
The Ugly, I found a broken axle half shaft.

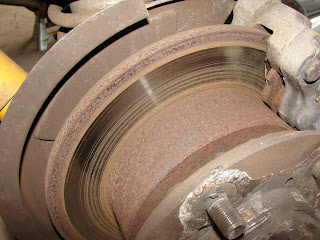
As you can see in this picture the rear brakes on the Range Rover are looking pretty knackered. I love that word “knackered”. In this context I’m using the British and Irish slang form. But it works as well for me on the British/Australasian level too. For when I saw the broken half shaft I translated it into American English and that was one of the words I used do describe my disappointment. RovErica, while driving her UN-air conditioned Taurus, is famous for her saying, “Dad it is hot as balls in my car.” It was definitely “hot as balls” in the garage while I was working on this project. The temperature was still above 95F when the sun started going down. Considering all this, knackered works on many levels.

 
On the final few drives in the Rover, the brakes seemed to be seized at least on the left rear side. And the rust is simply annoying. I normally don’t swap the brake discs when I do a brake job, and as you can see they have probably NEVER been replaced in this Rover’s life. The groove or lip on the edge of the disc was getting pretty deep so it was time for some new discs.

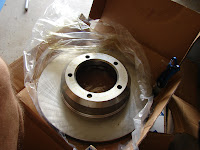
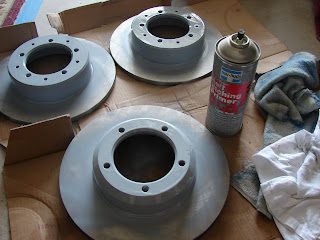
I bought a full set of discs and decided, like all the new items I put on the Rover, to limit the rust the best I can. I decided that a coat of acid etching primer would be just the thing. You might ask, “Will it work?” Who knows, but I feel better about them being painted.

So I took the new brake discs and painted them with the primer. It was not my intention to paint the actual braking surface but through my laziness efforts and impatience some healthy overspray, I got paint on the braking surface. I don’t think it matters for when the brake pads start making contact there won’t be much paint there after a few stops.

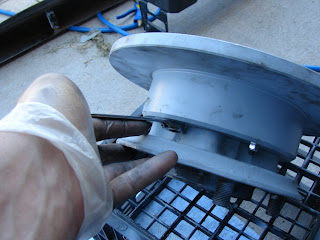
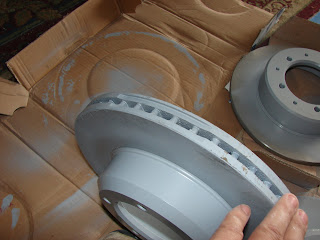
After I had put the first coat of paint on the discs I noticed an irregularity on one of the front discs.

After checking with several sources (JagGuy and The Evil German Dude) it was determined this was done to balance that disc. I had seen this before, but wanted to make sure.

Swapping the discs is a pretty straight forward job. You remove the caliper, or as EGD says the “ka-LIPer” (I wish I had an audio file of him saying that for you). This requires the brake lines on the rear brakes to be removed. So have a catch pan available or you will have a huge mess. The brake lines are “hard piped” as in not flexible at the caliper. The flexible part of the brake line on the rear axle is in the center above the axle.

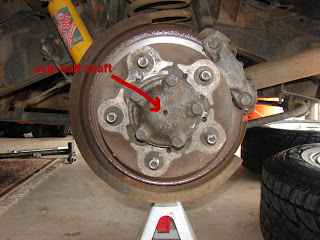
After you have the caliper off, it is time to remove the axle half shaft. That can be seen in this picture.

Five bolts and you are done.

Pro Tip: I used a breaker bar to hold the wheel in place as I broke the bolts lose. I also had to use a cheater pipe to extend the leverage of the socket and ratchet. I’m getting wimpier in my advanced age.

I used a large screw driver to slip between the axle half shaft cap and the hub. Once you break the seal it comes out easily. You then flatten out the keeper ring and remove the bearing nuts. These nuts are very large and I used the biggest channel locking pliers to get them started. They were not very tight in the first place but the grease made them very hard to work with.

Here is another “good” for this project. It is a good idea to replace stuff as you go through the vehicle you are working on. In this example the wheel bearings are in these hubs. I remember I had bought a wheel bearing replacement kit some time ago when RovErica reported some odd behavior and noise. From what she described I thought the bearings were going out. It turned out not to be the case and I had the kits still sitting on the shelf. My axles have 185,000 miles on them. So basically if you break something down this far, go ahead and replace the serviceable parts while your there, if your budget can afford it. I will store the old bearings “for good measure” as I believe they were not bad in the first place and will work in a pinch if necessary.

After you have the hub off it is time to remove the disc from the rest of the hub. This is done by removing the crown nuts that hold the anti-lock brake sensor ring.

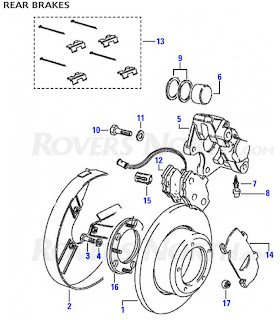
And those thread shafts pass through the disc holding the hub to the disc. They are dual threaded. Both ends are threaded and this may cause you trouble when you attempt to take the crown nuts off. Be creative. Extra points are awarded to you for removing the ring if you have to deploy additional tools or techniques. Rovers North has a good picture of the ring and assembly and how it all fits together. Click on the picture to open their site for a complete parts list.

With a little persuasion gentle tap of a hammer the hub and the disc will separate. Reassemble in reverse order. If you have a bearing kit to install you will need to do that as well. If no, definitely renew the grease on the old bearings. I will post another entry when I put the new bearings back in.

Right now I’m debating if I’m going to bother sand blasting and painting the hub unit. I really want it all to be pretty and new so maybe perhaps.

Now on to the broken axle half shaft.

This crappy photo shows the sheared off end of my right rear axle shaft. After seeing this and an expletive laden rant a little disappointed cursing, it hit me, I will have to tear the differential apart. KNACKERS!

If we refer to the rule above, now would be a good time to put in a locking differential. But sadly the budget does not support it. What? You’ve never had the axles out of your Rover? Click here to see what a proper shaft should look like. In short, it depends on who you ask and what you are doing with your Rover.

IF we, that is you and I, were sitting in my garage having a Bodington’s the conversation might turn to 10 spline versus 24 spline axles at this point. Basically in mid-1993 Land Rover started using 24 spline axles instead of 10 spline. Are 24’s better than 10’s? There is a thread on RangeRovers.net in their forum. Check it out for wisdom on the subject.

So another phase of the project will be to assess the damage done and get the axle half shaft piece (or pieces) out of the differential. Gag.

As I posted in an earlier post, everything I touch generates two (2) more projects. At this pace I may never finish the restoration. I am trying to keep a positive outlook on everything, but Mrs. OkieRover is wondering how much this will all cost and when will it be done. As I told her, this is my “mid-life crisis motorcycle”.

I am respecting her wishes that I not buy a motorcycle. I’m hoping she realizes that this is my hobby and in her mind, is a lot safer than a motorcycle. Well, it’s a lot safer than ME BEING ON A MOTORCYCLE.

Thanks for reading and Happy Rovering.
Error Code 17 (Post #162) 1/2/2010

The mystery surrounding the OBD code display continues. Just when I thought it failed I have a code 17 displayed. So the mystery is, why no code when the Check Engine light came on last month? And why has it decided to display a code 17. I didn’t ask for a code 17.

A throttle position sensor is a cool 200$ depending on where I buy it. I guess I should be happy that my sensor made it to 180,000 miles. So I’m gonna order a sensor this month. And I’ll write up its install for all to see.

I still have a great deal of work to do on the Range Rover. This cold weather is wreaking havoc on my door latches and they are beginning to stick on both sides. I complete refurbish kit for those parts would come in very handy.

I also have the brake discs and fluid reservoir to replace. That job requires a jacked up vehicle and decent weather. Neither of which is expected or possible right now. The weather man is predicting teens and single digits for middle of next week. And the garage looks like I’m preparing for a garage sale. There are way too many pieces of furniture and other things. Exactly why storage buildings were invented. No I don’t have one….yet.

I’m planning on making an event or two this spring…if you have any suggestions drop me an email.

Thanks for reading and Happy Rovering.
Yep! Brake cylinder was leakin’ (Post #126) 1/19/2009

Not my exact one, but as close a picture as I could find
I changed the oil today on the Range Rover Classic. It was past due. I also gave her a run down the street. I was quickly harkened back to the days of my youth. The growl from the steering pump reminded me of my 1973 Ford Maverick Grabber. It was always leaking steering fluid. And once the pump was ruined it didn’t matter if you had fluid in it or not, it still growled. Why it never occurred to me to swap it out is still a mystery.

So I checked the reservoir and sure enough it was very, very low. I filled it up. I also checked the brake fluid reservoir. I could not believe how low it was. I had only noticed it puddling up on the drive way this week.

So I pulled her into the wife’s side of the garage and got the left (driver’s side) rear tire off. I proceeded to pull the caliper and this is what I found.

As you can see in the picture the seal has slipped out. The ring around the outside should sit flush to the caliper. This seal must have been leaking for quite awhile. The grime was pretty heavy.

I pulled the seal and cleaned the ring and groove for the seal with the wire wheel on the end of the Dremel tool. I also cleaned the outside of the caliper with some brake cleaner. I forgot how good this stuff was at removing paint and soon the acid etching gray I sprayed on there during the restore was coming off. So I blew everything off with the compressor to stop the mess. As I have done this job about a million times it was pretty easy. Actually I have only done this about 6 times. As with the last repair on the calipers I’m hoping the seal holds this time.

I buttoned everything up and gave her a test drive. She stopped when I pressed on the brake. So I have that going for me. I’ll let you know if it doesn’t hold.

Brakes…again (Post #106) 10/7/2008

It seems that this is the month for squeeking brakes on Land Rovers that park in my driveway. I’m going to have to break down and give them some attention. Perhaps on my Friday off. It is the day before the OU beat down of Texass. This year it should be fun to watch the Longhorns offense sputter and die as we shut down Colt McCoy. I remember how shell shocked he was in the 4th quarter last year. Not a pretty sight.

Anyway it’s time to get busy on the brakes because winter is approaching. I have some other smaller jobs to do but not much money motivation to do them. If I find anything fun I’ll let you know.

Code 44. The Rangie threw a code 44 last weekend. She’s been running rough for a month and I’ve finally gotten around to replacing the cap. It helped, but the injector cleaner helped even more. Anyway in the midst of all this running like crap including a code 69, gear lever position sensor, the oxygen sensors have gone south.

I’m going to be pricing them out this week and getting them ordered because the gas mileage has turn to ridiculously bad numbers.