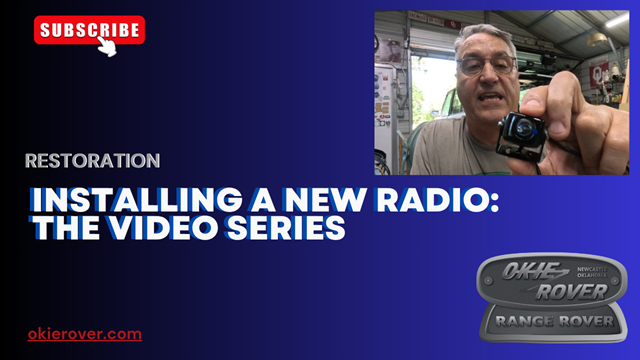
In this video series I am installing a new radio in my Range Rover Classic Overland rig.
Part 1 – is installing the integrated cameras.
Part 2 – is a lot of wiring and some rust abatement and painting.
https://youtu.be/8x6PginHrQs
Part 3 – is painting… yeah, painting. When have you ever worked on your Land Rover and NOT had to address some rust when trying to wire up a camera? Oh, it’s just me? I doubt it.
https://youtu.be/BlGF9UUMtps
Part 4 – I reveal my paint job (terrible) and fish, fiche, fishe, no, I’m certain it is FISH, fish the wires through the tailgate and back through the truck to a power source.
Sorry no post last week. I was really tired and my back was really acting up. All you missed was three hours of frustration and a hot ember flying off the cutting wheel and landing in my ear. WHICH I didn’t manage to catch on the video. Stupid GoPro. I’ll post the link to both videos down below.
This weekend I pulled the second radius arm off. I went straight to the cutting. There was no resolution to remove the bolt with a wrench. The bushing sleave was completely rust welded to the bolt. I banged and banged on the first one to NO avail. I even managed to hit my hand at the wrist with the hammer. OUCH does not cover it. Two pound hammers win EVERY time when they meet bone.
Once off everything needed to have rust removed or nasty old sticky polyurethane failed bushing material removed from it. Think, chewing gum, but it doesn’t dissolve in acetone. Nasty.
After I spent 30 minutes at the bench wire wheel, I remembered I own a sandblasting cabinet. So I blasted all the parts. So easy. It did reinforce that I need to improve that cabinet by relocating the pick up tube like they do on a hundred YouTube videos.
Once clean all the parts got a nice couple of coats of primer and a coat of matte black paint in the vain hope that rust and corrosion will not cause me trouble later. I know I’m fooling myself, but it’s become habit at this point.
I found a nice surprise… I have already replaced the poly bushings on the front half!!! Yeah! Holy unexpected outcomes Batman! I am swapping the panhard rod bushing because its been sitting soaked in steering oil for 5 years. I wonder if a put a boot over it, it would not deteriorate….. hmmmmm.
Next step is getting the new bushings pressed into the radius arm and the panhard rod. For this I will need to visit one of my friends shops that own a press. That’s either the Evil German Dude or Mike the JagGuy. You’ll see who wins next week.
That’s about it for this week. Thanks for visiting.
May the wind take your troubles away…. Happy Rovering.
In this video I reassemble the D Pillars on my Range Rover Classic overland build. If you like watching a guy assemble and disassemble stuff and get really frustrated at his dumbassery this is the right channel for you!
I managed to find the hardware in the pile of screws and nuts and bolts. That saved me a trip to the hardware store. But the side vents required new press nuts.
I had to dig through the three tiny boxes at the hardware store to get the number I needed. I needed 16. They had 18 spread across the three boxes of different sizes. So I bought all 18. I joked with the register lady that I wouldn’t charge her for organizing their entire collection of press nuts. I don’t think the joke landed.
I put this together several times. I managed to drop the washers and nuts a few times. Then I installed the right beauty panel without the vent. So it had to all come apart again. The hole covers were really brittle. I replaced them with rubber hole grommets. I cleaned it all up and it looks great. Well it looks okay. The paint on the pillars is only rattle can good. and I managed to get a couple of runs. I will have to do for now.
In this video I am finally starting to get the trim back into the Range Rover Classic. I had to do some touch up to some of the pieces. I got that all done.
I also forgot the steering column cowling. So I got that off and gave it a coat of paint and at least three coats of matte clear. This is in the sun most of the time and frankly I’m surprised it isn’t in worse condition.
The rear wiper switch on in the cowl didn’t want to come out. The tabs were badly bent. I don’t remember ever touching that so I can’t say it was me that damaged it. In any event, I had to take it apart to get it out of the cowling piece. And as you can probably follow, I had to refurbish it a bit to get it reinstalled.
I also popped one of the bullet connector ends of the wiring off and had to repair that. That too a little quick thinking as they are very small and the crip was really going to be a bitch to solder. So I used a small jewelers screwdriver end and tapped it through the connector to open up the prongs. This worked better than I thought it would. So bully for me!
I had to make a run to the hardware store for “hardware” to replace the bolts on the passenger side. I found four nuts in my stash for the instrument panel. Where I put all the hardware to take this dash apart is still a mystery. I’ve dug through all the project cups and pie plates and have not found one that had the correct parts.
So I guess I’ll just keep replacing the “hardware” with new. And then one day, I’ll find all the original hardware and think to myself, “why did you put it in that spot?”
The tick invasion is on us. After the creek flooded last weekend all the ticks in this end of the county have moved to higher ground.
The result is the dogs are carrying them in and they are dropping on us from the trees. I had another tick on me during this video. I hate ticks.
My dad hated them too and once said to me, “I’d rather be bitten by a good clean snake than have a tick bite.” I agree dad. I’ve had two on me this year and I haven’t even been camping yet. One latched on and caused an infection. That resulted in me having a round of antibiotics. Damn I hate those things. As I type this I keep thinking I feel them on me. Hopefully a HOT shower will settle my nerves down.
In this video, I clean up my interior trim and put another coat of clear on them. They had gotten dusty since I painted them way back in 2022? WHAT-THE-HELL? Two and a half years ago?
I don’t know why my images are missing. I am not good at WordPress or apparently managing my website. I’ve got to take some time and sort that out.
So I applied another coat of clear for good measure. I’ve got a week off from work and I want to make some progress on the interior in that time. We all know the hot summer is coming and I want to get a bunch done before my shoppe tries to kill me with the oppressive heat we are famous for here in Oklahoma.
It was too cold to paint. Temps in the forties in my shop. I didn’t feel like getting bundled up to lay on my back getting paint all over me.
Call me lazy, that’s fine, but not super fun for me. So I’m going to tackle the sealing of the seams with paint, seam sealer, and truck bed liner next weekend. I’ll get it as “protected” as I can.
In this video I also talk about what is coming next. Call it a little planning. I have a lot of wiring to run. Lights for the interior and exterior and wiring for a battery management system. I need to plan for a DC to DC converter and all the magic electronics that make everything work well together.
I also mention some of my current storage solution in the U.S. G.I. Aluminum Medical Transport Chests. If you’ve followed for any time, you’ve seen me talk about the.
This is going to be a lot of coin to drop. So getting the wires run will require some planning. I’m certain I’ll screw this up and have to re-run some of this. But that’s part of the fun, right?