Imitation is the sincerest form of flattery that mediocrity can pay to greatness. – Oscar Wilde.
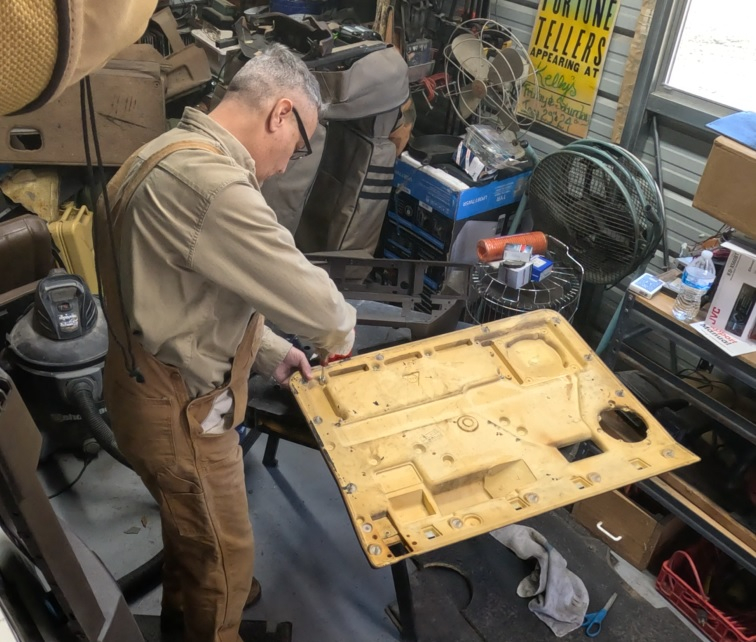
I’ve put together a video of me assembling the refurbished door cards for the Range Rover Classic. I didn’t record an intro nor did I record an outro. It’s just me assembling the cards. If you watch the Working Axle YouTube channel [YouTube.com] you will see some of the prettiest videos. If you aren’t watching him, you are missing out. His videos are simple, cinematic, and yet informative, and he doesn’t say a lot. So this is my homage to his brilliant work. Unfortunately for you, my videos aren’t as pretty or well shot, suck to be you, never-the-less I appreciate you visiting me and sincerely hope this content assists you.
So there’s no pithy commentary. I had to stop at one point and run to the hardware store to get more nuts and bolts. Just some assembling of door cards.
Brown is back!!! I think these door cards look great now with a new coat of paint. The dark brown is very similar to some of the interiors of modern cars today. I seriously looked at getting dark brown seat covers. But in the end I went with the Knightsbridge seat covers so they ain’t going to be brown.
My dash looks like hell. The sun has really taken it’s toll on the plastic. Several places are starting to turn into dust. It also is no longer uniform in color and some pieces aren’t even close to the original color. That color was/is Bokhara Green. Named from the color often found in oriental rugs from the Bokhara district of Turkestan. Traditionally made by the Turkmen tribes, the rugs were made almost entirely from locally obtained materials. Using wool from the herds and vegetable dyes, or other natural dyes from the land to create the Bokhara green color.
In my extensive research (30 minutes of distracted Google searching), I could not find a paint code I could take to a paint store. Nor could I find a can of paint on my side of the big pond (the Atlantic Ocean). You can’t ship paint, believe it or not, its flammable (the more you know…).
Before we get too far into this post…a disclaimer:
I have no idea if painting the plastic parts of my dash is going to work. I did not do any extensive research on best practices or if the products I had available would even bond properly with my very sun damaged dash. Undertake this at your own risk.
With OEM Bokhara Green unavailable, I started looking for colors and stumbled across Rust-Oleum Specialty Flat Earth Brown Camouflage Spray Paint [Ace Hardware]. I originally found the green color but once I saw the brown…I knew that was it.
I painted the dash pieces and have decided that the “flat” and “powdery” nature of this paint is going to be difficult to clean up later. Dust and whatever that will inevitably find its way on to these parts is going to be hard to wipe off. So I decided to experiment with coating the paint with a matte clear. It will also help with keeping the sun off the plastic. UV protection is right there on the label.
I stopped at the store on the way home and picked up the Matte Clear. I tested it on a piece of trim. It dried to a matte finish. This is a second wet coat in the picture.
Un-coated above, Matte finish below
I’ve got a bunch more work to do. I found some more rust on the floorboard in the cargo area. To get this fixed I’m going to need to cut the floorboard out and patch it. The floorboard is supported by a piece of steel that is very rusted and failing in several places. To do this right, I need to replace the steel that is failing. I don’t know what that will entail at this time.
Rusty hole in the floorboard in the cargo area.
I also popped for this ridiculously expensive rust paint.
Hopefully this will magically do what it says it will do.
This paint was insanely expensive. Like 160$(US) for this gallon. I’m not going to lie, I’ve got high hopes for this stuff. Everything I’ve painted on this Range Rover has already begun to have surface rust. I see these types of products used on the YouTubes and TV shows and I’m hoping it works as well as it appears to in the magic of television and the interwebs.
To replace the rusted bits, I’m going to check with Mickey at Mickey’s Garage [Mickey’s Garage] as he indicated on the Facebook that he may have a donor vehicle that I could perhaps get some parts from.
Every one of these “new discoveries” just postpone the day I will get to drive the Big White Bus for pleasure again. It’s frustrating, but it is what it is. I need to fix this rust. The things I want to use this vehicle for will require the flooring to be fixed. No reason to spend a few hundred dollars on building a bed and drawer solution if its just going to get ruined when water gets inside. It’s fun to fix stuff…right? Am I having fun? I’m not sure yet.
My friend the Evil German Dude gave me some excellent advise recently. “You’ve got to leave work at work, and put things behind you so you can go out to the shop and do things you WANT to do.” He’s right, I’ve been very distracted by home repair, nursing our dog back to health again, and I have neglected myself and my wants and needs.
In this video post I investigate my cracking vinyl on the D pillar of the Big White Bus. The Southern Plains is very unforgiving to fabric, even plastic fabric. Mine is cracking and looking pretty terrible. Time to pull it off and get it replaced.
I’m going to need to refresh the black paint on all the pillars and the door frames. I found the part number for a rattle can of Beluga Black. Lots of cleaning, light sanding, cleaning, taping, priming, sanding, and painting, and more painting coming this summer.
And…the headliner is going to need either regluing or replacing…..again. I might go with a fabric that I can stick my souvenir event patches can stick to, just.like.a.real.overlander.
I also find a lovely whole rusted in the passenger side D pillar that will need some repair. Lots of grinding away the rust (rust abatement), welding in a new piece of metal, priming and painting. Good thing I took a welding class last year.
Some time ago I noticed the footpad on my inner fender well would droop when I rested my foot on it. In the beginning I would just put my foot under it and lift it back up. But one day when doing that the footpad broke away from the fender well.
The bolts holding the footpad in place had rust welded to the fender well. So when I was lifting it back into place I was actually bending the fender well pieces, much like you wiggle a wire rapidly to break it. As I’ve said before I really have become accustom to resting my foot on the pad and I wanted it fixed.
So I took some time and investigated and repaired it. I used a Dremel tool with a 60 grit grinding wheel and got as much rust off the inner and outer fender well. While I was behind the quarter panel I also ground off some surface rust.
Once I had it all ground down, I applied some acid etching primer to the metal surfaces. I know it won’t last forever, but maybe it will slow down the rust.
Thanks for reading and watching the video. It’s low quality but hopefully entertaining.
If you are a regular reader you will remember some late unpleasantness when a distracted driver smacked into the Big White Bus while she was parked on a city street. I was determined to get the BWB back on the road. After all we already have one car payment and my budget would not allow for a second. Besides that, I love this Range Rover. We have a lot of miles together and I know her inside and out. I didn’t really relish going through learning another automobile.
So the day was set aside for “mechanic-ing”, but before we managed to get started some friends of Rogers showed up with a lovely 1932 Buick. I don’t remember all the specs on this car but it was a Buick and nicely done. The trunk was a dealer option and still had the original leather clad luggage inside. A time capsule to another time.
1932 Buick. You never know what will show up at the shoppe.
To get the fender straightened was the first thing. We got the Range Rover lined up with our pull point. We did not believe the under structure was damaged but we needed to pull the fender out to make sure. JagGuy got the “come along” out and hooked it to a M54 military truck parked in front of the shoppe and on to the bent fender.
Mike gently pulls the fender out.
After the pulling, inspection.
That worked nicely. “The panel “wants” to go back the way it started.” he said admiring the job. So pulling it straight will help with a lot of the work. We did learn the bumper was a loss. I couldn’t see any reason to try and straighten it. I’ll have to get a new bumper. I’ve got my eyes on some aftermarket ones.
We took a break after that and went over to Back Door BBQ. The “Beastwich” sounded appetizing so I indulged. This might have been the best sandwich I’ve ever eaten. No, really. It was amazing.
Beastwich. Something different each day.
Satisfied we decided to attempt to put a coat of paint on the new fender I had salvaged from the Pull-A-Part yard a few weeks back. We got it on to the table and I was instructed to rough it up and wash it down with a solution that removed all the grit and oils. These are basically all the same, sorry I didn’t remember the product name.
A little rust to remove.
Buffing it rough to assist in paint adhesion.
Painting.
After JagGuy applied a layer of paint he wasn’t terribly happy with the results. Knowing we weren’t going to be able to install the same day as paint, he told me he would put another coat on during the week and it would be ready for the next weekend to install.
The results were mixed. I should have probably bought medium drying instead of the fast I wound up buying from English Color and Supply. Good folks there, and they have the expertise and a nice disposition. I didn’t pretend to know what I was doing and asked for help all the way. Highly recommended.
English Color and Supply
So I retrieved the fender and a couple of weeks later I installed it. I had already disassembled the fender on the donor Range Rover so this was old hat to me. There really isn’t anything special about removing the fender. Remember these are built to be worked on.
Remove the lights.
Remove the pozi-drive (The Garage Journal) screws (use a number 1 or 2 Phillips) from the inside.
You will need to remove the plastic box on the seat release. The push button unscrews.
You need to remove the two bolts on the inside of the fender above the tire.
Screw removed.
Five if I remember correctly.
Two bolts underneath.
What she looks like without the fender.
Fender off.
Reattached the lens cover rubber to the fender BEFORE you put the new fender on. You can do it after…its just harder. I ground down the rust spots as well as I could and gave everything with rust a coat of self-etching primer.
I reattached the fender. The rear inside is attached with pop rivets. So you’ll need to put some elbow grease on the fender to get the holes lined up.
Pop rivets
I think there were 4 or 5 needed. That’s it except for putting the light assembly back on. I used the new one I salvaged from the wreck. In the end, it looks great.
It is now the third different painting she has had. I really should get an orbital buffer to her this summer and get the oxidation off and get the panels shining and perhaps closer to the same color.
That’s about it. The removal and reassembly of the fender is a 1(one) on the Okierover Difficulty Scale. The painting however is another thing. If you REALLY, REALLY care about the paint matching and there being a nice coat of paint this might be a 3(three) on the Difficulty Scale. You would need to apply bondo and sand a great deal more than we did. Every minor imperfection on the panel will be magnified by ten once you start to apply paint. I didn’t care all that much about perfection.
If you follow me on the Okierover Facebook Page you read that I needed to replace my oil sump gasket. And as I predicted the weather did NOT cooperate. It stopped snowing at 1030 that morning but the wind was blowing 20-30 mph all day. It was very chilly in the garage.
If you are from Oklahoma or drive a domestic automobile (Chevy, Ford, Dodge, just kidding no one drives a Dodge) you can translate oil sump to oil pan.
I had trouble with the term too. Try Googling “oil pan gasket” when your British motor car has all their parts listed as “oil sump”. The same thing happens when you are searching the RAVE manual looking for an oil pan. Thankfully when I ordered the part from Rovah Farm it was easy to find.
Back to the leak, the Big White Bus has recently been leaving a nice puddle of oil when she comes to a stop. I know all the jokes about British cars and leaks. If you don’t see a leak, it’s probably dry. Well, I don’t care for leaks. I do my best to find the leaks and eliminate them. Like the steering box, it leaks like a sieve. I should have a rebuilt unit next week. And I will have it installed by the end of that Saturday. That will be the last of the petroleum based fluid leaks. It only took me 3 (three) years!
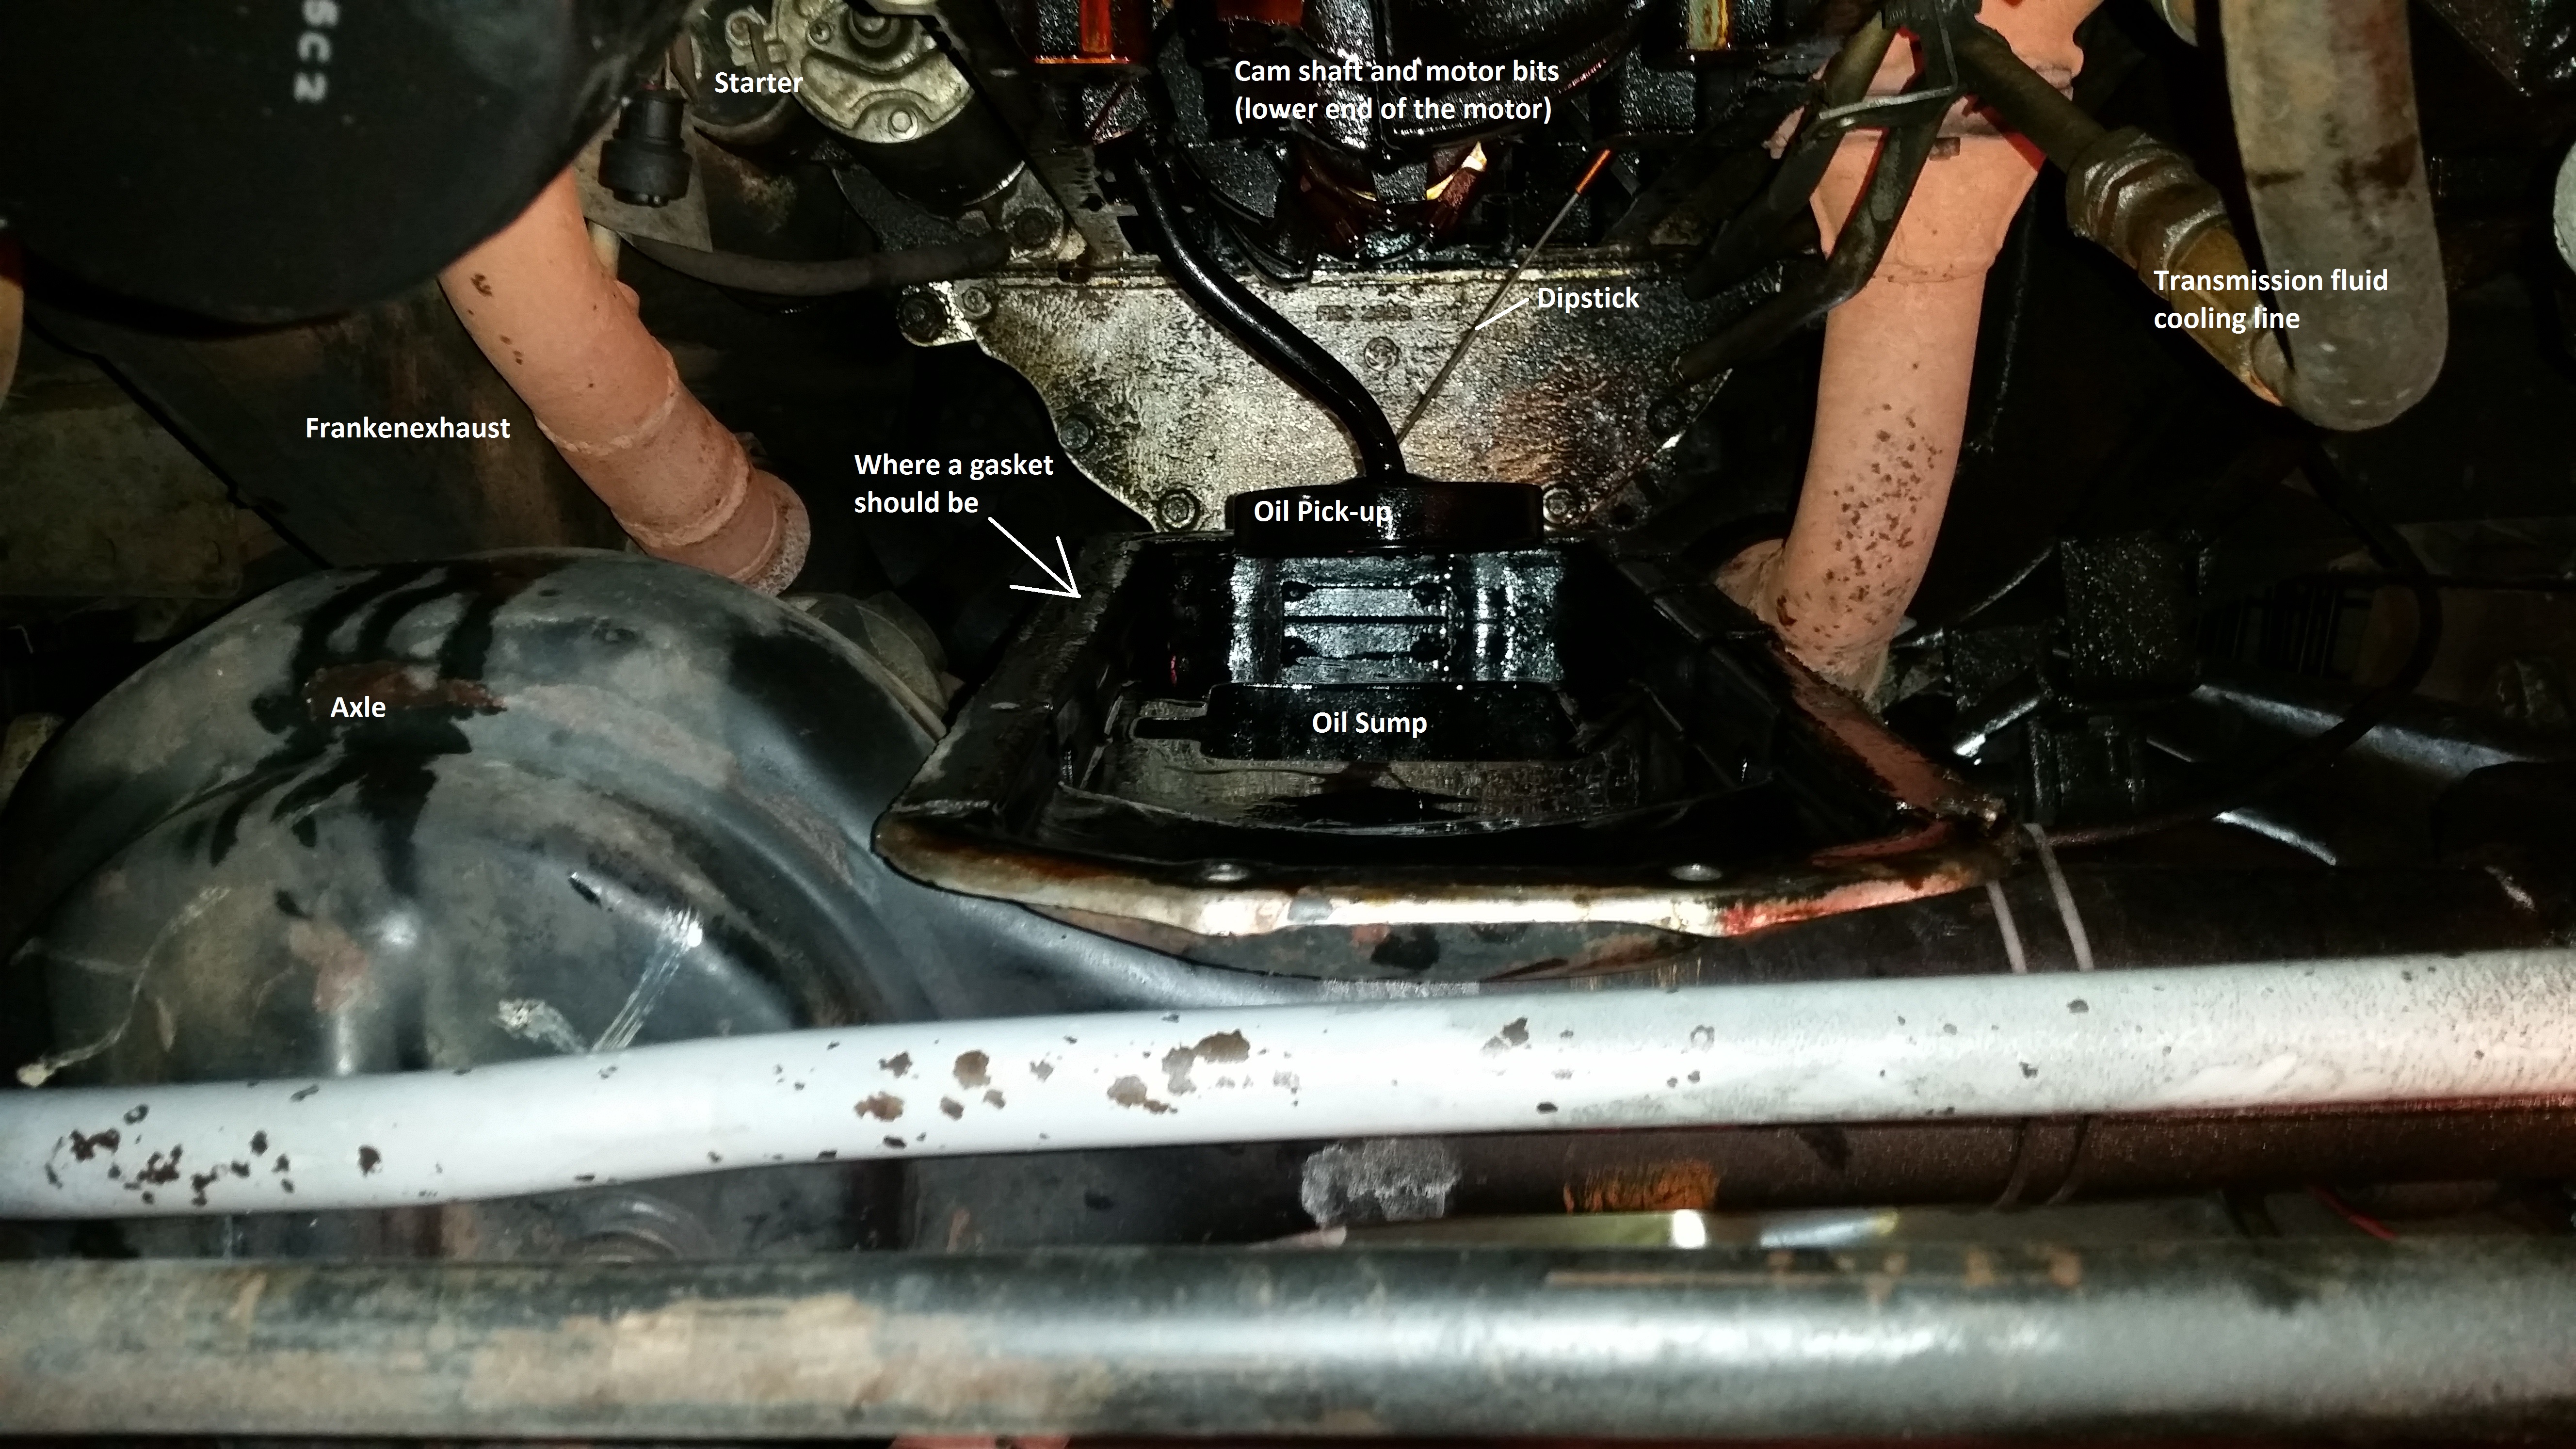
The sump dropped away from the block. Labeled for your reference.
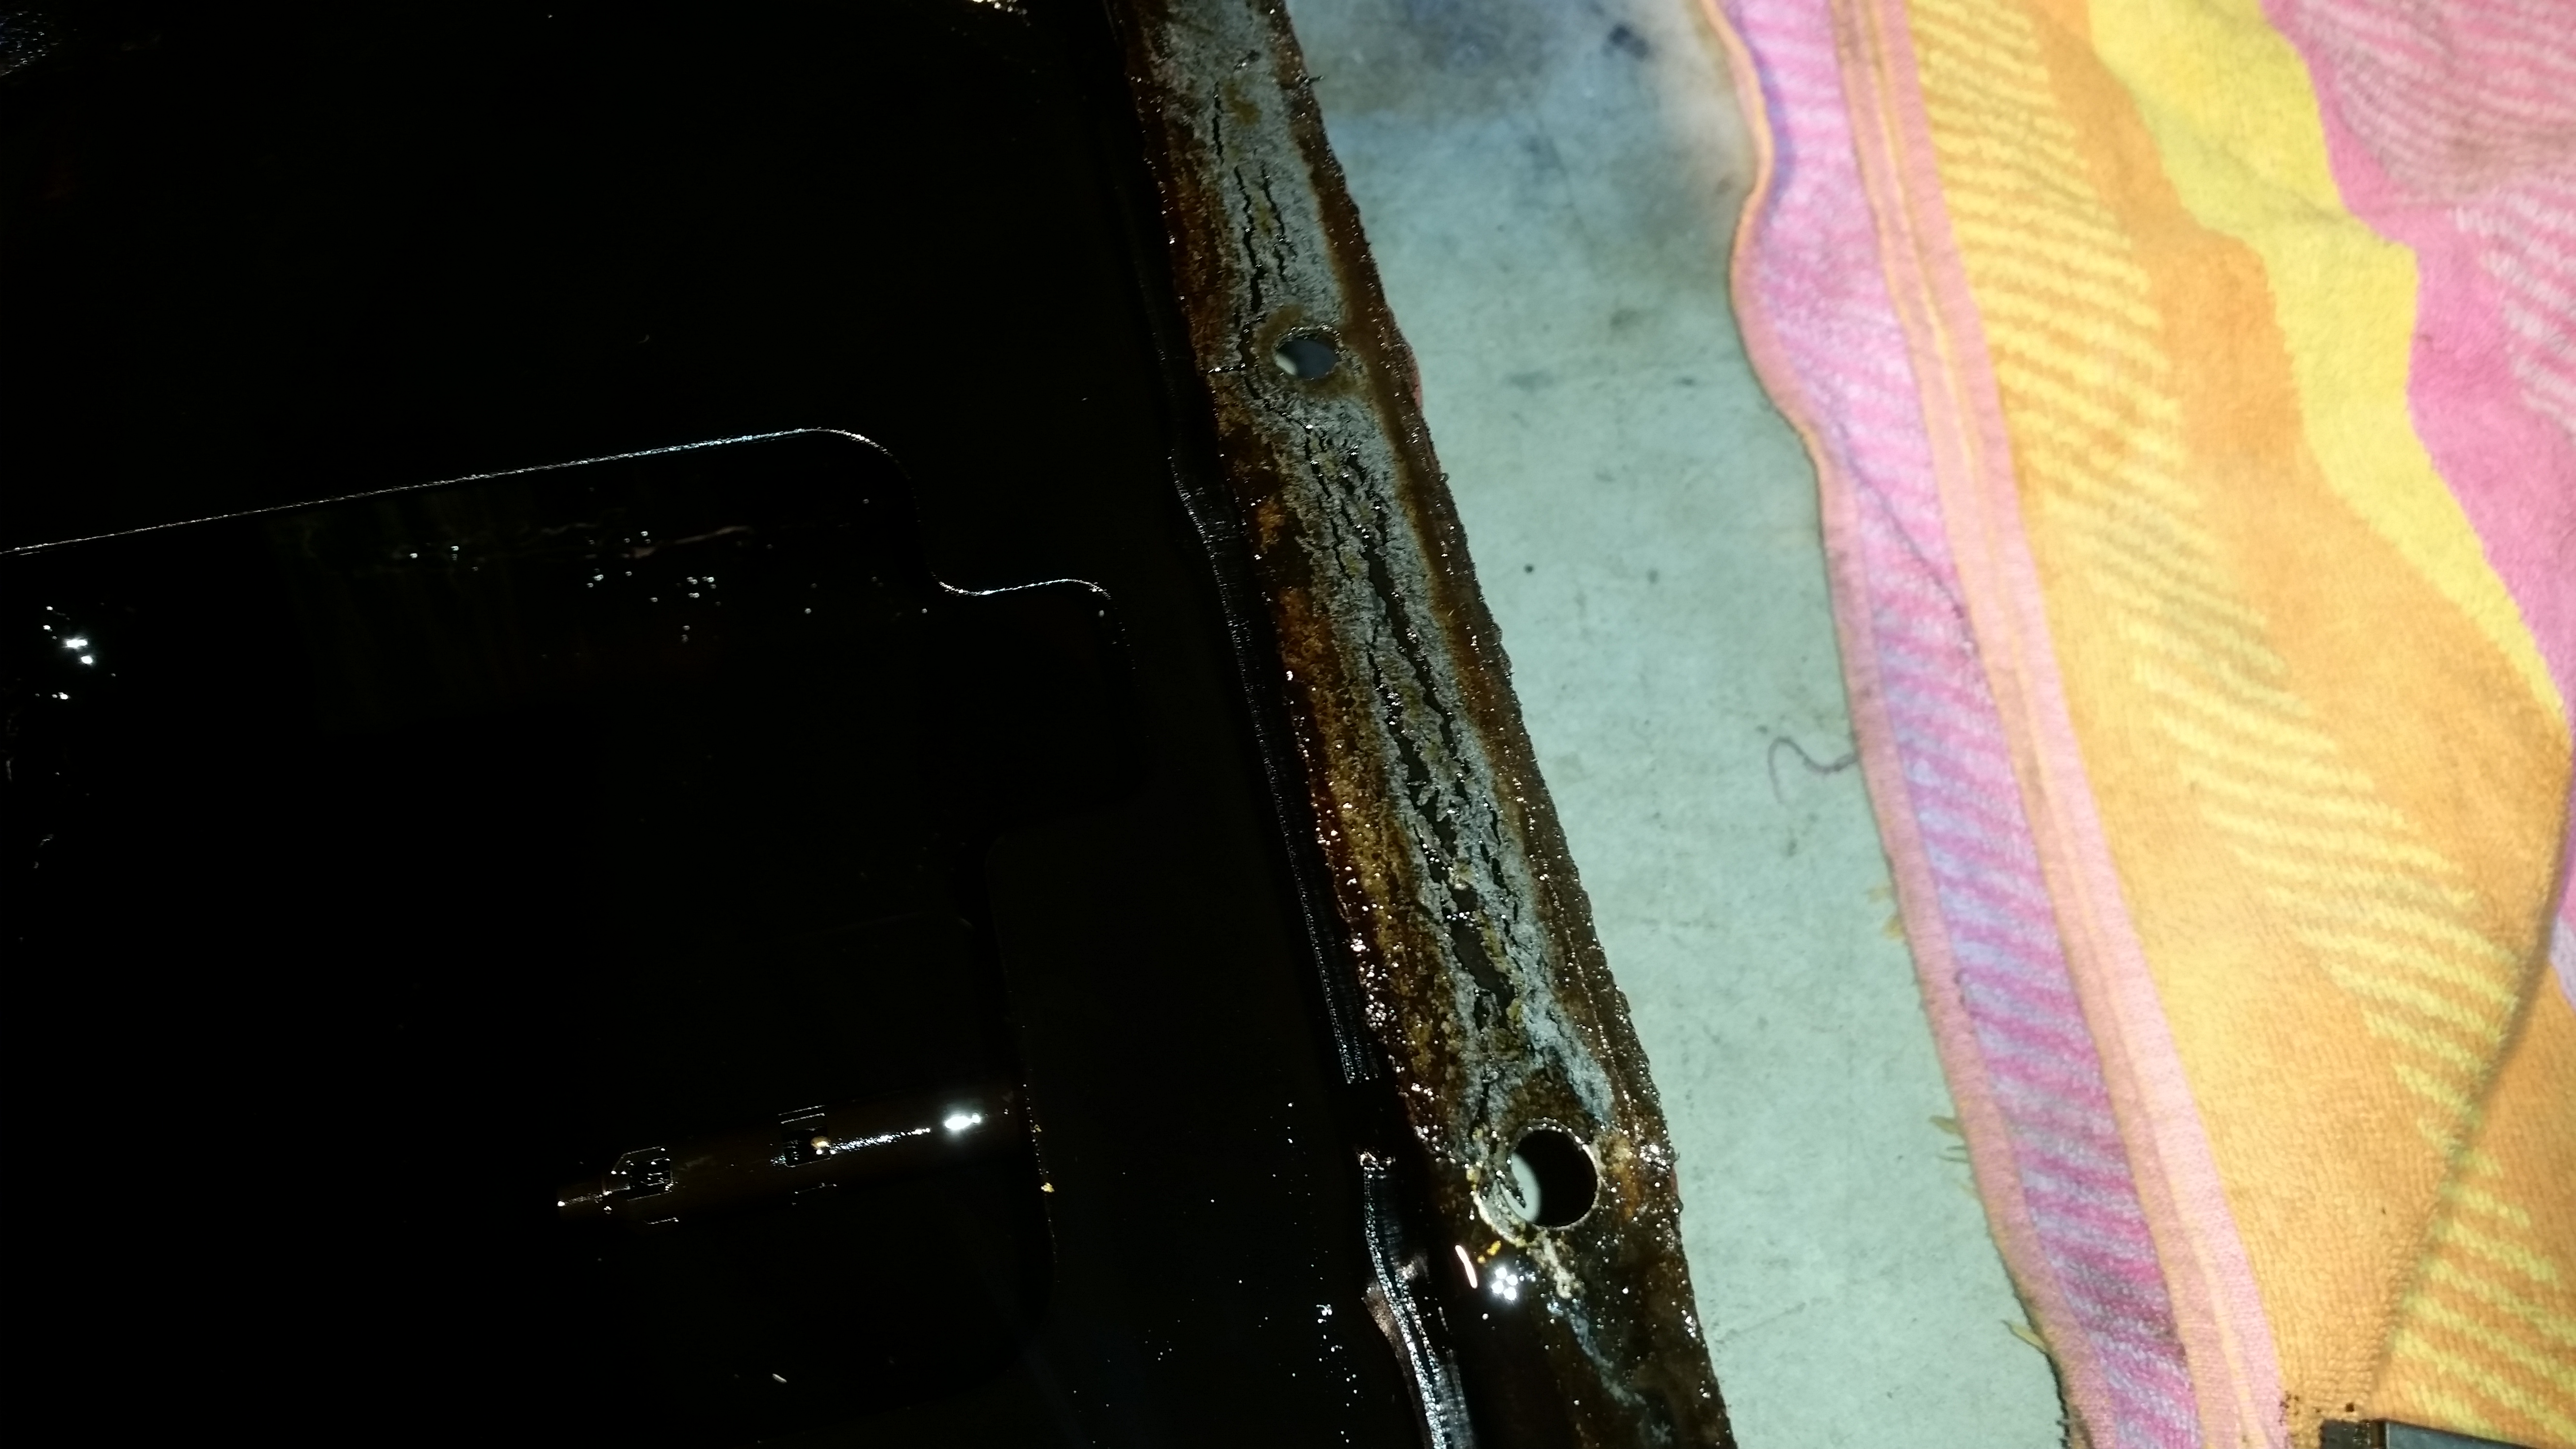
The source of the leak? the oil sump gasket or to be more specific, the LACK of a gasket. I am the second owner of this motor. As you can see below, someone used Permatex Ultra Gray for a gasket. First, Ultra Black should be used, not Gray, and there should be a cork gasket completing the seal. If you have done this I’m not criticizing, I’m just pointing out now you probably know why it’s leaking.
That is a bit too porous to hold oil back.
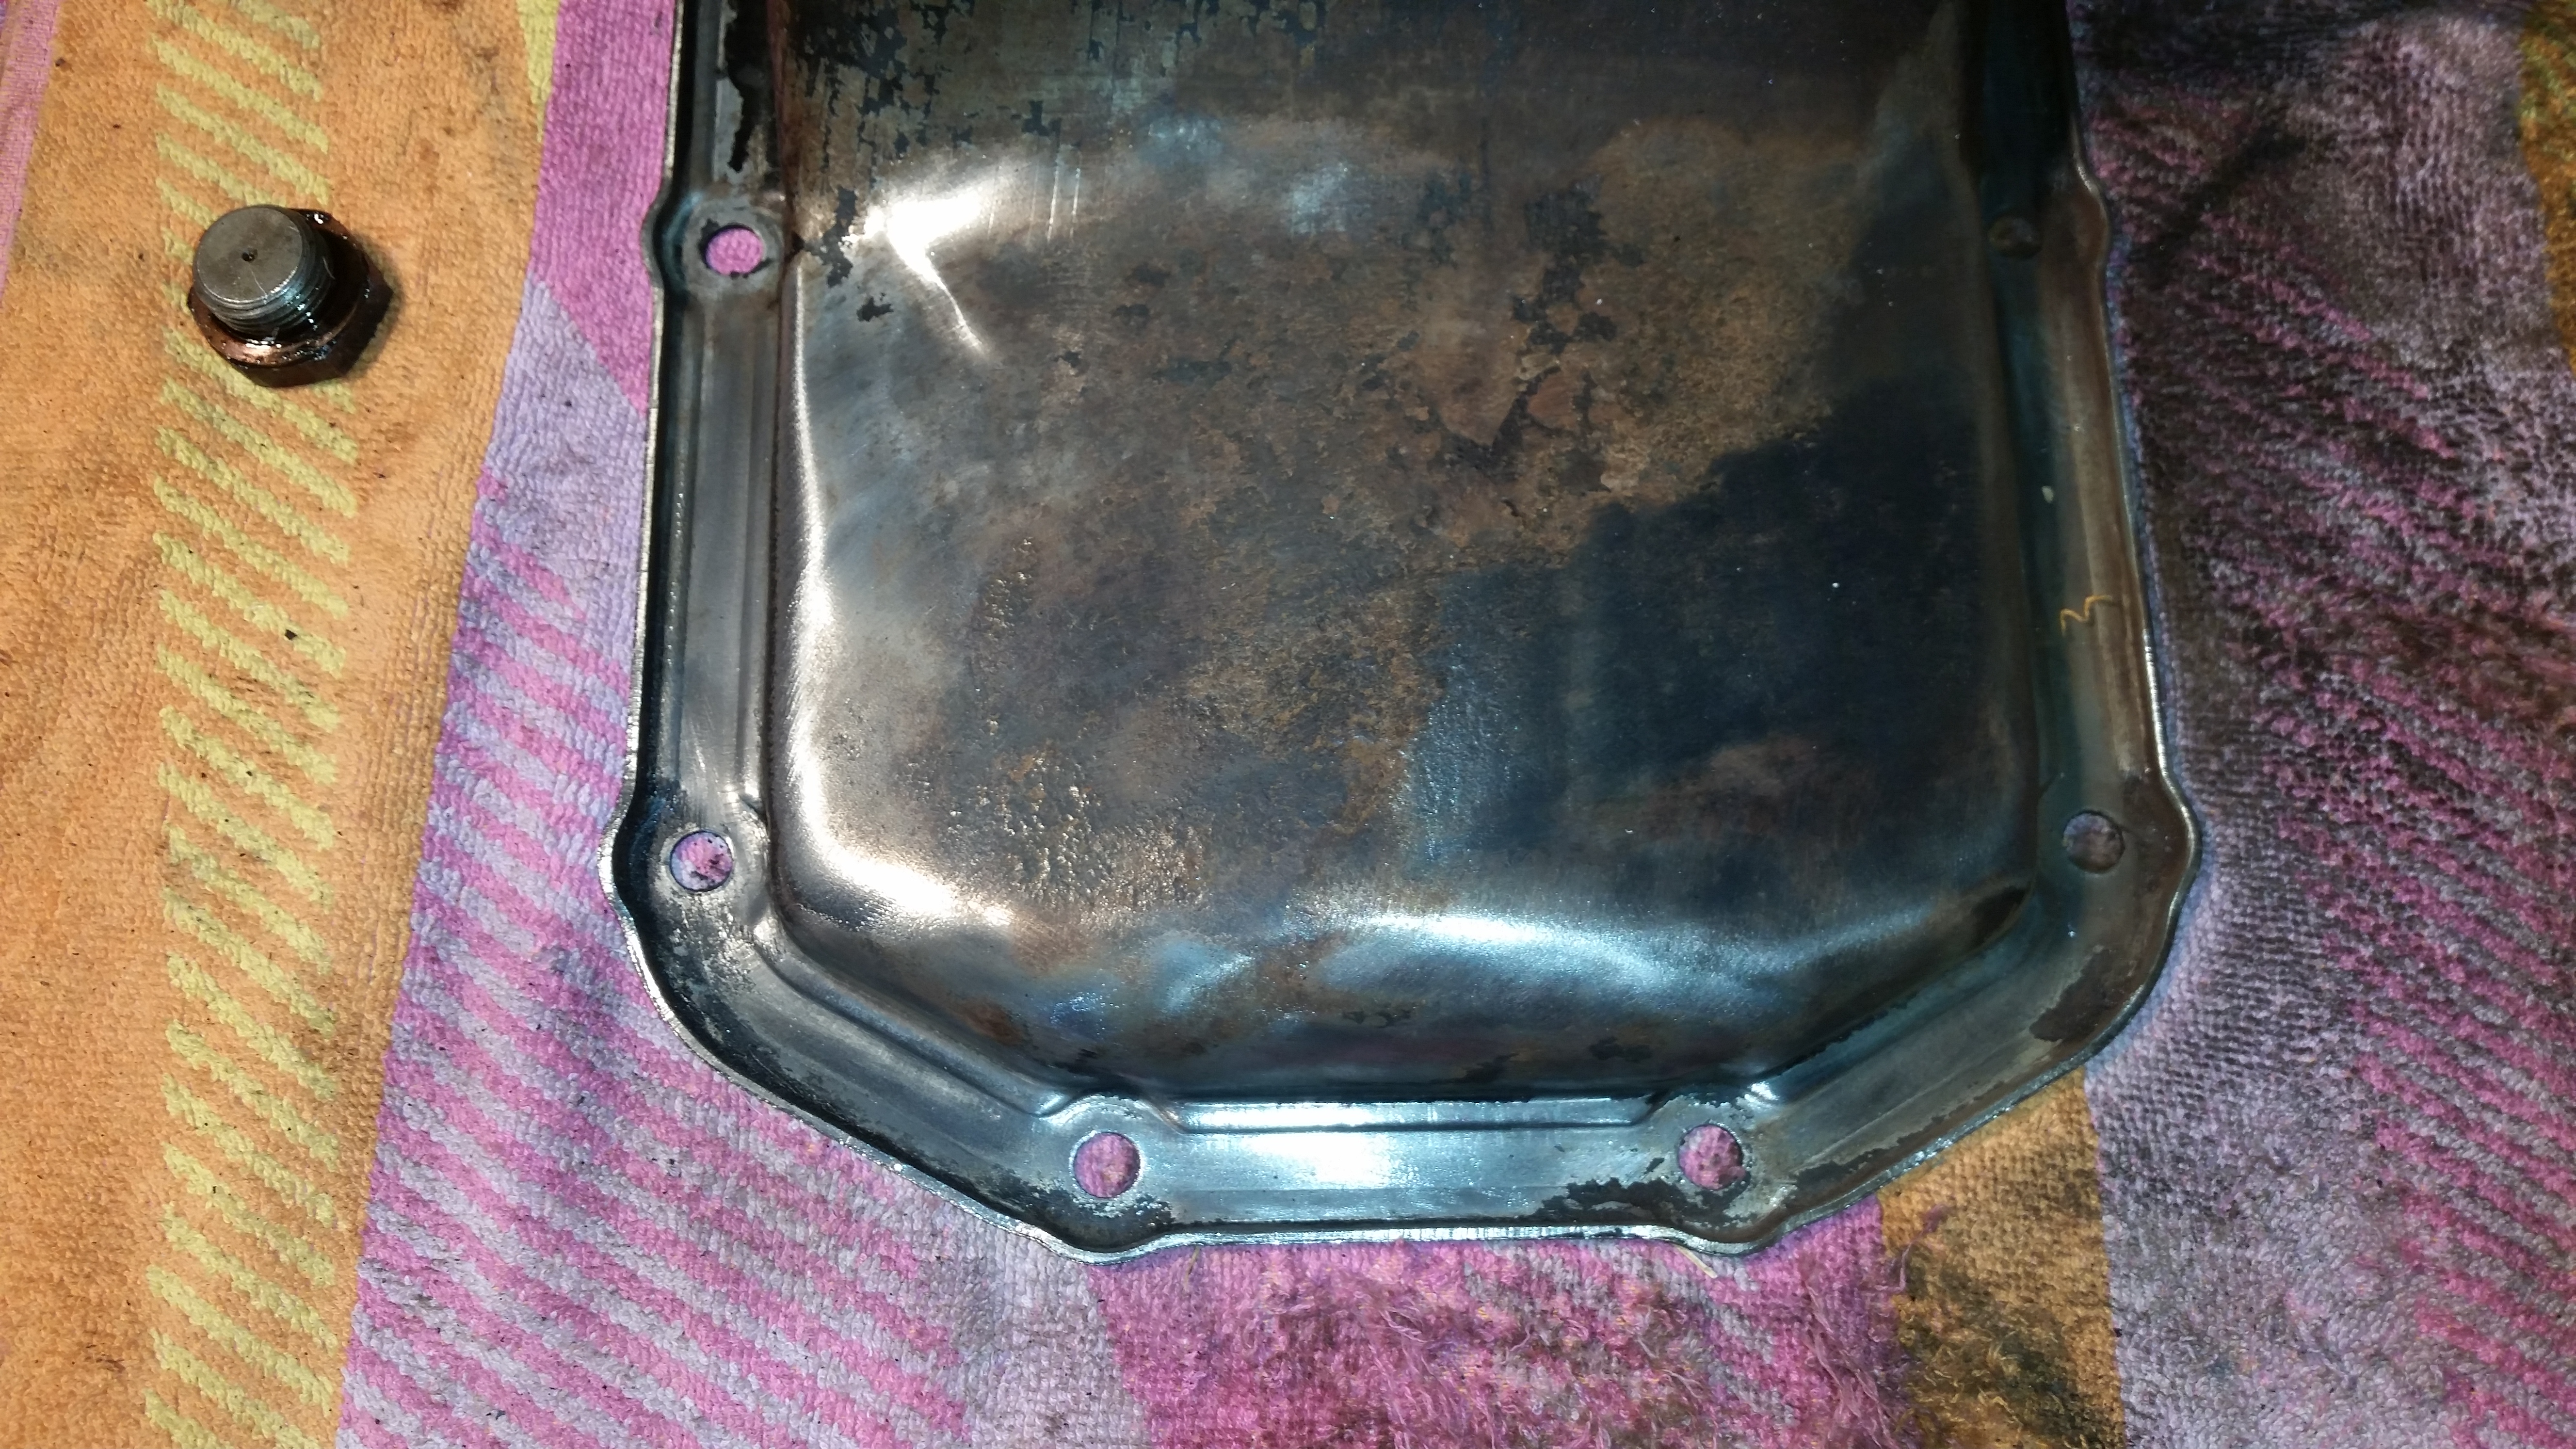
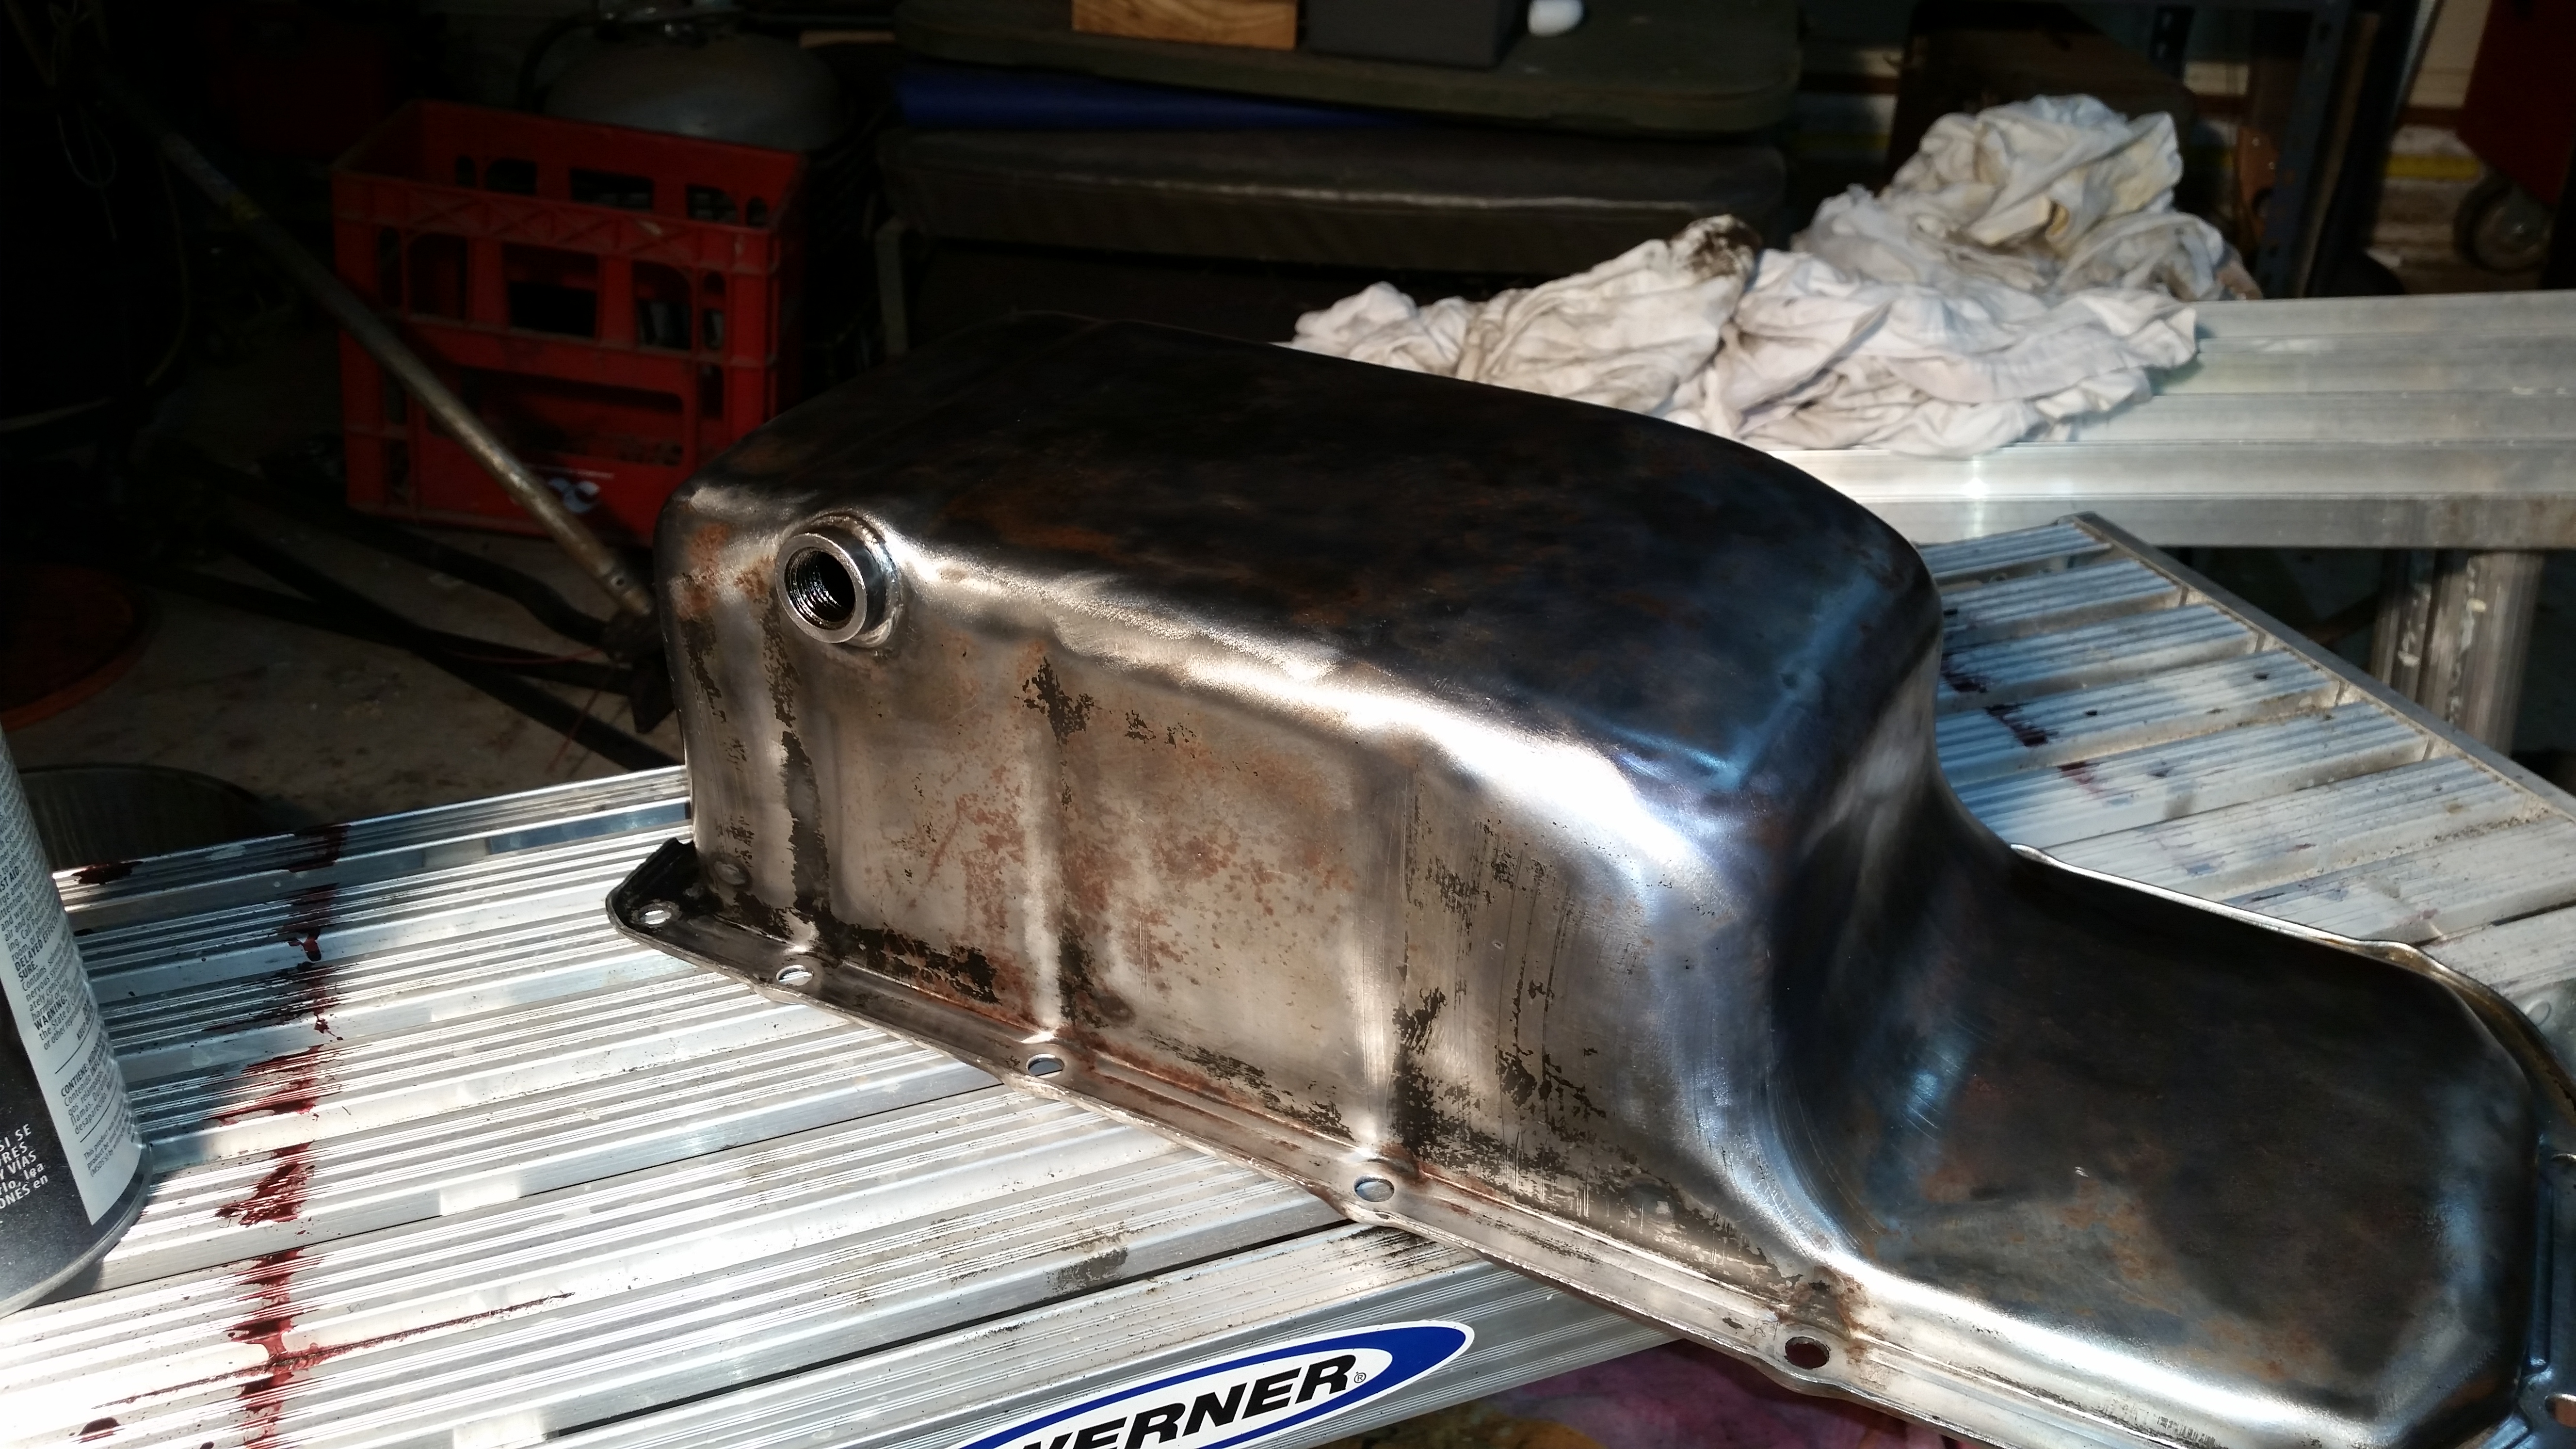
My oil pan sump had to be removed and serviced. There was rust and chipped paint and what was left of the “gasket” had to be removed prior to putting a new one in. I was surprised that something that has had so much leaked oil on it could rust, but it did.
The oil sump with a bit of the rust removed (on the right).
I got the trusty angle grinder out and hooked up a wire wheel and scraped off the rust and the factory paint (black). The challenge was getting the oil and grime off. I used brake cleaner, a lot of rags, and in the final stage before painting I used some pre-paint grease remover.
Ready for paint.
While I had it off I cleaned some of the grime and muck out of the sump. I used a flat razor scraper. I was careful to make sure I left no “chunks” in there. Short of a sand blaster there was no way to get all the baked on muck out of there. My sand blaster cabinet is not big enough.
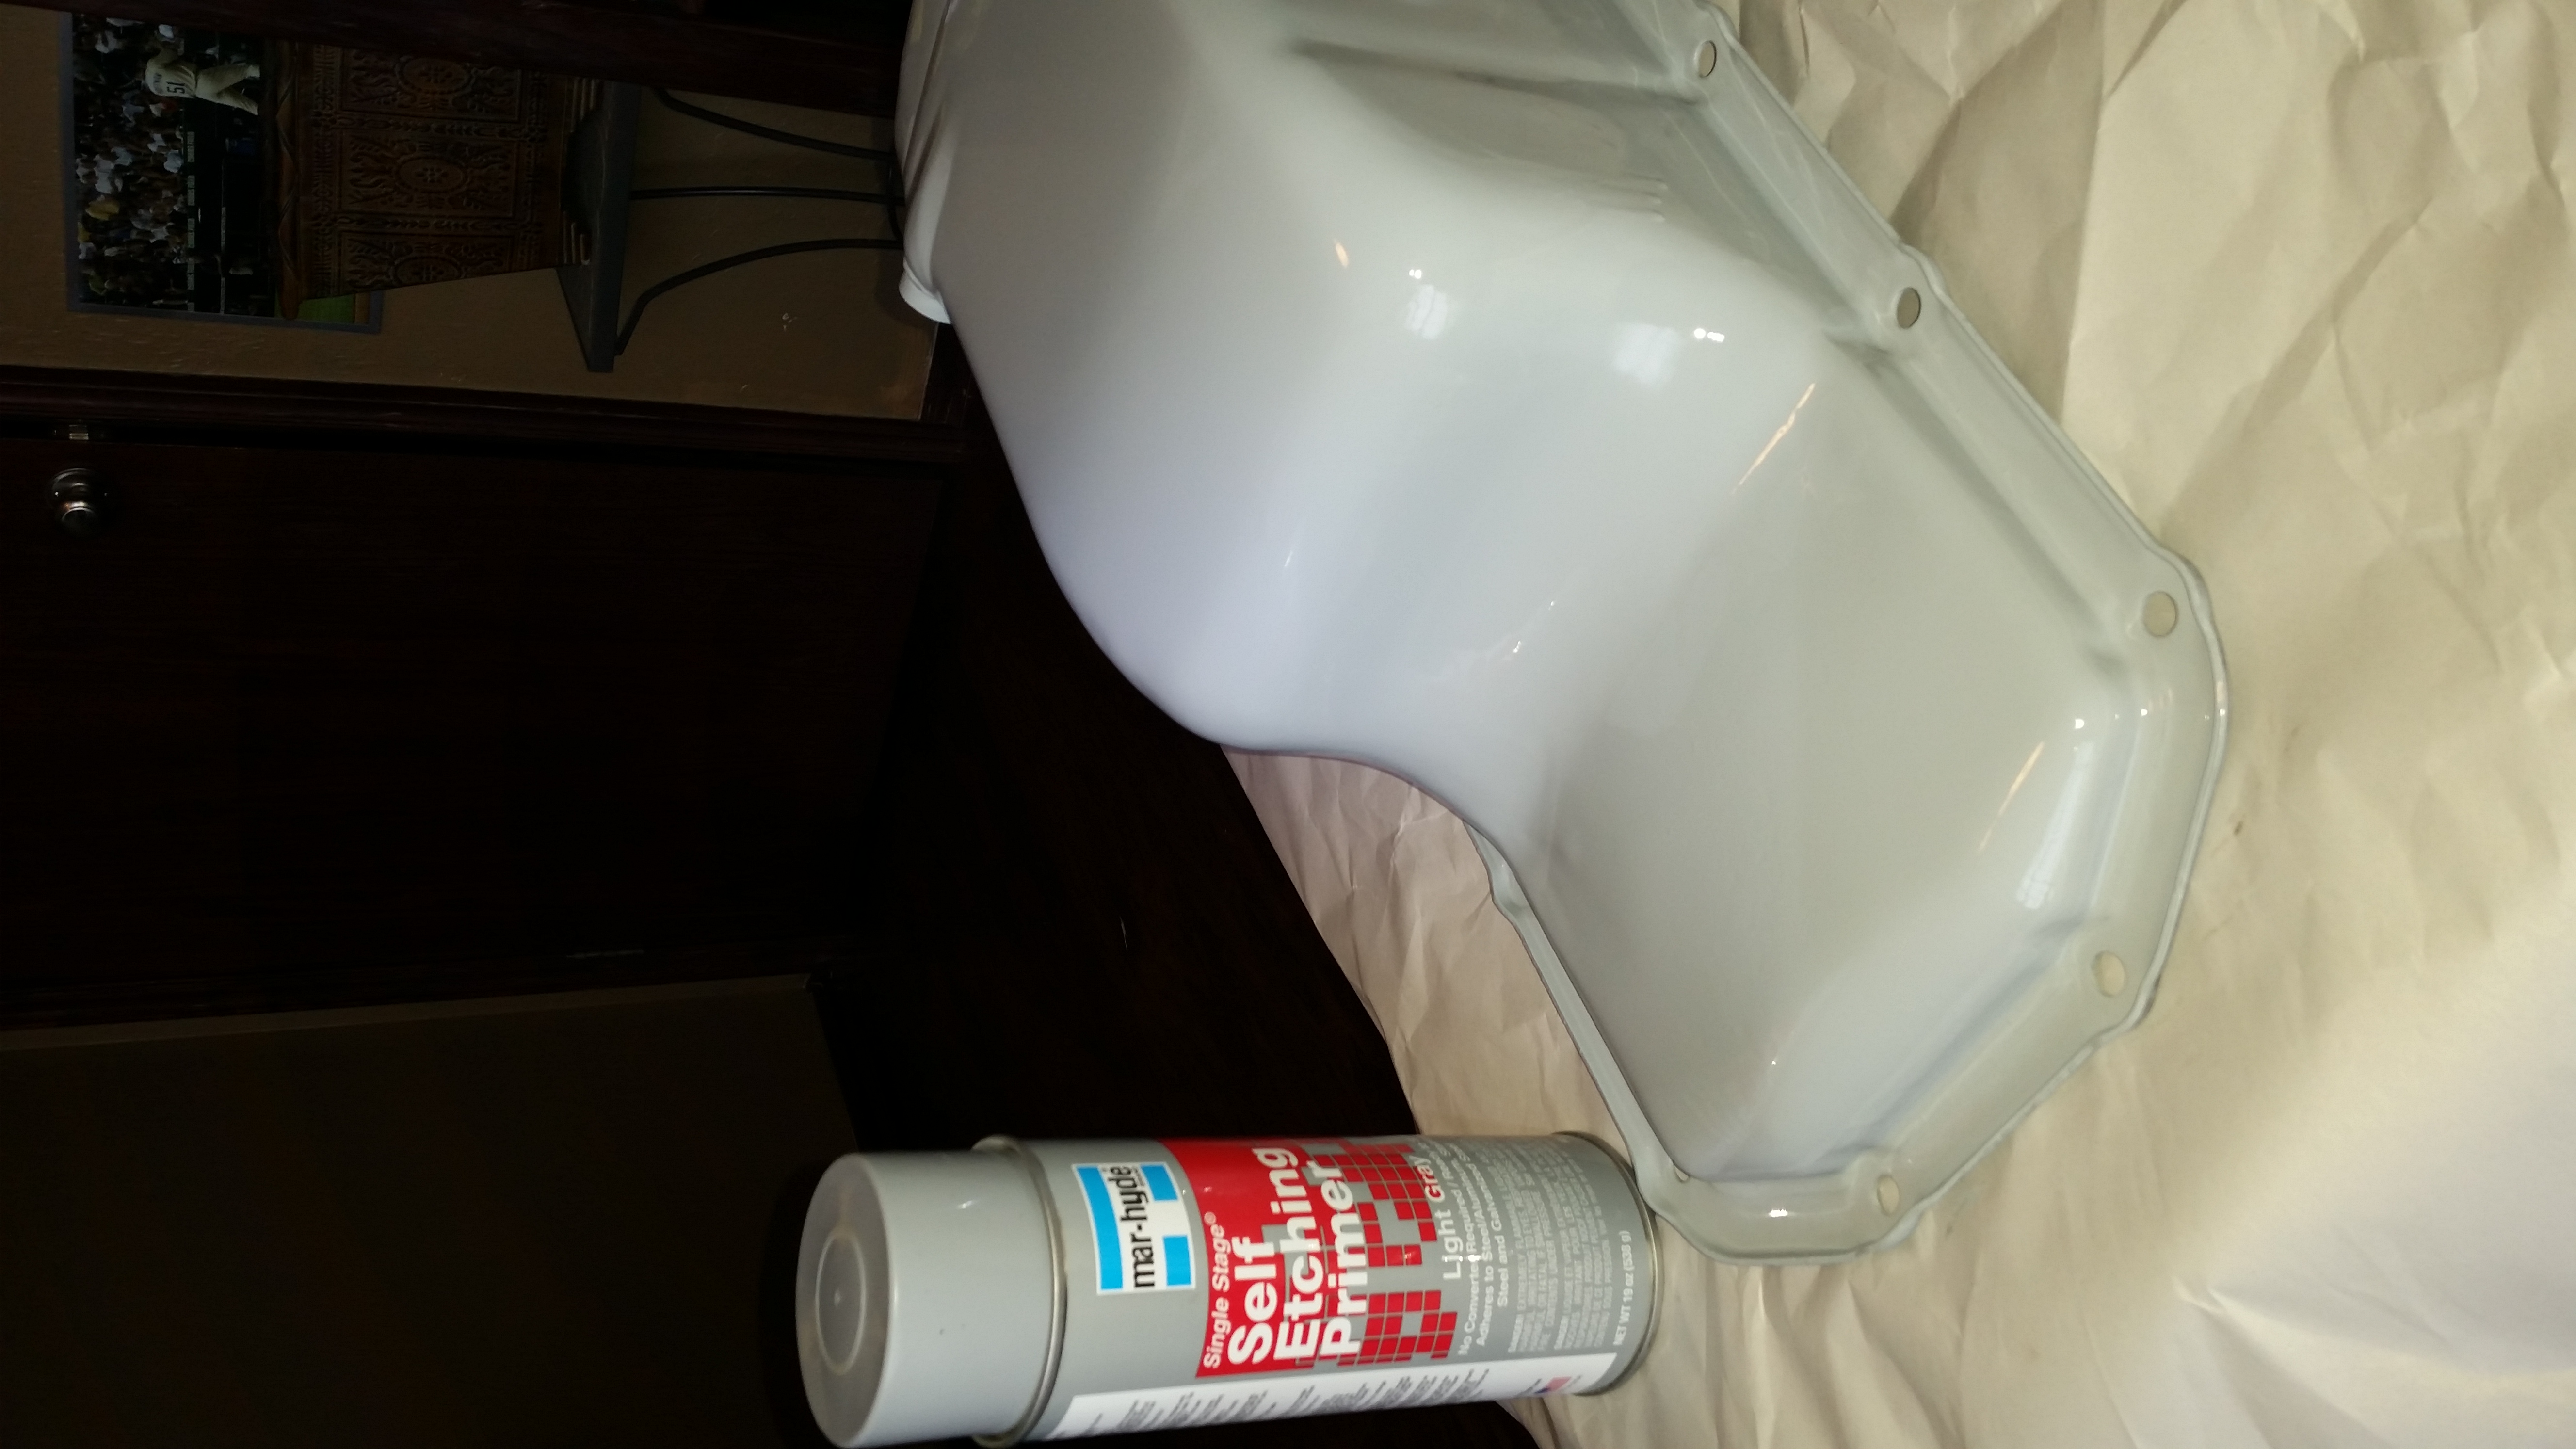
The sump was ready to be painted. I got the Mar-Hyde Self Etching Primer from inside the house where it was being stored at a temperature that allowed it to be used. I painted the pan with the first coat and then brought the pan into the house and into my office to dry. I gave it an hour to dray and when back out to clean up the underside of the motor. I also swapped out the last poly bushings on the radius arms.
I don’t know why WordPress won’t let me rotate this picture. Fresh paint looks good.
I put the second coat of paint on and after some waiting I started to put it all back together. The first thing that is required is getting the Permatex Ultra Black gasket maker on and letting it set up. I did this in my office. I wasn’t even sure if it would setup in my garage at 30 degrees Fahrenheit. Once it set up I put the cork gasket on and lined it up. The Permatex acts like an adhesive at least enough to secure the gasket from moving during install.
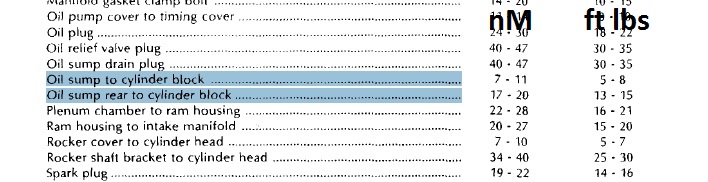
The next challenge is to get the sump back in place and bolted up to the block. Take your time and don’t rush. The cork gasket can slip and if you break it, you are done. After it is in place you bring the bolts up to snug. The manual calls for you to tighten it to specific torque settings. The idea here is that you don’t crush the gasket.
From the manual you can see that is not a lot of torque needed. I don’t have a torque wrench that I could get my 13mm sockets on. You have to use narrow walled sockets, etc… in short my tool chest is inadequate for this. So I was careful when I was tightening them. A note here, the rear bolts are not labeled but I assumed it was the ones on the row nearest the transmission tunnel.
I finished up the oil change and and then the moment of truth came. I got the oil up to temperature and watched for leaks. None were found. I drove the Big White Bus to church the next day and still no leaks. I’m going to mark that down as a success. I will of course be watching it for the next week.
On the Okierover Difficulty Scale this job is a 2 (two). You will have the oil sump off, you will get oily and dirty (and not the good kind). You also have to remove the sway bar to get the sump out. If you aren’t going to clean it up you can skip the removal and just clean it up while under the engine.
Thanks for reading and Happy Rovering.
PS the Oklahoma Land Rover Group is still on track to #Hibernot and take on a section of the Oklahoma Adventure Trail. If you are interested check out the details on the Oklahoma Land Rover Group on Facebook.