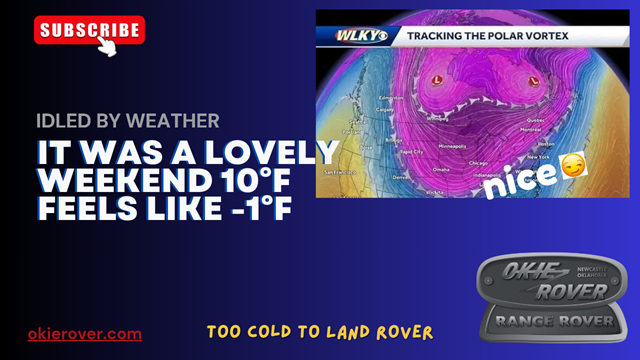
In this video I talk about how cold it has been and our recent weather event. It was a good one. We got 7 inches of snow here at Okierover Base Camp. We had a couple of days with temps in the low teens and 24 hours of single digit temps.
I never really thought about it but I have 120°F (49°C for the people who have never landed humans on the moon) of temperature variation in the course of all four seasons.
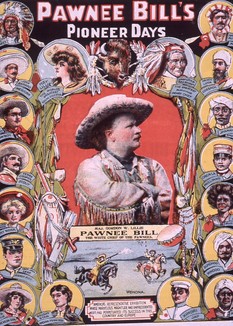
In this video I briefly talk about the Pawnee Bill Ranch and Museum. They have a reenactment of a real Wild West Show each summer.
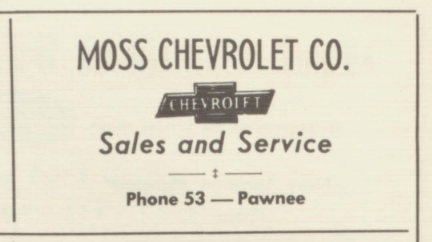
I also talk about a now defunct Chevy dealership in Pawnee, Oklahoma. Moss Chevrolet was in business from 1941 to 1966.
An advert in the Pawnee Bruin Yearbook from 1952.
Relax…it’s not a real wolf pelt.
Thanks for reading, like, subscribe, tell your friends, and Happy Rovering.
From Wikipedia: The dog days or dog days of summer are the hot, sultry days of summer. They were historically the period following the heliacal rising of the star system Sirius (known colloquially as the “Dog Star”), which Hellenistic astrology connected with heat, drought, sudden thunderstorms, lethargy, fever, mad dogs, and bad luck. They are now taken to be the hottest, most uncomfortable part of summer in the Northern Hemisphere.
Actually we are a week outside the OFFICIAL Dog Days of Summer, that’s okay Oklahoma is behind in a lot of things.
In 2024 Oklahoma was 49th in Education among the states. Thanks New Mexico!
We are 37th in crime…
48th in Healthcare! West Virginia and Mississippi are still worse.
On the good side!!!!!
2025 US News ranked Oklahoma City was named #1 Big City to live in!!!!
When it comes to food, Oklahoma is #1 in Onion Burgers and probably chicken fried steak. I’d say we are top 5 in BBQ too.
When it comes to oppressive heat we are rocking it on that too!!!
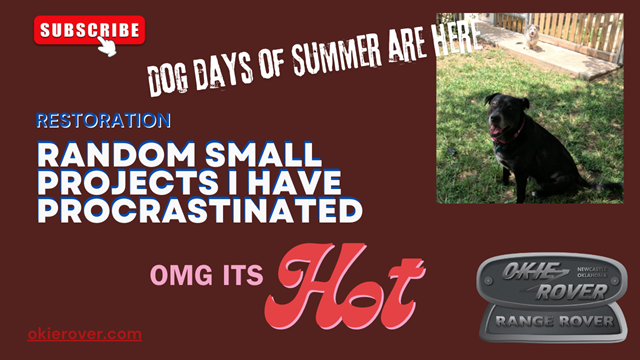
It’s too hot to work in the shoppe. I’ve tried to get out in this hell-scape but my 60 year old body is not my 40 year old body and I’ve had a mutiny. My brain still thinks I’m 40 so my body chronologically aged is 60+.
I’ve got a few things I’ve been putting off fixing. They aren’t all that important individually, but necessary.
Zip tie some wires. I’ve got a bunch of failed zip ties underneath. I bought some special for this and I need to get under and get this sorted.
Rear brake line bracket. I cut the bracket off so I didn’t have to deal with the brake lines. Now it’s just hanging and needs to be reattached.
Rust. I bought some rust converter. I could use it very judiciously to make some stuff look better and to stop the rust.
GMRS Radio. I need a solution for my GMRS radio that would make it portable. Was thinking ammo can… haven’t decided exactly.
Not in the video. I have to seal up the floor of the passenger side footwell where I welded and it melted off the stone chip coating.
That’s about it. Like and subscribe, hell drop me an email or comment on the video. Share it with friends at parties…
May the wind take your troubles away….Thanks for reading and Happy Rovering.
In this post I fit my floor panel in the Range Rover. Yes, I know, it’s about time!
I finished up bolting on the support beams and got the panel test fitted in the Big White Bus. This required me to go to the hardware store and buy a bunch of stainless steel hardware. Fortunately for me I bought a box of 100 bolts. Unfortunately for me the bolts had a 37.5% failure rate when fastening them with nyloc nuts.
Why? I have no idea. It’s not like I was torquing the hell out of them. I hadn’t even bottomed the nuts out and the bolts were binding up. Pretty disappointing. I’ll be sourcing a different brand of hardware in the future. These really let me down. I’ve had problems before but thought it was me being rambunctious with the impact driver. Turns out it wasn’t that after all. You might be quick to say “made in China” I’m not surprised. But these were made in Taiwan. Normally an acceptable substitute, and if that helps them stick it to the CCP I’m all for it. Not sure where I’ll find another brand but I’ll be looking.
The panel fit was “tight” to say the least. It required a bit of persuasion (with a hammer) but it fits. The next step is to get the damn thing welded into place. I probably have 100+ plug welds to do. This is going to be a challenge.
I can see the end of this part of the project in sight so I’m excited to get after it. That’s all for this week. Like and subscribe if you enjoy the content and appreciate all the free content.
In this update I begin attaching the supports to the floor pan. Also in this update I tried to get carbon monoxide poison and avoided getting bit by a fiddleback spider.
I started on the supports and the first one was the strap across the back portion of the floor bed. When I removed the strap during my tear down I drilled out the welds. I did a decent job and only punched through on one weld. This allowed me to plug weld the strap back into place.
This was fortuitous. The other support beams are drilled through. That’s gonna make reattaching …difficult.
Since it was a bit chilly in the shoppe, I fired up the kerosene heater. I done this several times in the past. Before I closed the overhead door a little exhaust from the Big White Bus managed to get in. The heater must have added to a substantial amount of carbon monoxide. This set off the sensor. So I opened up the door to let the monoxides out.
I also moved the alarm, under the alarm was a damn fiddleback spider. The cold didn’t allow for the damn thing to scurry away. I ended it right there with a tap. When it twitched, I gave it a SMASH. One less brown recluse spider is a good thing.
I now have one of the three supports into place. The other two will not be as fun.
Like and subscribe if you are enjoying the content. It is appreciated.
3: working in a metal shop building in the heat of an Oklahoma summer
Good grief it was hot today. The shop was 120F° (48.8°C) when I opened the big rollup door. After a few minutes the temp calmed down to a very tolerable 105-110°F (sarcasm). It was about as hot in there as I’ve ever seen.
But temperature is not something we let ruin a good time. Some people go camping in this heat, I don’t. Some people continue to run as a hobby in this heat, I don’t. Some people work on their Land Rovers when its this hot outside, I definitely do.
The heat aside, I have to work on this Land Rover at every opportunity if I’m ever going to drive her again. So there I was sweating my b@11s off to make a floor panel patch.
I started with measuring the size AGAIN. I seriously measured for this patch at least a half dozen times. I then proceeded to cut a patch from my recently procured steel.
The patch needed a lot of manipulation to get close to fitting. I bent the panel by hand first and then used the BF hammer to get it even closer. I’ve still got a long way to go to get this even closer.
One of the seems in the deep bend along the transmission tunnel is not welded. That will need to be welded and sealed again. I also have a small patch to fix next to the bulkhead on the door side. Those two will be the next two things I tackle.
Once those are fixed, I’ll be able to finish the patch. The patch will need to have another 1/2 inch trimmed off. Then…there is the two bends that are there for structure or to limit the vibration. I’ll need to build a jig and use the air chisel as an air hammer to bend the metal.
This is going to take a router bit that will closely approximate bends. And it will take me making a jig. I watched a video on YouTube by “Make It Kustom” where he did this very thing. I’ll need to make the same tool he did. And I’ll need my air compressor…which…is now disabled.
Seems my last working air fitting end, which started leaking recently, now will not hold any tools because the ball bearings are missing. And if that wasn’t enough, my hose end is now stripped out and I won’t be able to put a new fitting on, so I get to buy a new hose too. Super awesome.
That’s where I decided to shut down my work and jump in the pool.
Thanks for reading, like and subscribe, and Happy Rovering.
The good news…I have the swimming pool setup and I’ve been in it twice this weekend.
The bad news…I still suck at welding. In my defense this part of the Range Rover Classic is a mish-mash of panels converging into a very small space. There are no less that three different pieces in this area that are plug welded and the gaps filled with seam sealer. In a future video when I build the rest of of the upper wheel well, I will point out the three layers of panels that go into building the wheel well. It’s so convoluted that screws were even used to hold the parts together. SCREWS!
Anyway. I build my replacement parts and attempted to get them married together. Ironically I have three pieces of metal to get this done. Well four if you count the patch of the side bulkhead.
Did I say it was hard to weld under there? NO? Well it’s damn hard to weld under there. You have basically two positions. Mashed up against the wheel hub and laying on the ground with welding slag (molten metal) falling on you. Both, super awesome as you can well imagine.
I said I was swimming earlier in this post. While sitting on the patio drying off Mrs. Okierover noted the weird red scratches on my right arm. I told her they were from being mashed up against the hub.
Manufacturing the repair pieces was a bit of folly too. I had to make the “L” three times. First time was an experiment to see if I could make a bended L. The second was because I measured the piece without the floor panel in the right place. The third time was a charm or I decided that was going to be the last time I made it and I made it work.
Don’t get me wrong, careful thought was expended. A LOT of thought. And in the end I was still wrong but not by much.
With a lot of clamping and grinding and grunting I have the pieces welded together. The welds are ugly. A lot of seam sealer will be used to discourage water from coming in these seams. Probably about as much as was used by the factor but the difference is my metal is covered with primer. Theirs was not. To protect this section I will rely on primer, at least three coats. Rust encapsulator will also be liberally applied. And over that, rhino/bed liner. Inside the cab will also be a layer of Fat Mat.
Will all this work and product prevent rust? Probably not. Who are we kidding? The Range Rover Classic was built to rust. The goal was that it rusted out on the second or third owner. I had the added bad luck that my Range Rover was a victim of a front end wreck before I owned it. Sports and Classics did the best they could to weld a donor front end on to the rear half. And I’m doing my best to keep rust at bay the best I can.
There were 19 segments filmed over two days. I left a lot of the welding out of the video. Mostly because it was difficult enough for me to get into place to weld, there really wasn’t any room for a camera.
It was hot in the shoppe too. Temps at or above 100F (37.8 C for those of you living in countries that have never had a man on the moon). The camera overheats when I’m filming in these temps. So the camera sat on the air conditioner when I wasn’t filming. I wonder if anyone makes a camera that can do warmer temps? My next camera will be evaluated for temps.
This weekend was Memorial Day. Freedom is not free. So many have given everything they had to keep you free. Remember those and their great sacrifice.