Here in Oklahoma if want to keep the inside of you Land Rover from reaching cookies baking hot you must Crack your windows during the day. At a minimum at least the inside temp will be close to the air temp outside.
When got in the Big White Bus the other day the sun was shining just right to illuminate the webs you see above. It’s quite a set up. I wondered which species I had this month. A day or two went by before I saw the spider.
I was about to merge on to the street outside my office and there he was swinging from the rear view mirror. He doing his best Tarzan impression and too quickly for me to get a picture.
Normally I wouldn’t have shown any concern for the webs but we have had an unusually populous spider season. Thankfully I’m 90 percent sure the spider I saw was my man. It wouldn’t do to have a Black Widow or Brown Recluse in the Big White Bus. Because if I felt a spider crawling up my leg while I was driving I’d most likely kill myself trying exterminate it with extreme prejudice. At least I’d have the satisfaction that the fiery crash would extinguish it and it’s offspring’s lives.
This year the weather was a “little wetter” than last year. In official terms, it was downright amphibian compared to last year. We enjoyed thunderstorms every evening we were there. “Enjoyed” is a relative term.
We arrived on Thursday night and immediately began to put up camp and get dinner ready. We knew weather was heading toward us. We had it on our phones and in our bones. Our phones gave us the radar and my bones told me it was going to rain and rain hard. It did. Continue reading “SCARR 2015 – The Weather (Post #538) 6/10/2015”
We are home and safe from the 2015 SCARR event. Nothing broke or malfunctioned. If you ever wanted to experience what driving in a Camel Trophy event was like this would have been your weekend. Lucky 8 has a great video I will try to link to in coming posts.
The torrential downpours and thunderstorms made this year “quite wet”. It was thick mud and creeks were up. All this made for a very fun driving experience.
Mr. Fisher cut his driving teeth by taking on a 4 diamond trail. He learned some new hand signals from our guide Arto. And at the end, you couldn’t have wiped the grin off his face with an angle grinder.
The prize raffle was fun with many great prizes from the sponsors. Thanks to all you that sponsored. Thanks to Texas Rovers for another fine event.
As soon as the videos get through post production and editing I’ll get them up for your enjoyment.
The final piece of maintenance was to replace the Fuel Filter. This is one of my least favorite maintenance items. Gasoline is expensive, toxic, flammable, and generally unpleasant to work with.
But the fuel filter is an important item when it comes to maintaining the Fuel system. Keeping the nasty bits out of your system will ensure that you to have many miles of enjoyment. The tick sheet has this as a every 50,000 mile replacement. I’m going to guess it’s been at least 10 years since it swapped mine.
The location of the filter is in the right rear tire well. It is not a pleasant place to work. I suggest removal of the rear right tire to ease access.
You will need two large wrenches to loosen the fuel hoses. In this picture the wrap-around bracket has been removed. I have modified the bracket slightly. I slipped a piece of an old bicycle tube over it. This was to prevent the metal bracket from rubbing a hole in the filter.
I bought the Wix brand filter. It was twice as much as the others. I like Wix filters and use their oil filters in all my cars. Quality before price.
When I got the old filter off I could see the particles coming out with the gasoline. It was super dirty. I’m hoping that this will stop what might be a starving of fuel at high speeds due a less than effective flow of petrol through a dirty filter.
As I mentioned this is a dirty job and you WILL get dirt in your eyes. Once you bang a wrench under the body you will see all the sand and dirt the Land Rover has been saving up just for this moment.
I also checked the transmission fluid level (cold fluid and in neutral). It needed some to get it topped it off. The transmission shifts amazingly well now.
The only tasked left is to stage and inventory the camping gear.
I have to get my adult beverages.
I need a form mattress for my cot.
I need to buy groceries.
I need to coordinate with Mr. Fisher on the supplies above.
I’m pretty excited about this trip. Once again I hope to meet some of you. Please stop by if you are in the neighborhood.
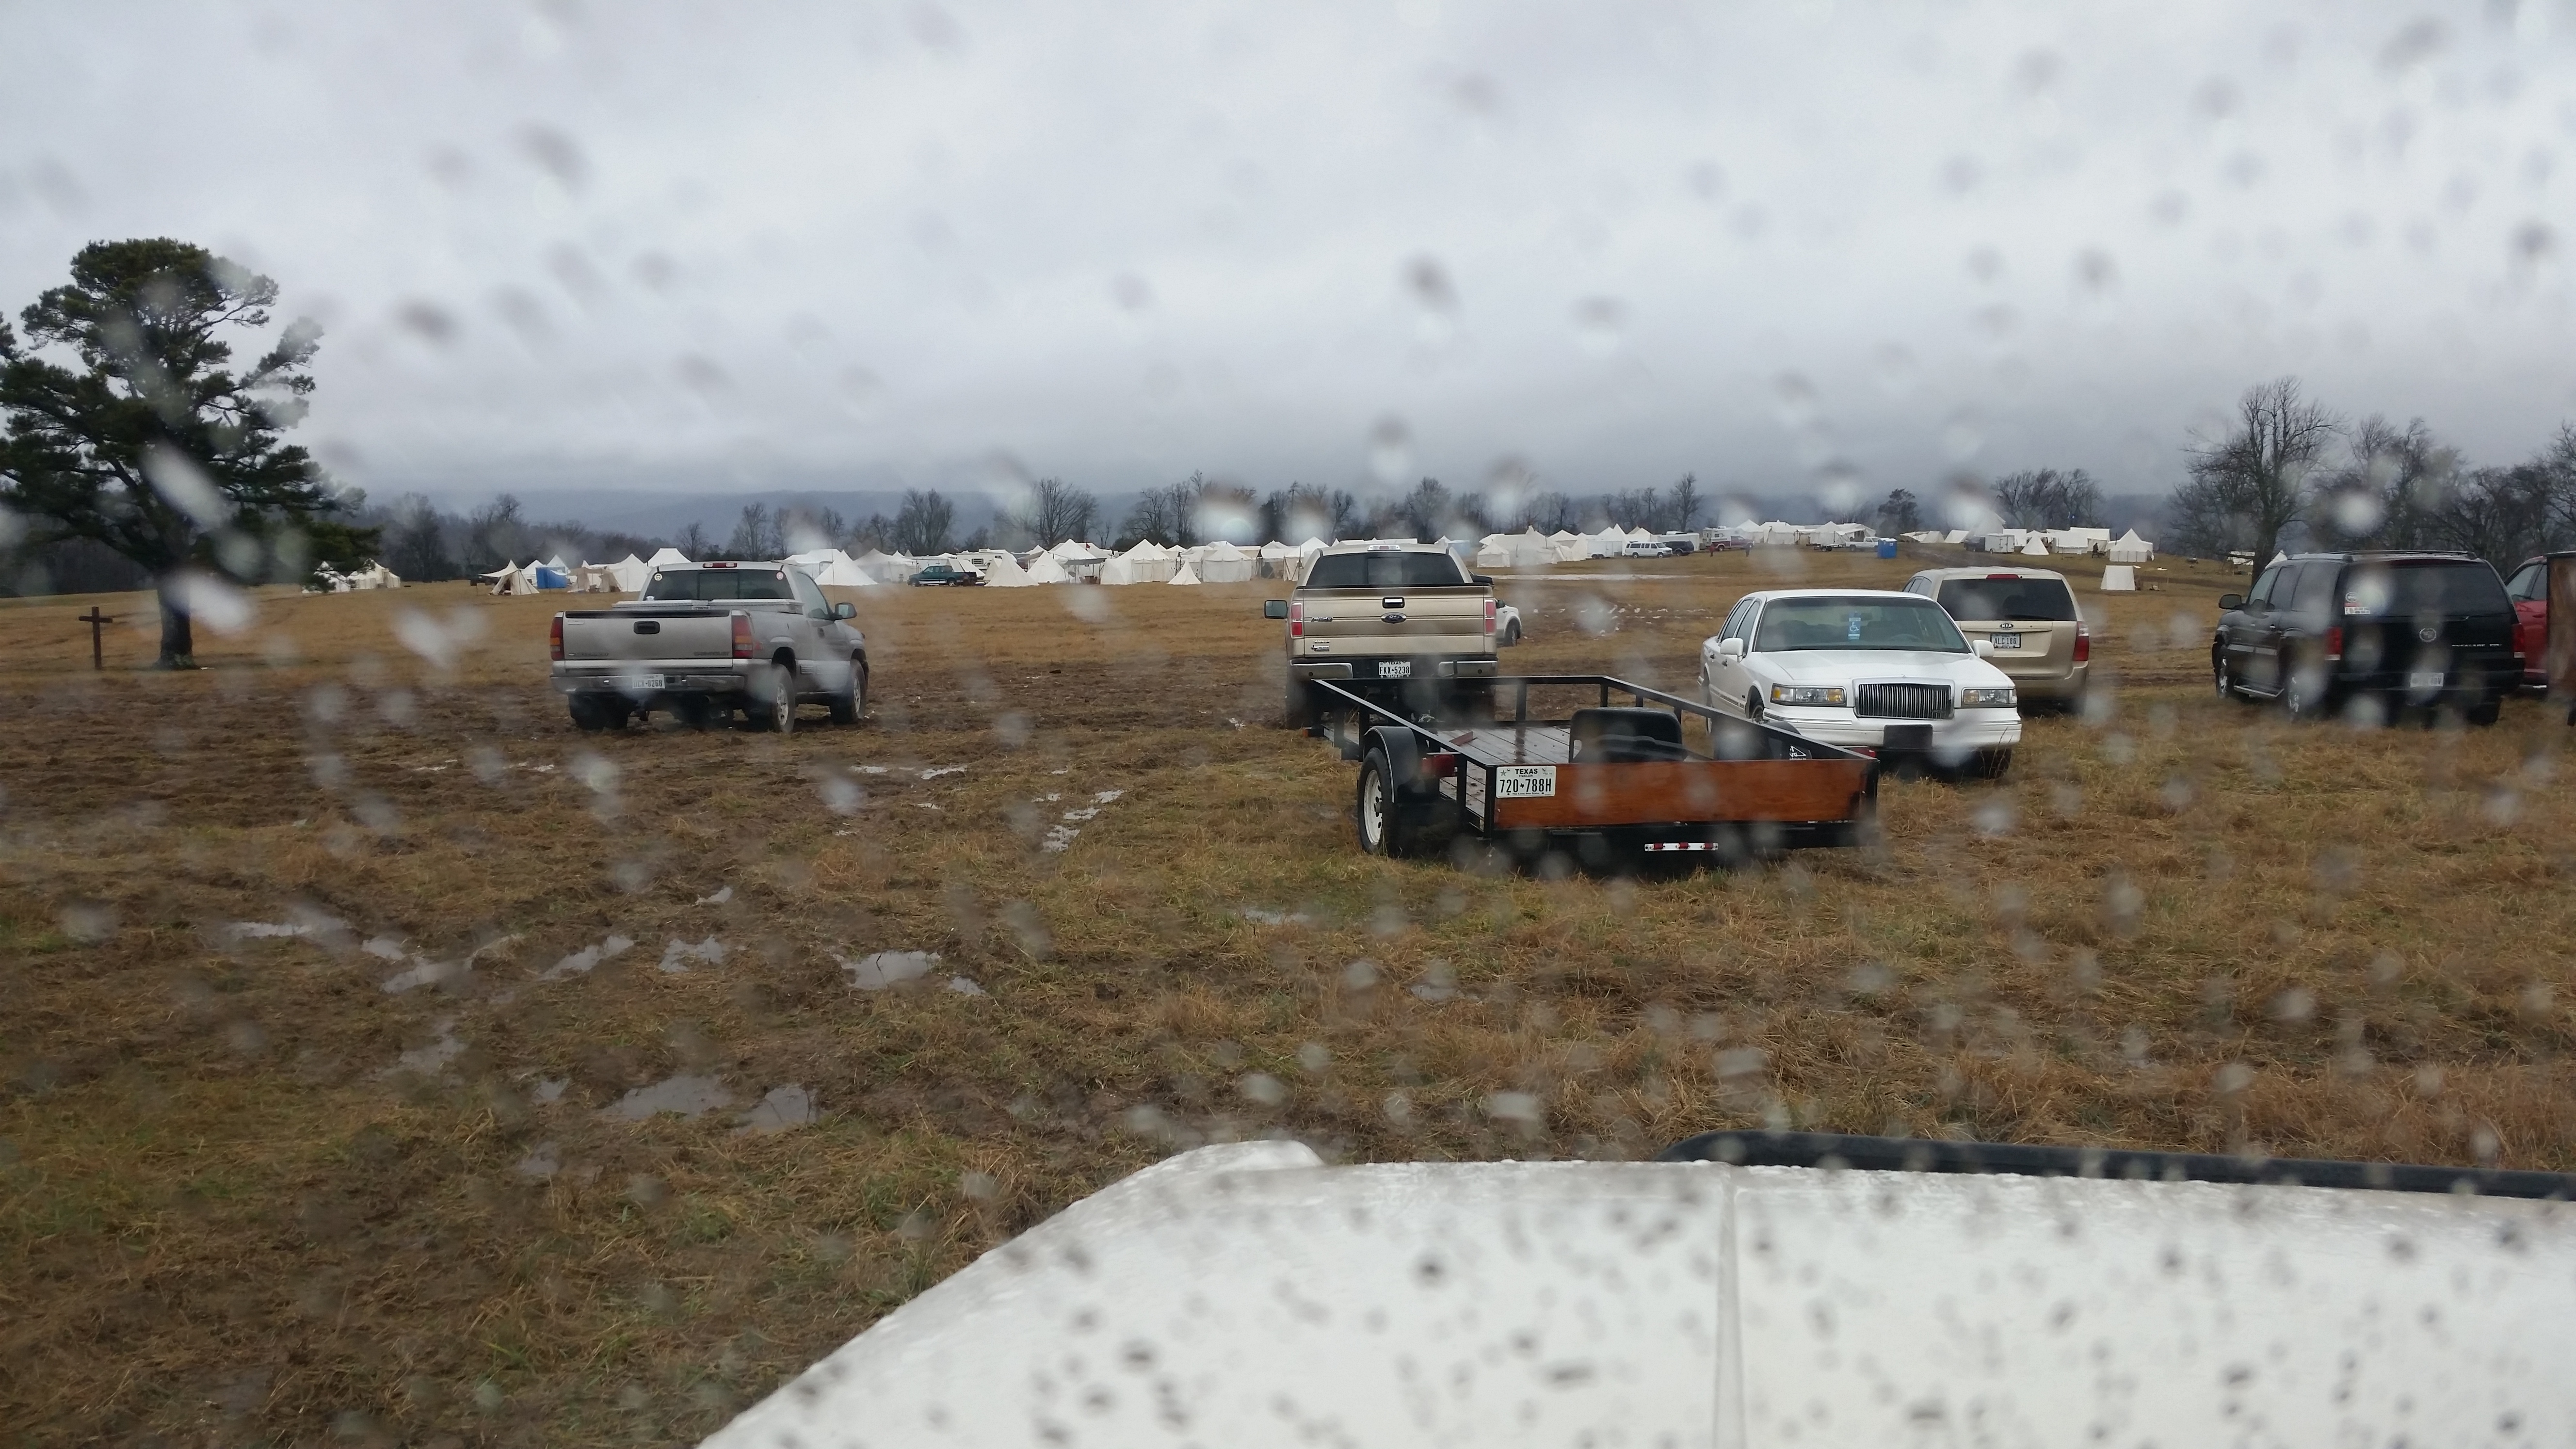
It turned out to be a long drive for nothing. My goal this past weekend was to go to the Southwestern Regional Rendezvous in Leslie, Arkansas. I went. But I didn’t stay.
It was a 5.5 hour drive to Leslie, Arkansas from Norman, Oklahoma. About an hour into the drive it started to rain. It rained from Shawnee all the way to Leslie. When I got to Leslie I found the event. I pulled into the lot that was passing for a parking lot.
I’ve gotten several requests for the details of the fan resistor for the Range Rover Classic. The latest one came in from Patrick in France. Yes, that France, the one in Europe. He is the happy owner of a 1991 Classic Vogue SE with 4 doors and the 3.9 not catalysted engine in magnificent Beluga Black. Sorry no pictures.
His problem is the same as several of you had last winter that of trying to find a heater resistor to purchase. They are often difficult to find. He sent me a picture I posted the last time I replaced mine. Unfortunately for him the picture was not high enough resolution to make out the part numbers. You see, he is keen to make his own.
So I went out and removed mine and took down the details and took some photos.
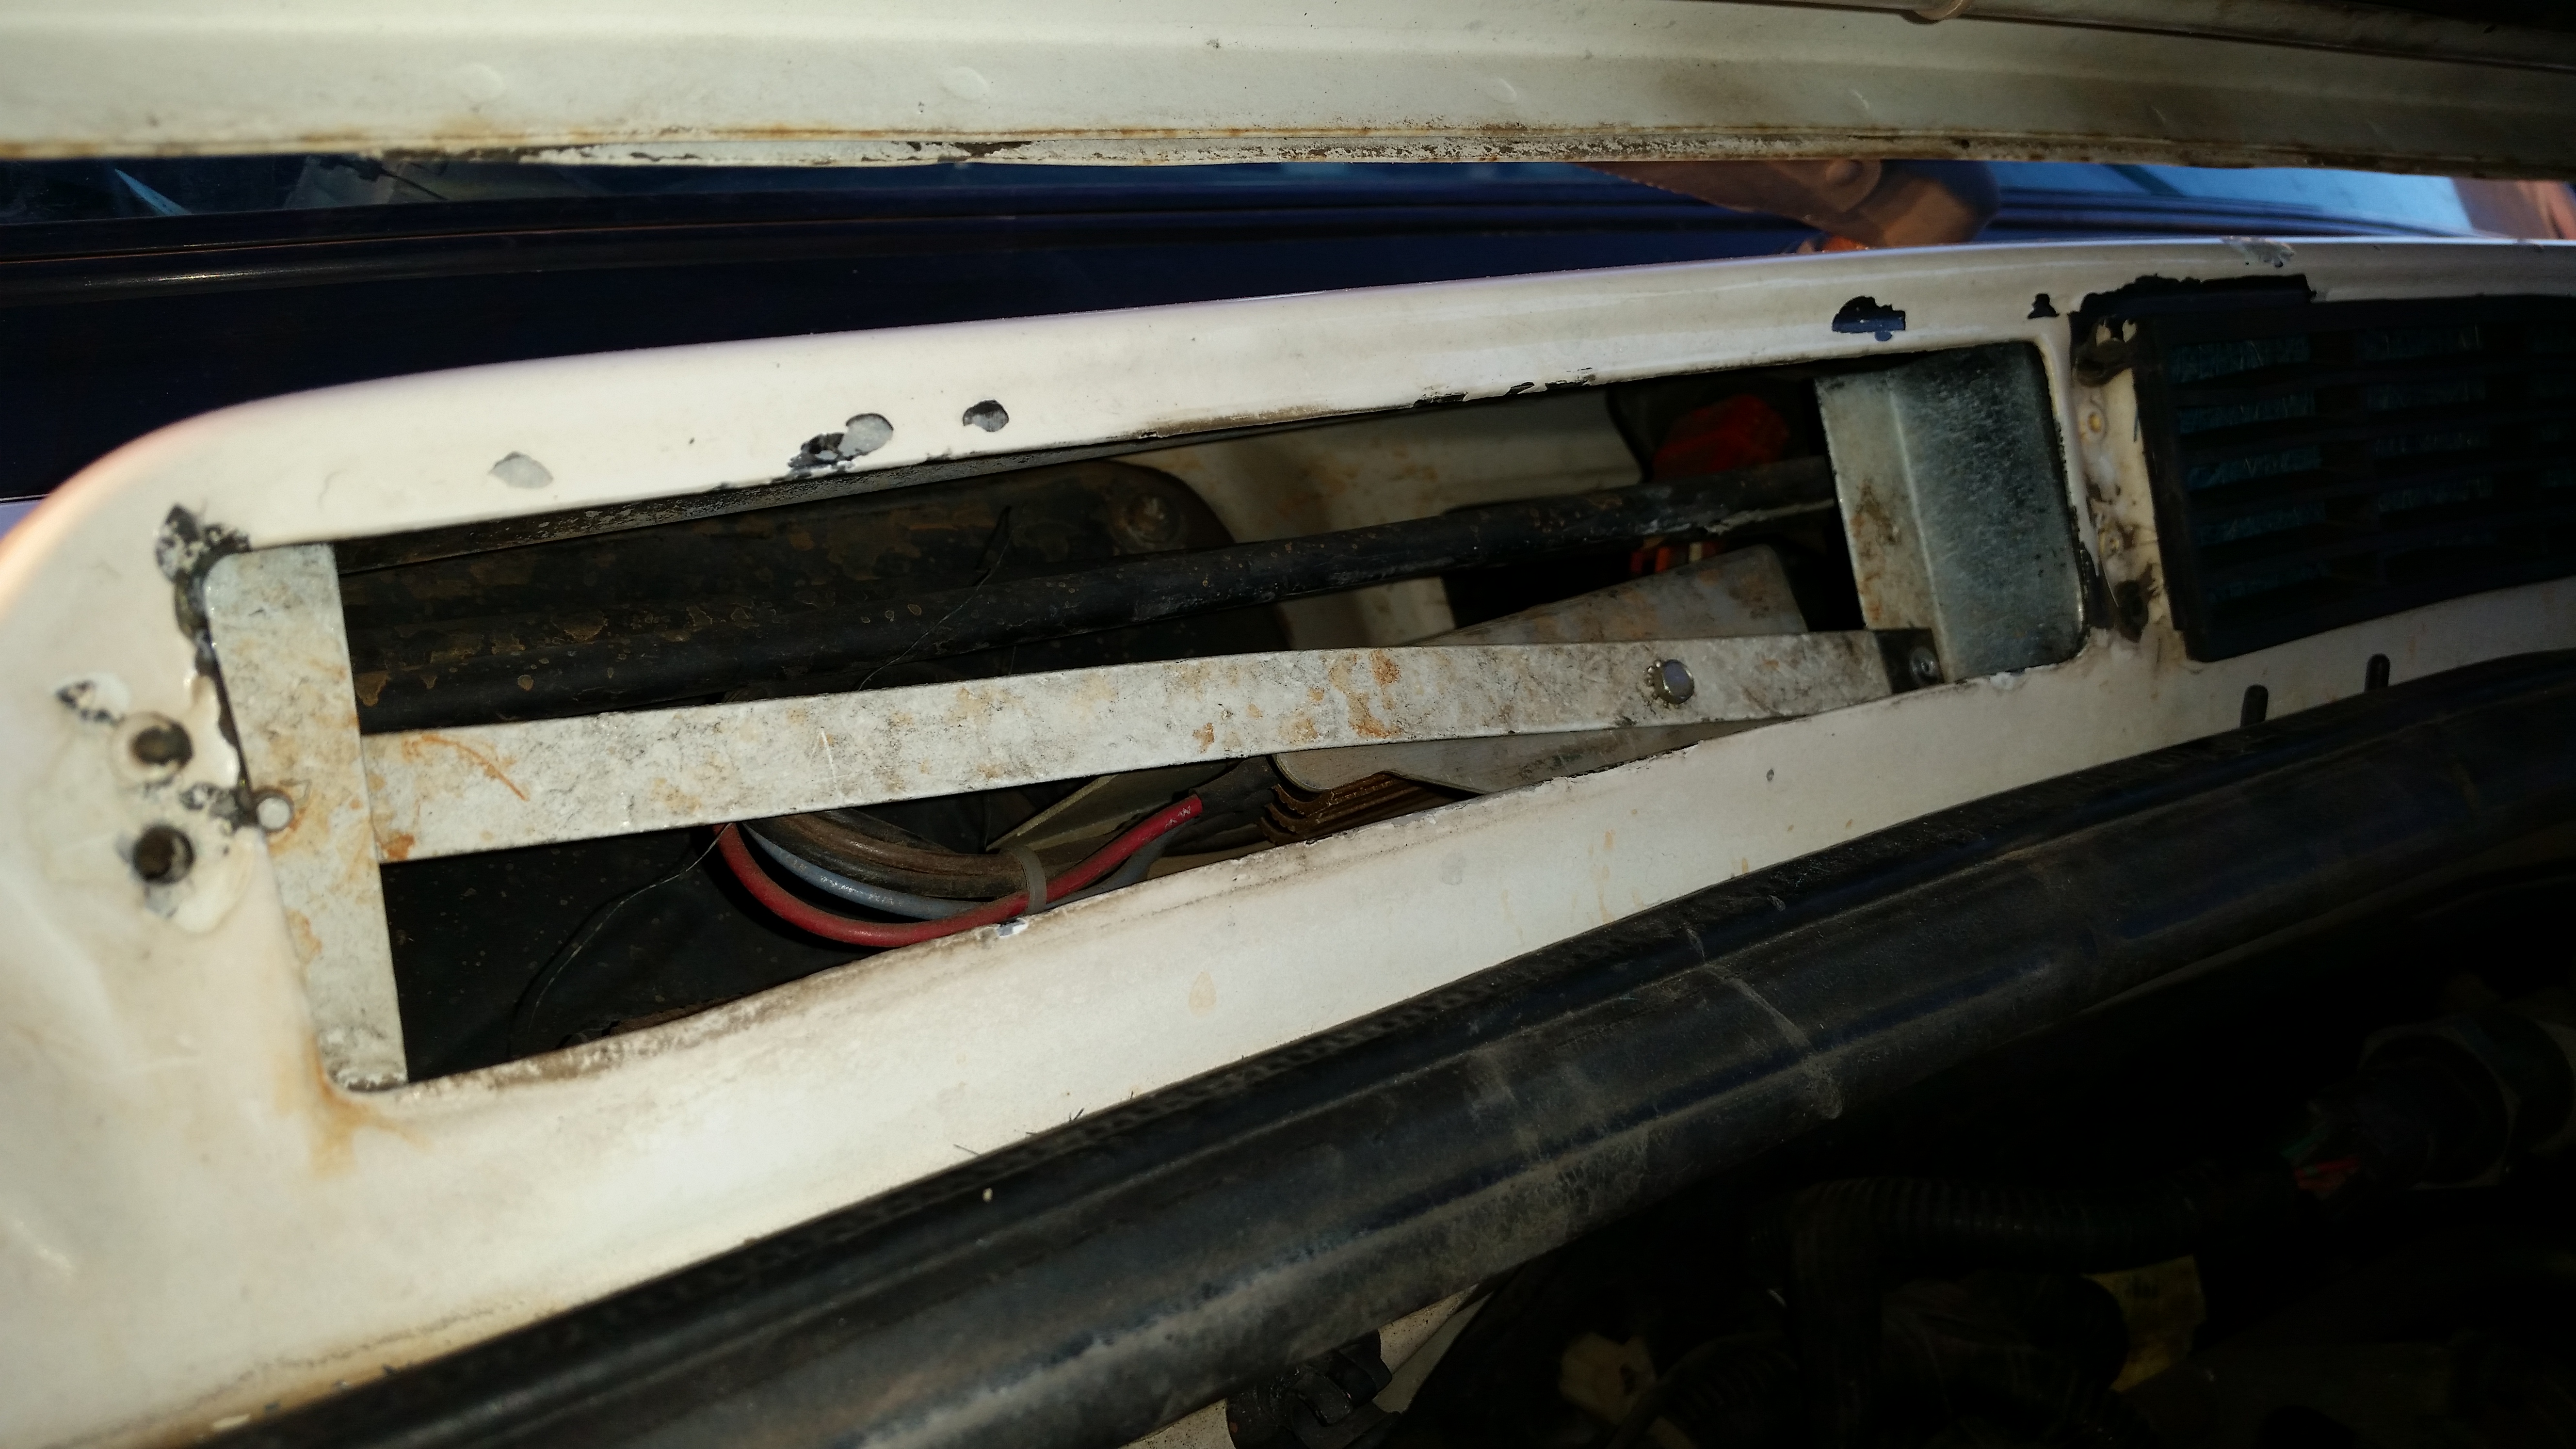
Getting to it is relatively simple.
You remove the louver from the passenger side intake. It just takes a flat-head screw and a gentle touch. Remember your plastic bits are 20+ years old and are prone to breaking.
Once it’s out of the way remove the filter material. I have replaced mine with some air filter material I picked up from one of the big box stores. It’s cheap and sturdy.
I had to drill out the rivet. You can see it on the far side in the picture below. That was easy enough. Yours may also be riveted. Whatever, you need to be able to rivet it back or use a screw.
And you have the resistor…simple.
The official part number for a resistor pack is PRC 8010.
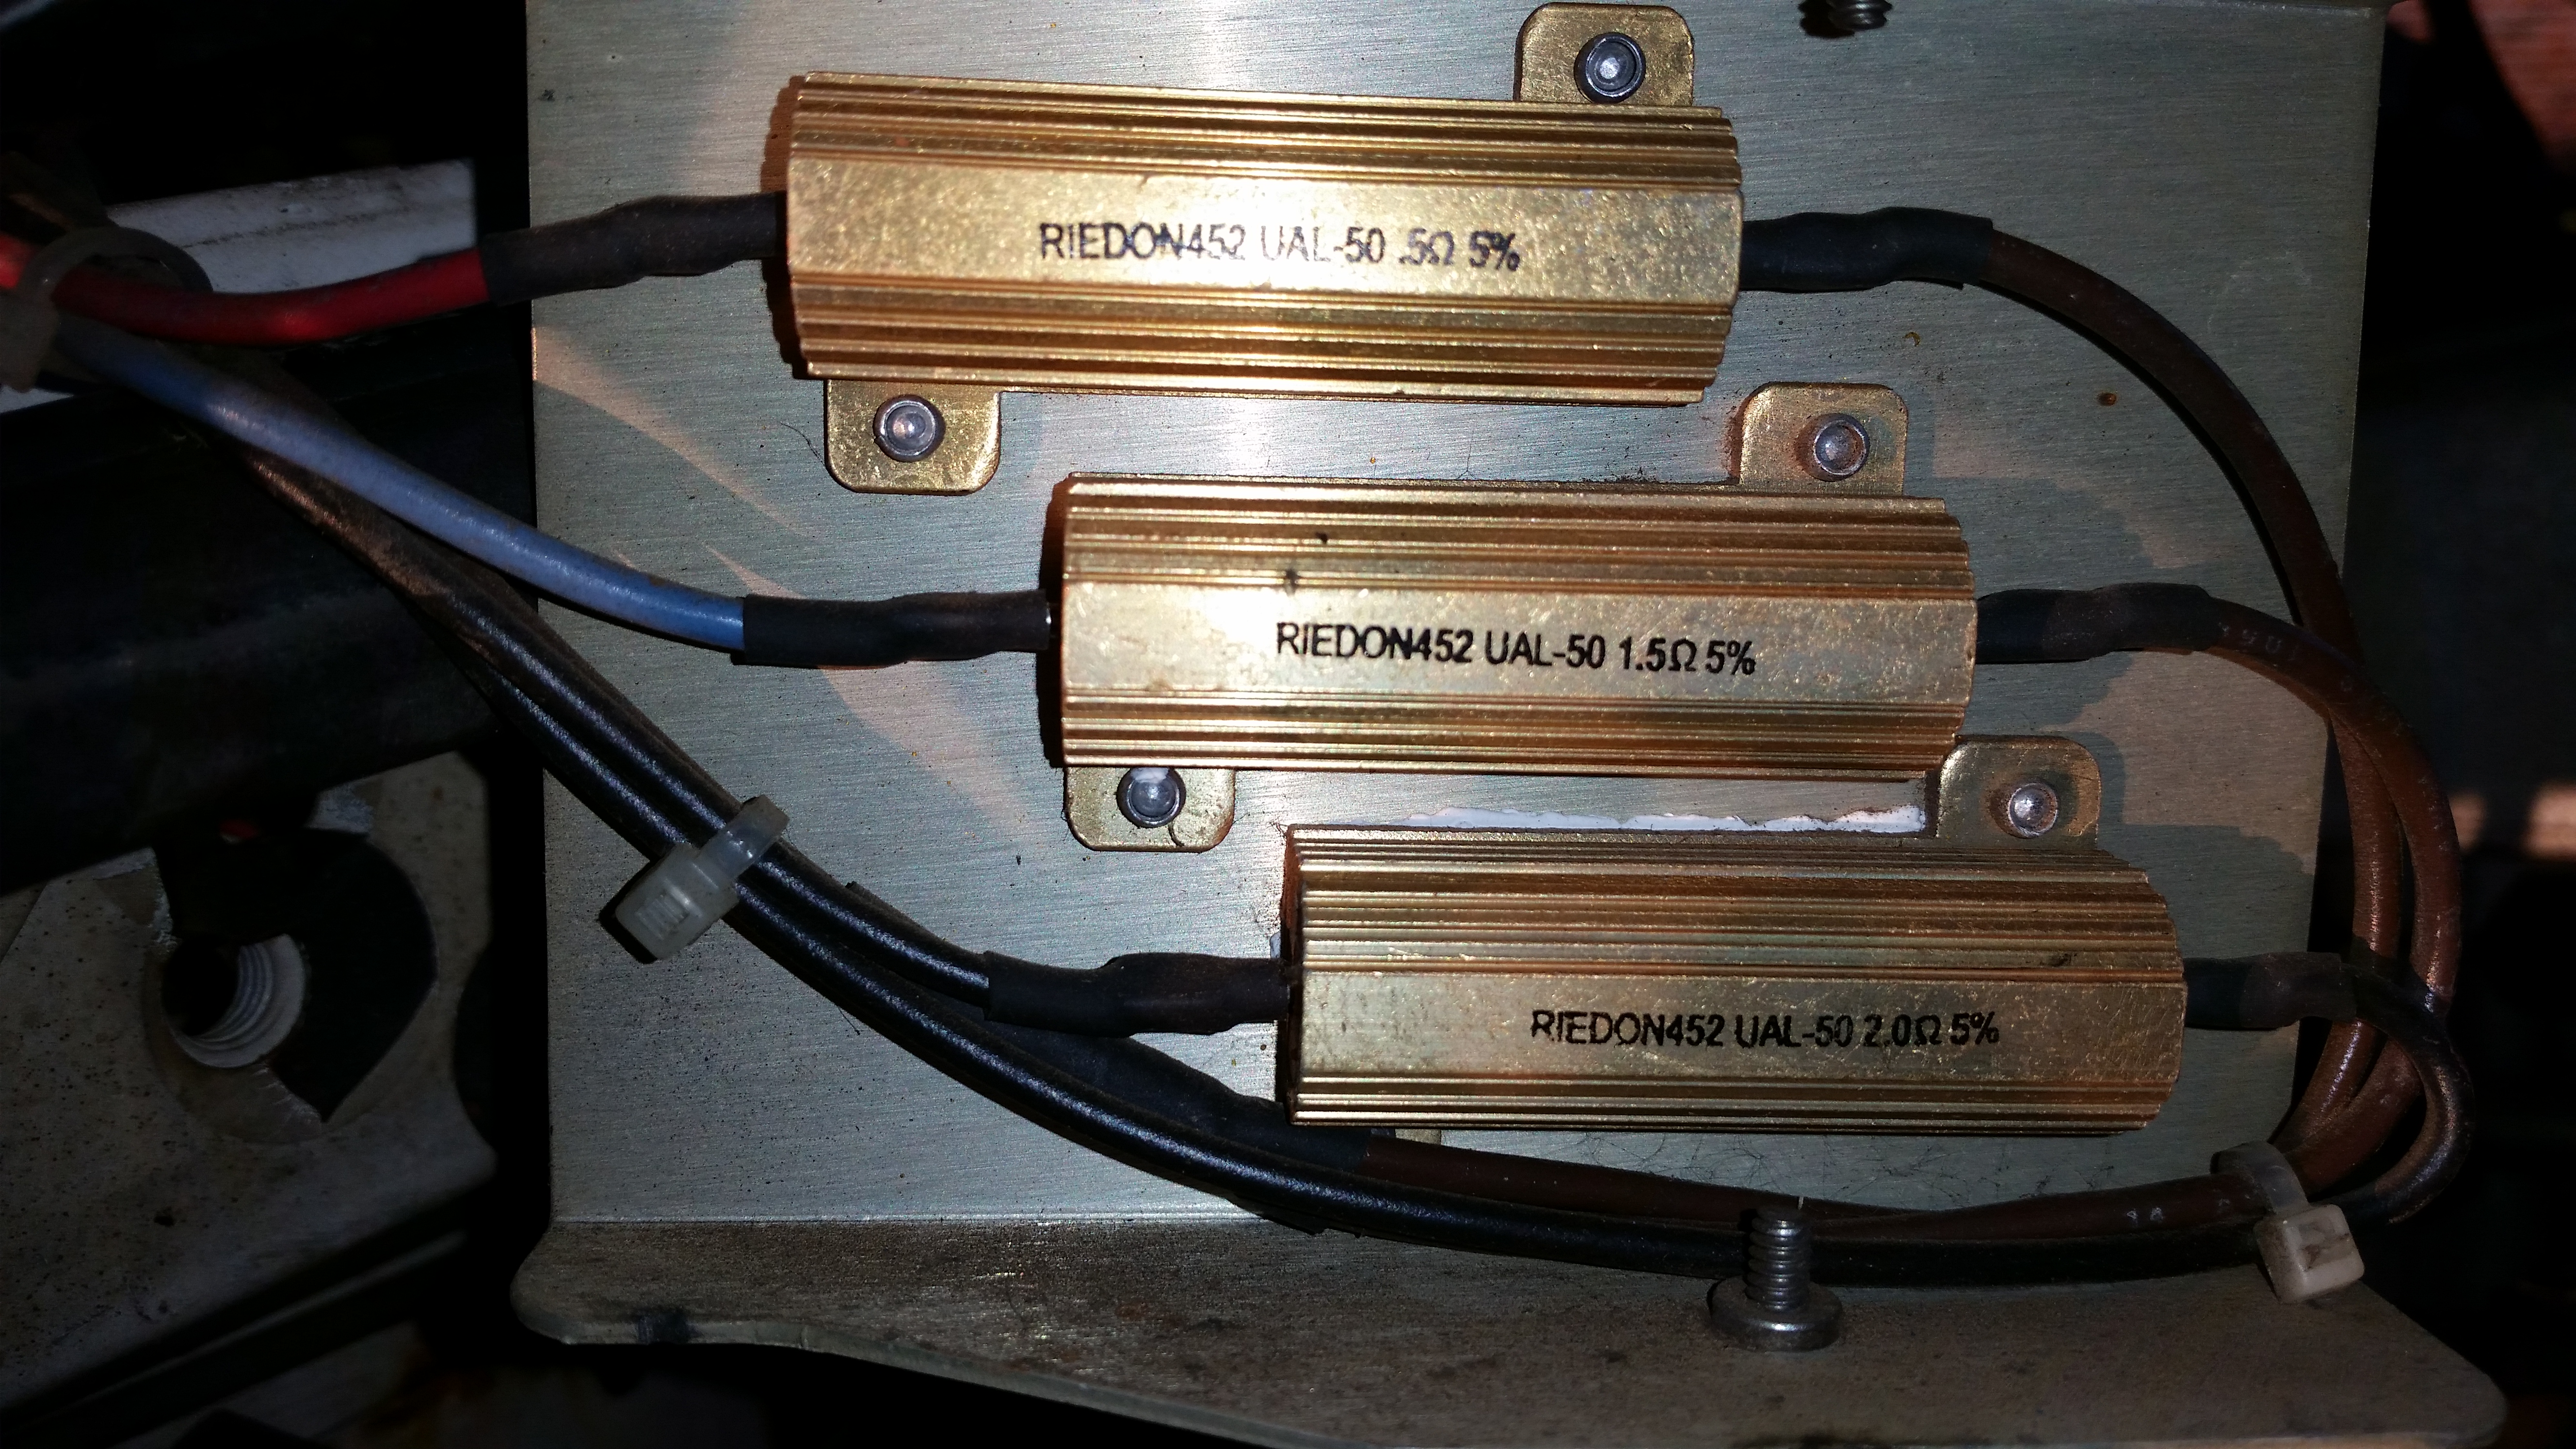
The part numbers on the resistors are…
RIEDON452 UAL-50 .5Ω 5%
RIEDON452 UAL-50 1.5Ω 5%
RIEDON452 UAL-50 2.0Ω 5%
This is cost prohibitive for Patrick due to the crappy exchange rate of dollars to euros, shipping, import tax, duty tax, it road in the back of a truck tax, more than one person handled the package fee, and five more taxes we’ve never even heard of I’m sure. SO, I also found them at Island 4×4 in the United Kingdom, currently in stock. Hopefully this won’t be so bad. http://www.island-4×4.co.uk/heater-resistor-britpart-da4178resistor-p-7373.html
So if you are keen like Patrick you can source the resistors from the interwebs for just a few dollars and if you are handy with a soldering iron you can put your own together.
I wish you the best of luck getting a ready-made one or making one yourself.
Merci beaucoup Patrick for emailing.
UPDATE:
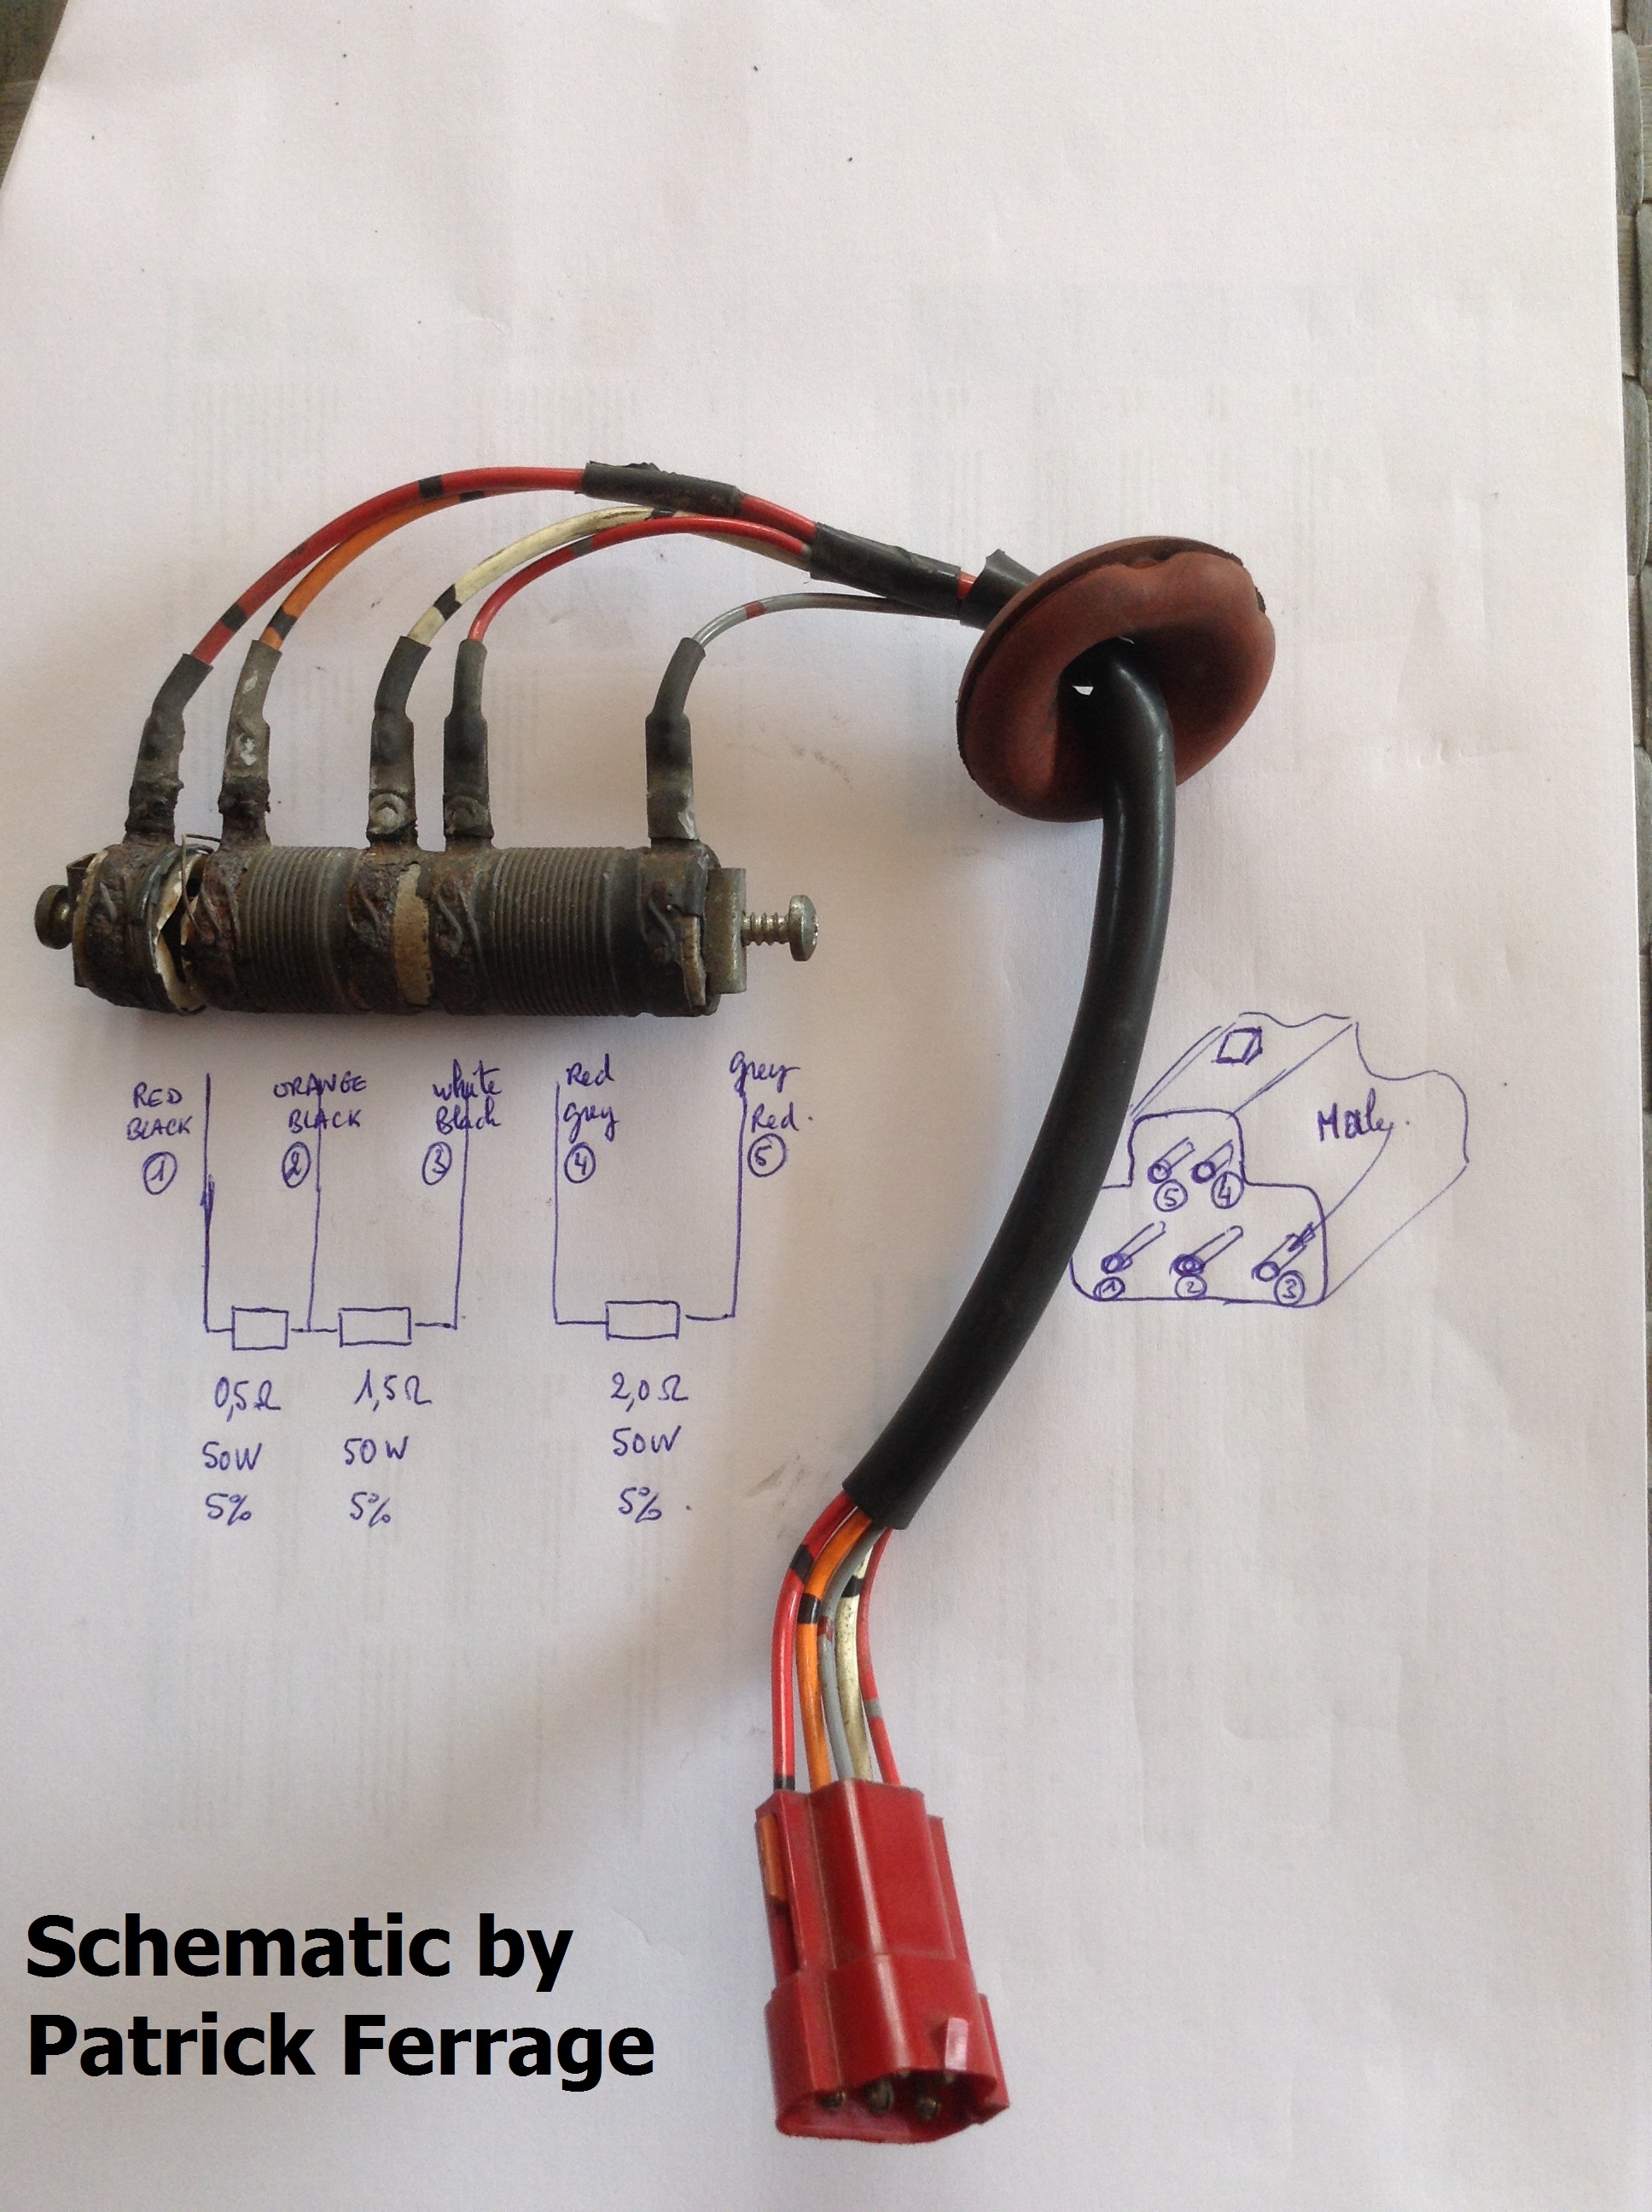
Patrick Ferrage emailed us a very nice drawing and schematic of the resistors and the wiring harness. This is top work and makes building one by hand a very simple matter. Once again thank you Patrick.
Drawing by Patrick Ferrage
To the rest of you, thanks for reading and Happy Rovering.