

Before my raging sinus infection took hold of me on Saturday, I decided to paint the tailgate. I woke up to a rainy day and temperatures in the 50s. I know humidity has a huge effect on painting but I could not wait. I’d been held up too many times on this project to blow an entire day once again.
On Thursday I went by my local auto paint supply store, B&H Supply. The good folks there were very patient with me when I had stopped by a month ago to get the “low down” on painting. After describing the project and what I wanted to accomplish, they suggested using a one step process to paint the tailgate. They suggested using Preval system to paint the tailgate. It is simple and easy and has pretty good results considering the situation.
I found the Land Rover paint codes from a website by Stephen Hull (updated link, July 2013). He has a great site that had a helpful chart of codes for all Land Rovers. I found my paint code in the “non metallic” page. I printed the page and took it with me to the paint store. Bud (a truly great Okie name) was a lot of help and was able to find the code listed in his computer. He went to the back and got the paint mixed. He said I’d only need a pint.
He brought out the paint, hardener, reducer. With a measured mixing container he marked the ratios for me and told me I’d have about half my paint left over when I poured the first mix. That wasn’t quite right. I mentioned that when he marked it but he was insistent. As it turned out it was exactly twice too much. Live and learn.
Bud had suggested that I should at least sand the surface with at least 500 grit sandpaper. I’m pretty sure I didn’t give enough attention to the sanding that I could have. I sanded off most of the edges.

I got everything set up and mixed the paint. I went back to the Range Rover and made sure I had everything taped off. In hind sight I should have lit that side of the garage up as well. I set up in my wife’s third of the garage. I got my bright halogen lamps and set them up. I got the paint materials out and tried to imagine how it would all go. I decided to paint the tailgate flat on the work table.
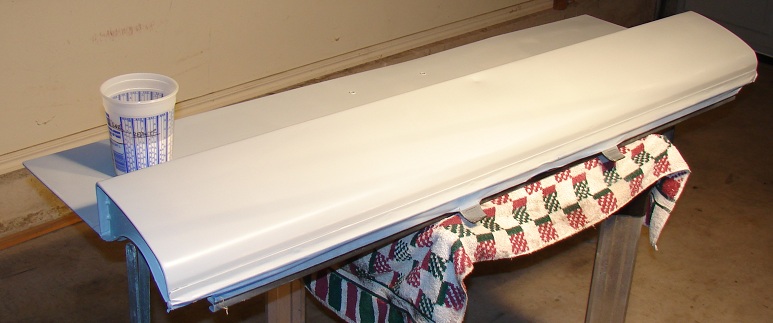
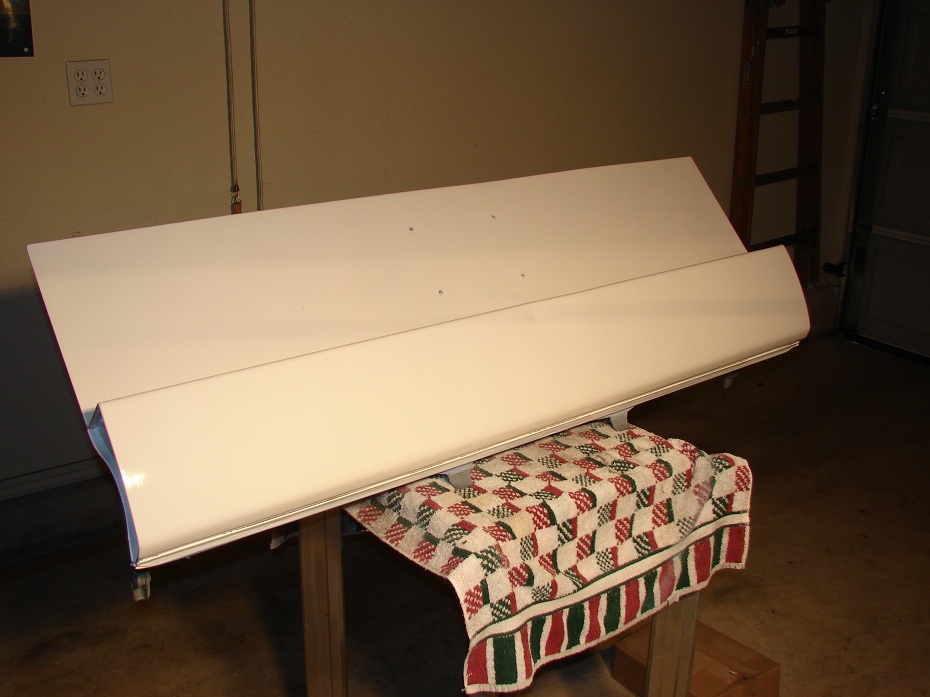
That would turn out to be a mistake. I should have had it propped up from the beginning. I was able to correct that later.
I mixed the paint and filled the paint jar. I used the short spray, short stroke method I’ve seen Edd China do a hundred times. Basically you spray and move, spray and move. If you do it the same way as Edd does you never have the paint coming out more than a couple of seconds before you release. After a couple of passes you have the area coated but not so much paint on it that it will cause a drop or a wave.
Now I say that and it seems my technique could use some more work. I did have runs and I did have one wave. The paint coats well and I think the problems I had were from the humidity. If I had a booth I think the results would have been better.
I painted both sides of the tailgate and both of the spots on the fenders. I sprayed the tailgate hitch, I sprayed stuff I didn’t think I even needed to spray. I had a lot of paint still mixed. I almost painted the floor board on the driver’s side but it was really dirty and would have taken me an hour to get clean enough to paint, so I passed.
Once I was done I used some of the reducer to clean up the parts. I let it dry all the rest of Saturday. I went in and watched football and tried to beat back the sinus attack with orange juice and Respa ™.
On Sunday I assembled everything. I had left the spots where the bolts went through the tailgate unpainted. Turned out I didn’t need to do that after all. The hinges were so loose that I had to align them from scratch. That was easy. I put the tailgate on and tightened it down. Open and closed the gate a few times and called it good. I tightened the bolts and began to work on the upper tail gate. It was a lot harder to get aligned.
I had to adjust the catches to get them to function correctly. This takes a vise-grip and a 7mm wrench to tighten the keeper nut. I got the latches working well, lubed them and put the pieces back on the gate.
I then began to put the badging back on the tail gate. I purchased some double sided tape for emblems from O’Reily’s. I cut it and got all the emblems reattached.
You may notice my EXTRA addition of the Oklahoma Edition badge. I have a friend that works for a dealership and I asked him to get me one when I saw them on a Ford Truck commercial. I put one on my 2003 Discovery and no one ever mentioned it. So when that truck was on the way to the scrap heap I took the badge off. I have a spare but was unable to find it.
I bought the RANGE ROVER and the COUNTY LWB badges quite a while ago and quite frankly was surprised I found them in that mess I call a garage. I put them on and the original dealer badge which was Andrew’s out of Nashville. That dealer is now called Land Rover Nashville. I also mounted the original green oval as well after I cleaned it up and re-glued it all back together.
The purchase of stainless steel screws came in handy when reassembling the tail lights. I was a few short so I just cleaned up the old rusty ones and gave them a coat of paint. I put the lamp assemblies back in their places and with a couple of new bulbs they were ready to go.
And if you go back to the first picture you can see the end result. I am happy with it. It is after all a work truck. It is not a beauty queen. God only knows how many scratches this paint job will have in the future. That is if the floor boards don’t rust out from under my feet before I can get those well earned scratches on her.
Thanks for reading and Happy Rovering.
is it made of steel or aluminum? what about quarter panels? did you have to remove rust? I’m a bit afraid of taking the tailgate off the rover, but I can see rusty bubbles on the paint, and it’s sort of a bad sign…
It is steel. If you have surface rust grind to bare and prime and paint. If it is inside rust replace the whole gate. I sprayed mine on the inside when I took it off the Rover during my rust abatement process.