Looking for the thread specification was pretty easy with a Google search. I stumbled on this thread on Rangerovers.net. “Tex” from Italy states its a M10x1.5. “LanceL” had a novel idea to use a M10 Rivnut.
I decided to use a M10x1.5 nyloc nut. I also bought a bolt to go with it which provides a clean threaded path to the nyloc nut. I also used some of my supply of Dr. Crafty Clear Epoxy Resin [Amazon.com]. As you will see in the video. I cleaned out the shift knob. I also carved “channels” in the knob to provide “keys” to keep the resin from someday rotating inside the perfectly cylindrical knob.
I then placed the bolt with the nyloc nut on it down inside the knob. Mixed up my resin and poured it in. It took 72 hours to cure. I let it sit for a full week, due to work, and a living history camping trip I had planned at Ft. Towson [Oklahoma Historical Society].
This project turned out great. It was easy, didn’t require any tools that most Land Rover owners don’t already own. I was genuinely surprised this actually work as I had hoped it would. Now I can turn to the rest of the 3000+ things I need to do to the Big Whit Bus to get her back on the trail.
I decided that my existing cell phone and tablet mount in the Range Rover Classic needed to be replaced. Mr. Fisher and I went to the MOORE Expo [Moore Expo] in 2022. We saw lots of products and gear. One of the cool pieces of gear was the Bulletpoint Mounting System.
Mr. Fisher bought a system for his new Chevy Silverado. Once we got home, I decided I needed a system for my F150. My existing cell phone mount was disappointing and needed to be replaced. I got to thinking that I should upgrade the mounts in the Range Rover Classic. I took some measurements and emailed the company to ask which of their existing system would fit best for the measurements. I chose not to cut up my coin tray. I did have a thought that I would mount the system over the tray. But it would have had to be cut and would have been useless if I wanted to remove the system and do something else.
As you can see in the video, not everything goes according to plan when you are “fabricating” stuff. I had to make a makeshift painting “booth” in the sunroom in the house. The temps in the shoppe were too cold to be painting, but it was a toasty 76F in the sunroom.
Mrs. Okierover didn’t fuss too much this time about the fumes.
Overall I spent four or so hours putting that together. The assembly was a lot of trial and error. I think it looks good and is very sturdy and will be perfect for holding my cell phone and a new tablet once I decide what that might be.
There are lots of accessories for this mounting system. I’m thinking of the handheld radio and or the microphone mount. Of course I have to decide on a radio before buying.
I’ve add a Patreon account. The costs of maintaining the website add up each year and if you like the content I provide chip in. Contributions are appreciated.
I got out into the shop and was working on some peripheral projects over the weekend. Peripheral because they don’t directly get the Big White Bus back on the road for driving. These are the cosmetic fixes, plain and simple. The primary project line is getting the motor back to 100% and making it reliable. I completed the repair of the heater fan blower motor. That disabled the motor due to the coolant hoses being removed.
I did start the motor about a month ago. Surprisingly she fired right up. I was really happy about that. I have not addressed the original issue with the reliability of the motor which is the ignition system. I’m 94.67% sure I’m going to replace the distributor with a Davis Unified Ignition (DUI). Its an all in one unit built in Memphis, Tennessee. Seeing the price today makes me wish I’d have bought it a year ago. The price has gone up about 50$(US). Although waiting has allowed me to start the one year warranty when I’m actually driving her.
All other projects from the list….linked here [Okierover.com Blog] not counting the replacement alternator, which I believe is where my vampire batter drain is coming from, are not keeping me from driving her.
I’ve ordered Knightsbridge seat covers. I finally talked myself out of putting leather back in. The estimates I got from local car upholstery companies were more expensive than ordering new leather…..customized with embroidered family crests on the headrests and my face digitally embroidered on the seat backs. Just kidding, but seriously, super expensive. So I ordered seat covers I’m not afraid to get muddy and dirty.
My new radio and speakers have arrived. I’ll need to watch the install video, call tech support 16 times, and finally give up and have the Evil German Dude or JagGuy help me install it. I’ll post something about that when I get closer to installing.
Still a couple of interior trim pieces that need painting. I am not going to remove them, I’m going to paint them in place, its just not worth the effort to remove them. The door cards came out without much effort and I need to wash them down, tape them off, and paint them. Perhaps next weekend.
I know this post was about the D Pillar so let me close with that. I have the welding repair still yet to do. As mentioned in the video, I used a palm sander and 100grit sandpaper to remove the glue from the beauty cover. It formerly had vinyl wrapped on it.
I’ve cut out some closed cell neoprene foam to replace the rust inducing open cell crap they delivered the Range Rover with from the factory. I’ve decided to start with painting the beauty panels. Rattle can style…can’t get much more redneck than that. I’ll show the finished product when I get it done.
While visiting my buddy JagGuy at his awesome shop, I saw something in his metal trash trailer. It was a mesh like material. I went over to check it out and it was a door off a server rack. You’ve seen these before or maybe you haven’t been in a server room where physical access the servers is secured by a keyed door of some kind or other.
I asked him if I could save it from the recyclers. He said, “Sure.” I told him I was going to see if it would work as a floor for my roof rack. We ate barbeque, chatted for a while, and I tossed the door in the truck and drove home.
The door was about 74 inches in length and 23.5 inches in width. My roof rack is 4 foot by 4 foot. So this door, cut in half, fit perfectly across and left about a foot of space uncovered along the length.
I think that will work.
I cut the door in half with my angle grinder and a cutoff wheel. I dry fitted the halves on the roof rack and was happy with the results. I went to the hardware store (twice, or was it three times, maybe twice to one store and once to another) to get stainless steel bolts, washers, and nyloc nuts.
I wiped the door with some grease and dust remover. I then painted it with some black spray paint I had left over from another project. I removed the roof rack from the roof and drilled my holes (lots of holes some in the wrong places) and got the hardware installed and tightened up. Several of the bolts failed catastrophically when I was tightening them up. Each one that failed, failed about the same as the others about midway up the bolt. My dad used to complain about the cheap Japanese products that began flooding the country in the 1970s. Today we complain about the cheap CHINESE parts that flood our country. I didn’t check the country of origin on these bolts, but let’s go with China for arguments sake. Bring back American made hardware. I promise not to complain too much when they fail. At least if they fail, an American had a job making them and we aren’t sending money to a country determined to destroy us. (stepping off soap box)
I recorded several videos of my cutting and narrative about what I was going to do only to have my phone camera fail in the heat of my shop.
“Blazing Saddles” (1974) Pure genius.
The temperature in the shoppe was 110F that day. I would have this trouble again later when recording video for several other projects. I really need to upgrade my camera equipment to a GoPro or something. Maybe my wife will buy me one for my birthday in two weeks….hint, hint. (who are we kidding, she doesn’t read my blog, she’ll never see this)
So I have the upgraded roof rack installed and I’m pretty happy with it. I feel pretty good about myself too. I recycled and reused something that would have just been thrown away, eventually bought by a Chinese scrapper, and made into some cheap crap and sent back to America for someone to buy and then either throw away, or be stacked in a garage packed full of crap.
My dash looks like hell. The sun has really taken it’s toll on the plastic. Several places are starting to turn into dust. It also is no longer uniform in color and some pieces aren’t even close to the original color. That color was/is Bokhara Green. Named from the color often found in oriental rugs from the Bokhara district of Turkestan. Traditionally made by the Turkmen tribes, the rugs were made almost entirely from locally obtained materials. Using wool from the herds and vegetable dyes, or other natural dyes from the land to create the Bokhara green color.
In my extensive research (30 minutes of distracted Google searching), I could not find a paint code I could take to a paint store. Nor could I find a can of paint on my side of the big pond (the Atlantic Ocean). You can’t ship paint, believe it or not, its flammable (the more you know…).
Before we get too far into this post…a disclaimer:
I have no idea if painting the plastic parts of my dash is going to work. I did not do any extensive research on best practices or if the products I had available would even bond properly with my very sun damaged dash. Undertake this at your own risk.
With OEM Bokhara Green unavailable, I started looking for colors and stumbled across Rust-Oleum Specialty Flat Earth Brown Camouflage Spray Paint [Ace Hardware]. I originally found the green color but once I saw the brown…I knew that was it.
I painted the dash pieces and have decided that the “flat” and “powdery” nature of this paint is going to be difficult to clean up later. Dust and whatever that will inevitably find its way on to these parts is going to be hard to wipe off. So I decided to experiment with coating the paint with a matte clear. It will also help with keeping the sun off the plastic. UV protection is right there on the label.
I stopped at the store on the way home and picked up the Matte Clear. I tested it on a piece of trim. It dried to a matte finish. This is a second wet coat in the picture.
Un-coated above, Matte finish below
I’ve got a bunch more work to do. I found some more rust on the floorboard in the cargo area. To get this fixed I’m going to need to cut the floorboard out and patch it. The floorboard is supported by a piece of steel that is very rusted and failing in several places. To do this right, I need to replace the steel that is failing. I don’t know what that will entail at this time.
Rusty hole in the floorboard in the cargo area.
I also popped for this ridiculously expensive rust paint.
Hopefully this will magically do what it says it will do.
This paint was insanely expensive. Like 160$(US) for this gallon. I’m not going to lie, I’ve got high hopes for this stuff. Everything I’ve painted on this Range Rover has already begun to have surface rust. I see these types of products used on the YouTubes and TV shows and I’m hoping it works as well as it appears to in the magic of television and the interwebs.
To replace the rusted bits, I’m going to check with Mickey at Mickey’s Garage [Mickey’s Garage] as he indicated on the Facebook that he may have a donor vehicle that I could perhaps get some parts from.
Every one of these “new discoveries” just postpone the day I will get to drive the Big White Bus for pleasure again. It’s frustrating, but it is what it is. I need to fix this rust. The things I want to use this vehicle for will require the flooring to be fixed. No reason to spend a few hundred dollars on building a bed and drawer solution if its just going to get ruined when water gets inside. It’s fun to fix stuff…right? Am I having fun? I’m not sure yet.
My friend the Evil German Dude gave me some excellent advise recently. “You’ve got to leave work at work, and put things behind you so you can go out to the shop and do things you WANT to do.” He’s right, I’ve been very distracted by home repair, nursing our dog back to health again, and I have neglected myself and my wants and needs.
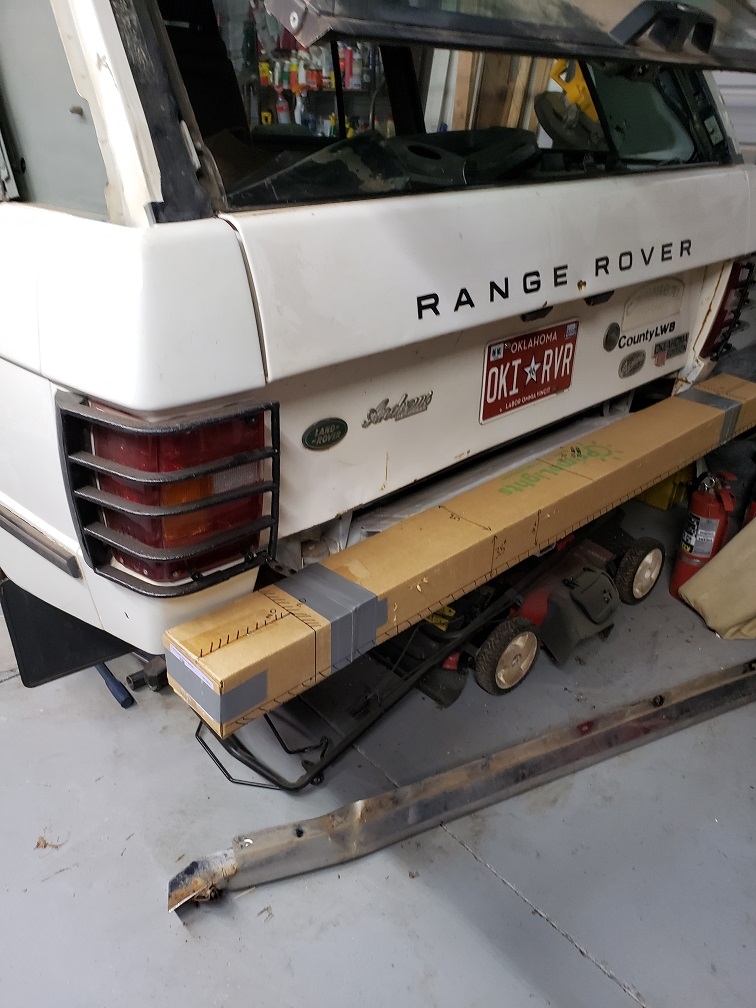
Part 1 of the Bumper Project. I mocked up a new bumper using cardboard. It will likely be 5×3 inch tube with rear fender protection. I got the idea from the PFab Youtube channel. You can check out his video in a link on mine.
If you remember the old bumper was damaged by an inattentive driver of a Hyundai reaching over to pick up a jar of spaghetti that had rolled off her seat [Okierover.com].
I’ll post another video when I get closer to pulling the trigger on this project. List of needs:
Welder
Plasma Cutter
Steel
I don’t have any of those things at the moment. I’ll have at least as much invested in those items as a new bumper from RTE would cost WITHOUT the tire carrier and jerry can holder. But I’ll have a welder at the minimum and maybe even a plasma cutter when I’m done.
If I hit the lottery, I’ll still buy the welder and plasma cutter, but I’d probably consider buy a RTE bumper built to spec.