Painting is harder than it looks (Post #213) 10/25/2010

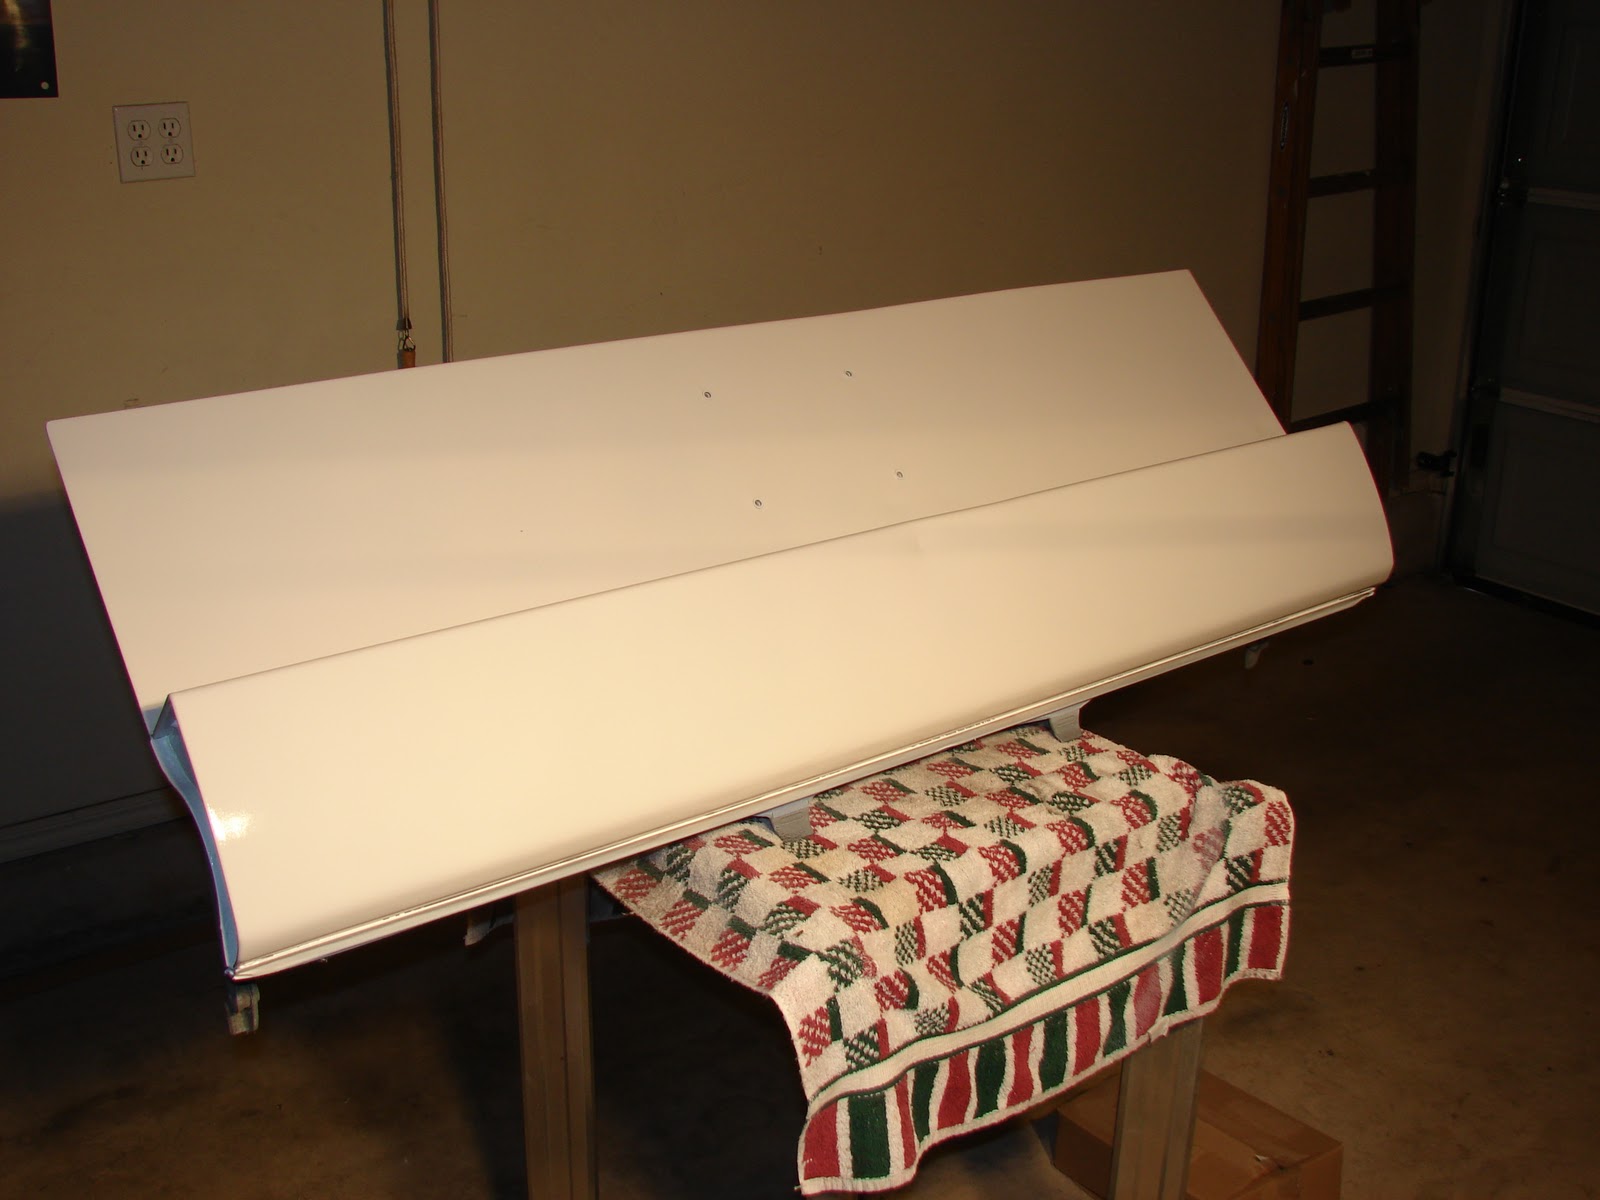
Before my raging sinus infection took hold of me on Saturday, I decided to paint the tailgate. I woke up to a rainy day and temperatures in the 50s. I know humidity has a huge effect on painting but I could not wait. I’d been held up too many times on this project to blow an entire day once again.

On Thursday I went by my local auto paint supply store, B&H Supply. The good folks there were very patient with me when I had stopped by a month ago to get the “low down” on painting. After describing the project and what I wanted to accomplish, they suggested using a one step process to paint the tailgate. They suggested using Preval system to paint the tailgate. It is simple and easy and has pretty good results considering the situation.

I found the Land Rover paint codes from a website by Stephen Hull (updated link, July 2013). He has a great site that had a helpful chart of codes for all Land Rovers. I found my paint code in the “non metallic” page. I printed the page and took it with me to the paint store. Bud (a truly great Okie name) was a lot of help and was able to find the code listed in his computer. He went to the back and got the paint mixed. He said I’d only need a pint.

He brought out the paint, hardener, reducer. With a measured mixing container he marked the ratios for me and told me I’d have about half my paint left over when I poured the first mix. That wasn’t quite right. I mentioned that when he marked it but he was insistent. As it turned out it was exactly twice too much. Live and learn.

Bud had suggested that I should at least sand the surface with at least 500 grit sandpaper. I’m pretty sure I didn’t give enough attention to the sanding that I could have. I sanded off most of the edges.

I got everything set up and mixed the paint. I went back to the Range Rover and made sure I had everything taped off. In hind sight I should have lit that side of the garage up as well. I set up in my wife’s third of the garage. I got my bright halogen lamps and set them up. I got the paint materials out and tried to imagine how it would all go. I decided to paint the tailgate flat on the work table.
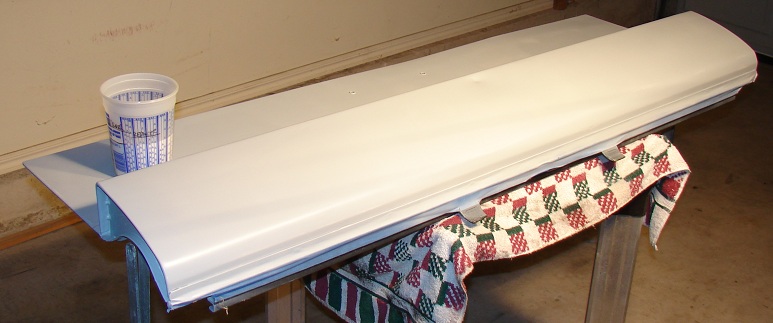
That would turn out to be a mistake. I should have had it propped up from the beginning. I was able to correct that later.
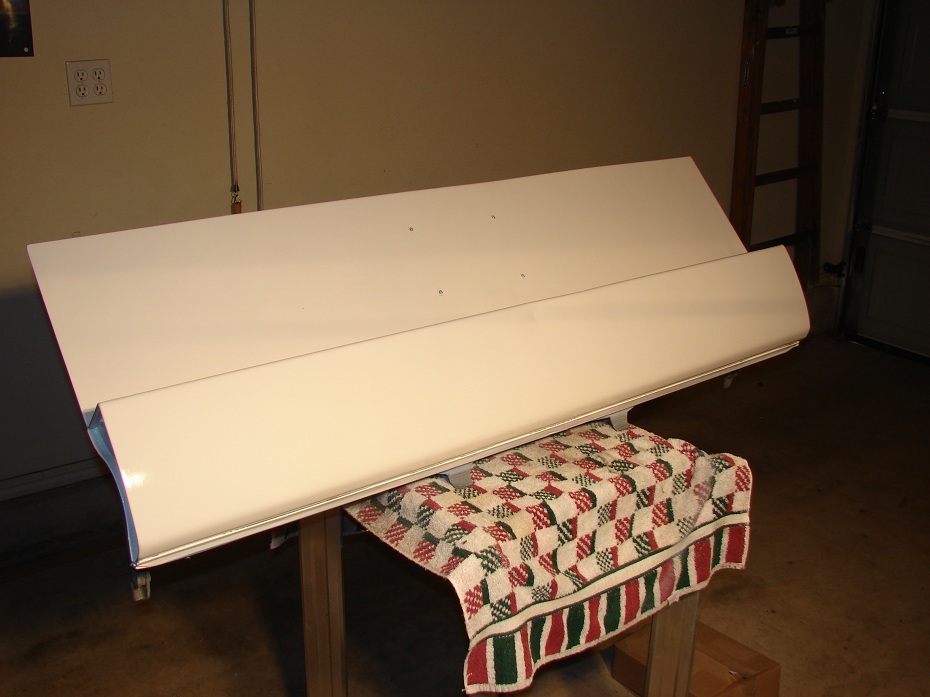
I mixed the paint and filled the paint jar. I used the short spray, short stroke method I’ve seen Edd China do a hundred times. Basically you spray and move, spray and move. If you do it the same way as Edd does you never have the paint coming out more than a couple of seconds before you release. After a couple of passes you have the area coated but not so much paint on it that it will cause a drop or a wave.

Now I say that and it seems my technique could use some more work. I did have runs and I did have one wave. The paint coats well and I think the problems I had were from the humidity. If I had a booth I think the results would have been better.

I painted both sides of the tailgate and both of the spots on the fenders. I sprayed the tailgate hitch, I sprayed stuff I didn’t think I even needed to spray. I had a lot of paint still mixed. I almost painted the floor board on the driver’s side but it was really dirty and would have taken me an hour to get clean enough to paint, so I passed.

Once I was done I used some of the reducer to clean up the parts. I let it dry all the rest of Saturday. I went in and watched football and tried to beat back the sinus attack with orange juice and Respa ™.

On Sunday I assembled everything. I had left the spots where the bolts went through the tailgate unpainted. Turned out I didn’t need to do that after all. The hinges were so loose that I had to align them from scratch. That was easy. I put the tailgate on and tightened it down. Open and closed the gate a few times and called it good. I tightened the bolts and began to work on the upper tail gate. It was a lot harder to get aligned.

I had to adjust the catches to get them to function correctly. This takes a vise-grip and a 7mm wrench to tighten the keeper nut. I got the latches working well, lubed them and put the pieces back on the gate.

I then began to put the badging back on the tail gate. I purchased some double sided tape for emblems from O’Reily’s. I cut it and got all the emblems reattached.

You may notice my EXTRA addition of the Oklahoma Edition badge. I have a friend that works for a dealership and I asked him to get me one when I saw them on a Ford Truck commercial. I put one on my 2003 Discovery and no one ever mentioned it. So when that truck was on the way to the scrap heap I took the badge off. I have a spare but was unable to find it.

I bought the RANGE ROVER and the COUNTY LWB badges quite a while ago and quite frankly was surprised I found them in that mess I call a garage. I put them on and the original dealer badge which was Andrew’s out of Nashville. That dealer is now called Land Rover Nashville. I also mounted the original green oval as well after I cleaned it up and re-glued it all back together.

The purchase of stainless steel screws came in handy when reassembling the tail lights. I was a few short so I just cleaned up the old rusty ones and gave them a coat of paint. I put the lamp assemblies back in their places and with a couple of new bulbs they were ready to go.

And if you go back to the first picture you can see the end result. I am happy with it. It is after all a work truck. It is not a beauty queen. God only knows how many scratches this paint job will have in the future. That is if the floor boards don’t rust out from under my feet before I can get those well earned scratches on her.

Thanks for reading and Happy Rovering.
Painting (Post #212) 10/23/2010

Its a rainy weekend here in Oklahoma. I am coming down with a sinus infection or something. I did manage to roll out of bed and get the paint on the quarter panels and the tailgate. Sadly it looks like “I” painted it. I’m hoping some buffing will help the finish. I’m not too worried about it though. This is a WORK truck or a TRAIL truck, not a show truck. I just wanted the paint to match.

I didn’t need half the paint I mixed up though and a lot went to waste. I feel more or less like crap and have decided to punt for the day and just relax and fight the sinus problems.

If I can string some thoughts together tomorrow I’ll post the final on the suspension bushings I finished yesterday. I also took care of the solenoid that malfunctioned and keeps me from going into low range.

More later….
Thanks for reading and Happy Rovering.
Feedback (Post #211) 10/15/2010

This is exactly the kind of feedback I love to receive. At this time, I don’t advertise or make any money off my website. The entire reason for it’s existence is to help others. From the Land Rovers Only Message Board:

I just saw a post you made back in Sept 2007. It was where you recommended that someone check the connection on the ignition switch. I’ve had my 16 yr old son’s 88 RRC torn to pieces this week looking for an electrical gremlin. The windows had stopped working as did the wipers, the a/c and the stereo. I had almost the whole dash out of this thing.

So tonight I checked the connector you mentioned. Behold, it was about to fall off. A few wire ties later and everything is fine. I could have fixed this by removing 6 screws… Next time I’ll search this forum first. It’s the first place I go for any Disco issues but didn’t think of it for the RRC.

It’s all back together now and I just wanted to say thanks! Also got your site marked as it appears to be full of good things.

Robert
Huntsville, AL
2004 Disco SE7
1988 RRC

When you hear several major systems have failed you can be sure it has something to do with the accessory connections on the ignition switch. I initially noticed problems with my radio and my windows not working when my ignition tumbler problem was discovered. Sadly when my quit me it was a cold December day. The temperature had dropped to 12 degrees that night and early morning. It is not any fun trying to find issues when you are shaking so hard your teeth are chattering from the arctic cold.

I’m really happy I could help some one out. I see a lot of these issues on the message boards. Of all the problems on Land Rovers, the electrical ones are the worst. At least that’s my opinion. When you break down the system to its elements it gets easier but it can be a overwhelming situation when you open a panel or look behind something and all you see are bundles of wires.

I opened a kick panel on my Range Rover one day. Inside I found a severely burnt bare wire. Everything on the Rover at that time was working fine. What was it? Who knows. There is really no good way to know. I taped it off so it would no longer make sparks bumping up against the bulk head. To this day I have no idea what that wire goes to.

Have a good weekend, and wish me luck when I fire up the Range Rover and drive her for the first time in nearly 4 months.
Thanks for reading and Happy Rovering.

Transaxle Fluid Fill (Post #210) 10/13/2010

As you read yesterday, or are about to go back and read from yesterday, or about to click on the next link in your list, I had a sick feeling in my stomach from finding very little fluid in my transfer case. The fluid that was there was in terrible shape.

I had a gallon of Dex-Merc which is a Dextron III compatible fluid. Matter of fact, Dextron is a General Motors owned name. It denotes a standard of fluid. As the fluid was improved with each new formula they added a number to denote which formula was in the container. Dextron, was replaced with Dextron II, IIa and eventually Dextron III. In 2006 all the licenses to produce this fluid expired.

The licenses were for companies wishing to produce a Dextron III fluid and market it. If the company’s product met GM’s standard they received a license to use the name. That is why you see companies that don’t use the name produce documentation that compares their “BRAND NAME X” product to Dextron III with out using the Dextron III name.

With all the licenses expired it is more important now to know the numbers for the fluid to compare it to another company. Claiming or using the Dextron III name does mean anything any more. GM no longer controls the quality or standard and thus companies can say their product is Dextron III even though you don’t know what it really is.

Now this is not to say that these companies are skimping on quality. Any company in their right mind that wants repeat business will continue to produce fluids of the quality they are able.

Today Dextron VI is the standard and is specially formulated for “today’s” automotive transmissions. Meaning, Dextron III will not work in your wife’s Chevy Aveo. And Dextron VI is not formulated for your 1978 Chevy Suburban.

With that out of the way. I had some Coastal Dextron III. Its just some generic transmission fluid my buddy gave me when he decided he would not be fixing his step-son’s 1991 Range Rover with the busted transmission case. I will run this fluid for a few months and then drain it. That is, if the transfer case is not crapped out. If it is good to go, I’ll refill it with Castrol Dex Merc.

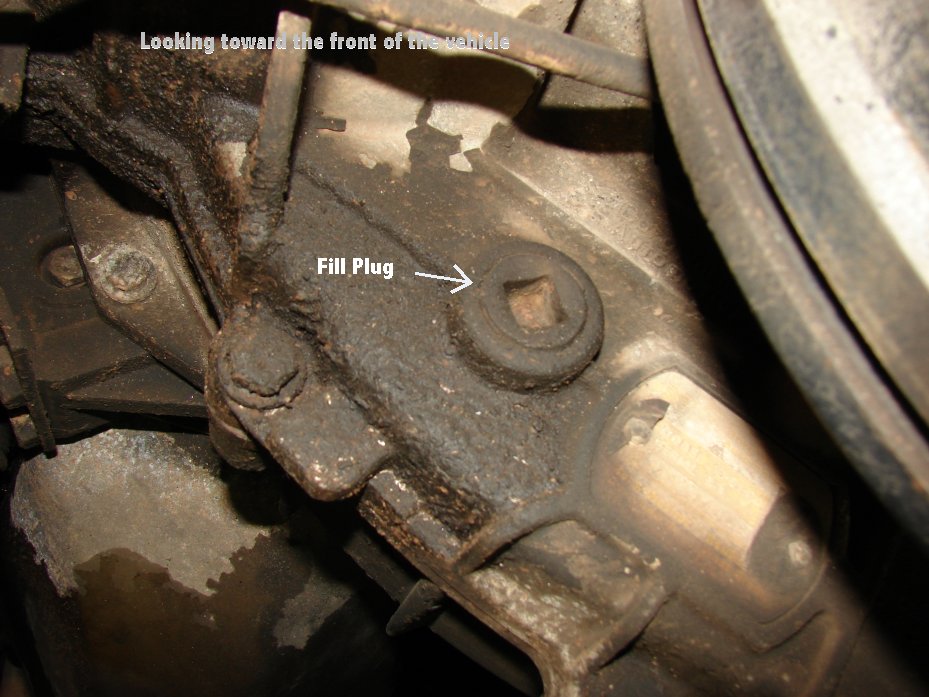
I located the fill plug.

I broke it free using a 1/2 inch break over bar. It required at least that much leverage it was well placed.

I then broke the drain plug lose.

You can see my painting handy work there behind the transfer case. This plug took the 1/2 inch break over bar and the cheater pipe for me to break it lose. It was in very tight.

The fluid that drained out was black like the fluid that came out of the viscous coupling. I would say there was not near enough fluid in the transfer case. After it drained out, I prepared the plugs with with gray gasket sealer and put the drain plug back in.

I then located my fluid pump.

If you don’t own this tool, go tomorrow and buy one, hell, buy two. They are great for filling differentials, transfer cases, anywhere you need to move fluid from a bottle into a place where you can’t tip a bottle up.

I proceeded to fill the transfer case.

You can see my black nitrile glove covered hand on the pump. I pumped a full half gallon into the transfer case.

I can’t wait to drive the Range Rover to test my work. I will probably empty the transmission and refill it with transmission fluid. This is only a test as I’m pretty sure that 4th gear is toast. I’m hoping that it is not and that the troubles I had are related to the transfer case and the VC.

With that said and a prayer on my lips, I need to see if the new used viscous coupling works.
I need to see if the brakes work.
I need to feel the transmission shift into and out of fourth gear.
I need to know that all this work has made a difference.
I need my Range Rover Morale lifted.

Thanks for all the great posts from the guys over on RangeRovers.net.

Thanks for reading and Happy Rovering….hopefully! {fingers crossed}

Bloody Viscous Coupling (Post #209) 10/13/2010

My best friend’s wife commented on Facebook this week that the term “viscous coupling” sounded real nasty and ask if I should be posting about such a thing. Well I’d have to agree. Viscous coupling…(dramatic reverb)it does sound bad. Well thankfully the bad part is only in the difficulty of replacing one. On the OkieRover Difficulty Scale, this one is a SOLID FOUR. It was physically demanding and very frustrating at least from the point of view of lying underneath the Rangie to do the job.

I have been dreading this job for 4 weeks. I knew it would not be easy. I knew it would be a long day. I knew from the start this job was going to challenge me. None of these statements proved false.

In a technical sense this job was a straight forward bolts off, replace part, bolts on, job. The difficulty came in getting the bolts off and the tight spaces you have to work in if you are laying down under the Rover as I was. Thankfully the weather was nice and I had a relatively clean area to work in.

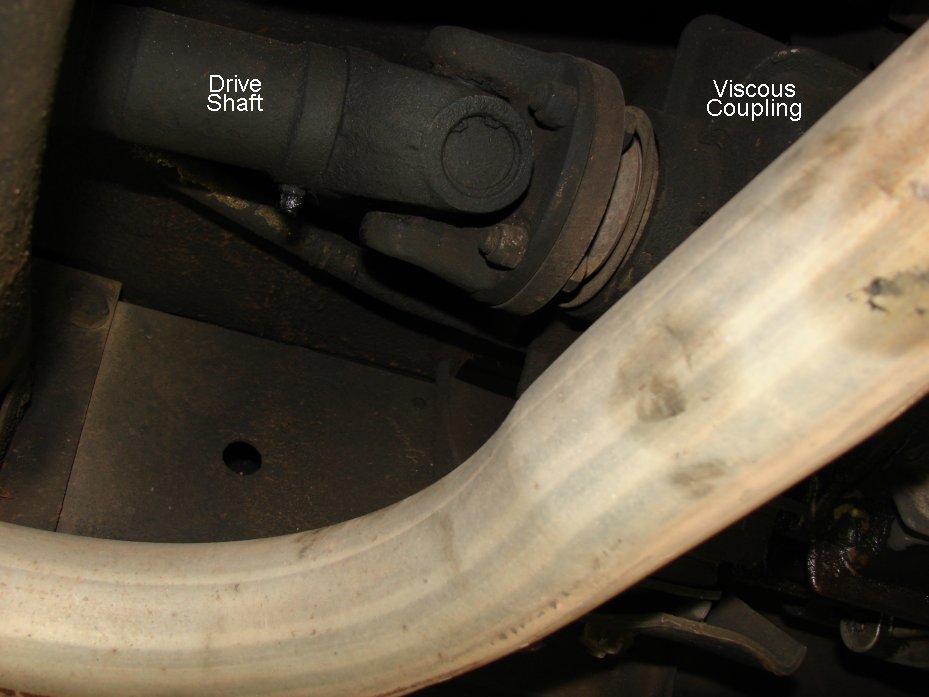
The first thing off was the front driveshaft. The nuts are nyloc and I’m pretty sure made out of a previously unheard of combination alloy known as “Leadoround”. Sound it out, break it down. As I told JagGuy on the phone, “I swear these nuts were half lead.” And boy, were they were quick round off.

Lets look at the tool options I had available to remove these nuts and their subsequent failure point…
Twelve and six sided sockets in 3/8th size 
Twelve sided
Improper tool, rounds off eventually 
Both sets of Sockets
Angle of the drive shaft and the size of the sockets prevented the sockets from being used

14 mm wrenches
Open ended
Improper tool, which rounds immediately
Box ended
Box end would not go over the end of the nuts due to the location of the drive shaft yokes

Vise-grips
I had every size that is made. No seriously, I went down to Lowe’s and bought one of each. None were able to grab without tearing up the nut

I tried, no seriously, I really, really tried. Eventually the nuts were so damaged I had to cut them off with the angle grinder and a cutting wheel. I got some nicks on the yokes of the drive shaft but they are not structurally significant. At least I don’t think so.

Two things I must immediately mention. First, this job would ideally be done without the exhaust in the way. The second, dropping the drive shaft at the universal joint. Both of these would have made this job easier. I chose not to do either for the simple fact that every time I touch something I get two more projects to fix. With that I’ll continue…

I managed to get one bolt off conventionally with the wrenches, this left three to cut. So with red hot magma sparks flying all over the place and most notably resting in the palm of my hand, I got the bolts cut. That hot ember resting in my palm while I held the angle grinder tested my United States Marine Corps instilled discipline to its maximum peace time setting.

In some manner or other I got the nuts cut off. Two required additional persuasion with a chisel and hammer. They provided little resistance to these brutal tools.

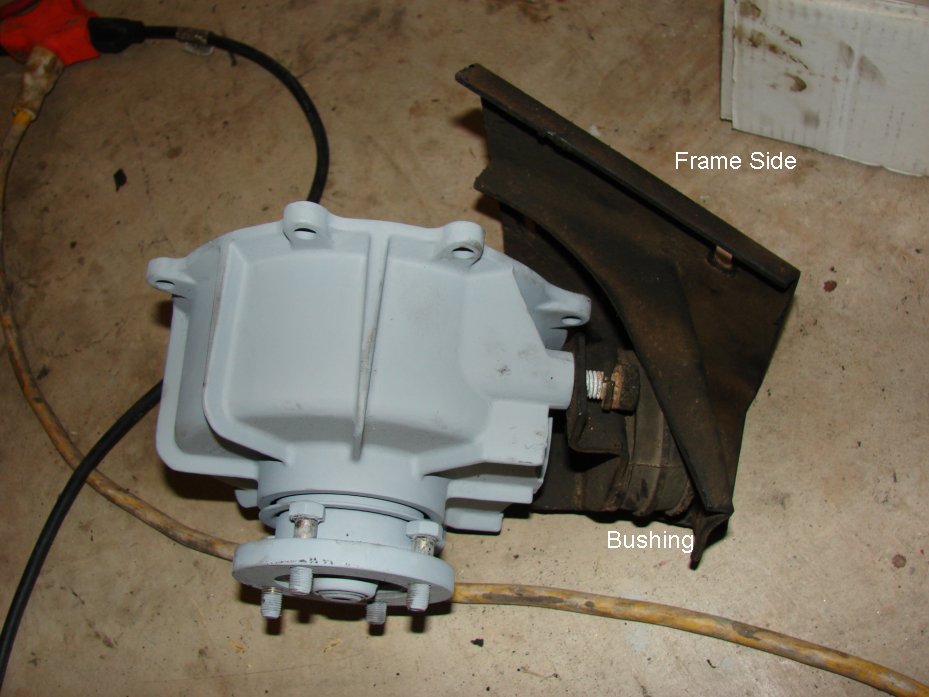
The bolts holding the viscous coupling (VC) were next. Thankfully these came off with just a little elbow grease. You can get to most of them with a little effort. Except for the one located under the transmission mount bushing. To get the bushing off you have to remove the frame mount and its three bolts. That was not a problem. One of these was a badly stripped bolt, most likely from the factory. That will have to be replaced, with a grade 8 bolt and nut, which I bought the next day.

Getting the frame mount loose from the bushing is only sticky point here. Once those two are separated, you can remove the bushing and its mount from the VC which is held in place with 19mm bolts. That just so happens to be the largest socket in my set. One of these bolts was badly corroded.

I have laid out the three parts here on the garage floor so you can see another (all be it useless) picture of how all the parts are assembled.

I also took a picture and labeled it with the various mounting points.

The next thing to remove is the transmission brace. For some ungodly reason the original designers felt that a bushing mounted to a frame member wasn’t enough bracing for this part. They added another brace that runs up to the transmission housing.

I removed those bolts and now had the VC ready to remove from the transaxle housing. You can see that the two are sealed with gasket maker. This has been a point of confusion for me.

I cracked the case and immediately black fluid came out. I had planned for this and had a drip pan ready. I slid it into place and let it drain.

You can see the fluid that came out. Very black, and smelled mostly burned.

What I did not plan for was what I spent the better part of Tuesday reading about. There should have been lots of fluid in there. Matter of fact I should have drained the transfer case before I did this project.

Now I’m sitting here wondering, “what have I done?”

I have a sick feeling in my stomach.

I read through this forum post on RangeRovers.net. I learned a lot. I learned what type of fluid to put back in the transfer case, automatic transmission fluid. I learned that the fluid that was supposed to be in there is important for COOLING and the obvious, lubrication.

And from what I read, I deduced this:
Fact: The VC failed in my Range Rover. The failure could have been from either a broken rear drive shaft or lack of fluid, which may have damaged the VC. I may have destroyed my transfer case or significantly reduced its life. The transfer case has 180,000+ miles on it and perhaps I’m lucky it still works at all, at this point.

So where to go from here? I am going to drain what little fluid is left in the transfer case out and fill it with transmission fluid. I’m going to get the LWB out of the garage and drive it this weekend. One: to test the brakes. Two: to test the viscous coupling I just installed.

FACT: At this point I’m pretty embarrassed.
People look to me for answers and this was a huge rookie mistake. I’ve changed the transfer case fluid on my Discovery 2. Why I didn’t think to check my Range Rover transfer case is just stupid. So if you are reading this, remember to do your scheduled maintenance. Just because nothing is wrong doesn’t mean something isn’t GOING WRONG.

Well that’s all for now. More from this front as I learn it…

Thanks for reading and Happy Rovering.

Off Weekend (Post #203) 9/13/2010

I didn’t work on the Classic this weekend. I wanted to…but I just didn’t have the time. I had time to talk about her. I showed my progress to two of my friends. My neighbors asked me if I was going to work on her this weekend. But I told them I could not.

Even though I did not climb underneath her and get greasy grimy I have worked out the sequence of events that will lead to the Classic being completed. There are two sets of tasks that will lead to the Classic being back on the road. There are the MUST DO tasks that present road blocks to driving her. And there are NEED TO DO tasks. These are less critical but necessary if I am to claim victory over this round of restoration projects.

This is the MUST DO list in the order these tasks must be done.

Brakes

  • Finish the front brake disc replacement
  • Replace the brake fluid reservoir
  • Bleed brakes
  • Replace the axle shaft seals (not ordered yet)
  • Pack bearings, drain and refill front differential

Viscous Coupling

  • Replace the viscous coupling

Tail gate

  • Paint and reassemble the tail gate
  • Apply badging

Repair floor

  • Make the replacement floor panels
  • Weld panels
  • Seal panels inside (painting) and outside (yet to be determined sealant)
  • Install sound deadening material

Bushings

  • I have the kit and have started to install it. I need to finish the install and get the Rover under control from weaving and

Transmission

  • Take Range Rover to transmission shop and have them assess the damage and repair

Tires

  • Replace tires all the way around with a new set of Bridgestone Dueler AT Revo II’s. Which I am pleased to report they still make. My best friend Retired Poster Marine purchased set not a month ago.

Windshield

  • I have to have the windshield removed and seal fixed. The water coming in is mostly from the top and not through the bottom of the floor. I’m hoping it can be sealed and that we don’t find any rust on the metal under the seal. This should eliminate or seriously limit the water that is causing the rust issue on my floor boards.

I also have a list of repairs that I should do while the Classic is in its various states of disassembly. Several of these repairs are not at all necessary but merely cosmetic. Some are luxuries that if I want Mrs. OkieRover to ride with me, I’ll have to fix This is the NEED TO DO list starting with…

Air Conditioning

  • I need to completely recondition the AC (again). My daughter ran the AC without coolant from an undetermined leak and thusly the compressor is dead. I need a new compressor, dryer, and valve (which I have already purchased) and it all needs to be installed. I think I’ll have a professional test the system and charge it after I get everything replaced.

Radio

  • While I have the carpets and head liner out I should take the opportunity to rewire the sound system. I haven’t determined what is broken with the system yet. I’m pretty sure the amp is not working. I’m also pretty sure that the subwoofer is not working. I have two bad speakers in the back as well.

Headliner

  • The headliner is showing signs of sagging again. My last repair is finally starting to show signs of needing a redo. I could also take the opportunity if I had the money to add some sound deadening material to the roof while the headliner is out.

Sunroof

  • The sunroof mysterious stopped working. It will start to retract, but stops. I’m not sure what it is but while I have the headliner out I should probably investigate that problem and repair it if possible. I love the sunroof. I love driving around in the Fall with it open. But I don’t love it so much that I’ll spend a ton of money to fix it.

Window tinting

  • I’d like to do this as well. I understand it will be around 200$(US) maybe as much as 300$(US). It gets hot in the Range Rover in Oklahoma and since I’ve converted the air conditioning to R134a it hasn’t cooled at the level it did before. Tinting the windows looks bad ass on a white car too.

Door locks

  • This system is completely failed. The fob no longer locks the doors and the bouncing lock problem is back. Completely pulling out the old and replacing with another system will be expensive. I have sourced some replacement actuators that are reasonably priced. Sadly I lost the resource and will have to source them AGAIN. There was a write up on a blog that described how they wired around the relays that seem to fail but alas I’ll have to find that again as well as I failed to bookmark it the last time I read it.

Power Steering Hoses

  • I have replace these hoses. The leaking, although a rust inhibitor is annoy as it has buggered up my driveway with a nasty oil spot. I will remove them and take them to a shop in OKC that makes custom hoses. I can get stainless steel braided hoses made for the same cost as those in the supply magazines.


New springs and shocks

  • After I get the transmission and the tires paid off I will buy all new shocks and tires. I can get a bit of lift from a stiffer set of springs and the shocks are in their seventh (7th) year and should be replaced. I don’t think they’ve failed out right but I think they are on the way.